When things go sideways, having a way to get safe drinking water is the one skill that trumps all others. We’re talking about the know-how to take questionable water and make it safe to drink, whether that means using boiling, chemicals, or a good filter. This isn’t just a “nice-to-have” skill—it’s foundational. Dehydration can take a person down in mere hours, long before hunger even becomes a concern.
Why Safe Water Is Your Top Survival Priority
In a crisis, the systems we take for granted are usually the first to go. A hurricane, an earthquake, or even a prolonged power outage can knock municipal water treatment plants offline. Pipes break, and contamination becomes a real and immediate threat. Suddenly, that crystal-clear stream—or even the water from your own tap—can be a delivery system for some truly nasty bugs.
This isn’t just a hypothetical. We’ve seen it play out time and again. Look at the aftermath of Hurricane Katrina back in 2005. Survivors who knew how to purify their own water were worlds ahead of those forced to gamble on tainted supplies. In an emergency setting, simply having the means to make water safe can cut the risk of waterborne illness by up to 90%. When medical help is a long way off, those are odds you want on your side. You can get a broader picture of how water purifiers impact global health and safety at marknteladvisors.com.
Adopting a Multi-Barrier Approach
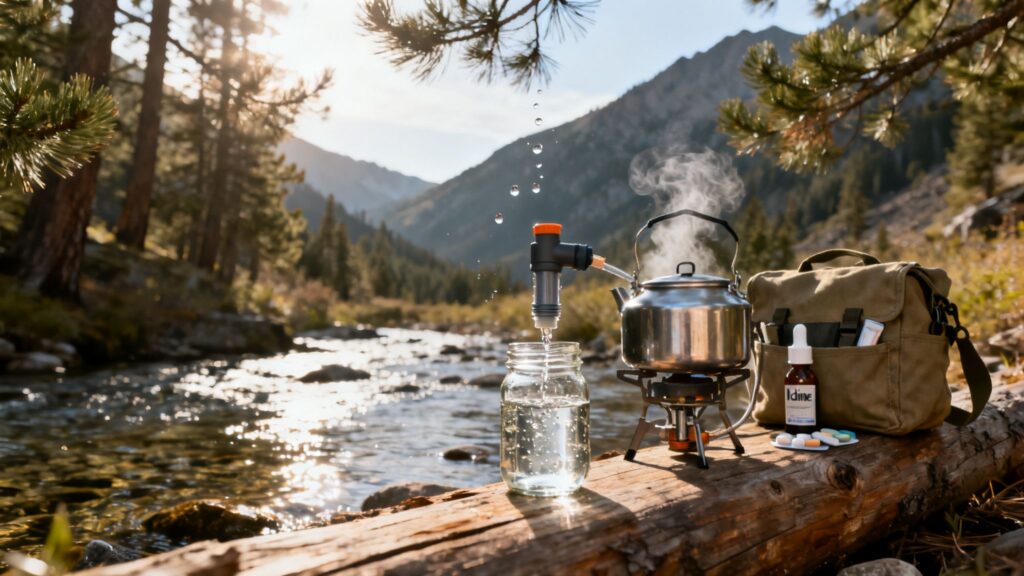
The key to truly effective water purification in the field is what’s known as the multi-barrier approach. Think of it as creating layers of safety. Instead of relying on a single method, you combine them to cover all your bases. For instance, you might run murky water through a bandana first to get the big stuff out, then boil it to kill off the microscopic threats.
A multi-barrier approach isn’t about being paranoid; it’s about being prepared. Layering your purification techniques—like filtering before treating with chemicals—removes more contaminants and provides a much higher margin of safety when your health is on the line.
This guide is built around that exact principle. We’re going to give you a complete toolkit of proven methods so you can handle whatever comes your way. We’ll dive into:
- Boiling: The gold standard. It’s the most reliable way to kill pretty much every pathogen out there.
- Chemical Treatments: Using everyday items like household bleach or iodine to make water safe.
- Modern Filtration: Putting today’s portable filters to work to physically screen out the bad stuff.
- Situational Methods: Getting creative with techniques like solar disinfection when you’re in a pinch.
Mastering these skills isn’t just for hardcore wilderness survivalists; it’s a core part of being prepared for any family. Having a solid plan and the right knowledge means you can provide safe, clean drinking water when it counts the most. A great place to start is by building out your 72-hour emergency water plan.
Finding and Assessing Water Sources in a Crisis
Before you can even think about purification, you have to find water. In a crisis, your options might range from a rushing river to the tank in your water heater, and knowing where to look is the first critical skill. The source you choose directly impacts how much work you’ll need to do to make it safe to drink.
Out in the wild, nature leaves plenty of clues. Always head downhill—valleys, low-lying areas, and patches of unusually green vegetation often point to groundwater, streams, or hidden springs. Keep an eye out for animal tracks, especially around dawn and dusk, as they can lead you straight to their watering holes.
Urban environments are a completely different ballgame. You have to be extremely cautious of standing water in streets or parking lots; it’s almost always a toxic soup of chemicals, fuel, and sewage. Instead, look for safer alternatives. The water heater in your home probably holds 30-50 gallons of perfectly good drinking water. Rainwater, collected from a clean roof into a clean container, is another excellent option.
Reading the Red Flags of a Water Source
Once you’ve found a potential source, take a moment to assess it. This quick visual check is your first line of defense, because not all water is created equal. You need to train your eye to spot the obvious signs of heavy contamination.
Look for these immediate red flags:
- Industrial Runoff: See an oily sheen on the surface? Notice strangely discolored soil on the banks? Back away. That’s a clear sign of chemical pollution, and most field purification methods won’t touch it.
- Agricultural Contamination: If you’re downstream from a farm, you can bet that water is loaded with pesticides, herbicides, and animal waste. The microbial load will be extremely high.
- Stagnant Water: Water that isn’t moving is a breeding ground for bacteria, parasites, and mosquito larvae. While you can purify it, flowing water is almost always a safer bet.
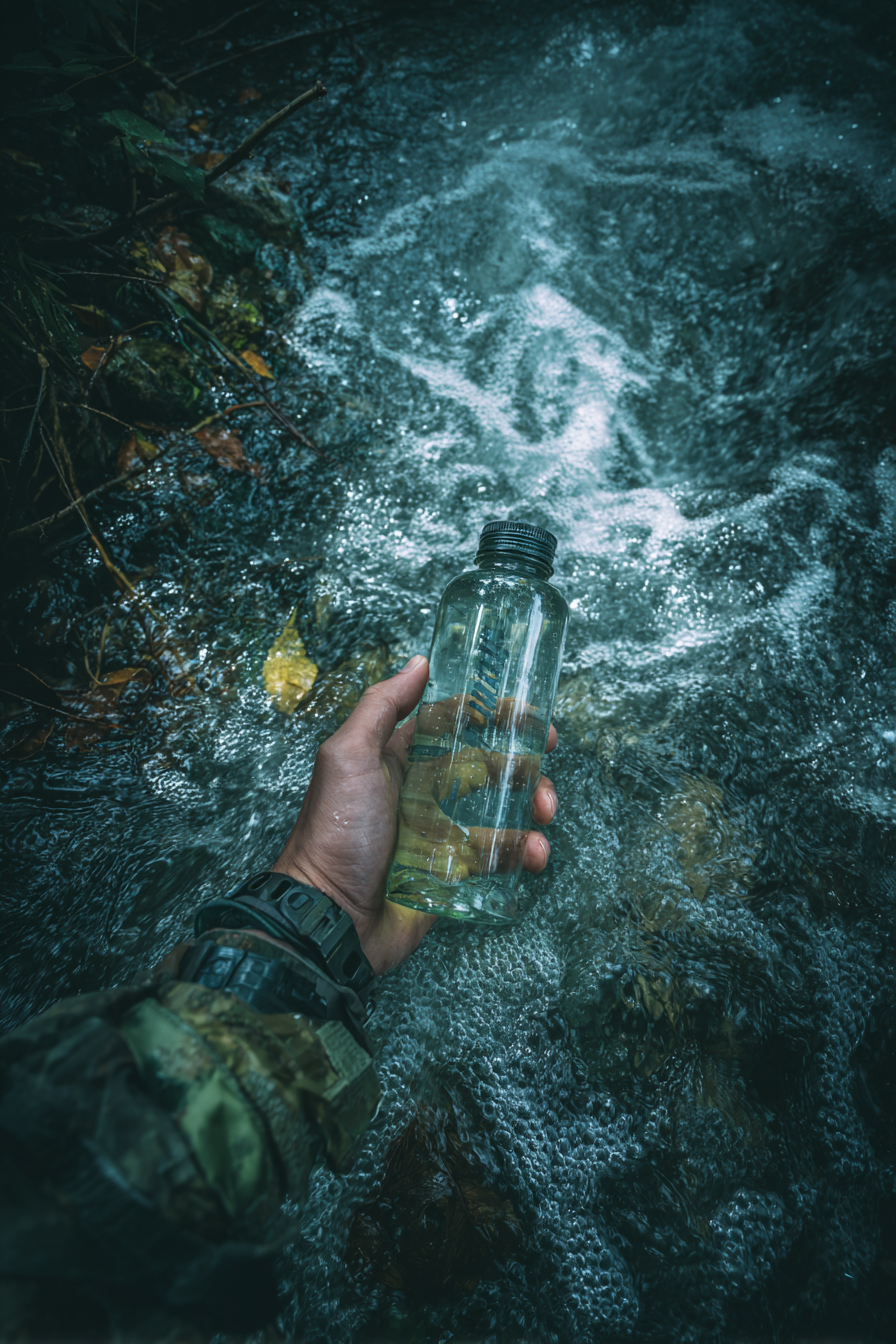
The most dangerous threats in water are the ones you can’t see. Clear water isn’t necessarily clean water. Microscopic pathogens like Giardia, Cryptosporidium, and bacteria are invisible, which is why you must treat every field water source as contaminated.
Never, ever make assumptions based on how clear the water looks. Even the most pristine-looking mountain stream can be contaminated with pathogens from an animal carcass just upstream.
The Critical First Step: Pre-Filtering
Most water you find in the wild will have stuff floating in it—silt, leaves, sand, and other grit. This cloudiness is called turbidity. Trying to purify turbid water is a losing battle. It makes chemical treatments less effective and will clog your expensive water filter in a heartbeat.
That’s why pre-filtering is a non-negotiable first step. It’s the simple act of straining out all the big particles before you start the real purification. Luckily, you can improvise a pre-filter with things you probably have right now.
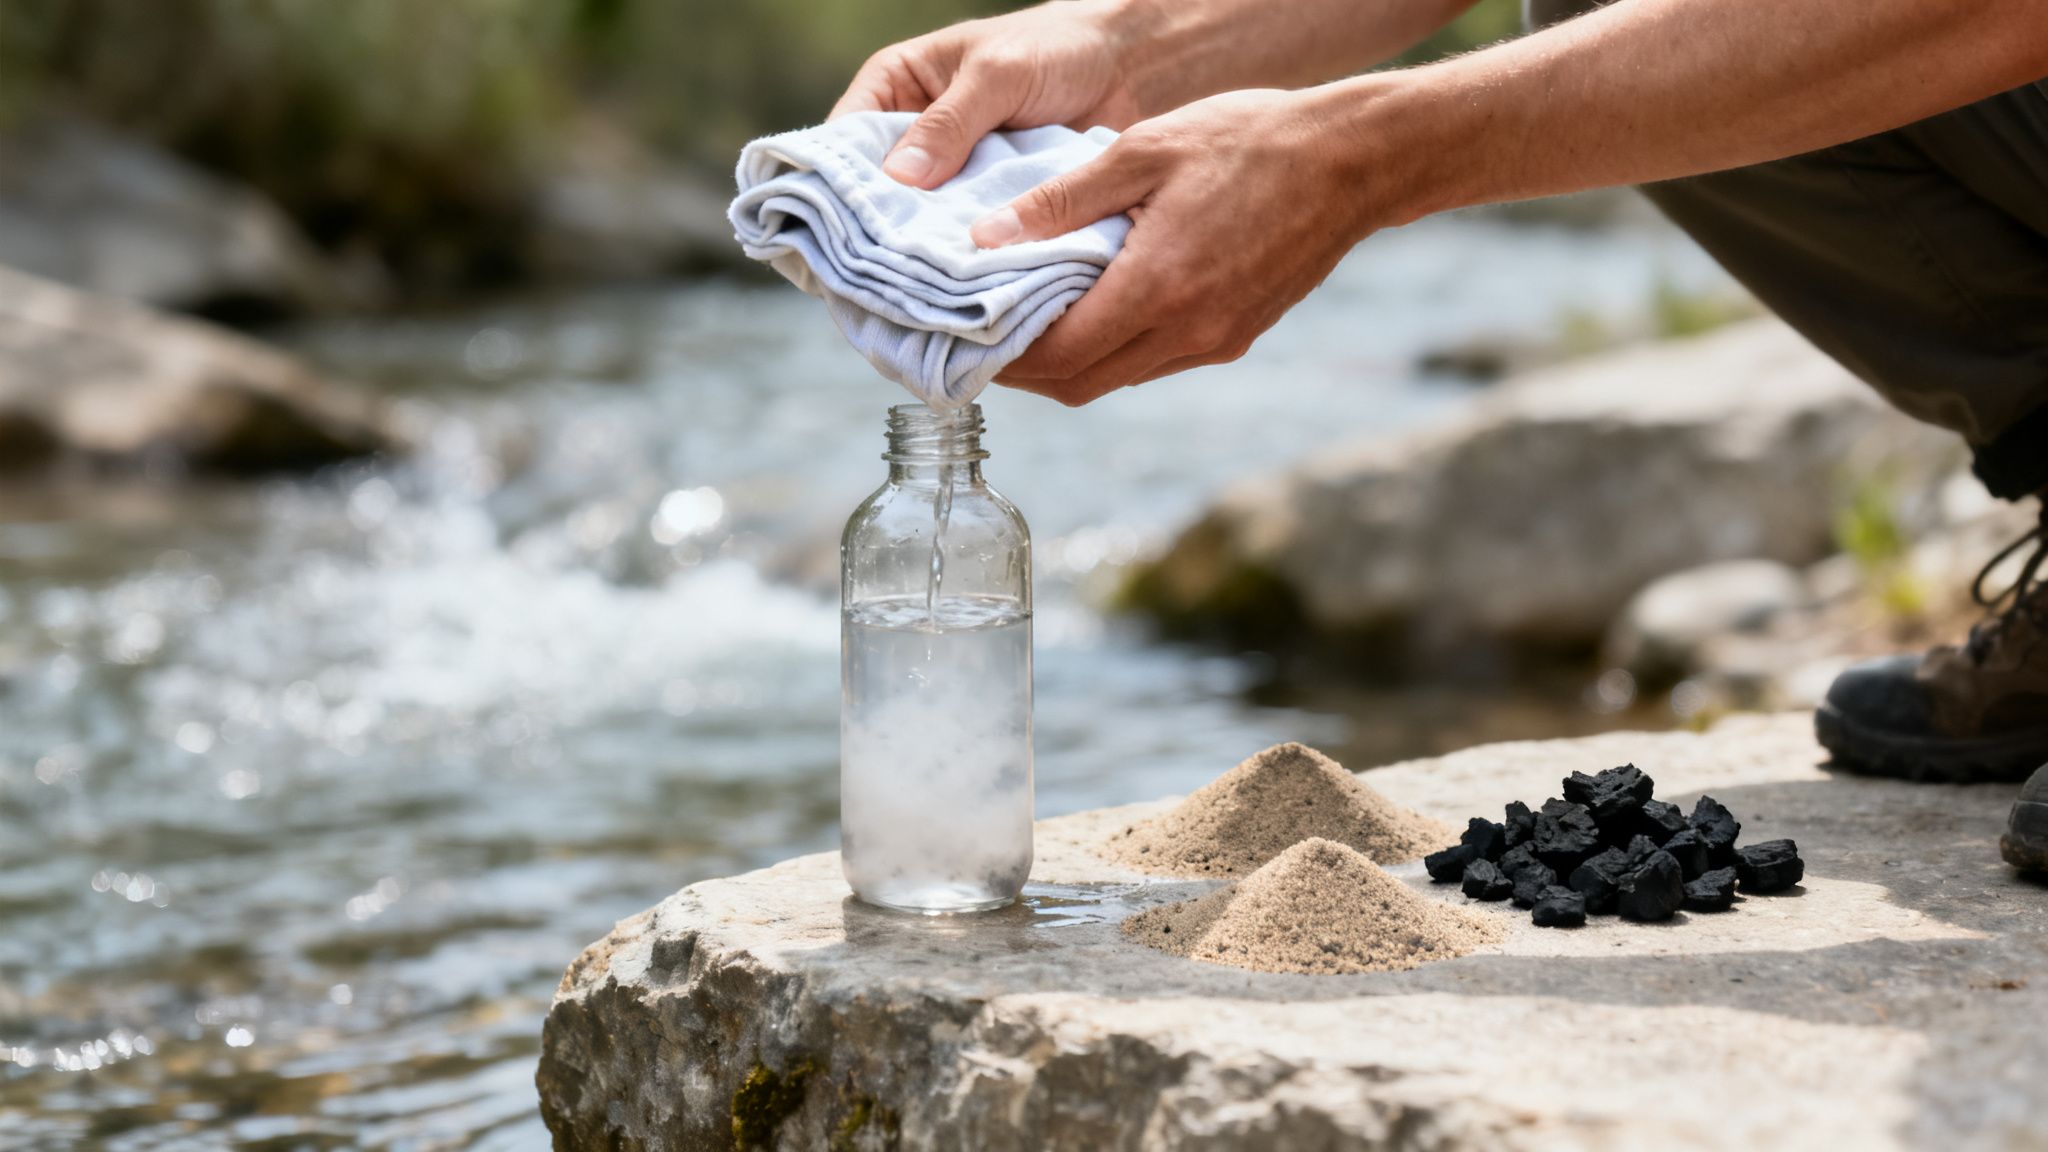
The easiest method is to stretch a bandana, a t-shirt, or even a coffee filter over your water bottle and pour the water through it. This will catch a surprising amount of gunk. For really murky water, you can build a more effective DIY filter by layering materials in a container, like a plastic bottle with the bottom cut off.
A basic layered system would look like this:
- Bottom Layer (Cloth): A piece of fabric to hold everything in place.
- Middle Layers (Sand/Charcoal): Alternate layers of fine sand and crushed charcoal from your campfire. Sand filters out fine sediment, and charcoal helps absorb some impurities.
- Top Layer (Gravel): A layer of small rocks or pebbles to spread the water out and keep it from washing away your finer layers.
Pouring water through this setup will give you much clearer water to work with, making the next stage of purification—whether it’s boiling, chemicals, or a commercial filter—far more effective. For more in-depth techniques on this, check out our guide on collecting water in survival situations.
Your Field Guide to Water Purification Methods
Alright, you’ve found a water source and run it through a pre-filter. Now comes the most important part of the whole process: making that water safe to drink. This is where we deal with the invisible threats—the nasty bacteria, viruses, and protozoa that can take you out of commission faster than a twisted ankle.
Knowing how to neutralize these pathogens is a non-negotiable survival skill. Each method has its time and place, and the true expert knows which tool to pull from their toolkit for any given situation.
We’re going to walk through the most reliable, field-tested techniques out there. From the ancient, foolproof method of boiling to the latest and greatest in filtration gear, mastering these options gives you the flexibility to adapt and overcome.
The Gold Standard: Boiling Water
To do it right, you need to bring the water to a full, rolling boil. I’m not talking about a few lazy bubbles. It needs to be a churning, vigorous boil that you can’t stir down.
- At sea level up to 6,500 feet (2,000 meters): Hold that rolling boil for one full minute.
- Above 6,500 feet (2,000 meters): You need to extend the boil time to three full minutes. Why? Because water boils at a lower temperature at high altitudes, so you need the extra time to ensure everything is dead.
The biggest downsides are the time and fuel it eats up. Gathering wood, building a fire, and waiting for the water to cool can feel like an eternity when you’re thirsty. But its sheer reliability makes it the ultimate fallback when other methods fail or you just can’t trust them.
Comparing Survival Water Purification Methods
Deciding which method to use can be tough under pressure. This quick-reference table breaks down the most common purification methods, helping you compare their effectiveness, time commitment, and what they’re best suited for in a survival scenario.
| Method | Effectiveness | Time Required | Pros | Cons |
|---|---|---|---|---|
| Boiling | Kills all pathogens | 5-10 mins + cool time | Most reliable method; no special gear needed. | Requires fire, fuel, and time; not portable. |
| Bleach/Iodine | Kills most pathogens | 30-60 mins | Lightweight, cheap, and easy to carry. | Unpleasant taste; less effective in cold/murky water. |
| Filtration | Removes bacteria/protozoa | Immediate | Fast and easy; improves taste and clarity. | Most don’t remove viruses; can clog or break. |
| SODIS | Kills most pathogens | 6+ hours | Free and uses no fuel. | Slow; requires clear bottles and strong sunlight. |
| Distillation | Removes all contaminants | Very slow (hours) | Removes salt, chemicals, heavy metals. | Very slow yield; requires specific setup. |
Use this table as a mental checklist. The best prepper is the one who understands these trade-offs and can pivot from one method to another as the situation demands.
Chemical Treatments: Bleach and Iodine
When boiling just isn’t an option, chemical treatments are a fantastic, lightweight alternative. The two go-to choices are household bleach and iodine tablets. Both work by oxidizing and destroying microorganisms from the inside out.
For a comprehensive comparison of all purification methods and when to use each one, see our complete guide on water purification for survival.
Precision is everything here. Too little, and you’re not killing all the bugs. Too much, and you’re drinking harmful chemicals.
Crucial Tip: Chemicals are far less effective in cold or murky water. If the water is icy, double the wait time. If it’s cloudy, you must pre-filter it. Suspended particles act like tiny shields, protecting microbes from the chemical attack.
Using Household Bleach
Your standard, unscented laundry bleach is a potent disinfectant. Just make sure you’re using a plain bleach with 5.25% to 8.25% sodium hypochlorite. No added soaps, fragrances, or “color-safe” gimmicks.
Here are the dosages for one quart (or liter) of clear water:
- 5.25% Bleach: Add 2 drops.
- 8.25% Bleach: Add 1 drop.
After adding the drops, screw the cap on tight and give it a good shake. Then, loosen the cap just enough to let some treated water swish around the threads to disinfect them. Tighten it again and let it sit for a minimum of 30 minutes. You should smell a faint hint of chlorine. If you don’t, add one more drop and wait another 15 minutes. If you want a deep dive on this, you can learn more about using bleach for water purification in our dedicated guide.
Using Iodine Tablets
Iodine tablets, like the ones from Potable Aqua, are a classic for a reason. They’re a favorite among hikers and preppers because they take all the guesswork out of dosing.
The process couldn’t be simpler:
- Drop two tablets into one quart of water.
- Wait five minutes for them to dissolve completely.
- Shake the container well to mix everything up.
- Let the water stand for at least 30 minutes before drinking.
Iodine does leave a pretty distinct taste that some people can’t stand. Many kits come with a second “PA Plus” tablet (ascorbic acid, or vitamin C) that you add after the 30-minute disinfection time to neutralize the taste and color. Just a heads-up: iodine isn’t recommended for long-term use, pregnant women, or anyone with thyroid issues.
Modern Filtration Systems
Portable water filters have completely changed the game. These devices work like a microscopic strainer, using a physical barrier with tiny pores to block harmful protozoa and bacteria. The catch is that most portable filters on the market are not fine enough to stop viruses, which are much, much smaller.
Water scarcity is a growing threat. Projections show that by 2050, the number of urban dwellers facing water shortages could double to between 1.7 and 2.4 billion. Filters are a powerful, low-energy solution perfect for preppers. During the 2020 Texas winter storm blackouts, which affected 4.5 million people, families with simple gravity-fed filters were able to avoid the nasty gastrointestinal outbreaks that hit many households. This is why the market for these point-of-use systems is expected to boom by 2035.
To dive deeper into building a complete water purification strategy that covers every scenario, check out our survivalist water purification guide.
Let’s break down a few of the most popular and battle-tested filter types.
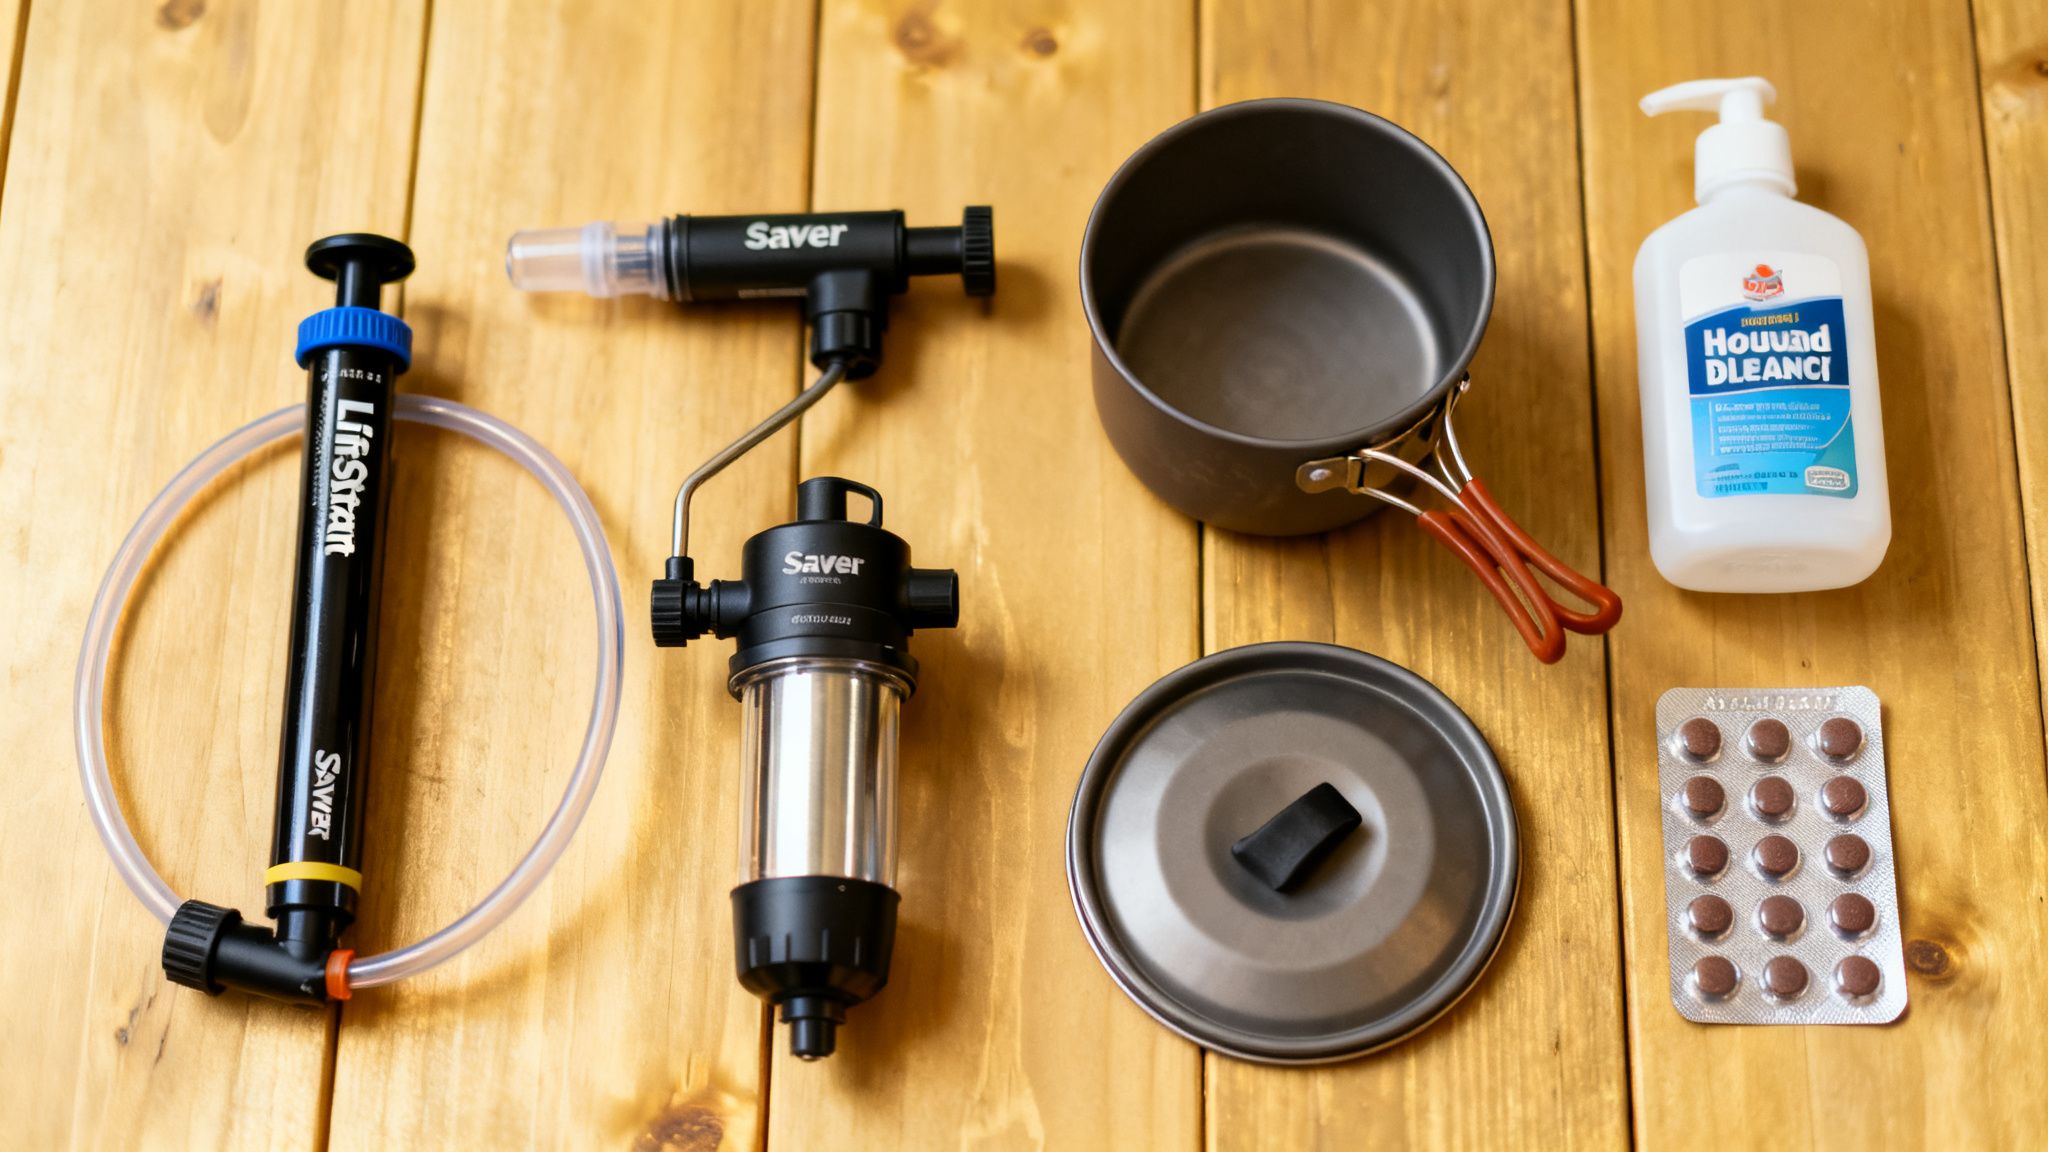
Squeeze and Gravity Filters
These are my personal favorites for their balance of convenience and portability. The Sawyer Squeeze is a legend in this space. It’s a simple hollow-fiber filter you can screw onto a water bottle, splice into a hydration pack line, or set up as a gravity system. Just fill a pouch, screw on the filter, and squeeze clean water into your container.
Gravity filters use the same technology but let physics do the heavy lifting. You hang a “dirty” water bag, and clean water drips through the filter into a “clean” reservoir below. This is the best way to process a large amount of water at camp without sitting there squeezing a bag for an hour.
Pump Filters
Pump filters are the workhorses. A classic like the Katadyn BeFree lets you draw water directly from a shallow source—like a puddle or small stream—and pump it through a filter into your bottle. They’re fast and reliable. The main downsides are the physical effort involved and the fact that they have moving parts that can break down in the field if you’re not careful.
Straw-Style Filters
The LifeStraw is probably the most recognized filter on the planet. It’s an ultralight, dead-simple tube that lets you drink directly from a water source. It’s a perfect backup to throw in a bug-out bag or for solo trips where speed and weight are everything. The big limitation? You can only drink through it. You can’t use it to fill a water bottle or a cooking pot.
Situational Purification Methods
Sometimes, your primary gear fails, or you find yourself in a unique spot. That’s when you have to get creative. Two other methods are worth keeping in your back pocket.
- Solar Disinfection (SODIS): This one is pure science. It uses the sun’s UV rays to kill pathogens. The catch is it only works with clear water inside clear plastic (PET) bottles. Fill a bottle, screw on the cap, and lay it on its side in direct, bright sunlight. It needs at least six hours on a sunny day or two full days if it’s overcast. It’s slow and weather-dependent, but it’s a fuel-free option that absolutely works.
- Distillation: This is the only method you can use in the field to remove salt, heavy metals, and chemical contaminants. It works by boiling water to create steam and then collecting the condensed, pure water. You can rig up a solar still with some plastic sheeting and a container to slowly evaporate and collect clean water. It’s incredibly effective for making seawater drinkable, but it’s a painfully slow process that yields very little water.
Setting Up a Resilient Home Water System
While portable filters and chemical tablets are non-negotiable for your bug-out bag, a serious preparedness plan needs a solid water strategy for your home base. When you’re hunkered down, you need something that can handle more than just bacteria and protozoa. I’m talking about heavy metals, pesticides, and industrial chemicals that could easily find their way into the municipal supply during a crisis.
This is where you graduate from basic filtration to comprehensive purification.

To build that level of resilience, you need a system that can fight the invisible threats dissolved in your water. A good gravity filter is a fantastic starting point, but for knocking out the widest possible range of contaminants, the gold standard is a Reverse Osmosis (RO) system.
Why Reverse Osmosis Is King for Home Purification
Reverse Osmosis isn’t just a filter—it’s a molecular-level purification process. It works by forcing water through a special semipermeable membrane that traps contaminants, letting only pure water molecules pass through. Think of it as an incredibly fine sieve that can remove up to 99% of all total dissolved solids (TDS).
A typical under-sink RO system is a multi-stage workhorse:
- Sediment Pre-filter: The first line of defense. It catches the big stuff like rust, sand, and silt, which protects the more sensitive parts of the system down the line.
- Carbon Pre-filter: Next, activated carbon grabs onto chlorine and other chemicals. This not only improves taste and odor but also prevents these chemicals from destroying the delicate RO membrane.
- RO Membrane: This is where the magic happens. The membrane removes a massive list of contaminants, from lead and arsenic to fluoride and nitrates.
- Carbon Post-filter: As a final step, the purified water gets a last “polish” from another carbon filter to ensure it tastes crisp and clean right out of the tap.
For long-term survival scenarios, reverse osmosis systems are the clear leader with a 55% market share, precisely because they remove 99% of dissolved solids, heavy metals, and other nasty stuff. This is becoming more critical every day, especially with the EPA reporting that PFAS ‘forever chemicals’ are now in 45% of U.S. tap water. We only need to look at historical events like the 1993 Milwaukee cryptosporidium outbreak to see RO’s value; after the crisis, its adoption cut recurrence risks by a staggering 95%. Modern countertop RO units can produce 50-100 gallons a day, making them a perfect fit for home preparedness. You can dig deeper into water treatment trends over at grandviewresearch.com.
Taking Your RO System Off-Grid
Here’s the catch: standard under-sink RO systems need household water pressure to work. If the grid goes down and the city water stops flowing, your high-tech purifier becomes a paperweight. That is, unless you’ve planned for it.
The whole game is about generating the 40-60 PSI required to force water through that RO membrane. And thankfully, it’s very doable with a little prep.
A core tenet of preparedness is making your essential systems independent from public utilities. For water, that means being able to purify your own stored supply when the power is out and the taps are dry. An off-grid RO setup is the ultimate statement of water self-reliance.
There are a couple of straightforward ways to power your RO system when the grid fails:
- Manual Pumping: A simple RV hand pump or even a small marine bilge pump can be plumbed into the system’s intake. You can then manually pump water from a storage tank (like a 55-gallon drum) to create the pressure needed to run the filter. It’s work, but it gets you pure water.
- Solar-Powered Pumping: For a more hands-off approach, a small 12-volt DC water pump hooked up to a solar panel and a deep-cycle battery is a game-changer. This creates a self-sustaining system that can purify large amounts of water without any manual effort, as long as you have some sunshine. This is especially effective if your water source is a private well. If that’s part of your plan, you should check out our guide on how to make a water well to complete your setup.
By building in these off-grid adaptations, your home water system goes from a simple convenience to a genuine survival lifeline, ready to provide safe, clean water no matter what’s going on in the world outside.
How to Properly Store Water for Long-Term Emergencies
Knowing how to purify water is a mission-critical skill, but all that hard work goes down the drain if your supply gets contaminated in storage. Building a safe, long-term water cache is just as important as knowing how to find and treat it in the first place.
It all starts with choosing the right container. The ideal choice is made from food-grade, BPA-free plastic or glass. You’ll want to steer clear of old milk jugs or juice containers. They’re nearly impossible to fully clean of the proteins and sugars that will absolutely encourage bacterial growth over time. Stick with containers designed specifically for the job.
Choosing and Sanitizing Your Containers
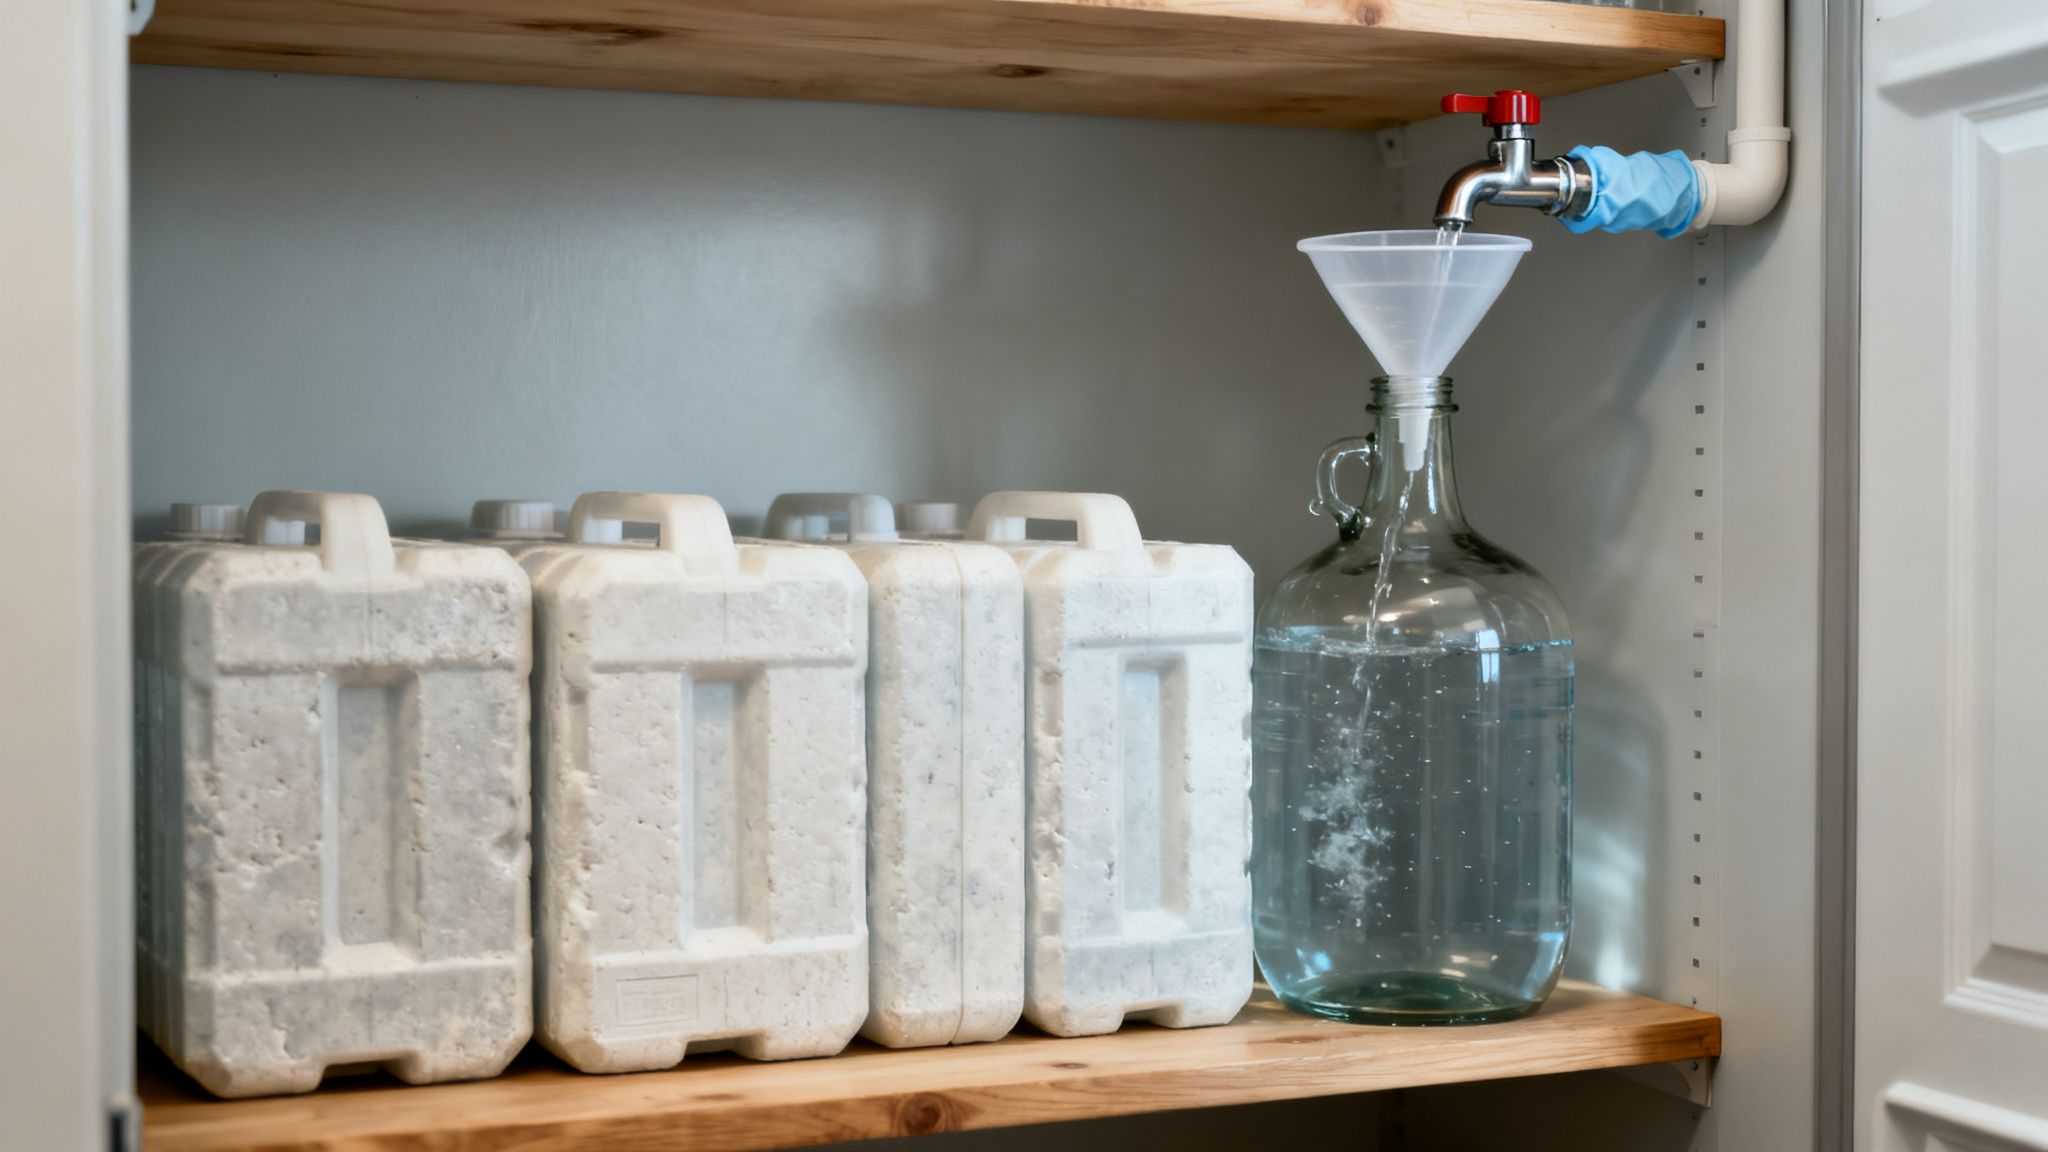
Sturdy, stackable containers like the WaterBrick are a popular option because they’re tough and make great use of limited space. Traditional glass carboys are another excellent, completely inert choice, but you have to be mindful of their weight and fragility. Whatever you end up with, sanitizing it before you fill it is non-negotiable.
Here’s how to do it right:
- First, give the container a good wash with soap and hot water, then rinse it out completely.
- Next, mix up a sanitizing solution of one teaspoon of unscented household bleach per quart of water.
- Pour this solution into your container, seal it up, and shake it vigorously to make sure the bleach water touches every single interior surface.
- Finally, empty the container and let it air-dry completely before you fill it with your purified water.
Don’t skip this step. It guarantees you’re starting with a sterile environment, which is the key to preventing nasty microbial growth down the road.
The rule of thumb for water storage is simple: cool, dark, and off the ground. UV light from the sun degrades plastic and encourages algae growth, while heat can cause chemicals to leach from the plastic. Direct contact with concrete floors can also impart a funky chemical taste to the water.
Proper storage conditions will drastically extend the life and safety of your water supply. A basement, a cool closet, or a pantry are all solid locations. If you’re planning for more capacity, you can explore larger options. Check out our guide on collapsible water tanks for some high-volume home storage solutions.
Rotation and Labeling for Reliability
Once your water is stored, you can’t just set it and forget it. Commercially bottled water has an expiration date for a reason, and your self-stored supply should be treated the same way.
The best practice is to rotate your water supply every 6 to 12 months. This just means using up the water you have stored—for drinking, cooking, whatever—and then refilling your sanitized containers with a fresh supply. This simple habit keeps your cache fresh and safe.
Finally, every container needs a clear label. Grab a permanent marker and write the date you filled it directly on the container. This eliminates any guesswork about which containers need to be rotated first. Knowing you have a well-maintained, properly stored, and clearly labeled water supply provides a peace of mind that’s absolutely invaluable.
Common Questions About Survival Water Purification
Even with the best training, things get complicated when you’re actually out in the field. When you’re exhausted, thirsty, and stressed, small doubts can snowball into big, dangerous mistakes. This section cuts through the noise to tackle the practical questions that pop up when it really counts, giving you clear answers so you can act with confidence.
Knowing what your gear can—and can’t—do is every bit as important as having it in the first place. This is where theory meets reality.
Can My Filter Make Saltwater Drinkable?
The short answer is a hard no. Your standard survival filters, even the best ones like a Sawyer Squeeze or a LifeStraw, just aren’t built for that. They work like microscopic strainers, catching bacteria and protozoa, but their pores are way too big to stop dissolved salt molecules.
Boiling won’t work either. In fact, it’ll make things worse by evaporating the fresh water and leaving behind a more concentrated salty brine. To make seawater safe to drink, you have to get the salt out, a process called desalination. In a real-world survival scenario, you’ve really only got two options:
- Distillation: This is your most likely bet. By building a solar still with a plastic sheet and a container, you can use the sun’s heat to evaporate fresh water, leaving the salt behind. You then collect the pure condensed vapor as it drips down.
- Reverse Osmosis (RO): This method requires specialized gear, like a hand-pumped marine RO unit. They’re effective but expensive and not something most people carry in their pack.
For the average person in a tough spot, a makeshift solar still is the most realistic way to desalinate water.
How Can I Be Sure the Water Is Safe?
You can’t trust your eyes. The most dangerous pathogens are completely invisible, and crystal-clear water can still be teeming with viruses and bacteria that will lay you flat. Confidence comes from your process, not from a visual check.
Safety isn’t about what you can see; it’s about rigorously trusting your proven technique. Every shortcut taken is a gamble with your health.
Your guarantee of safety comes from following the rules for your chosen method to the letter, every single time.
- Boiling: The water must hit a full, rolling boil for at least one minute. If you’re at high altitude (above 6,500 feet), make it three minutes.
- Chemicals: Use the exact dose of bleach or iodine and, just as importantly, wait the full contact time. This is usually 30-60 minutes, depending on the water’s temperature and clarity.
- Filtration: Use and maintain your filter exactly as the manufacturer tells you. That means backflushing it regularly to prevent clogs and, critically, avoiding cross-contamination between the dirty and clean ends.
What Is the Biggest Mistake People Make?
Hands down, the single biggest mistake is impatience. Rushing the purification process is the quickest way to get sick when you can least afford it, and it completely undermines whatever method you’re using.
Every reliable technique needs time to work its magic. We see it constantly: people who don’t let water boil long enough, who add their chemical drops and drink after just ten minutes, or who accidentally touch the “clean” outlet of their filter with dirty hands. Time is a non-negotiable ingredient for safe water.
Is Pool Water Safe to Drink After Purification?
Treating pool water is a last-ditch, dire-emergency-only option. That water is a chemical cocktail of chlorine, algaecides, stabilizers, and other compounds you really don’t want to drink.
If you absolutely have to, it’s a two-step process. First, you still need to purify it to kill any pathogens that might have survived the pool chemicals. But that’s not enough. After that, you must filter it through activated carbon to pull out as many of those harmful chemicals as possible.
A high-quality gravity filter with a carbon element, like a Berkey system, would be one of the safer approaches. Distillation would also work. Just boiling it or running it through a standard backpacking filter won’t cut it—you have to tackle both the biological and the chemical threats.

