When you think about emergency water storage, what comes to mind? For most people, it’s rows of bulky, rigid 55-gallon barrels taking up precious space in a garage or basement. That’s the old way. Today, there’s a smarter, more flexible solution: collapsible water tanks.
These are high-capacity containers engineered to hold huge amounts of water, but here’s the game-changer: when they’re empty, they fold down to a tiny fraction of their filled size. They’re a modern answer for preparedness, offering a practical path to self-reliance without sacrificing your living space.
Why Modern Preparedness Demands Better Water Storage
Let’s be honest, traditional water storage is a massive pain for the average person. The sheer impracticality of dedicating a huge corner of your home to a collection of blue plastic drums is a major roadblock for anyone trying to get serious about being prepared. This is exactly where collapsible tanks change the entire equation.
Think of a collapsible water tank like a spare tire for your home’s water supply. It stays tucked away, compact and unnoticed in a closet or on a shelf, until the day you desperately need it. When a water main breaks or a storm knocks out municipal services, it deploys in minutes to provide a life-sustaining reservoir of clean water.
If you’re storing your tank in a basement or cellar, proper insulation of your cellar ceiling helps maintain stable temperatures for your water supply year-round.
Moving Beyond Bulky Barrels
For families, homesteaders, and tight-knit communities, a scalable plan is the bedrock of resilience. The old methods force you into a tough choice: either have enough water to last or have enough space to live. A collapsible water tank means you don’t have to compromise.
This innovative design solves several critical problems at once:
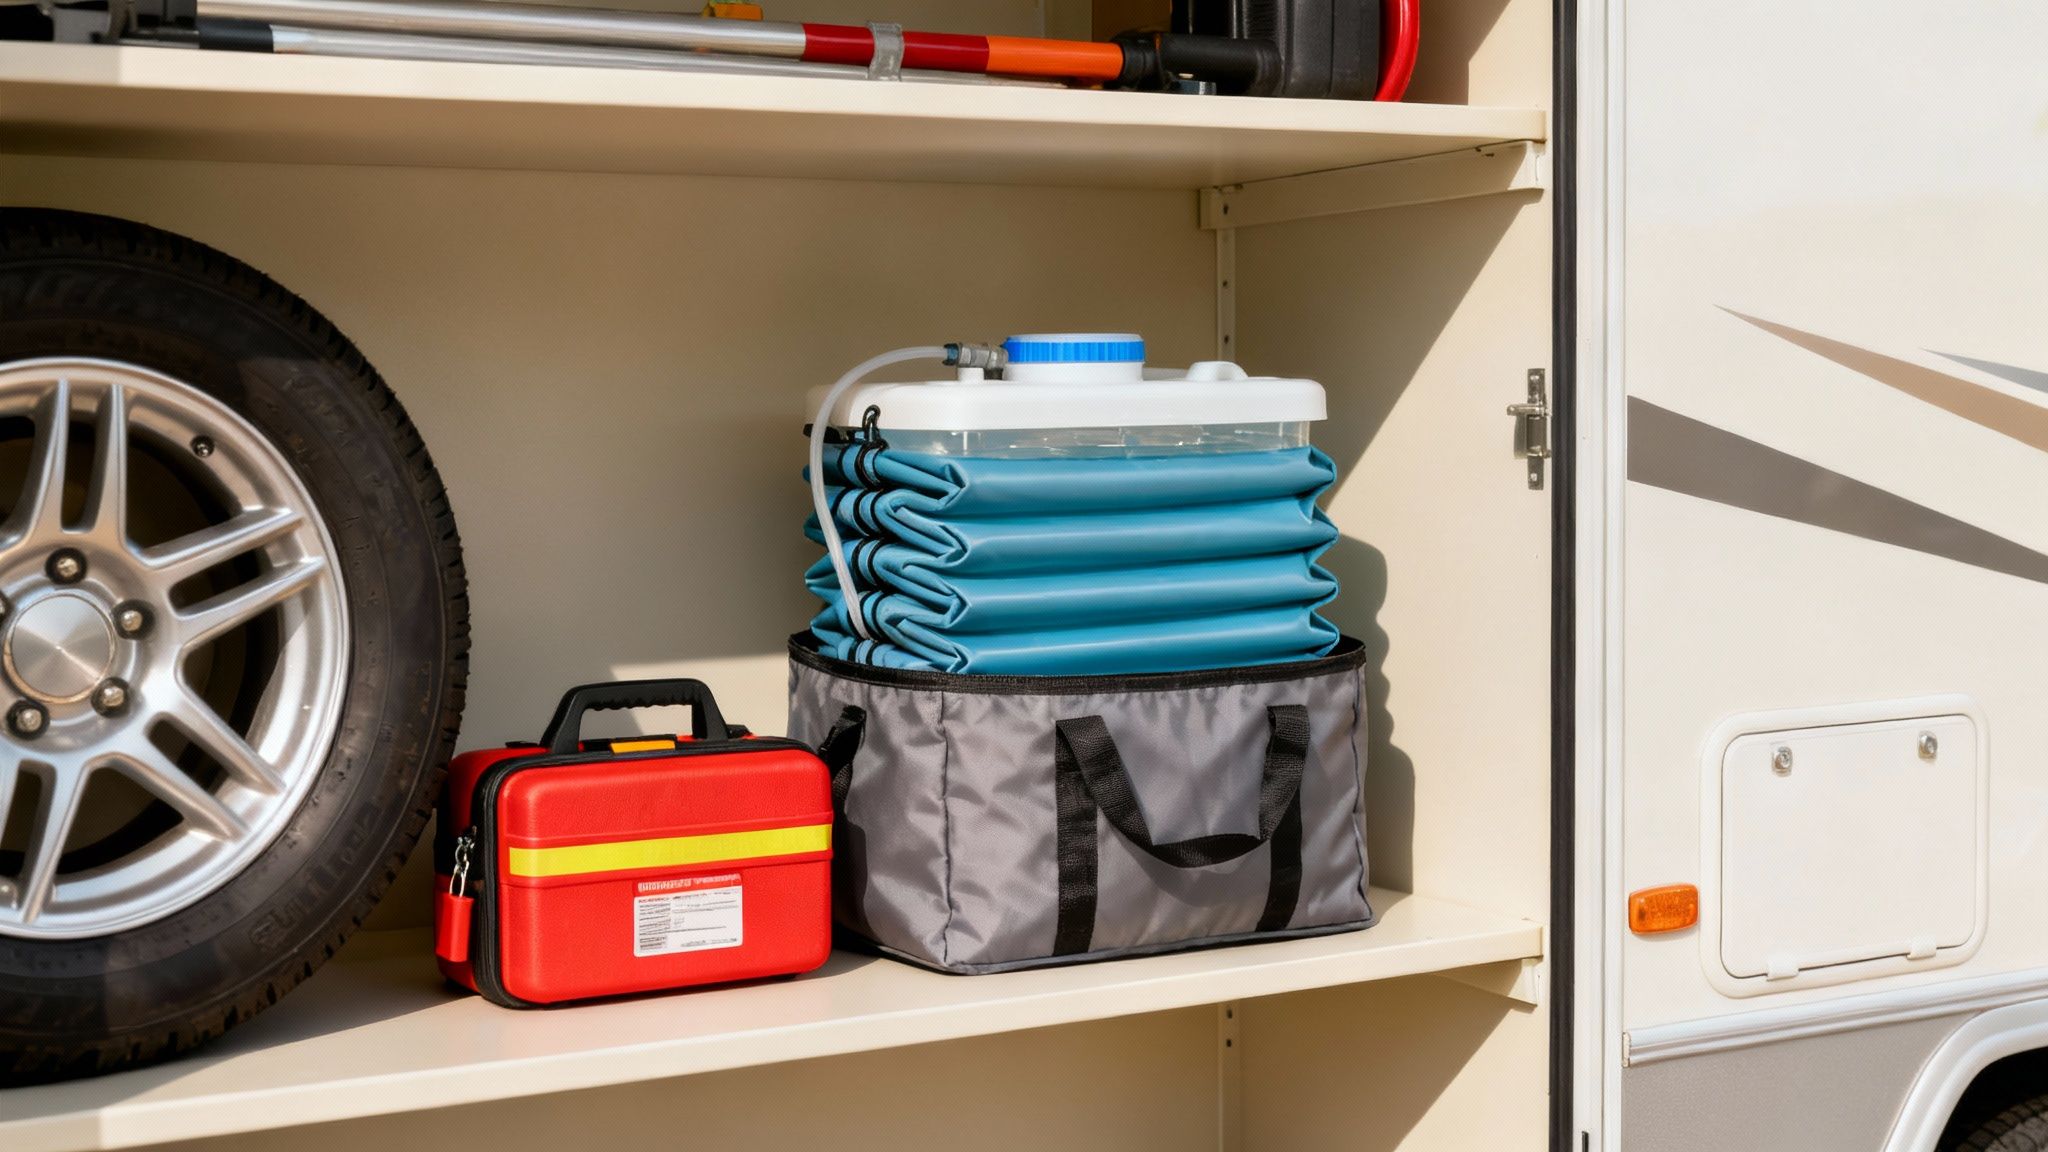
- Space Efficiency: They can be stored in a space no bigger than a shoebox, making them perfect for apartments, RVs, and any home where storage is at a premium.
- Scalability: You can easily store multiple tanks to ramp up your water reserves from 50 gallons to over 1,000 gallons—without the permanent footprint.
- Portability: Their lightweight, folded state makes them easy to transport to a bug-out location or to help neighbors in a wider emergency.
Let’s take a quick look at why these features are so important for real-world preparedness.
Collapsible Water Tank Advantages at a Glance
| Benefit | Why It Matters for Preparedness |
|---|---|
| Compact Storage | Frees up valuable living space, making preparedness accessible for everyone, even in small homes or apartments. |
| Rapid Deployment | Can be set up and filled in minutes when a crisis hits, unlike permanent tanks that require constant maintenance. |
| Portability | Easily transported by one person, allowing you to move your water supply or take it with you if you need to evacuate. |
| Scalable Capacity | Start with one tank and add more as your needs grow, allowing for a flexible and affordable approach to water security. |
These advantages make collapsible tanks a far more practical and adaptable solution for the challenges we face today.
A Modern Answer to a Timeless Problem
The need for water is ancient, but our lifestyles are not. Modern preparedness demands solutions that fit our modern lives. Water storage shouldn’t be an afterthought stuffed into a corner; it should be integrated seamlessly into your overall plan, right alongside a well-stocked first aid kit like those from My Medic or a reliable Goal Zero power station.
While modern tools are invaluable, don’t overlook the wisdom of traditional Amish survival skills that have sustained families through countless crises without relying on technology.
A robust water plan isn’t just about having water; it’s about having accessible, safe water in a quantity that can actually see your family through an extended crisis. Collapsible systems make that level of readiness achievable for everyone.
Once you grasp the “why” behind these tanks, you can see how perfectly they fit into a comprehensive preparedness strategy. They aren’t just containers; they are a critical tool for building a truly resilient household. To see how water storage fits into the bigger picture, check out our guide on building a complete emergency preparedness checklist.
Water is only one pillar of preparedness—pair your water storage plan with a robust food storage strategy for survival to ensure complete self-sufficiency during extended emergencies.
Choosing the Right Tank Design and Material
Once you decide a collapsible tank is right for you, you’ll quickly find out they aren’t all made the same. The tank’s design and what it’s made of are the two biggest factors that will determine how well it holds up and whether it’s the right tool for your specific situation. Getting this choice right from the start is what ensures your water supply is safe and ready when you need it most.
It might seem like there are a ton of options, but they really boil down to two main designs and a couple of key materials. Understanding the pros and cons of each will help you pick a tank you can depend on, whether it’s tucked away in your basement for a power outage or deployed in the field as an off-grid water source.
Comparing Tank Designs: Pillow vs. Frame Supported
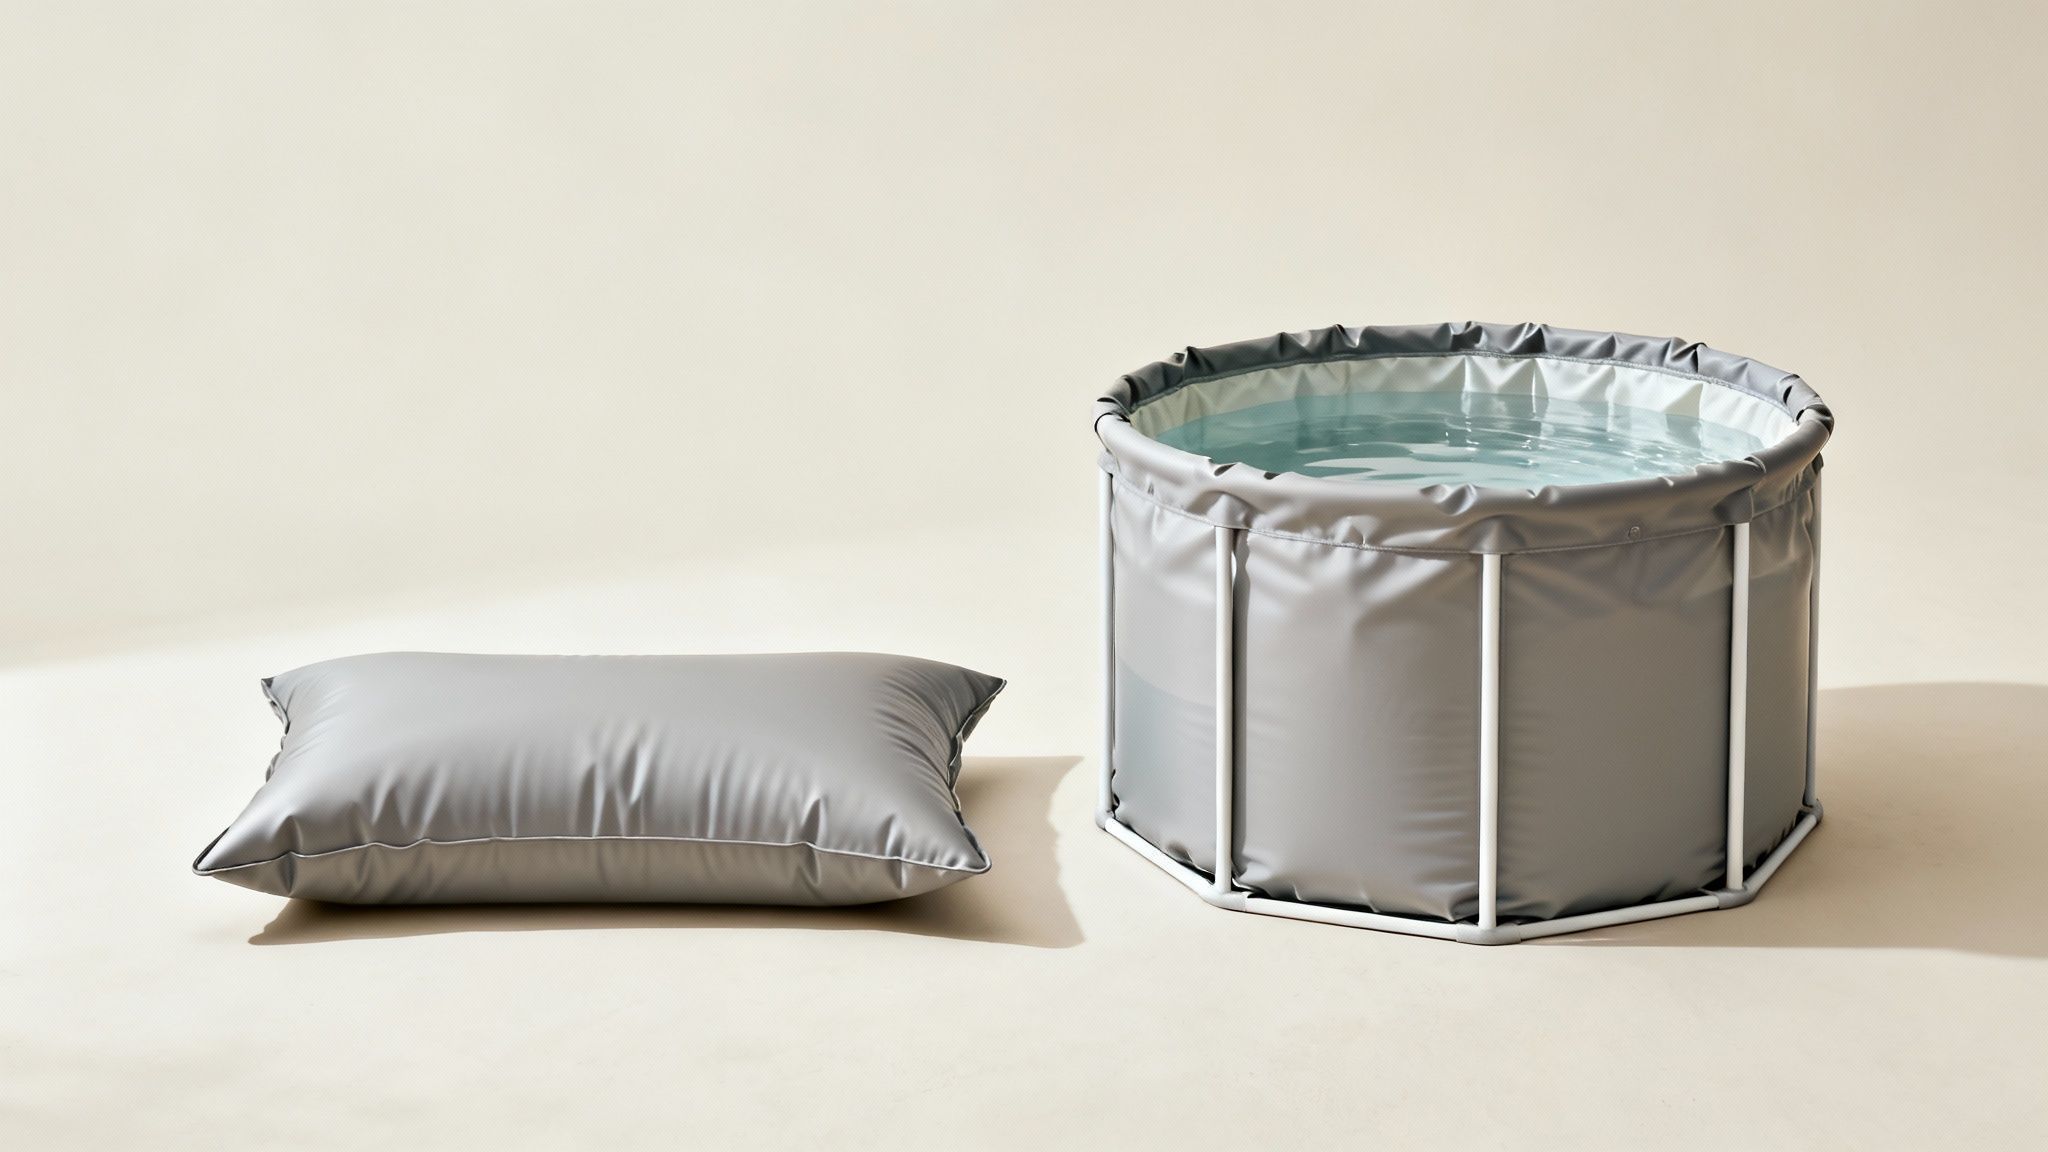
The two main styles of collapsible tanks are built for completely different jobs. Think of it like the difference between a backpack and a rolling suitcase—both carry your stuff, but one is built for mobility and staying out of the way, while the other offers structure and easy access.
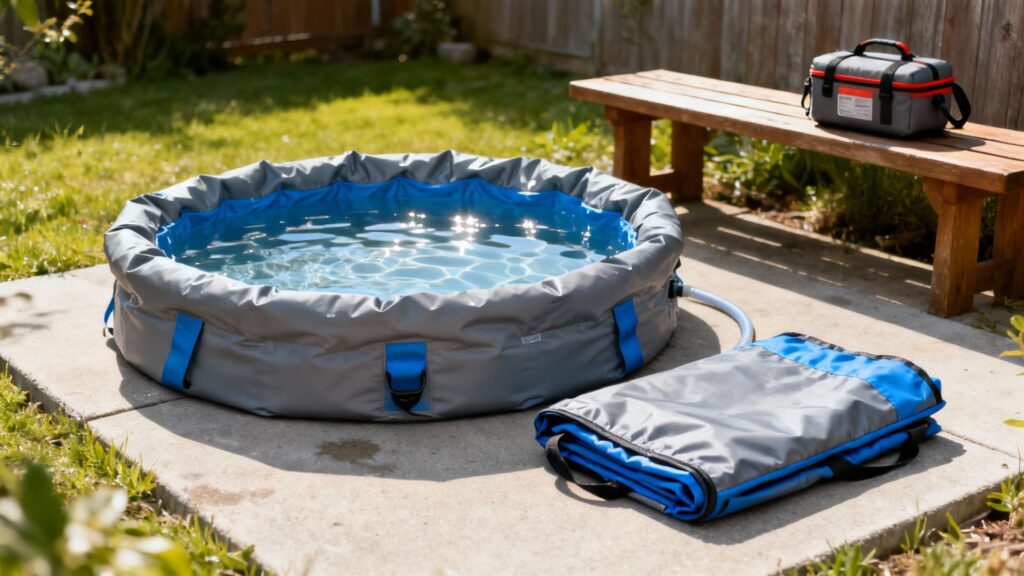
- Pillow Tanks: These are basically heavy-duty bladders, like the Aqua-Tank II. They lie flat when empty and swell into a low-profile “pillow” shape when you fill them. Their biggest win is discreet storage. You can slide them under a deck, into a crawl space, or other tight spots. The trade-off? Getting water out usually requires a pump or a siphon, since the fittings are almost always on the top.
- Frame-Supported Tanks: These work more like a mini above-ground pool. You get a tough liner supported by a rigid external frame. They are incredibly easy to use, often built with spigots near the bottom for simple, gravity-fed access. While they do take up more vertical space, that open-top design makes them perfect for catching rainwater.
Your choice here really just depends on where you plan to put it and how you need to get the water out.
Why Tank Material Is a Critical Choice
Beyond the shape, the material the tank is made from is a non-negotiable safety issue, especially if you’re storing drinking water. The right material guarantees your water won’t pick up chemical contaminants or a nasty plastic taste, even after sitting for months.
The market for these tanks has exploded, growing into a global industry valued at around $500 million in 2025. This growth is thanks to big steps forward in material science, giving us stronger, lighter, and more reliable fabrics perfect for long-term emergency use.
For drinking water, you absolutely have to find tanks made from food-grade materials that won’t leach junk into your supply.
Crucial Takeaway: If a tank isn’t explicitly rated for potable water with an NSF/ANSI 61 certification, don’t even think about using it for drinking, cooking, or hygiene. That certification is your proof that the material has been rigorously tested and is safe for contact with drinking water.
Decoding Common Tank Materials
Most potable-grade collapsible tanks are made from one of two main materials, and each has its own strengths.
- Polyvinyl Chloride (PVC): This is a very common and affordable option. Just make sure it’s an NSF-rated, BPA-free PVC. It’s known for being tough and resisting scrapes, but it can get stiff and hard to work with in the cold.
- Thermoplastic Polyurethane (TPU): This is the more premium material. TPU is incredibly flexible across a huge range of temperatures, has excellent puncture resistance, and won’t give your water that dreaded plastic taste. It’s the go-to for many of the best tanks on the market.
Industrial-grade tanks, like those from manufacturers such as ContiTech, use specialized rubber compounds built for extreme conditions and chemical resistance. That’s overkill for most of us, but it shows you the high end of material quality. When you’re picking your tank, also look for something with good UV resistance to keep the sun from breaking it down over time.
Of course, storing water safely starts with the right container, but knowing how to purify it is just as vital. Make sure to check out our guide on how to filter rainwater for drinking to round out your water preparedness plan.
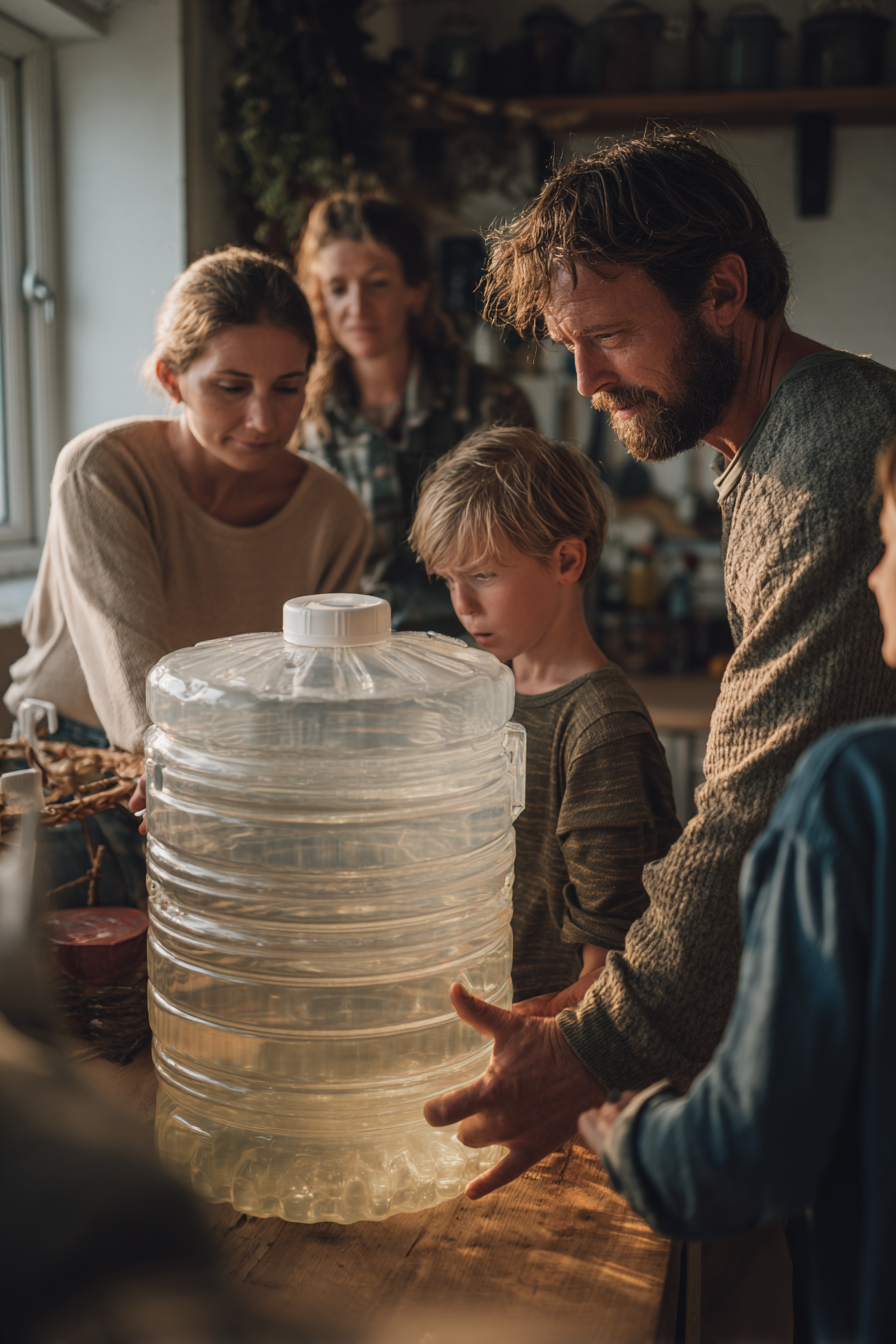
Calculating How Much Water Your Family Really Needs
You’ve probably heard the old survival rule of thumb: one gallon of water per person, per day. It’s a decent starting point, but in a real crisis, it’s dangerously incomplete.
That classic rule covers just enough for basic hydration and maybe a little cooking. But a real-world emergency demands much more. A solid water plan needs to account for everything from personal hygiene to unexpected medical needs, ensuring you can stay healthy and comfortable when the taps run dry.
To figure out the right size for a collapsible water tank, you need to get real about your household’s actual consumption. This means looking way beyond just drinking water and building a complete picture of what your family truly requires to get by.
Building Your Water Budget From the Ground Up
Think of it like a financial budget, but for water. You start with the non-negotiables (drinking) and then layer in all the other critical categories. A good plan doesn’t just keep you alive—it keeps you clean, healthy, and ready for whatever comes next.
The goal is to nail down a realistic daily total, then multiply it by the number of days you want to be self-sufficient. This process makes it crystal clear whether you need a 100-gallon tank for short-term hiccups or a 1,000-gallon reserve for serious, long-term security.
Daily Water Usage Planning Guide Per Person
Here’s a table that breaks down daily water needs into practical categories. Use it to build a much more accurate picture of your per-person total.
| Activity | Minimum Recommended Gallons | Optimal Recommended Gallons |
|---|---|---|
| Drinking Water | 0.5 Gallons | 1 Gallon |
| Cooking & Food Prep | 0.5 Gallons | 1 Gallon |
| Basic Hygiene (Hand Washing) | 0.5 Gallons | 1 Gallon |
| Sanitation (Flushing) | 1 Gallon | 2 Gallons |
| Medical/First Aid Needs | 0.25 Gallons | 0.5 Gallons |
Looking at this guide, a family of four aiming for an optimal level of readiness would actually need 22 gallons per day—a far cry from the four gallons the old rule suggests. A week-long outage suddenly demands 154 gallons, which shows you just how fast those needs stack up.
Accounting for Special Circumstances
Your calculation isn’t finished until you factor in the unique variables of your own household and environment. These little buffers are what turn a good plan into a great one.
- Pets and Livestock: Don’t forget your animals! A big dog can easily lap up a gallon of water a day, and livestock needs are much, much higher. A few goats or sheep can require 5-10 gallons every single day.
- Climate and Activity Level: If you live in a hot, dry climate or you’re planning on doing manual labor like clearing storm debris, your personal hydration needs could easily double.
- Medical Needs: Anyone with chronic health issues, infants needing formula, or elderly family members will have specialized hydration or sanitation needs. Tacking on a 5-10% buffer to your total is a very wise move.
- Community Support: A core idea in preparedness is helping each other out. Having an extra 10-20% stored could mean the world to a neighbor who wasn’t as prepared.
By planning for two gallons per person per day as a baseline before adding special circumstances, you create a much more resilient water strategy. This shifts your mindset from mere survival to maintaining a reasonable standard of living during a crisis.
From Calculation to Capacity
Once you have your realistic daily number, the final step is simple multiplication. Just decide on your preparedness timeline. Are you planning for three days, one week, or a full month?
Family Daily Total x Number of Days = Required Storage Capacity
For that same family of four needing 22 gallons per day, a two-week plan demands a storage capacity of 308 gallons. This simple math makes it obvious why a high-capacity collapsible water tank is such a practical tool. Trying to store over 300 gallons of water in individual jugs is a logistical nightmare, but a single tank handles that volume with ease.
If you are starting from scratch, our detailed guide can help you build a solid 72-hour water plan to get you on the right track.
Your Step-by-Step Guide to Tank Setup and Filling
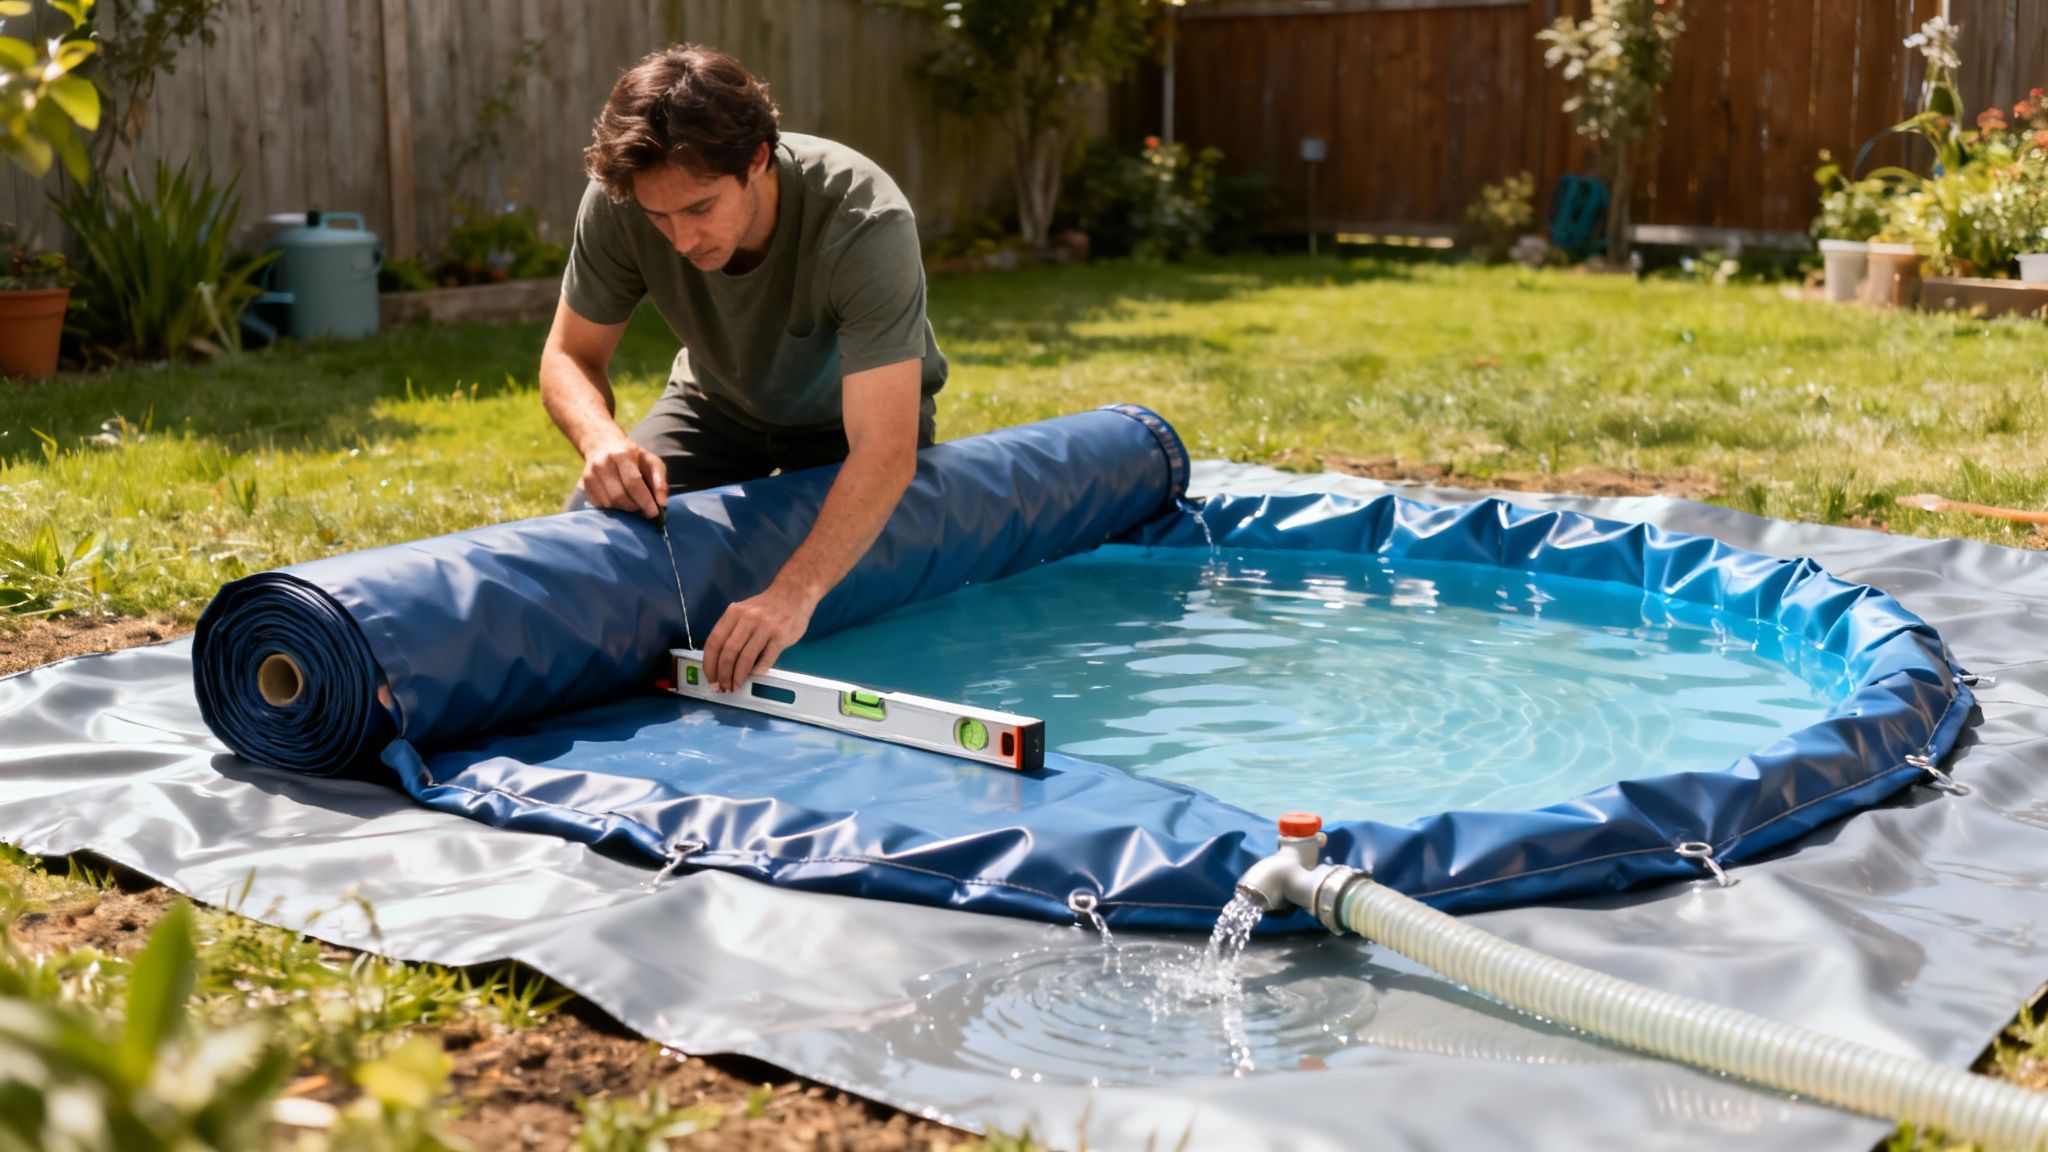
A collapsible water tank is a fantastic asset, but its reliability is only as good as its setup. An improperly deployed tank is a disaster waiting to happen, potentially spilling hundreds of gallons of your precious water reserve right when you need it most.
Taking the time to do this right is non-negotiable. Think of it as the pre-flight checklist for your family’s water security. Getting the site prep and filling process perfect protects your investment and ensures that water is there when you can’t get it anywhere else.
Preparing the Perfect Site
The ground your tank sits on is its single most important point of contact. Even a small, sharp rock can become a huge problem under the immense pressure of all that water. Your first job is to create a safe, stable foundation.
Select a Level Surface: Find the flattest ground you can. An uneven surface puts dangerous stress on the tank’s seams and frame, which can lead to a catastrophic failure over time. A simple carpenter’s level will tell you what your eyes can’t.
Clear All Debris: Get down on your hands and knees and meticulously clear the entire footprint of the tank. Remove every rock, twig, piece of glass, and sharp object. Don’t just look—run your bare hand over the area to feel for anything you might have missed.
Use a Ground Tarp: This step is absolutely critical. Lay down a heavy-duty ground tarp or even a remnant of old carpet. This adds a crucial layer of defense against punctures from unseen hazards buried just under the surface.
Once your site is prepped, unfold the tank and give it a thorough once-over before a single drop of water goes in.
Your Pre-Fill Inspection Checklist
Before you even think about connecting a hose, perform this quick but vital inspection. This is your last chance to spot a problem while the tank is still empty and manageable.
- Check All Seams: Look closely at the welded or stitched seams. You’re searching for any signs of separation, cracking, or weakness.
- Inspect Valves and Fittings: Make sure all valves are fully closed. Check that the threads on your fittings are clean and free of damage.
- Look for Punctures: If you can, hold the fabric up to the light or carefully scan the interior and exterior. You’re looking for tiny holes or abrasions from its time in storage.
A five-minute inspection now can save you from a thousand-gallon headache later. It’s always better to find a small issue with an empty tank than a massive failure with a full one.
The demand for home water storage has exploded recently, showing just how seriously people are taking their preparedness. During the COVID-19 pandemic, the global water storage system market shot up from $18.11 billion in 2023 to $19.43 billion in 2024—a jump of over 8% in a single year. This growth was fueled by families realizing the need for reliable household infrastructure when facing uncertainty.
Filling Your Collapsible Water Tank Correctly
With the site prepared and the tank inspected, it’s finally time to add water. The source you’re using will determine the tools you need.
If you’re filling from a municipal tap, always use a dedicated, food-grade hose like the Camco TastePURE Drinking Water Hose. A standard garden hose can leach nasty chemicals and flavors into your supply.
For private sources like a well or a rainwater catchment system, pre-filtering is a must. An inline filter from a trusted brand like Sawyer will catch sediment and debris, keeping your stored water cleaner from the start. For those thinking bigger, you can check out our guide on how to make a water well.
As the water begins to flow, stay with it. Smooth out any major wrinkles or folds in the tank’s liner as it fills to prevent air from getting trapped, which can create stress points. Fill the tank slowly and steadily, allowing it to take shape naturally and ensuring it sits evenly on your prepared surface.
Keeping Your Stored Water Safe and Ready to Drink

Storing hundreds of gallons of water is a solid first step, but it’s only half the job. Water is a living resource; given enough time, it can become a breeding ground for bacteria, algae, and other nasties if you don’t manage it correctly.
Keeping your supply safe and drinkable is what turns that big container into a genuine life-sustaining asset. A good maintenance plan isn’t complicated. It really just boils down to starting clean, treating the water right, and rotating it on a reasonable schedule. Get these three things down, and the water you tap into during an emergency will be just as good as the day you stored it.
Creating a Simple Rotation Schedule
While you can treat water for extremely long-term storage, the most reliable and foolproof method for most of us is regular rotation. This approach guarantees freshness and gives you a built-in reminder to check your tank and all its connections.
A 6 to 12-month rotation schedule is the gold standard here. Once or twice a year, simply use up that stored water on everyday tasks—watering the garden, washing the car, you name it. Then, give the tank a quick clean and refill it with fresh, treated water. This simple habit keeps your supply from ever tasting stale and confirms your gear is ready to go when you need it.
Treating Water for Long Term Storage
When you fill your tank, treating the water is a non-negotiable step to stop microbial growth in its tracks. You’ve got a couple of solid options here.
- Commercial Stabilizers: For the longest shelf life and maximum peace of mind, a dedicated product is your best bet. A well-regarded option like Water Preserver Concentrate uses a stabilized, pH-balanced form of sodium hypochlorite that can protect water for up to five years when stored properly.
- Household Bleach: Plain, unscented household bleach will also get the job done, but you have to be precise. Always use a brand new bottle, as bleach loses its punch over time. The standard formula is 8 drops of bleach per gallon of water. For a 100-gallon tank, that works out to about 1.25 teaspoons.
Critical safety note: Never use scented, splash-less, or color-safe bleach. These have additives that are toxic. Stick to plain, regular-strength (5-9% sodium hypochlorite) liquid bleach.
Best Practices for Dispensing and Cleaning
Every time you access your water, you risk introducing contaminants. To keep your supply pristine, avoid dipping cups or containers directly into the tank. The safest way to get water out is with a clean, dedicated hand pump or a siphon hose, transferring it into smaller jugs for daily use.
When it’s time to rotate your supply, a proper cleaning is essential before refilling. A simple solution of one teaspoon of unscented bleach per gallon of water will sanitize the interior. Swish this solution around to coat every surface, let it sit for a few minutes, then drain and rinse thoroughly until you can’t smell any chlorine.
Finally, and this is crucial, let the tank air dry completely before folding it up for storage. Trapped moisture is the number one cause of mold and mildew, which can permanently ruin your tank. Proper care ensures your collapsible water tank remains a reliable part of your preparedness plan for years to come. For a deeper dive, our complete guide to water purification for survival covers even more techniques.
For comprehensive coverage of all purification methods, including advanced techniques for contaminated sources, explore our complete guide on survivalist water purification.
Common Questions About Collapsible Water Tanks
When you’re finally ready to pull the trigger on a serious water storage solution, a lot of practical questions pop up. Getting straight answers is the best way to build confidence and avoid some of the classic rookie mistakes. Let’s tackle the most common questions people have about using these tanks for real-world preparedness.
How Long Can Water Be Stored in These Tanks?
Here’s the deal: with proper upfront treatment and a high-quality, opaque tank that blocks all sunlight, you can safely store water for up to five years. It’s absolutely achievable, but it demands a meticulous approach from day one.
That said, for most of us, a more practical strategy is to rotate your water supply every 6 to 12 months. This keeps your supply at peak freshness and gives you a regular excuse to inspect your gear. If you’re aiming for that maximum five-year shelf life, a dedicated product like Water Preserver Concentrate is specifically formulated to keep water potable for that long. The bottom line is always the same: start with a spotless tank and a clean, potable water source.
Are All Collapsible Tanks Safe for Drinking Water?
Absolutely not. Getting this detail right is probably the most critical part of your purchase. You must choose a tank made from food-grade, potable-safe materials. Look for an explicit NSF/ANSI 61 certification on the product page—this is the public health standard for any component that touches drinking water.
A lot of industrial tanks look similar but are built for fuel, gray water, or other chemicals that can leach nasty stuff into your supply. Always, always verify the product specs before you buy. Insist on virgin, BPA-free materials like TPU or NSF-rated PVC. This ensures the emergency water you’re storing for your family is actually safe to drink.
Never assume a tank is safe for drinking water just by looking at it. That NSF/ANSI 61 certification is the only real guarantee of safety. It should be a non-negotiable requirement for your tank.
Can I Bury a Collapsible Pillow Tank for Discreet Storage?
I’m going to give you a hard “no” on this one. Standard collapsible pillow tanks are simply not engineered for it. They can’t handle the constant pressure, abrasion, and puncture risks that come with being buried. The sheer weight of the soil will eventually compromise the seams and the fabric itself.
Trying to bury a pillow tank will void its warranty in a heartbeat and, more importantly, will likely lead to a catastrophic failure right when you need it most. If you need discreet, underground storage, you’re looking for a rigid, purpose-built cistern specifically designed for burial.
What Is the Best Way to Repair a Small Leak or Puncture?
Most quality tanks come with a patch kit designed for their specific material, and the process is pretty straightforward if you take your time.
- First, thoroughly clean and dry the area around the hole.
- Apply the adhesive that came in the kit directly to the patch.
- Press the patch firmly over the puncture, making sure to smooth out any air bubbles.
- Let it cure completely based on the manufacturer’s instructions before you even think about refilling the tank.
If you’re in a pinch and don’t have the original kit handy, something like Gorilla Waterproof Patch & Seal Tape can be a fantastic field-expedient fix. It can stop a leak on the spot, buying you the time to do a more permanent repair later.

