Yes, you can absolutely use regular household bleach to purify water in an emergency. But there’s a catch: it must be unscented and contain 5% to 9% sodium hypochlorite as its active ingredient. This isn’t some old wives’ tale; it’s a method recommended by trusted organizations like FEMA and the Red Cross for killing off nasty bacteria and viruses when you have no other source of clean drinking water.
Why Bleach Is Your Lifeline in a Water Emergency
When a natural disaster hits or your tap just stops working, the question of safe drinking water becomes your number one priority. Many people immediately think of boiling or expensive filters, but that simple bottle of bleach under your sink is one of the most reliable tools you can have in your emergency kit. It’s cheap, easy to find, and it works.
The science behind it is solid. Sodium hypochlorite, the active ingredient, is a beast against dangerous pathogens like E. coli, Giardia, and norovirus. Knowing this simple fact can take you from feeling helpless to feeling confident, because you have a real, workable solution to keep your family safe.
A Proven Method Backed by History
Using chlorine to disinfect water is far from a new idea. It became the gold standard for city water treatment plants in the 20th century, and the results were incredible. By the 1950s, widespread chlorination of public water had slashed deaths from typhoid and diarrheal diseases by over 90% from what they were just a few decades earlier.
When things go south, you need solutions that are simple and reliable. Bleach is both. It doesn’t need power, fuel, or fancy gadgets. All it takes is the right kind of bleach and a little bit of know-how.
Building Confidence in Your Preparedness Plan
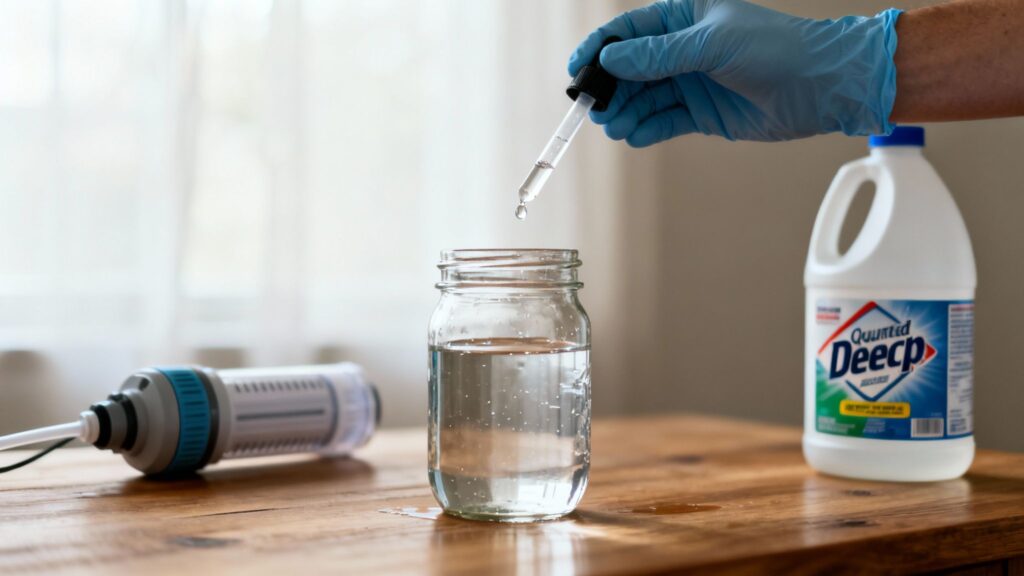
I get it—the idea of adding bleach to your drinking water sounds sketchy. But when you do it correctly, the process is perfectly safe and incredibly effective. We’re talking about a tiny amount, just a few drops per gallon, which is just enough to create a minimal chlorine level similar to what’s already in most city tap water.
Having a dependable way to purify water is the bedrock of any solid emergency plan. This skill works hand-in-hand with other critical preps, like having a 72-hour water plan in place. Think of that bottle of unscented bleach as a key piece of your survival gear, right up there with a good first-aid kit and an emergency radio like one from Midland. It’s an empowering and practical skill every single person should have.
Choosing The Right Bleach for Water Purification
Not all bleach is created equal, and when it comes to making water safe to drink, grabbing the wrong bottle is a critical mistake. The first step toward safe, drinkable emergency water is ensuring you have the right tool for the job. This means walking past the colorful, attractively labeled bottles and learning to read the fine print.
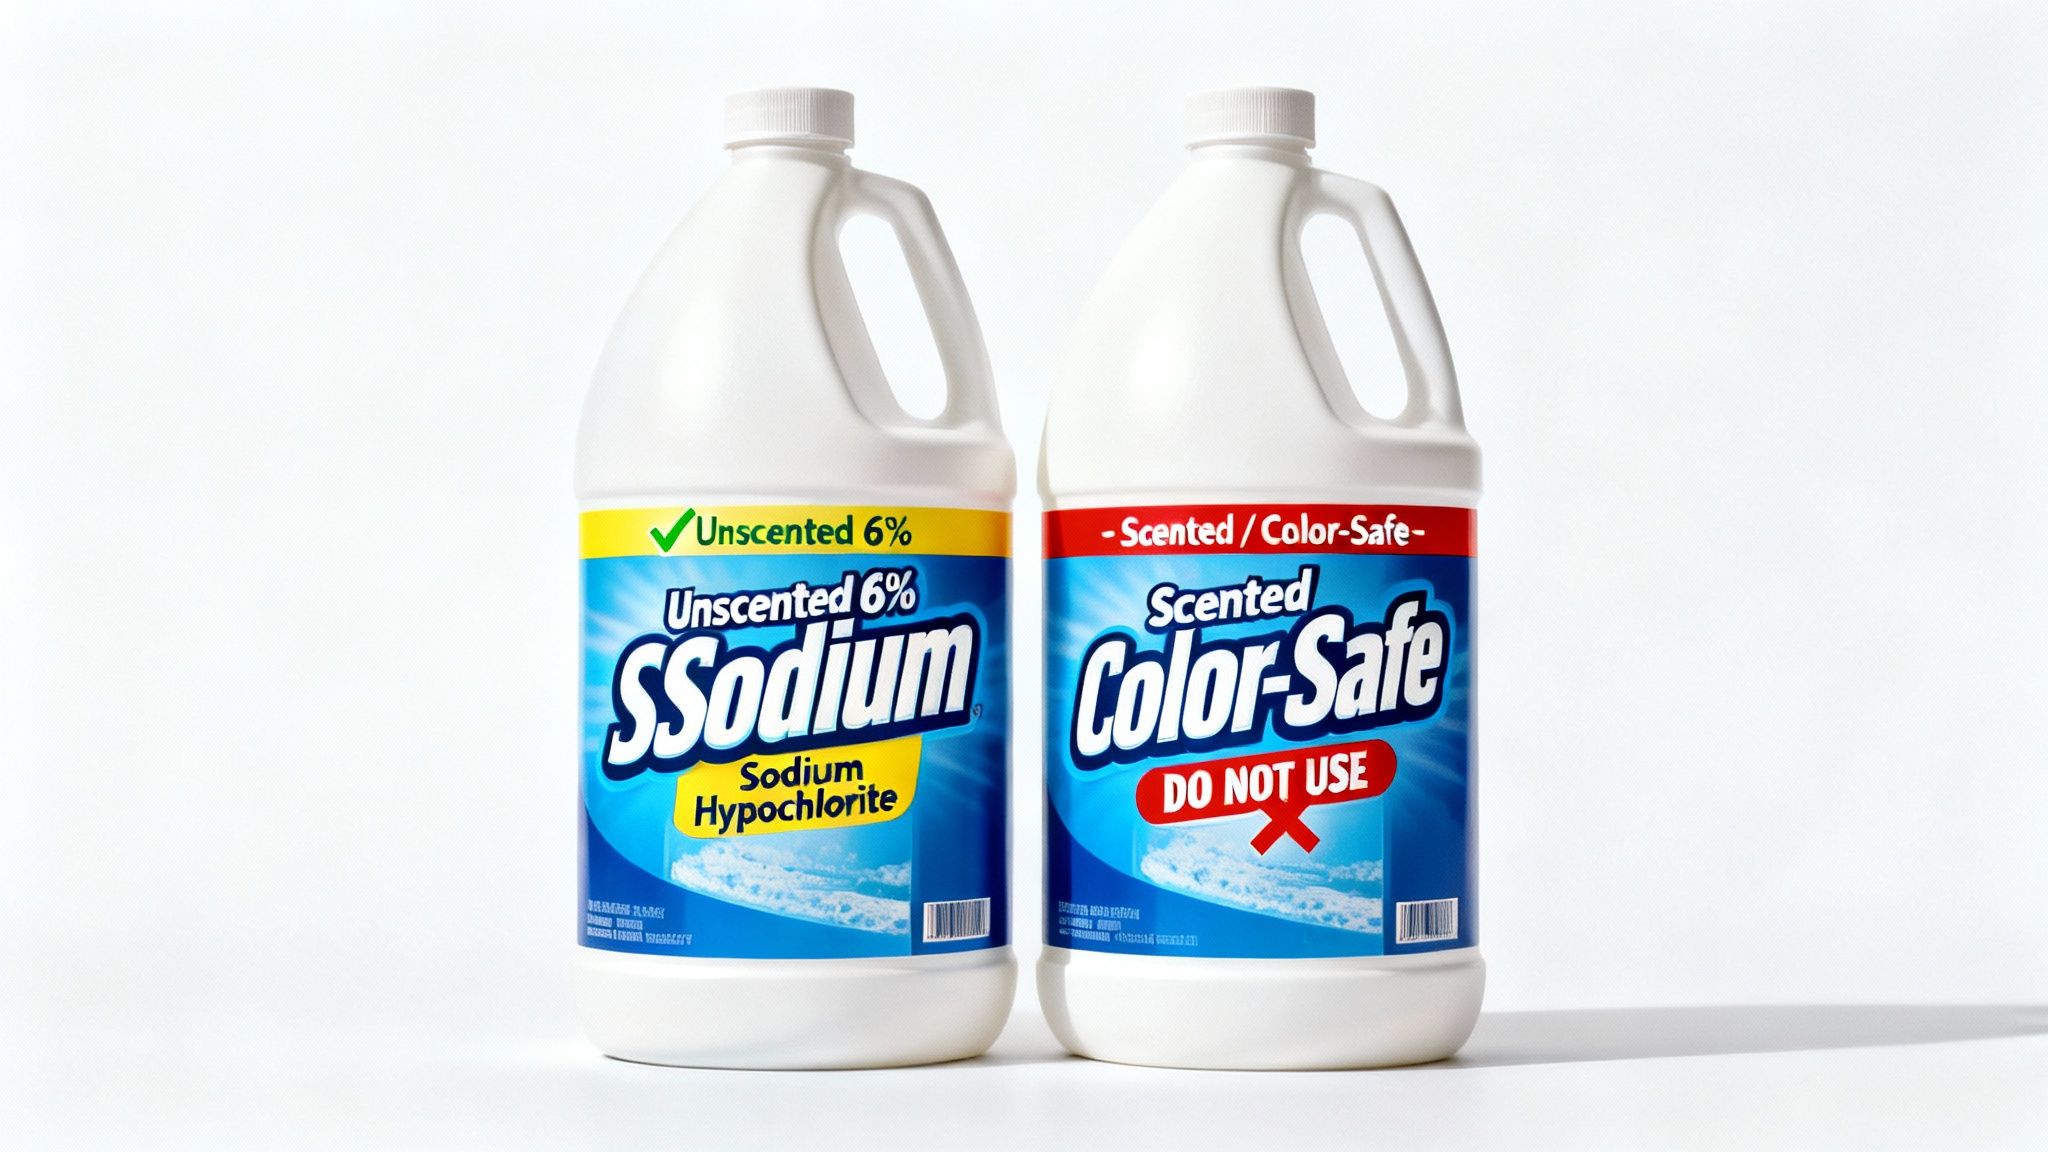
Your mission is simple: find plain, regular, unscented household bleach. Many modern bleach products are loaded with additives you absolutely do not want to ingest. Scents, thickeners for “splash-less” formulas, and detergents in “color-safe” bleach can make you sick. The only active ingredient you want to see listed is sodium hypochlorite.
Decoding the Bleach Label
Once you’ve found an unscented bottle, the next crucial detail is the concentration of sodium hypochlorite. For this to work reliably, you need a concentration between 5% and 9%. This range covers most standard household disinfecting bleaches, like the classic Clorox Disinfecting Bleach.
Here’s what to look for on the label:
- “Unscented” or “Regular”: This should be prominently displayed on the front. If it says “Fresh Scent,” “Lavender,” or anything similar, put it back.
- Active Ingredient List: Find the ingredients panel. It must explicitly state “Sodium Hypochlorite” followed by its percentage. If it lists other active ingredients, it’s the wrong choice.
- Avoid “Splash-Less” or “Thickened” Formulas: These varieties contain sodium polyacrylate or similar thickeners that should not be consumed. They are designed for cleaning surfaces, not for treating drinking water.
Key Takeaway: The only two things that should be in your bleach are sodium hypochlorite and water. Any other additive, from fragrance to color-safe boosters, makes it unsuitable and potentially dangerous for water treatment.
The widespread availability and effectiveness of sodium hypochlorite have made it a cornerstone of sanitation. Industry forecasts estimate that global liquid bleach production will reach approximately 5.21 million tonnes by 2034, driven by its essential role in everything from household cleaning to municipal water treatment. You can find more details in this global market forecast.
The Importance of the Manufacturing Date
Bleach isn’t shelf-stable forever. Sodium hypochlorite naturally degrades into saltwater over time, losing its disinfecting power. A bottle of bleach can lose about 20% of its potency within the first year after being manufactured, and this process accelerates with exposure to heat and sunlight.
Always check the bottle for a manufacturing date or a batch code. This code is usually stamped on the neck or bottom of the bottle and can be a bit tricky to decipher. For example, a code like “A823122” on a Clorox bottle often means the plant “A8,” the year “23” (2023), and the 122nd day of that year.
If you can’t find a clear date, it’s best to buy a fresh bottle specifically for your emergency kit and rotate it out annually. Using old, degraded bleach means you might not be adding enough active chlorine to kill all the pathogens, giving you a false sense of security. This attention to detail is a fundamental part of a layered approach to water safety, which is crucial for any survival situation. Check out our guide on how to purify water to see how this fits into a broader strategy. Using fresh, potent bleach is a non-negotiable step for reliable results.
Your Practical Guide to Purifying Water with Bleach
Alright, let’s move from theory to action. Knowing the why is important, but being able to confidently purify water with bleach is the skill that actually counts when you need it most. This is your field guide for turning questionable water into safe drinking water, step-by-step.
We’ll cover everything from cleaning up dirty water before you treat it to getting the dosage just right.
First Things First: Pre-Treating Cloudy Water
Before a single drop of bleach goes in, stop and look at your water. Is it cloudy, murky, or full of floaties like dirt and leaves? If the answer is yes, you have to pre-filter it. No exceptions.
Chlorine is a fantastic germ-killer, but it gets bogged down fighting through physical grit. All that debris essentially “uses up” the bleach’s power, leaving less of it available to neutralize the microscopic pathogens you can’t see.
In a pinch, you can improvise a filter. Pour the water through a few layers of a clean t-shirt, a bandana, or even a coffee filter to catch the big stuff. Afterward, let the water stand for about 30 minutes. Any finer sediment will settle to the bottom. Carefully pour the clearer water off the top into a clean container, leaving the gunk behind.
Of course, a purpose-built filter makes life easier and does a better job. A portable filter like the Sawyer Squeeze is a go-to for backpackers and preppers for a reason—it efficiently removes sediment and even some bacteria before you add any chemicals. Filtering first is non-negotiable for making sure your bleach works effectively. Knowing the best methods for collecting water in survival situations also helps you start with the clearest source possible.
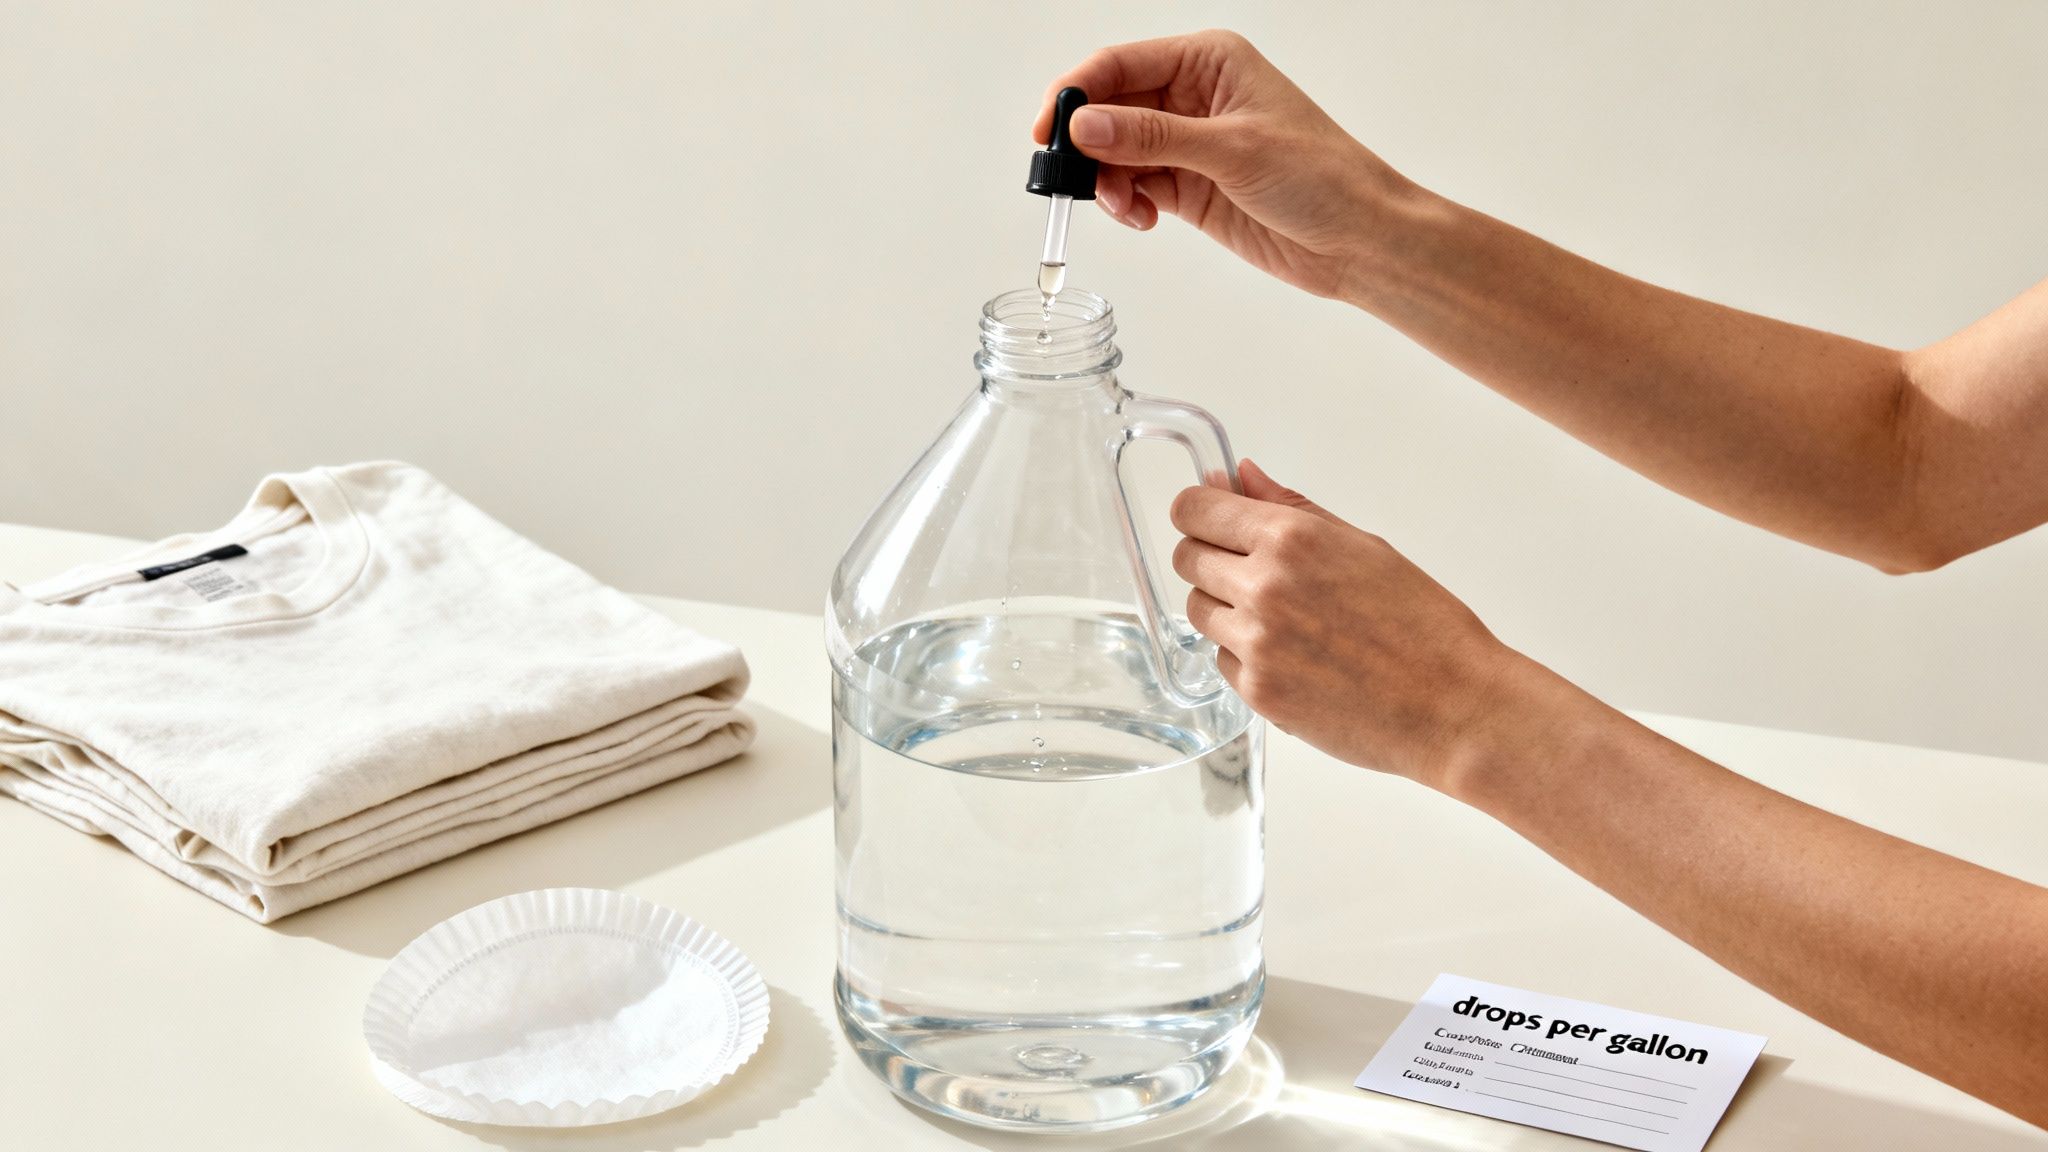
Bleach Dosing Chart for Water Purification (Using 5-9% Unscented Bleach)
This is the most critical part: getting the dose exactly right. Too little bleach won’t kill everything, and too much will make the water taste awful and potentially unsafe. The right amount depends on your bleach’s concentration and the volume of water you’re treating.
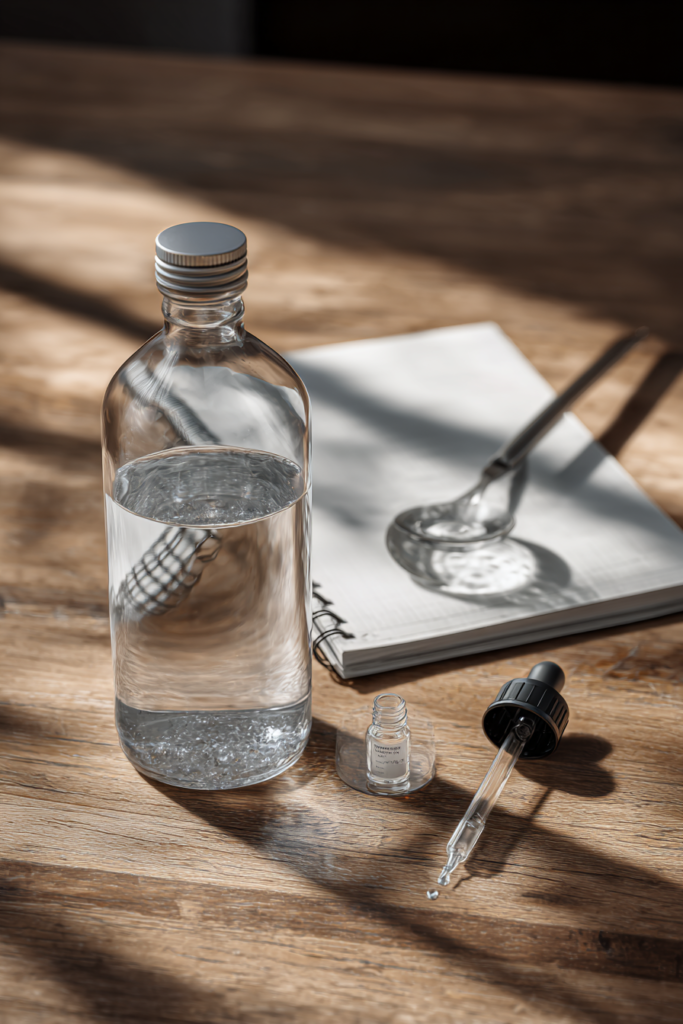
To make this simple and safe, I’ve put together a dosing chart based on recommendations from major health organizations. The goal is to leave a tiny bit of chlorine behind to keep the water safe. Use a clean medicine dropper for accuracy—remember that 1 milliliter (mL) is about 20 drops.
| Volume of Water | Bleach (5-6% Concentration) | Bleach (7-9% Concentration) |
|---|---|---|
| 1 Quart/Liter | 2 drops | 1 drop |
| 1 Gallon | 8 drops (or 1/8 teaspoon) | 4 drops |
| 5 Gallons | 1/2 teaspoon | 1/4 teaspoon |
Crucial Note: If your water is cloudy (even after filtering), murky, or very cold, you must double the amount of bleach listed in the chart. The extra gunk and cold temps demand more chlorine to get the job done right.
Getting the measurement correct ensures your water is disinfected without being over-treated. Keep this chart handy with your emergency supplies.
The Mix and Wait Protocol
Once you’ve added the right number of drops, the next steps are simple but mandatory.
Seal your container and shake it well to mix the bleach thoroughly. If you’re treating a larger batch in a bucket, use a clean stick or utensil to stir it vigorously for at least a minute.
Now, you wait. Let the water stand for a minimum of 30 minutes. This is the “contact time” the chlorine needs to find and neutralize any viruses, bacteria, or other nasties in the water. If your water is very cold (below 50°F or 10°C), give it more time—at least a full hour to be safe.
The Final Check: The Smell Test
After the wait is over, it’s time for the final confirmation. This is your most reliable safety check. Open the container and give it a sniff.
You smell a faint hint of chlorine: Perfect. This is exactly what you want. It smells a bit like a swimming pool or clean tap water. This tells you that you used enough bleach to kill the pathogens and a safe, protective amount remains. Your water is ready to drink.
You smell nothing at all: This means the bleach got used up fighting contaminants. The water is not safe yet. Add the same dose of bleach a second time, mix it again, and wait another 30 minutes. Do the smell test again. If there’s still no chlorine smell, ditch the water. It’s too contaminated to treat safely this way, and you need to find a cleaner source.
The chlorine smell is overpowering: Whoops, you probably added too much. To fix this, just pour the water back and forth between two clean containers a few times. This helps aerate the water, allowing some of that excess chlorine to evaporate. Letting it sit with the lid off for an hour or so will also help reduce the strong taste and smell.
Essential Safety Protocols You Cannot Ignore
Using bleach to purify water is a serious business. Get it right, and you have a lifesaver. Get it wrong, and you could make things much, much worse. These aren’t just suggestions; they’re hard-and-fast rules to keep you and yours safe.
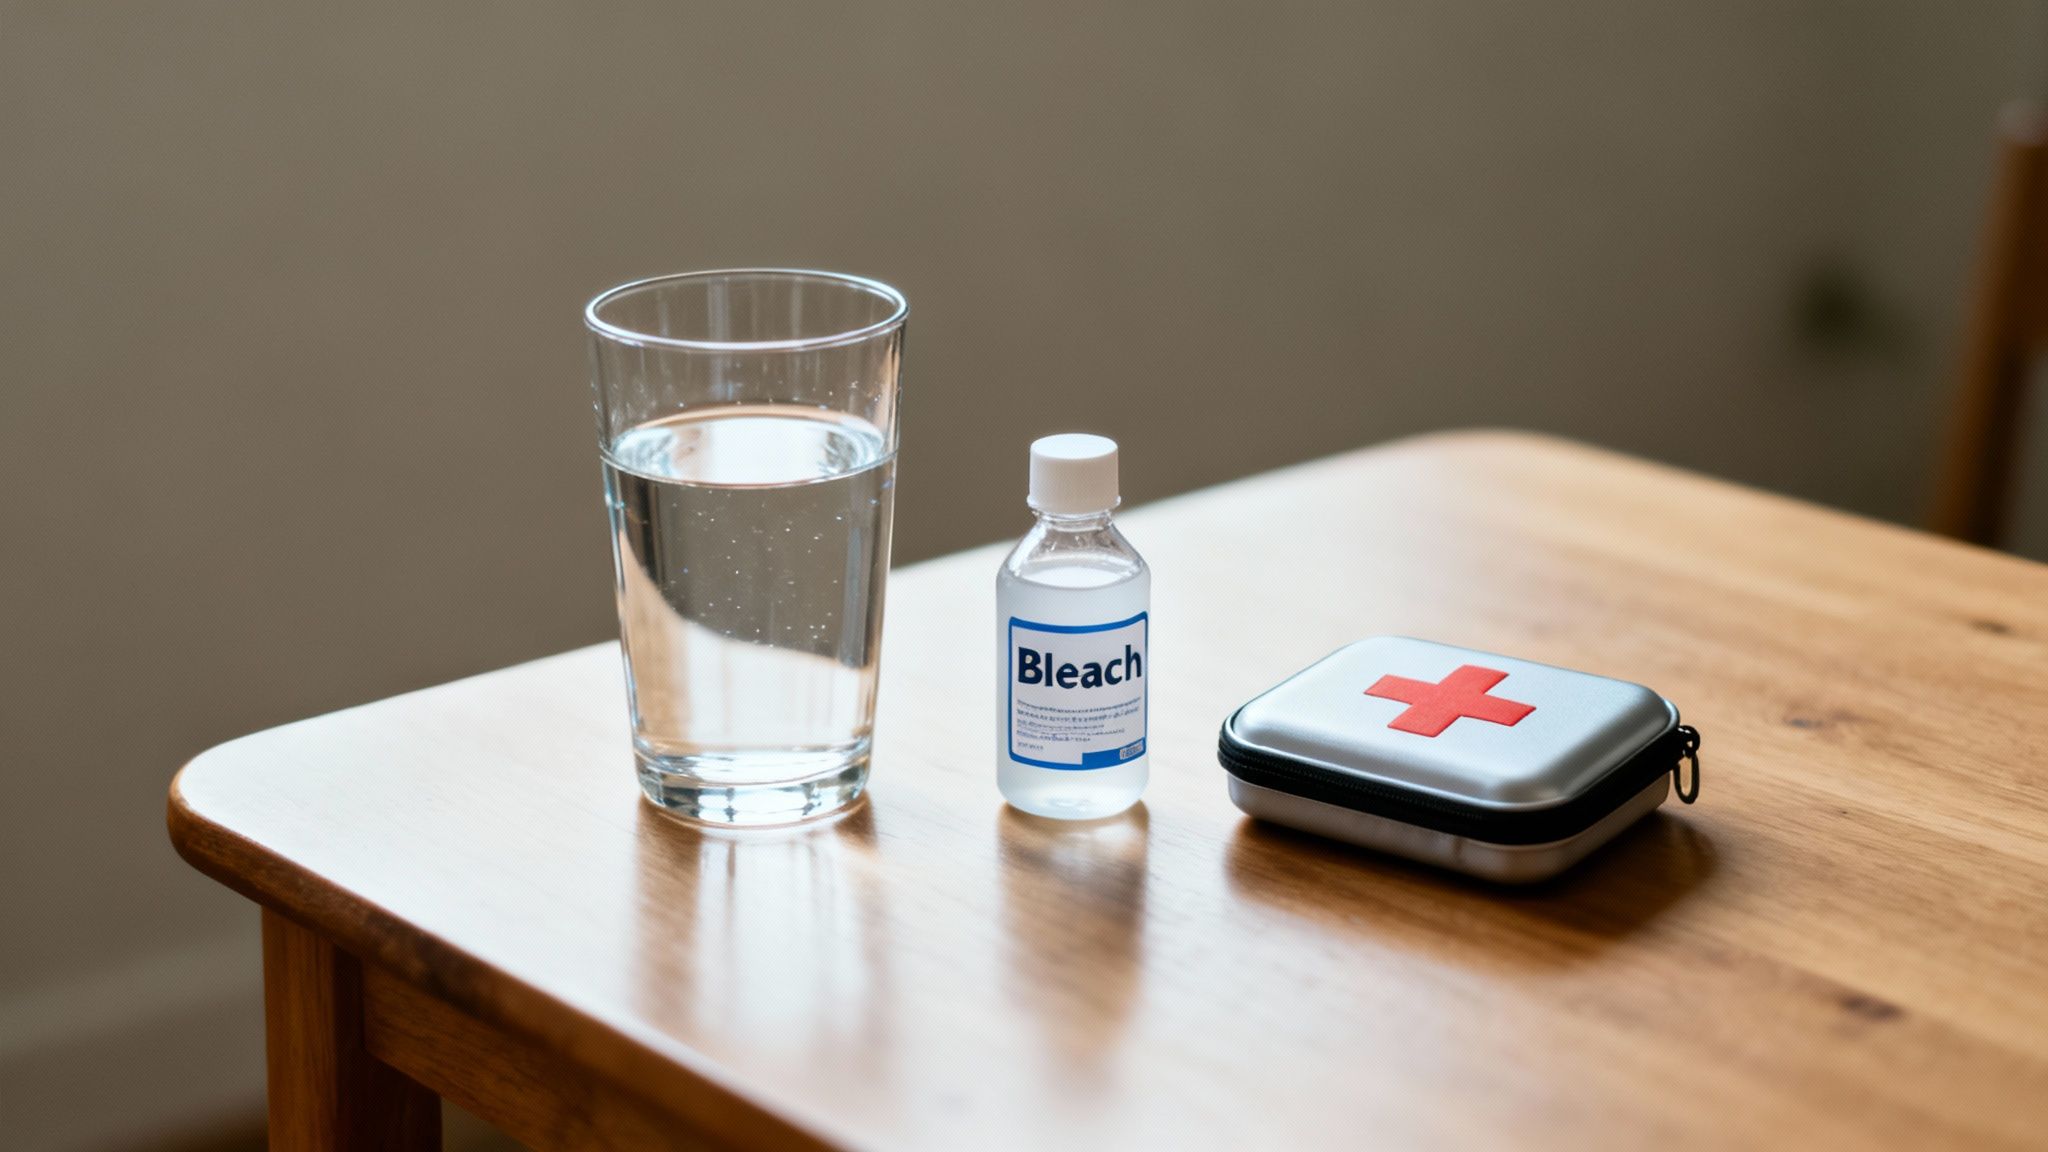
First things first: storage. Your water purification bleach needs its own home in a cool, dark place. Keep it far away from kids and pets. Sunlight and heat are the enemies here—they break down the sodium hypochlorite, making the bleach weaker and giving you a false sense of security.
When it’s time to measure, grab a clean, dedicated medicine dropper or syringe. Don’t just pull a spoon out of the drawer. Cross-contaminating your tools can introduce new germs into the water you’re trying to clean. It’s a simple step that keeps your measurements accurate and your water safe.
Handling and Mixing Dangers
Here’s the most important warning I can give you: never, under any circumstances, mix bleach with other chemicals. This is especially true for ammonia. When bleach and ammonia meet, they create toxic chloramine gas. Inhaling it can cause severe respiratory damage, chest pain, and nausea.
This isn’t some far-fetched lab scenario. A lot of household cleaners contain ammonia. In the middle of an emergency, when supplies might get jumbled together, it’s dangerously easy to make an accidental, toxic cocktail. Keep your water purification kit completely separate to avoid a deadly mistake.
Safety Imperative: Treat your water purification bleach like a standalone tool. Assume it will react dangerously with any other cleaning agent. Store it alone, use dedicated tools, and never mix it with anything but the water you’re purifying.
This kind of careful handling is a cornerstone of being truly prepared. It’s a mindset that applies to all aspects of emergency hygiene. If you’re building out a full kit, our guide on assembling your emergency sanitation supplies covers the bigger picture of staying clean and healthy when the grid goes down.
Special Considerations for Vulnerable Groups
In an emergency, bleach-treated water is generally safe for everyone, but some people need extra consideration. The goal is to create water that’s on par with what comes out of a municipal tap, but it’s good to know the limitations.
- Infants: For babies under six months who are formula-fed, their systems are still developing. While properly treated water is considered safe, bottled water is always the best choice for mixing formula if you have it.
- Pregnant Women: The CDC states that correctly purified water is safe during pregnancy in an emergency. Still, it’s always wise to minimize chemical exposure when you can.
- Immune-Compromised Individuals: People with severely weakened immune systems (from chemotherapy or HIV, for example) are more vulnerable to chlorine-resistant parasites like Cryptosporidium. For them, bleach alone might not cut it. Boiling water or using a certified water filter from a brand like Katadyn that is rated for cyst removal should be the go-to method.
Adjusting for Challenging Conditions
Emergencies don’t happen in a sterile lab. Real-world conditions can throw a wrench in your plans, and you need to know how to adapt. Water temperature is a perfect example.
Chlorine is sluggish in cold water. If your water source is chilly (below 50°F or 10°C), you absolutely must increase the contact time. After you’ve added the bleach, let the water sit for at least one full hour before you even think about doing a smell test. Rushing this step means you could be drinking water before all the pathogens are dead. When it comes to safety, patience is not a virtue—it’s a requirement.
Assembling Your Complete Emergency Water Kit
A bottle of bleach is a fantastic tool for making water safe, but it’s not something you can just toss in a kit and forget about. The active ingredient, sodium hypochlorite, has a shelf life. Over time, it naturally breaks down into simple salt and water, losing its disinfecting power along the way.
To put it in perspective, a brand-new bottle of household bleach can lose around 20% of its strength in the first year alone. That process gets a lot faster if the bottle is exposed to heat or sunlight. Storing it in a cool, dark place is an absolute must, but even then, you need a system to keep it fresh.
Creating a Rotation Schedule
The best way to make sure your bleach is ready when you need it is to set up a simple rotation schedule.
Once a year, just buy a new, small bottle of plain, unscented bleach. Take a permanent marker and write the date you bought it right on the label.
When you add that new bottle to your emergency kit, take last year’s bottle and move it into your laundry room for regular household cleaning. This way, nothing goes to waste, and you can be confident your emergency supply is always at full strength. It’s a small habit that makes a huge difference.
Building a Layered Water Defense
Relying on a single method for anything is a risky bet in a survival situation. A much smarter strategy is to build a layered defense for your water supply, with bleach being just one of your tools. If one method fails or just isn’t right for the job, you’ve got backups.
A truly comprehensive water kit gives you multiple options for filtering, treating, and storing water. Here are the core pieces you should have.
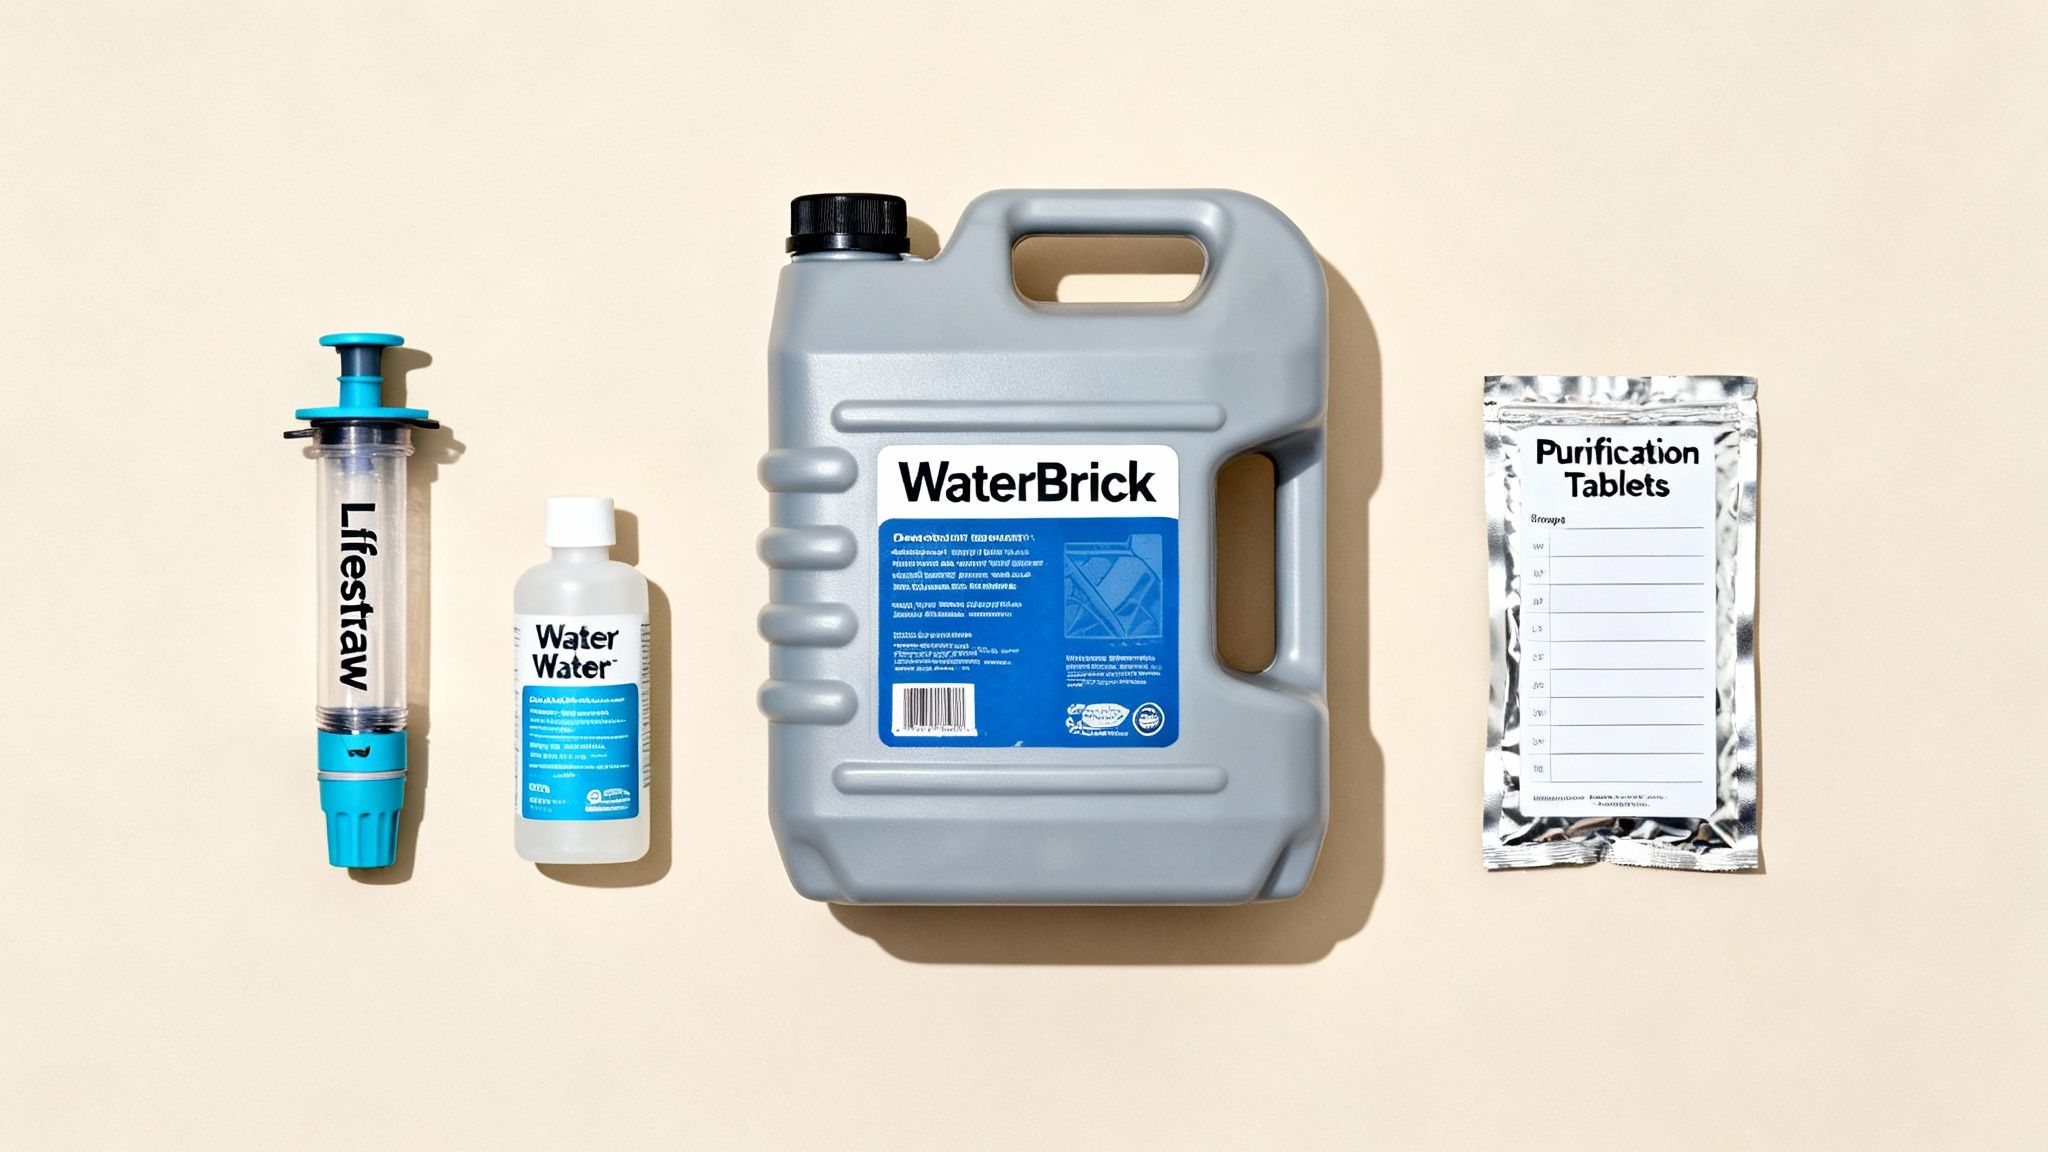
- Mechanical Filtration: A good water filter should be your first line of defense. Filters are amazing at pulling out sediment, protozoa like Giardia, and bacteria. The Lifestraw Personal Water Filter is a classic for a reason—it’s lightweight, dead simple to use, and perfect for a bug-out bag or a car kit. It lets you drink safely right from a water source.
- Backup Chemical Treatment: Sometimes, chemicals are faster or more practical than filtering, especially if you’re treating a large amount of water. Besides bleach, I always recommend having iodine-based tablets like Potable Aqua purification tablets. They come individually sealed, have a very long shelf life, and are a foolproof Plan B if you discover your bleach has expired.
- Robust Water Storage: You absolutely need a way to carry and store water without it leaking or breaking. Those plastic milk jugs from the grocery store are a terrible choice; they become brittle and crack easily. Instead, invest in purpose-built containers like the WaterBrick. They’re made from tough, food-grade plastic, they stack neatly for easy storage, and the wide mouth makes them a breeze to fill and clean.
By combining these different tools, you create redundancy. You can use your Lifestraw to pre-filter cloudy water before you treat it with bleach, which helps the bleach work much more effectively. If your bleach is old, no problem—just use the Potable Aqua tablets instead.
This layered approach is a fundamental principle of good prepping. It’s the same logic you’d use when putting together a complete 72-hour emergency kit, where you have multiple ways to make fire, create shelter, and prepare food. Your water strategy is just as critical and deserves the same careful planning.
Common Questions About Purifying Water with Bleach
Even with the best instructions, things get complicated in the real world. When you’re faced with a situation that requires purifying your own water, you need direct, no-nonsense answers. Let’s tackle some of the most common questions that pop up when using bleach, so you can act with confidence.
Can I Purify Water From Any Source?
While bleach is a fantastic disinfectant, it’s not a miracle worker. Its job is to neutralize microscopic threats like bacteria and viruses, not to remove physical dirt, chemicals, pesticides, or heavy metals. Because of this, you should always start with the cleanest water you can possibly find.
If your only option is a murky stream or a cloudy puddle, pre-filtering is non-negotiable. Run the water through a few layers of a clean t-shirt, a coffee filter, or a proper backpacking filter like the Katadyn BeFree before you even think about adding bleach. Think of bleach as the final knockout punch for the invisible germs, not a cleaning agent for visibly dirty water.
Important Reminder: Bleach only handles microbiological threats. If you have any reason to suspect the water is contaminated with industrial chemicals, fuel, or agricultural runoff, do not drink it. Bleach will not make it safe.
What if the Treated Water Smells Too Much Like Chlorine?
An overpowering chlorine smell is a dead giveaway that you’ve used a little too much bleach. It’s a common mistake, but thankfully, the fix is simple: you need to aerate the water. This helps some of that excess chlorine dissipate into the air.
Just pour the water back and forth between two clean containers a few times. You could also just let it sit open to the air for an hour or so. The goal is a faint, swimming-pool-like scent—that’s how you know the disinfection worked and a safe residual amount of chlorine is left to keep the water protected. If the smell is still too strong to drink after aerating, it’s best to dump that batch and start over with a more careful measurement.
How Does Bleach Compare to Boiling or Filtering?
Every purification method has its place, and the “best” one really depends on your specific situation.
- Boiling: This is the gold standard. A rolling boil for just one minute kills everything—viruses, bacteria, and protozoa. The downside? It takes a lot of fuel and time, and it won’t clear up sediment.
- Filtering: A good filter, like one from Sawyer, is brilliant at removing bacteria, protozoa, and all the gunk that makes water cloudy. It’s fast and makes water taste better, but most portable filters can’t catch the smallest viruses.
- Bleach: The bleach method is lightweight, cheap, and nails the viruses that filters might miss. The trade-offs are the 30-minute wait and the fact that it does nothing to remove physical debris.
For the most bulletproof approach in a serious situation, combine methods. Filter the water first to get rid of the sediment and bigger pathogens, then add a few drops of bleach to kill off any viruses that slipped through. That’s comprehensive protection.
Is Bleach-Treated Water Safe for Long-Term Use?
When you follow the proper dosage, water treated with bleach is considered safe for emergency use by major health organizations like the CDC and WHO. The chlorine levels are right in line with what you’d find in most municipal tap water. This is a method designed for getting you through a crisis.
However, if you’re planning for long-term, off-grid living or daily water needs, investing in a high-capacity system is a much more practical solution. Something like a Berkey Water Filter is built for daily use and can process gallons of water without you having to constantly measure and add chemicals. Bleach is your go-to for an immediate emergency; a larger filter is the answer for sustained self-reliance.

