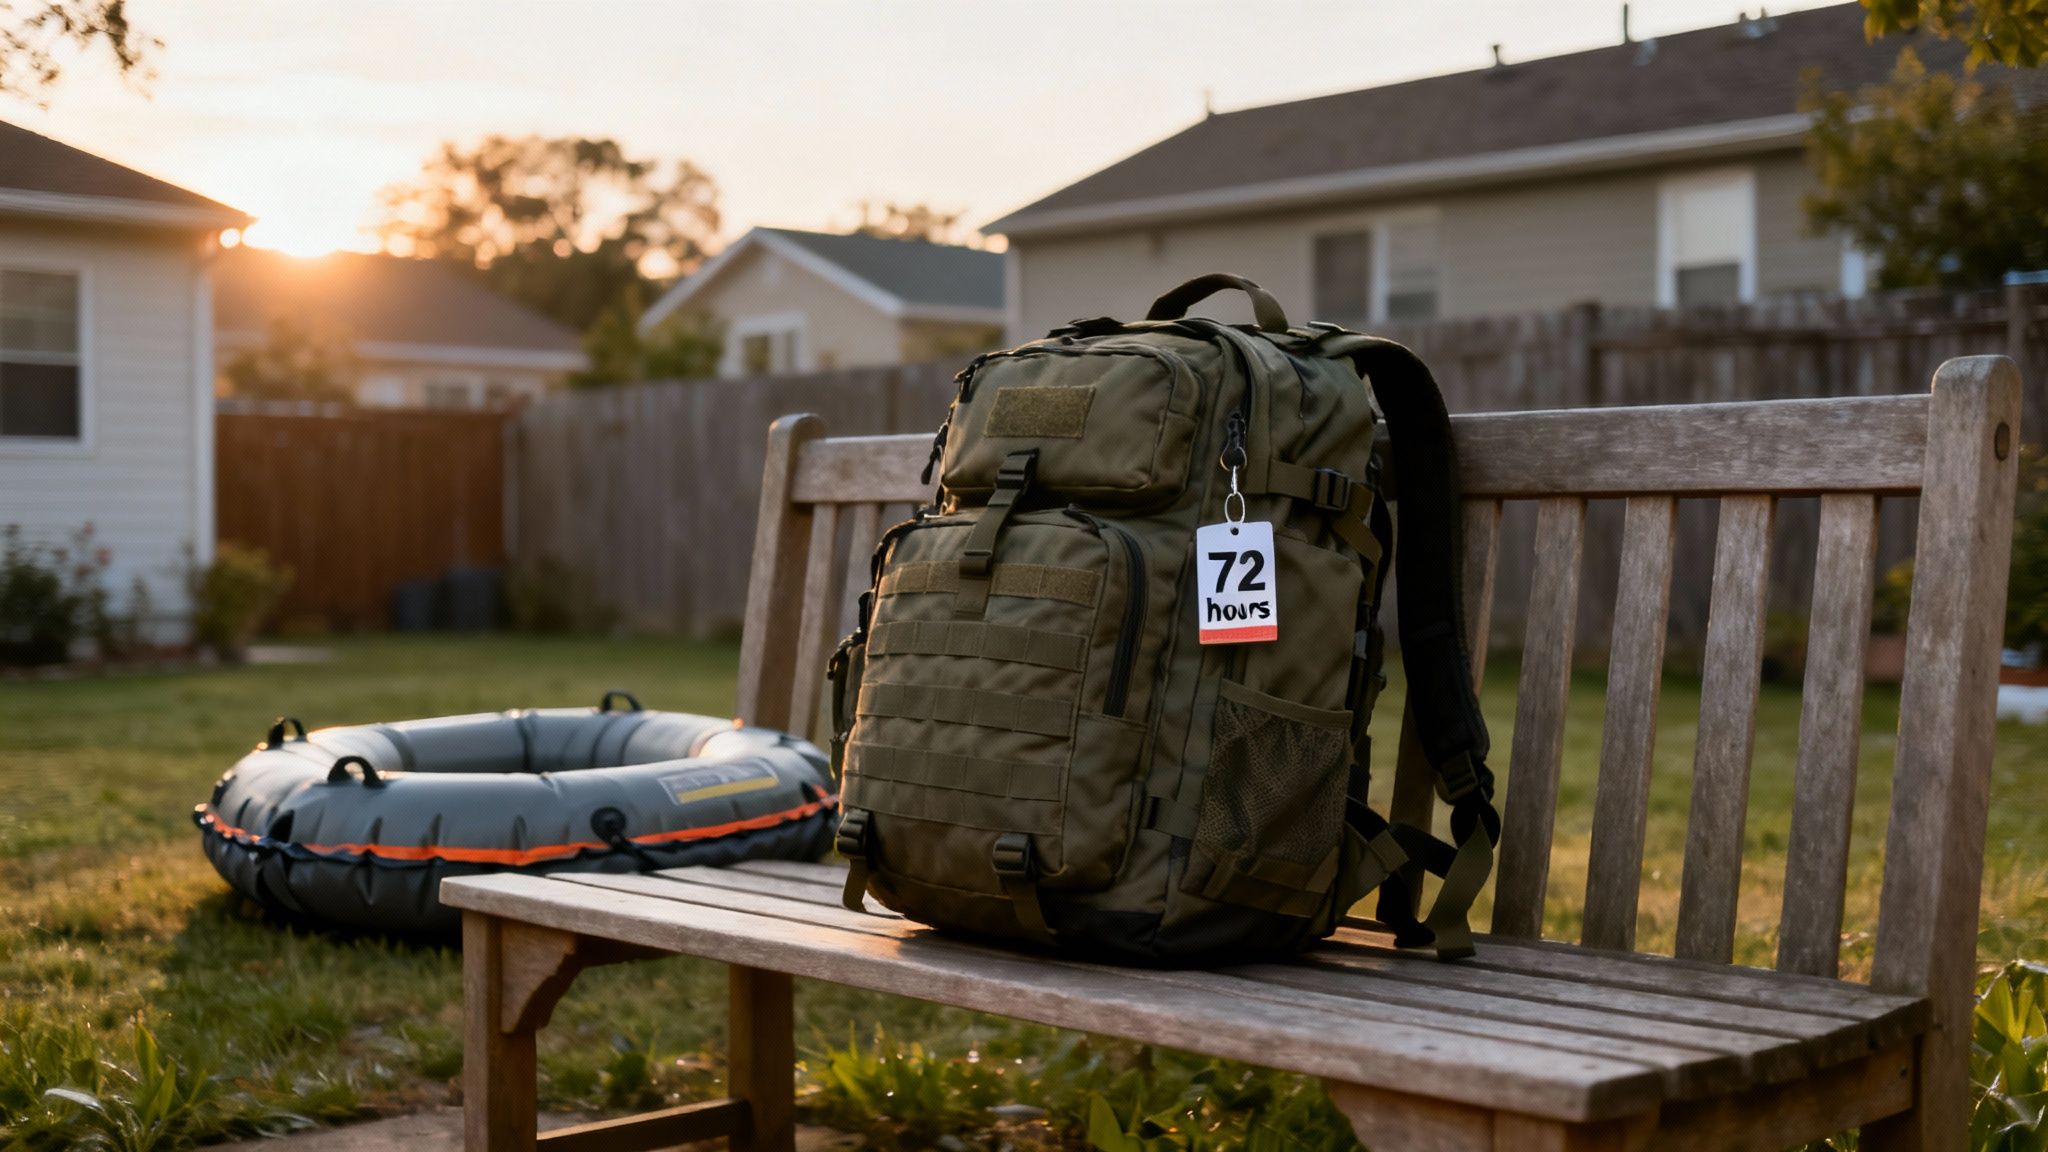
Think of a bug-out bag as your “lifeboat on land.” It’s a self-contained, portable survival kit built to keep you going for at least 72 hours if you have to evacuate suddenly. This isn’t about some far-fetched doomsday fantasy; it’s about smart, responsible readiness for the kinds of real-world emergencies we see on the news all the time.
Understanding the Modern Bug Out Bag
So, what makes a bag a “bug-out bag” instead of just a backpack stuffed with random gear? It’s a carefully thought-out system of essentials, pre-packed and ready to grab the second you need it. Its entire purpose is to get you through the chaotic first few days of a major crisis—think wildfires, hurricanes, floods, or even widespread civil unrest.
The whole concept is built around the globally recognized 72-hour survival window. That number isn’t just pulled out of thin air. It’s based on decades of disaster response data showing it typically takes two to three days for large-scale relief efforts to get organized and reach people on the ground.
While a bug-out bag is designed for mobility and evacuation, it works hand-in-hand with a comprehensive emergency preparedness kit that you keep at home for shelter-in-place scenarios.
Government agencies all over the world, from FEMA here in the States to civil defense authorities across Europe, recommend this 72-hour standard. After Germany’s deadly floods in 2021, their federal government pushed out detailed survival kit guides focused on multi-day self-reliance. It’s a proven principle.
Why Every Household Needs One
At its core, a bug-out bag is about self-reliance. It’s the bridge that gets you from the moment disaster strikes to the point where help can actually arrive. Waiting around and hoping for the best is a dangerous gamble when emergency services are stretched to their limits.
Having a bag ready to go gives you a massive advantage:
- Instant Evacuation: No frantic scrambling to find batteries or first-aid supplies. You just grab it and go.
- Peace of Mind: Knowing you’re prepared cuts down on panic, helping you make clear-headed decisions when stress is high.
- Self-Sufficiency: It gives you the tools for shelter, clean water, first aid, and food, so you can take care of yourself and your family.
This isn’t a weekend camping bag filled with creature comforts. It’s a streamlined tool packed with survival essentials that work, even when you’re exhausted and under pressure. Putting together a proper 72-hour emergency kit means you have what it takes to navigate a bad situation and get to safety. It’s the step that turns you from a potential victim of circumstance into someone who is ready to handle it.
Building Your Foundation: The 10 Survival Essentials
When you’re trying to figure out what to pack in a bug-out bag, the sheer number of options can feel paralyzing. The secret is to stop thinking about individual gadgets and start thinking in terms of survival priorities.
A proven way to do this is to use a framework called the “Ten C’s of Survivability.” This isn’t just some random list; it’s a logical system that makes sure your bag contains tools to solve the most critical problems you’ll face. By building your kit around these core concepts, you ensure every single ounce serves a life-saving purpose.
The Core of Your Kit
Let’s break down the most vital categories and translate them into a actual gear that will keep you safe and alive.
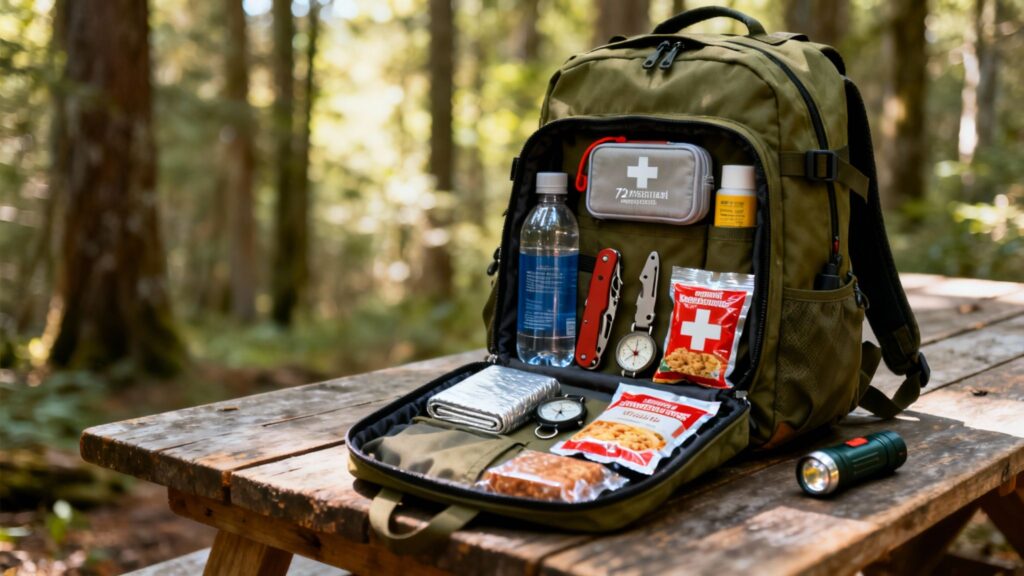
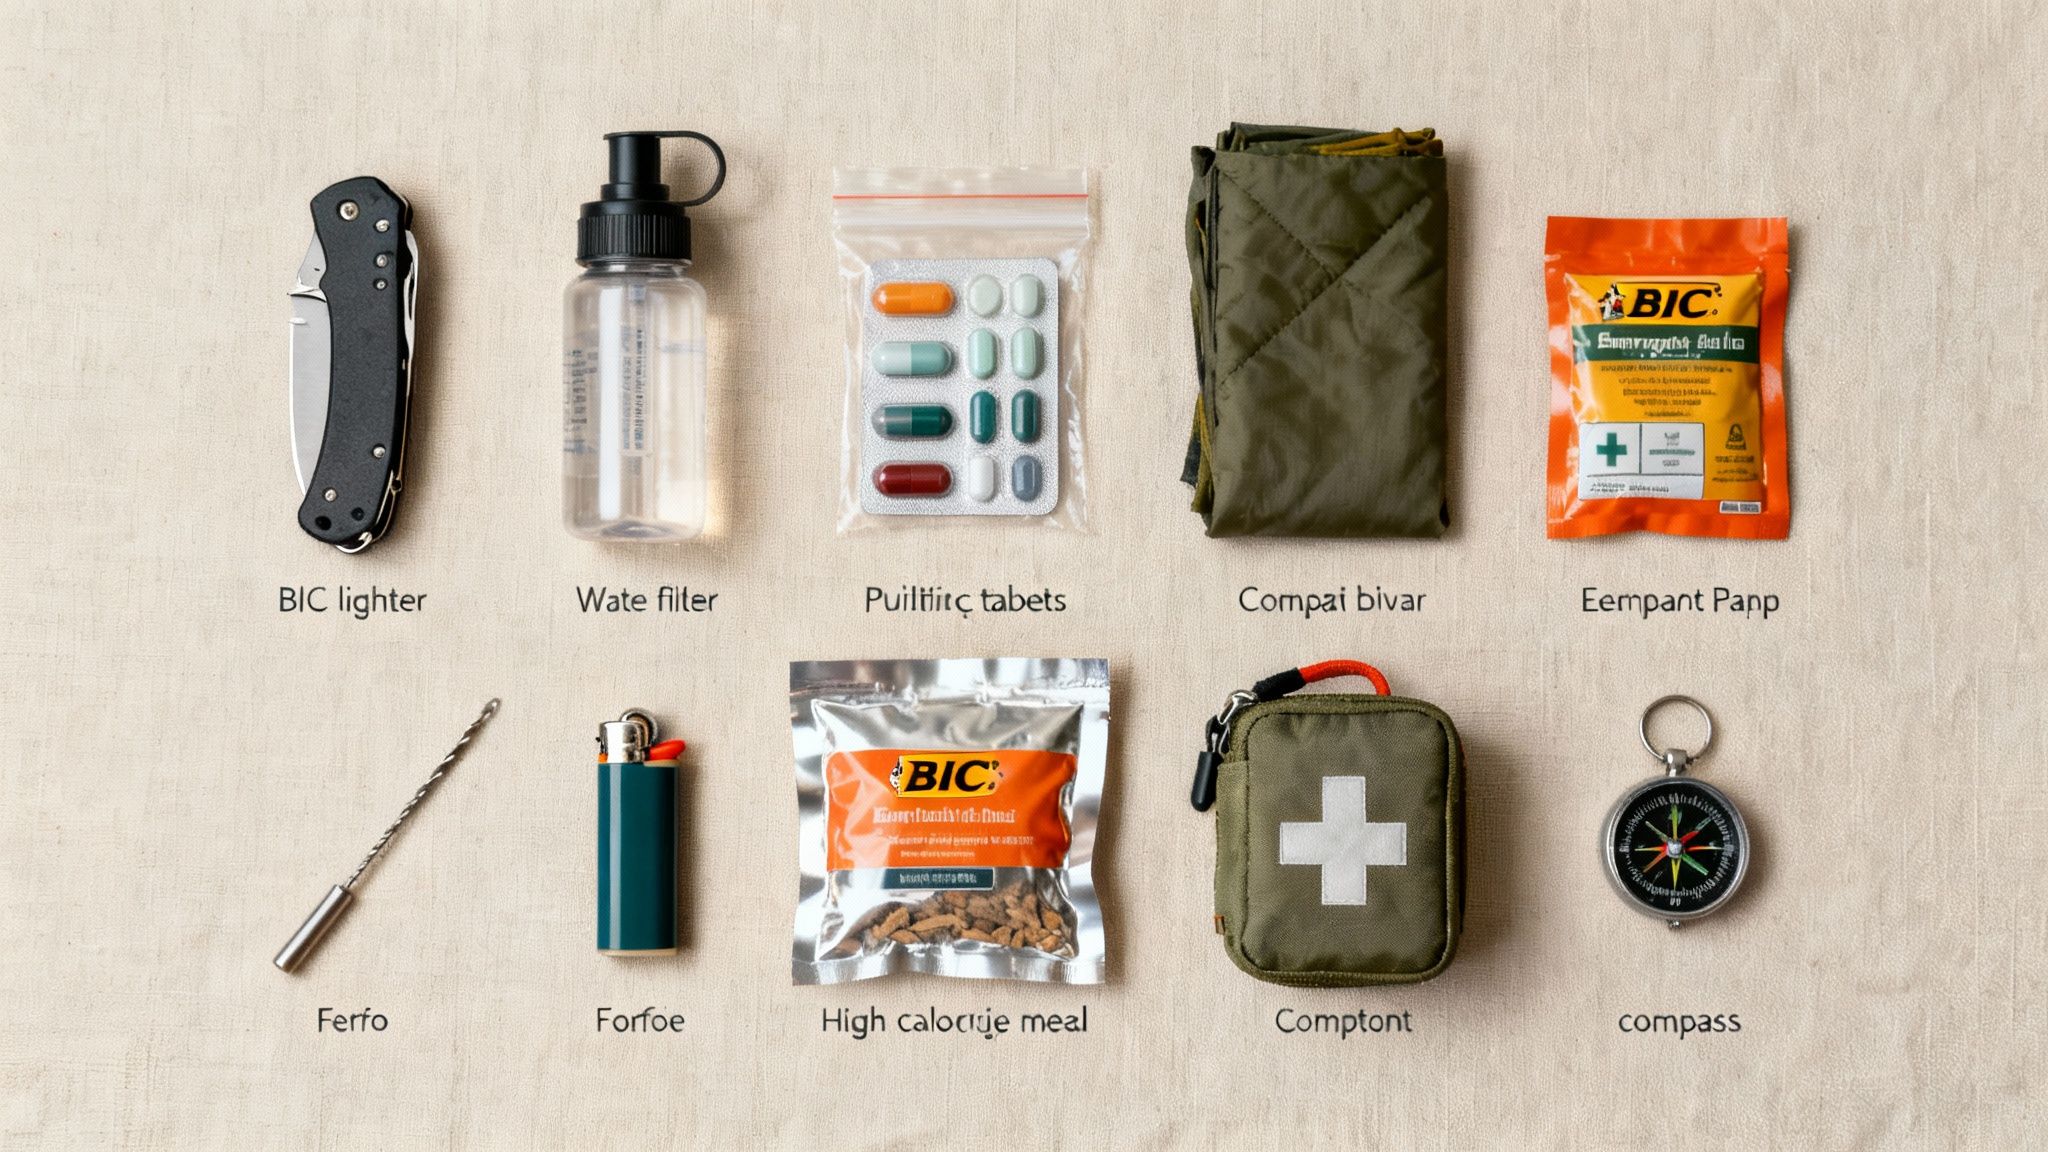
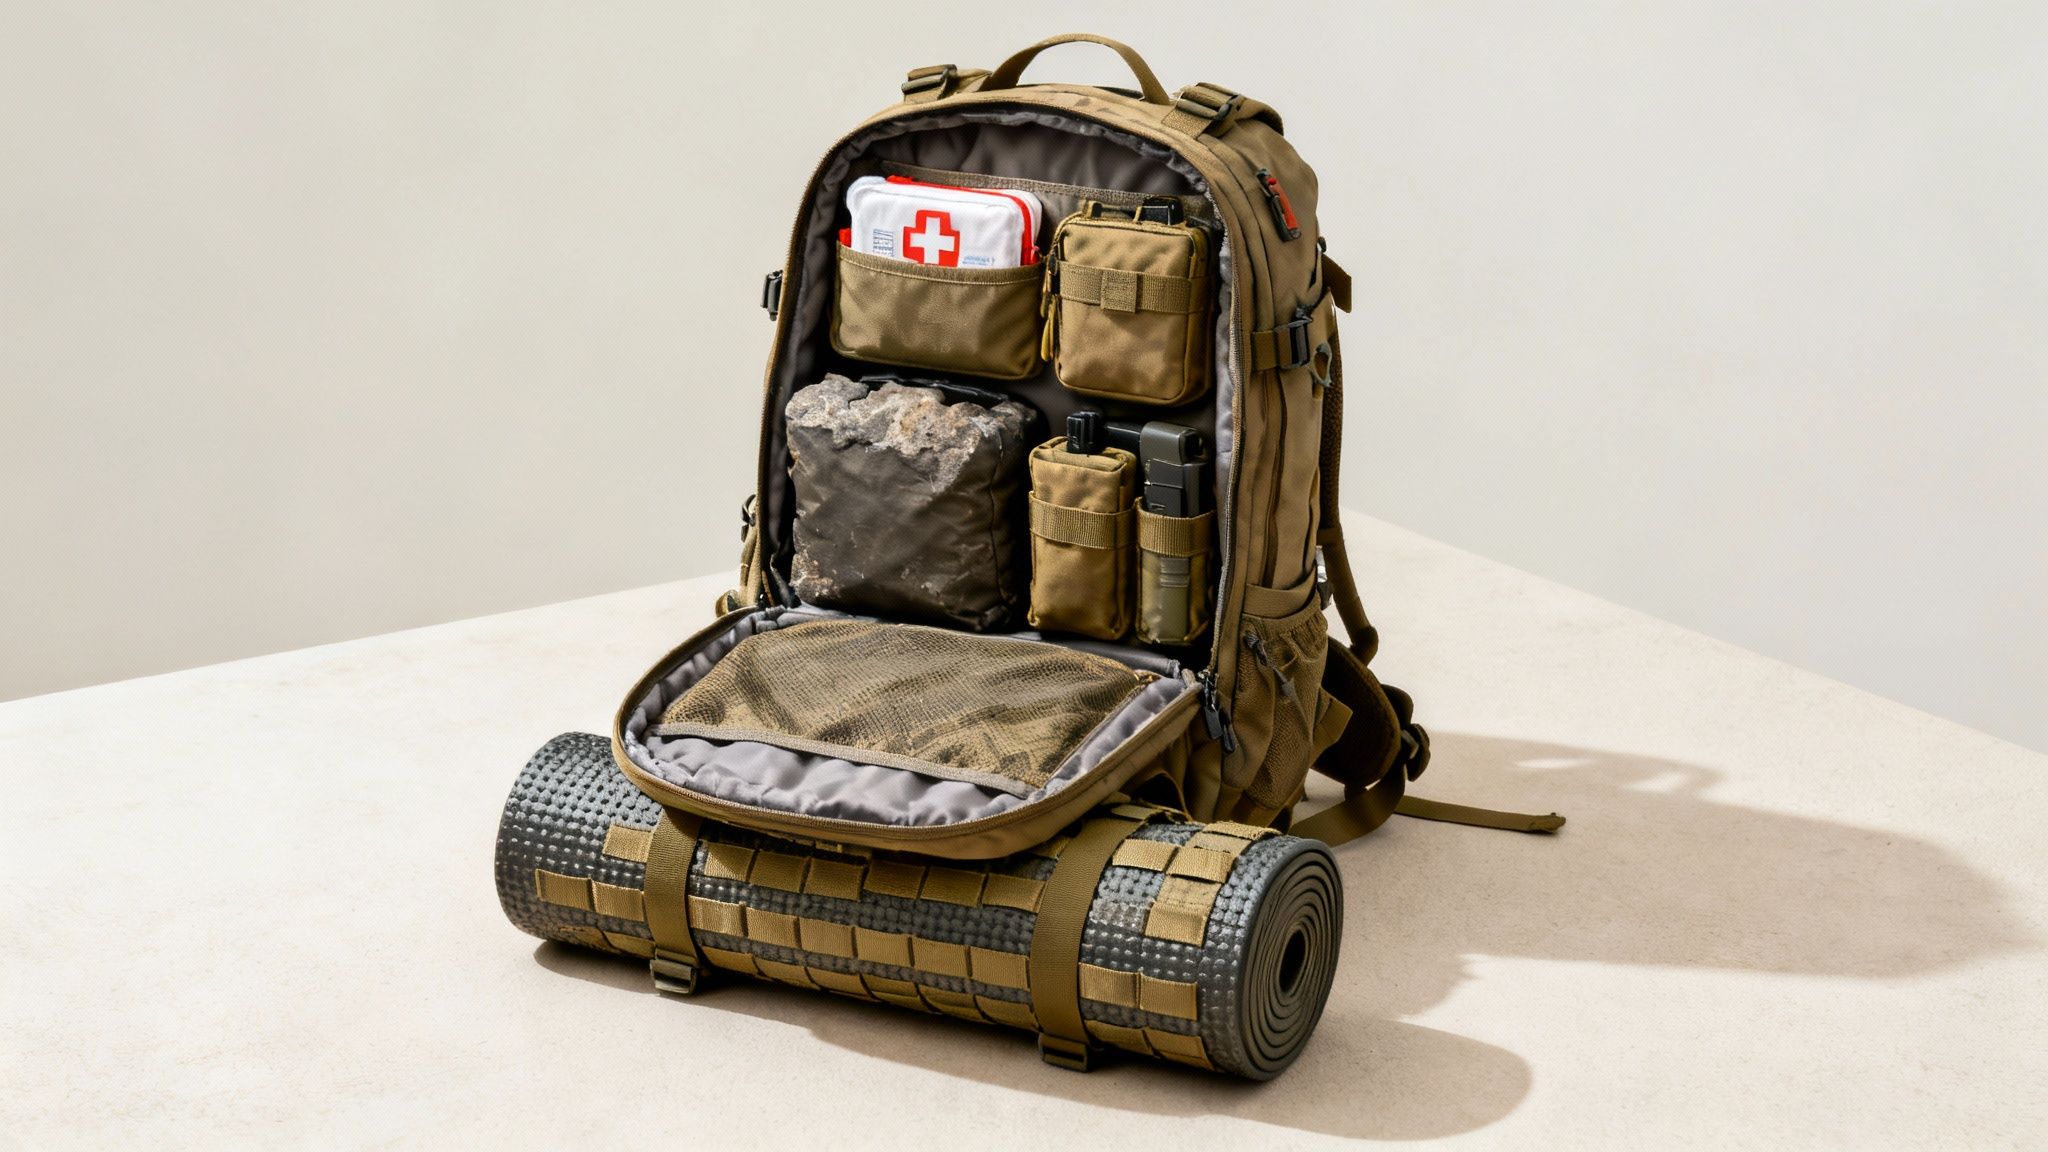
Cutting Tool: This is your primary workhorse. A sturdy, reliable fixed-blade knife, like a Morakniv Companion, is indispensable for everything from processing wood for a fire to preparing food or cutting cordage. It’s the one tool you’ll reach for more than any other.
Combustion: You absolutely must have a reliable way to create fire. Fire purifies water, cooks food, provides warmth, signals for help, and offers a massive psychological boost. Redundancy is key. Never rely on just one method. A simple BIC lighter is a great primary, backed up by waterproof matches and a ferrocerium rod that works even when soaking wet.
Cover: This is anything that protects you from the elements—your most immediate threat after a major injury. Your clothing is your first layer of cover. Beyond that, a lightweight emergency bivy like the SOL Emergency Bivvy or a durable tarp offers critical protection from rain, wind, and cold, preventing hypothermia.
These three C’s—Cutting, Combustion, and Cover—form the absolute bedrock of your survival kit. Without them, your chances of weathering a serious event drop dramatically.
Water and Sustenance Essentials
Once you’ve handled immediate shelter, your next priorities are hydration and energy. Dehydration can incapacitate you in less than a day, making water purification completely non-negotiable.
For water, you need a multi-layered approach. Start with a durable metal container, like a single-walled Klean Kanteen stainless steel bottle, which allows you to boil water directly over a fire. Combine this with a modern, high-efficiency water filter. Many of us trust the lightweight and effective Sawyer Squeeze, which can filter thousands of gallons of water, removing harmful bacteria and protozoa. As a final backup, always include water purification tablets; they are tiny, weigh almost nothing, and provide a foolproof way to make questionable water safe to drink.
When it comes to food, the goal isn’t gourmet meals—it’s maximum calories for minimum weight and hassle. Your body will burn through energy like a furnace under stress.
High-calorie, nutrient-dense foods are essential. Look for items that require no cooking and have a long shelf life. Freeze-dried meals from brands like Mountain House, and Ready Hour are an excellent option because they are lightweight and provide a hot, morale-boosting meal with just the addition of boiling water. Supplement these with energy bars, nuts, and jerky for on-the-go sustenance.
While your bug-out bag focuses on portable, ready-to-eat options, learning how to store food long-term is essential for your home stockpile and long-term survival planning.
Completing the Foundation
With the most critical needs met, you can round out your foundation with the remaining essentials that support your ability to navigate, signal, and maintain your gear.
Cordage: A good hank of strong cordage, like paracord, has a thousand uses. Rigging your tarp shelter, repairing gear, creating a clothesline, or even making a fishing line in a pinch. 100 feet is a solid starting point.
Container: As mentioned, a single-walled metal water bottle is a must-have. It carries your water and doubles as your boiling pot, saving you critical weight and space.
Candling (Light): You need a reliable, hands-free light source. A quality LED headlamp like the Petzl Tikkina with extra batteries is the standard for a reason. It lets you work, navigate, or set up camp in complete darkness while keeping your hands free for other tasks.
Compass: Electronic navigation can and will fail. A simple, reliable baseplate compass, paired with a physical map of your area, is a life-saving tool that doesn’t rely on batteries or satellites. Learn to use it.
Cargo (The Bag): This is the bag itself, which we’ll cover in more detail later. It must be durable, comfortable, and the right size to carry all your essentials without weighing you down.
Building your bug-out bag around these ten principles ensures you have a functional, life-sustaining system rather than just a jumbled collection of gear. You can find an expanded list of must-have items for survival in our detailed guide, which explores even more tools to consider for your kit.
Personalizing Your Kit for Real-World Scenarios
The core items we’ve covered are the universal template for survival, but a truly effective bug out bag is never one-size-fits-all. Think of those essentials as the sturdy frame of a house. Now it’s time to build out the rooms that fit your specific life. This is the crucial step where you move from a generic checklist to a personalized system built for your reality.
Your immediate environment is the biggest factor. A prepper in the Arizona desert faces a completely different set of challenges than someone in the snowy mountains of Colorado. The desert dweller needs to be obsessed with hydration, probably packing extra water bladders and electrolyte powders. The mountain prepper, on the other hand, is in a constant battle against hypothermia, needing thermal layers, hand warmers, and high-energy foods to keep their internal furnace running.
A common mistake is packing for a generic “apocalypse” instead of the most likely disaster you’ll face on a random Tuesday afternoon. Personalize your kit for the real-world probabilities—hurricanes on the coast, tornadoes in the plains, or wildfires out West—not some Hollywood fantasy.
Customizing for Your Climate
Adapting your kit starts with a hard look at your local weather and potential environmental threats.
- Cold Climates: You’ll want to add thermal underwear from brands like Smartwool, insulated gloves, wool socks, a balaclava, and high-calorie food bars. Your gear has to be rated for temperatures far colder than you’d normally venture out in.
- Hot & Arid Climates: Here, your focus shifts entirely to water and sun protection. Pack a wide-brimmed hat, sunglasses, sunscreen, and extra ways to carry water. A lightweight, light-colored long-sleeve shirt is also a smart addition to shield your skin.
- Wet & Humid Climates: Staying dry is everything in these environments. Make sure you have quality rain gear, a waterproof pack cover, and extra dry bags for your electronics and fire-starting materials. Foot care is also critical, so pack extra moisture-wicking socks and some foot powder.
Accounting for Personal and Family Needs
Beyond geography, your bag must serve the actual people who depend on it. This is a non-negotiable step in understanding what a bug out bag is truly for: protecting the ones you love.
Start with medical needs. This means packing a 30-day supply of any prescription medications, plus extra eyeglasses or contacts and copies of the prescriptions themselves. A well-stocked first-aid kit, such as one from MyMedic, can provide critical supplies for treating injuries. If you have kids, the list gets longer. Infant formula, diapers, wipes, and even a small comfort item like a favorite toy aren’t luxuries; they’re essential for maintaining health and morale.
And don’t forget about your four-legged family members. Your pets can’t fend for themselves in a disaster, so you have to pack their food, water, a leash, and any medications they need. Putting together a dedicated emergency kit for your pets is a critical, and often overlooked, part of a solid family plan. For a deeper dive, our comprehensive guide on creating a pet emergency kit gives you a detailed checklist.
Building Specialized Gear Modules
To keep everything organized and easy to find, many seasoned preppers use a modular system. This just means grouping related items into smaller, dedicated pouches or “modules.” This way, you can grab what you need quickly without tearing your entire bag apart, turning a cluttered mess into an efficient system.
Navigation Module: This pouch would hold your primary compass, like a reliable Suunto MC-2, alongside waterproofed local and regional maps. You might also include a GPS unit with backup batteries and a small notebook with waterproof paper.
Communications Module: When cell towers go down, you need a backup plan. This kit could hold a handheld ham radio, like a Baofeng UV-5R (make sure you’re licensed and know how to use it), a solar power bank from a brand like Anker, Grid Doctor 3300 EMP, and Jackery for recharging devices, and a list of emergency frequencies.
For those planning to shelter in place or bug out to a remote location, understanding off-grid living essentials will help you expand your capabilities beyond the 72-hour window.
This is the level of detail that makes the bag truly yours. It stops being a simple checklist and becomes a dynamic tool that reflects your skills, your location, and the unique needs of your family—ensuring it will actually work for you when it counts.
Choosing and Packing Your Bag Like a Pro
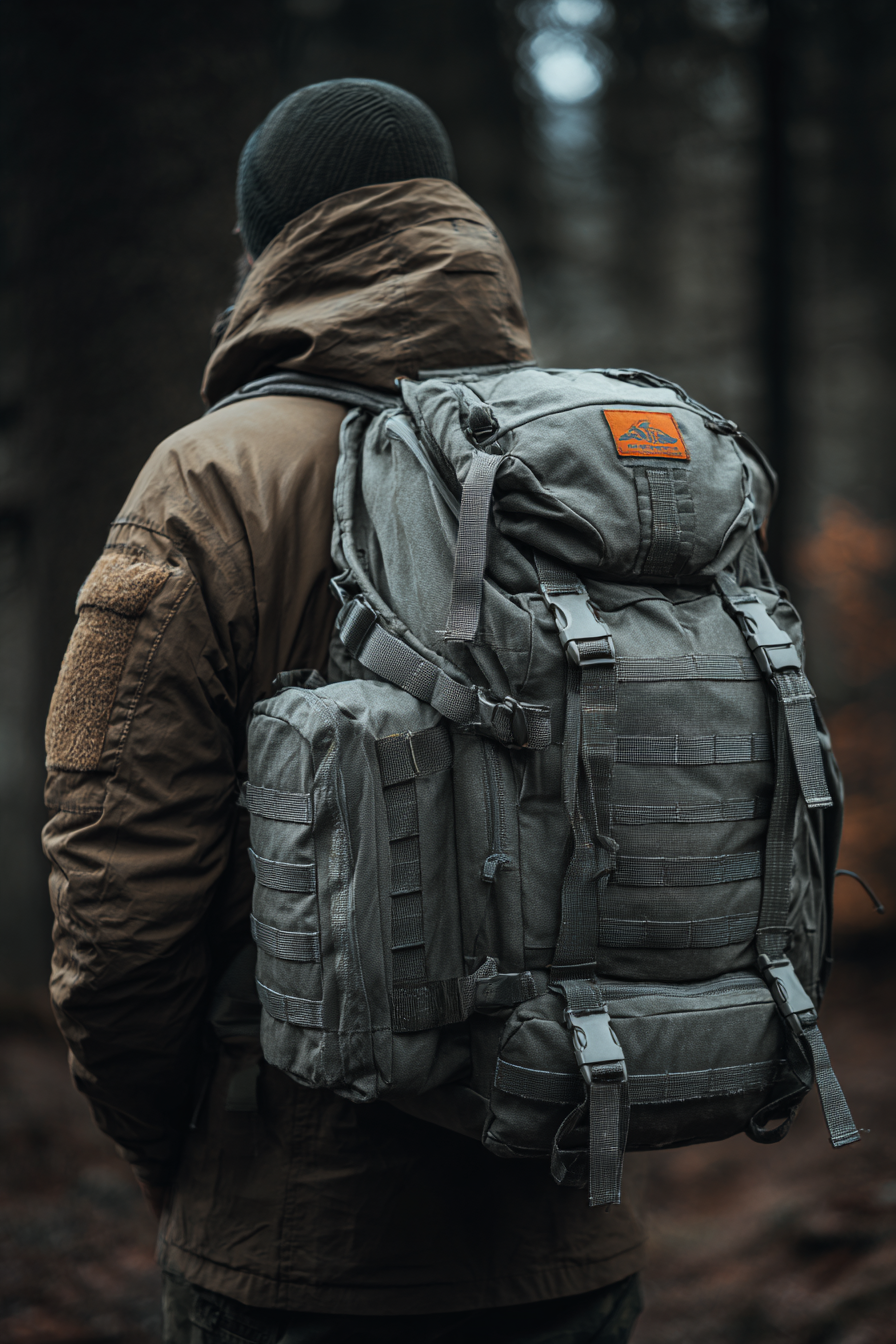
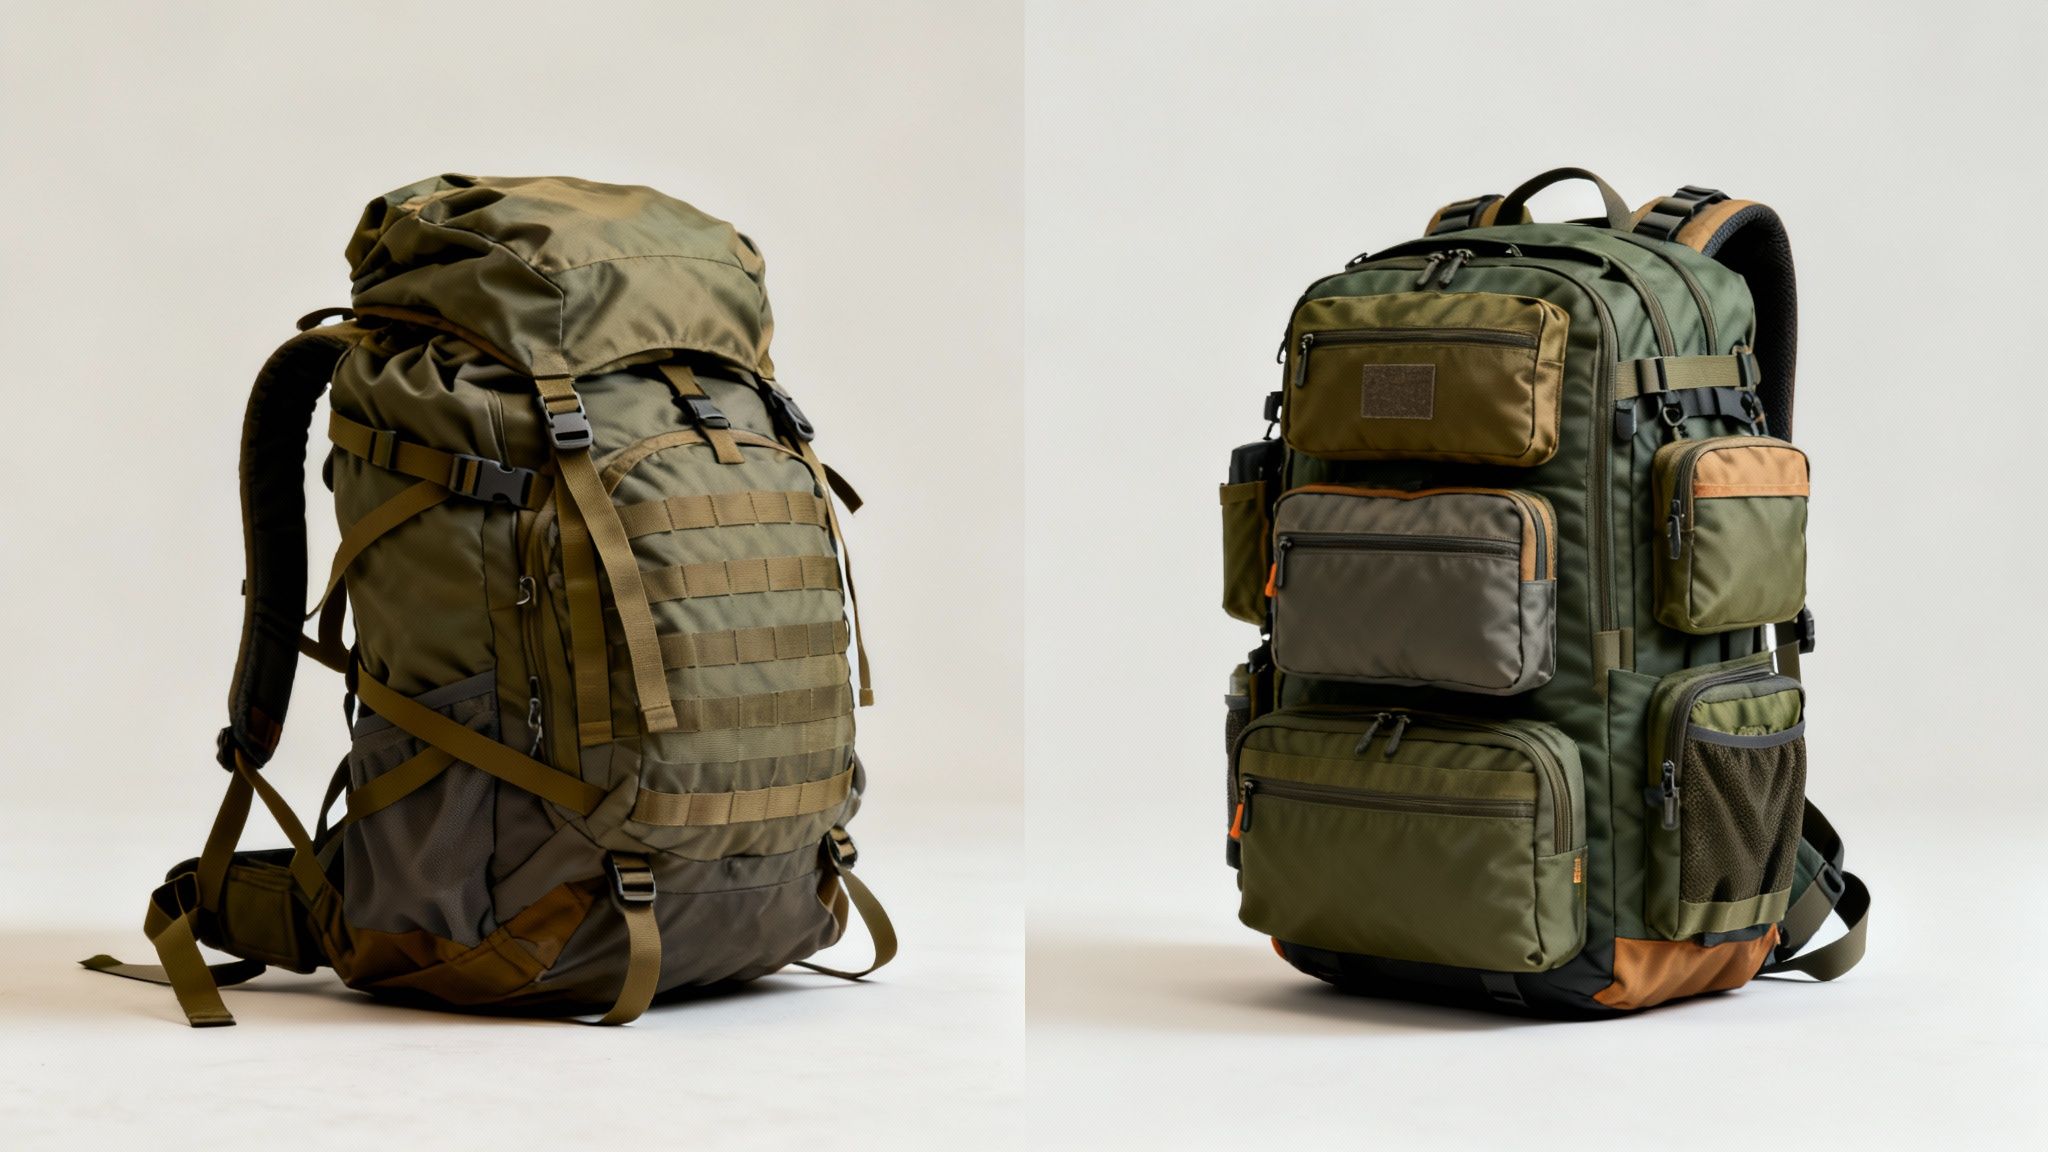
Once you’ve nailed down what goes into your bug-out bag, you need to tackle the final piece of the puzzle: the bag itself. This isn’t just a container. It’s the one piece of gear that directly impacts your mobility, comfort, and how long you can keep moving.
Picking the wrong pack can turn a life-saving tool into a back-breaking burden. Think of your bag as the foundation of your entire mobile survival plan. A cheap school backpack might seem fine sitting in the closet, but its zippers will bust and seams will rip the second you put it under real stress. You can’t afford that kind of failure.
Selecting the Right Backpack
Your pack needs to be tough enough to get thrown around, dragged through brush, and survive in harsh environments. This all comes down to the quality of its materials and construction.
- Material Durability: Look for packs made from high-denier fabrics like Cordura or ripstop nylon. These materials are built to resist tears, scrapes, and punctures, keeping your essential gear safe and sound.
- Capacity: The sweet spot for a 72-hour bug-out bag is usually between 40 and 65 liters. This gives you enough room for the essentials without tempting you to overpack and weigh yourself down. Too big, and it becomes a monster to carry; too small, and you’ll be forced to leave critical items behind.
- Modularity: Features like MOLLE (Modular Lightweight Load-carrying Equipment) webbing are a game-changer. This system of nylon straps lets you attach extra pouches and gear to the outside of your pack, expanding its capacity and keeping items like a first-aid kit or water bottle right where you can grab them.
Brands that live and breathe rugged gear are a great place to start. A pack from a company like 5.11 Tactical is designed with durability and modularity as its main purpose. On the other hand, a hiking pack from a brand like Osprey is engineered for incredible comfort and weight distribution over long treks. Your choice comes down to whether you prioritize tactical organization or carrying comfort.
The Art of Strategic Packing
How you load your gear is just as critical as what you choose to bring. A well-packed bag is more comfortable and lets you find what you need without dumping everything on the ground. The secret is to organize your gear by weight, how often you’ll need it, and its category.
Think of packing your bag like loading a cargo plane: heavy items must be centered and secured to maintain balance and stability. In a backpack, this means placing the heaviest gear—like water, food, or a dense tool roll—close to your spine and between your shoulder blades. This technique pulls the weight into your body’s center of gravity, making the load feel lighter and preventing the pack from pulling you backward.
Here’s a proven layering method that experienced backpackers swear by:
- Bottom Layer (Bulky & Infrequent Use): The very bottom of your pack is for stuff you won’t need until you make camp. Your sleeping bag or a spare set of clothes goes here.
- Middle Layer (Heaviest Items): This is your pack’s core. Your heaviest gear goes here, right up against your back, to create a stable center of gravity.
- Top Layer (Frequent Access): Things you’ll need on the move go on top. This includes your rain gear, a light jacket, or your main water filter.
- External Pockets (Immediate Access): Use the outside pockets for essentials you need in a hurry. This is the perfect spot for your compass, map, headlamp, snacks, and a small first-aid kit.
This systematic approach makes your bag work with you, not against you. If you’re looking to streamline even further, check out our guide on building a compact survival kit, which can easily slide into your main bag as a self-contained module.
This level of readiness is more common than you might think. The global survival tools market was valued at USD 1.5 billion in 2024 and is expected to more than double by 2035. This shows that building a bug-out bag is now a mainstream part of being prepared. You can dig into this growing trend on marketresearchfuture.com. By picking the right bag and packing it smart, you’re not just carrying gear—you’re carrying a highly effective, life-sustaining system.
Avoiding Critical Bug Out Bag Mistakes
Knowing what gear to pack is only half the battle. Just as important is knowing what not to do. Many well-intentioned preppers end up sabotaging their own efforts by making a few common, easily avoidable mistakes. These errors can turn a bug-out bag from a lifeline into a liability when it’s needed most.
Learning from these pitfalls is a crucial part of building a genuinely effective kit. It will save you from wasted money, physical exhaustion, and critical failures during a real emergency. The goal is to build a practical tool, not a monument to survival gear you can’t actually use.
The 80-Pound Monster Bag
The single most common mistake is creating a bag that’s far too heavy to carry for any real distance. It’s easy to fall into the trap of adding just one more “what if” item, but every ounce adds up. A pack weighing 60, 70, or even 80 pounds might feel manageable for a short walk down the driveway, but it becomes an anchor of misery after just a few miles, especially over rough terrain.
A good rule of thumb is that your fully loaded bag should not exceed 20% of your body weight. For a 180-pound person, that’s a maximum of 36 pounds. This ensures you can move quickly and efficiently without risking injury or exhaustion. Remember, you’re trying to escape a bad situation, not win a strongman competition.
The “Tacticool” Target
Another frequent error is choosing a bag that screams “I have expensive survival gear!” Large, military-style packs covered in MOLLE webbing and patches might look impressive, but in an urban evacuation, they can make you a target. The last thing you want is to attract unwanted attention from desperate people.
The best bag is often the one nobody notices. A plain, durable hiking backpack or even a sturdy school backpack in a muted color like gray, blue, or black is far more discreet. It allows you to blend in, which is a survival strategy in itself.
This “gray man” approach prioritizes practical concealment over aesthetics. Your goal is to get from point A to point B safely, not to advertise your preparedness level to everyone you pass.
Neglecting Maintenance And Practice
Finally, the most dangerous mistake is treating your bug-out bag as a “set it and forget it” project. Gear fails, skills get rusty, and supplies expire. Packing a brand-new water filter without ever testing it is a recipe for disaster. The same goes for food, batteries, and medical supplies that all have expiration dates.
Regular maintenance is non-negotiable. You have to practice with your gear and routinely check your supplies to make sure everything is in working order when you need it.
A simple maintenance schedule can prevent 99% of these issues. Think of it like changing the oil in your car—it’s a small task that prevents catastrophic failure down the road.
Bug Out Bag Maintenance Schedule
Here is a simple checklist and schedule to ensure your bag is always ready, preventing common mistakes like expired food, dead batteries, or outdated documents.
| Task | Frequency | Key Items to Check |
|---|---|---|
| Full Gear Check | Every 6 months | Test electronics, check batteries. Inspect gear for wear and tear. |
| Perishables Rotation | Every 12 months | Replace expired food, water, and medical supplies. |
| Document Update | Every 12 months | Ensure copies of IDs, maps, and important papers are current. |
A bug-out bag is a living system, not a static collection of items. By avoiding these critical mistakes and keeping your kit maintained, you transform your bag from a potential liability into a reliable, life-saving asset.
Your Phased Bug Out Bag Action Plan
Just knowing what a bug-out bag is doesn’t do you much good. True preparedness comes from action, not just knowledge. But staring at a long list of gear can feel completely overwhelming, and that’s where most people get stuck.
If you’re completely new to emergency preparedness, our guide on how to start prepping breaks down the fundamentals and helps you build a solid foundation before diving into specialized gear.
The secret is to stop trying to build the “perfect” bag all at once. Instead, break it down into simple, manageable phases. This roadmap gets you started today, building momentum week by week without emptying your wallet. If finances are tight, check out our detailed guide on prepping on a budget for smart strategies to build your kit without breaking the bank.
The goal isn’t to be perfectly prepared overnight. It’s to be a little more ready by next weekend than you are right now.
Phase 1: Your First Week
In the first seven days, your only job is to lock down the absolute essentials—what many of us call the “Big 5.” These five categories address the most immediate, life-threatening problems you’d face in an emergency. Forget about finding the perfect gear; just get functional gear.
- The Bag: Start with a solid backpack you already have. No need for a high-speed tactical pack just yet; any sturdy hiking or school bag will do the trick.
- Water: Grab a reliable water filter like a Sawyer Squeeze and a single-walled stainless steel bottle. That bottle is key because you can boil water in it directly over a fire.
- Shelter: An inexpensive emergency bivy or a simple, lightweight tarp is all you need to get started.
- Fire: Toss a few BIC lighters in the bag and pick up a ferro rod. Redundancy is your friend here.
- First Aid: Buy a decent pre-made first aid kit. Don’t overthink it—you can add to it and customize it down the road.
Phase 2: Your First Month
With the Big 5 handled, you can breathe a little. Over the next few weeks, you’ll start layering in gear for things like navigation, food, and general utility. This is where your bag evolves from a pure survival kit into something that provides a bit more capability and comfort.
Now’s the time to add some high-calorie, no-cook foods—think energy bars, jerky, and trail mix. Grab a quality headlamp and extra batteries (always pack extra batteries), a simple baseplate compass, and at least 100 feet of good paracord. This is also the perfect time to make sure this bag works with your family’s bigger picture by reviewing our comprehensive emergency preparedness checklist to ensure all bases are covered.
This step-by-step approach is catching on. More and more people are recognizing the importance of taking personal responsibility for their own safety. According to FEMA’s 2023 National Household Survey, 30.3% of Americans now identify as “continuously preparing,” a huge jump from just a few years ago. You can dig into more stats about the roughly 20 million preppers in the US over at TruePrepper.com.
Phase 3: Ongoing Maintenance
Here’s the thing: a bug-out bag is never truly “done.” It’s a living system that needs regular attention. This final phase is all about continuous practice, refinement, and maintenance.
Set a calendar reminder to rotate perishable items like food, water, and batteries every six months. More importantly, get out and use your gear. Take it on a weekend camping trip. Find out what works, what doesn’t, and what you’re missing. This is also when you’ll customize the kit for your family’s specific needs, adding things like prescription medications, glasses, or supplies for your pets.
Frequently Asked Questions About Bug Out Bags
Even after you’ve got a solid plan, a few key questions always pop up when it’s time to actually start building your bug out bag. Let’s tackle the most common ones head-on so you can move forward with confidence.
How Much Should a Bug Out Bag Weigh?
This is the big one. The golden rule is to keep your pack weight at or below 20% of your body weight. For most adults, that’s going to land somewhere between 25 and 45 pounds.
The whole point of a bug out bag is mobility. If your pack is so heavy that it slows you down, wears you out, or gets you injured, it has failed its primary purpose. To hit that target weight, you have to be ruthless about choosing lightweight, multi-use gear. The only way to know for sure is to pack it up and go for a hike—a real one, a few miles long. If it’s a beast to carry, you need to go back and cut more weight.
Should I Buy a Pre-Made Bag or Build My Own?
While grabbing a pre-made bag from a company like Ready America feels like an easy win, building your own is almost always the better route. Why? Because when you assemble your kit one piece at a time, you’re forced to learn what each item does and how to use it. That hands-on knowledge is priceless when the pressure is on.
Building your own also means you can choose higher-quality gear that you trust. It lets you customize everything for your specific climate, your skill level, and your family’s unique needs. A good compromise? Start with a pre-made kit as a base, then systematically replace and upgrade the components as your budget and experience grow.
Where Should I Store My Bug Out Bag?
Your bag needs to live somewhere cool, dry, and above all, instantly accessible. If you can’t grab it and be out the door in under a minute, it’s in the wrong spot.
A few excellent storage spots include:
- A closet right near your main exit.
- The trunk of your car, since that’s likely your primary bug out vehicle.
- An easy-to-reach spot in the garage.
Avoid damp basements where things can get musty or flooded, and stay away from hot attics where high temperatures can ruin food, batteries, and medical supplies. This simple idea of immediate access gets to the very core of what a bug out bag is all about: being ready to move at a moment’s notice.

