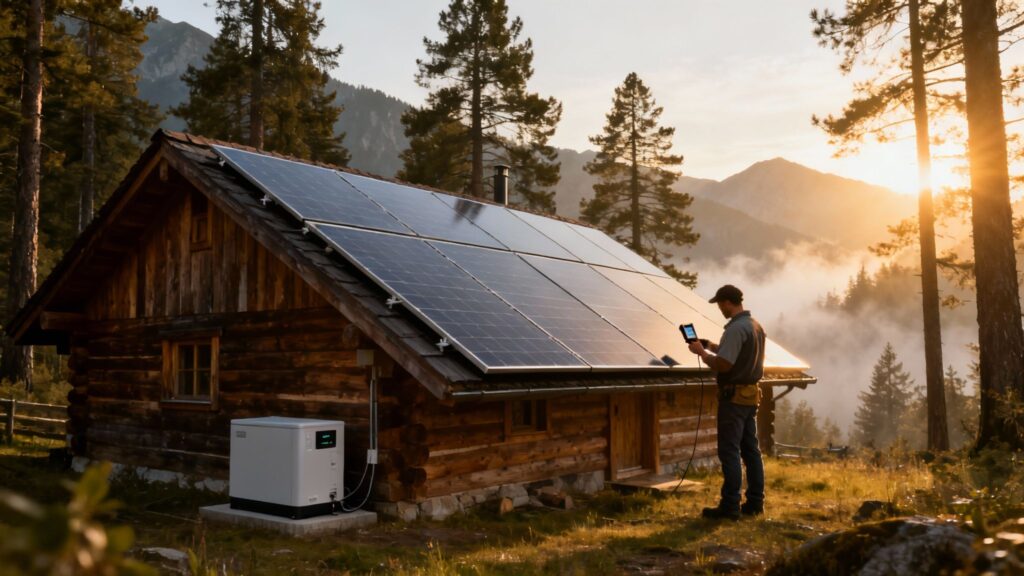
If you want true energy independence for a cabin far from the grid, solar power is your most reliable bet. Forget noisy, fuel-hungry generators. A properly designed solar system delivers quiet, consistent power that transforms a remote retreat into a self-sufficient outpost. For anyone serious about preparedness, a solar setup isn’t a luxury—it’s a strategic asset.

Why Solar Is the Smart Choice for Your Cabin
Picture your cabin, miles from the nearest power line. Your top priority is resilience—the ability to function on your own, no matter what happens out there. A gas generator might seem like an easy answer, but it’s a short-term fix with serious downsides. It constantly needs fuel, the noise it makes is a dead giveaway of your location, and it’s just another engine waiting to break down. This is where solar power for cabins proves it’s the superior, long-term solution.

Embrace True Energy Independence
The real power of solar is the ability to unplug from fragile systems. When you have your own solar setup, you become your own utility company. There are no monthly bills, no dependence on a power plant hundreds of miles away, and absolutely no vulnerability when the grid goes down from a storm, cyberattack, or simple neglect.
For preppers and homesteaders pursuing off-grid living, this kind of autonomy is non-negotiable. It’s the freedom to know you can always:
- Run a well pump to get clean water.
- Keep refrigerators and freezers cold to preserve your food stores.
- Power up communications gear, like a Baofeng UV-5R radio.
- Maintain critical lighting and security systems.
This push for self-reliance is a core principle of being prepared. We cover the mindset and other practical steps in our comprehensive guide to off-grid living for beginners. Think of solar power as one of your first and most important steps on that path.
The Strategic Advantages of Silence and Simplicity
In any survival situation, noise is a liability. A rumbling generator is like a beacon, announcing to anyone within earshot that you have resources worth taking. Solar panels, on the other hand, work in complete silence. That stealth is a massive tactical advantage, letting you keep a low profile when it matters most.
A solar power system’s reliability comes from its simplicity. With no moving parts, the panels themselves can last for 25 years or more with almost no maintenance. It’s a set-it-and-forget-it solution that a complicated combustion engine could never hope to be.
On top of that, a solar system is just fundamentally easier to maintain. Besides wiping down the panels once in a while and checking your connections, the system pretty much takes care of itself. That reliability means when you finally get to your cabin, you can flip a switch and have power—no wrestling with a pull cord, no emergency trips for fuel, and no frantic troubleshooting. This simple, dependable energy is the bedrock of any resilient retreat.
Calculating Your Cabin’s Real-World Power Needs
Before you buy a single panel or battery, the most important step is figuring out exactly how much juice you really need. Guessing here is the fastest way to build a system that either fails you when you need it most or costs you thousands in gear you didn’t need in the first place. This process, called an energy audit, is your blueprint for success.
Everything comes down to one number: your daily watt-hours. This is the total energy your appliances will gobble up over a 24-hour period, and it’s the foundation for every other calculation you’ll make.
Creating Your Cabin’s Load List
First things first, make a list of every single thing you plan to run on electricity. You have to be brutally honest with yourself about your lifestyle. A full-time winter homestead has vastly different power needs than a weekend hunting cabin used only in the fall.
Your list needs to include it all, big and small:
- Major Appliances: Refrigerator, freezer, well pump, mini-split for heat/AC.
- Kitchen Gadgets: Coffee maker, microwave, blender.
- Lighting: All your interior and exterior lights.
- Electronics: Laptops, phones, Starlink internet, ham radio.
- Tools & Miscellaneous: Battery chargers for power tools, fans, water filter systems.
For each item, you need two pieces of info: its power consumption in watts and how many hours you expect to use it per day. The wattage is usually on a sticker on the back of the appliance or buried in the manual.
Once you have those numbers, the math is simple: Watts × Hours of Use = Watt-Hours (Wh). Do this for every item, then add them all up. That final number is your target.
Getting Precise With an Energy Meter
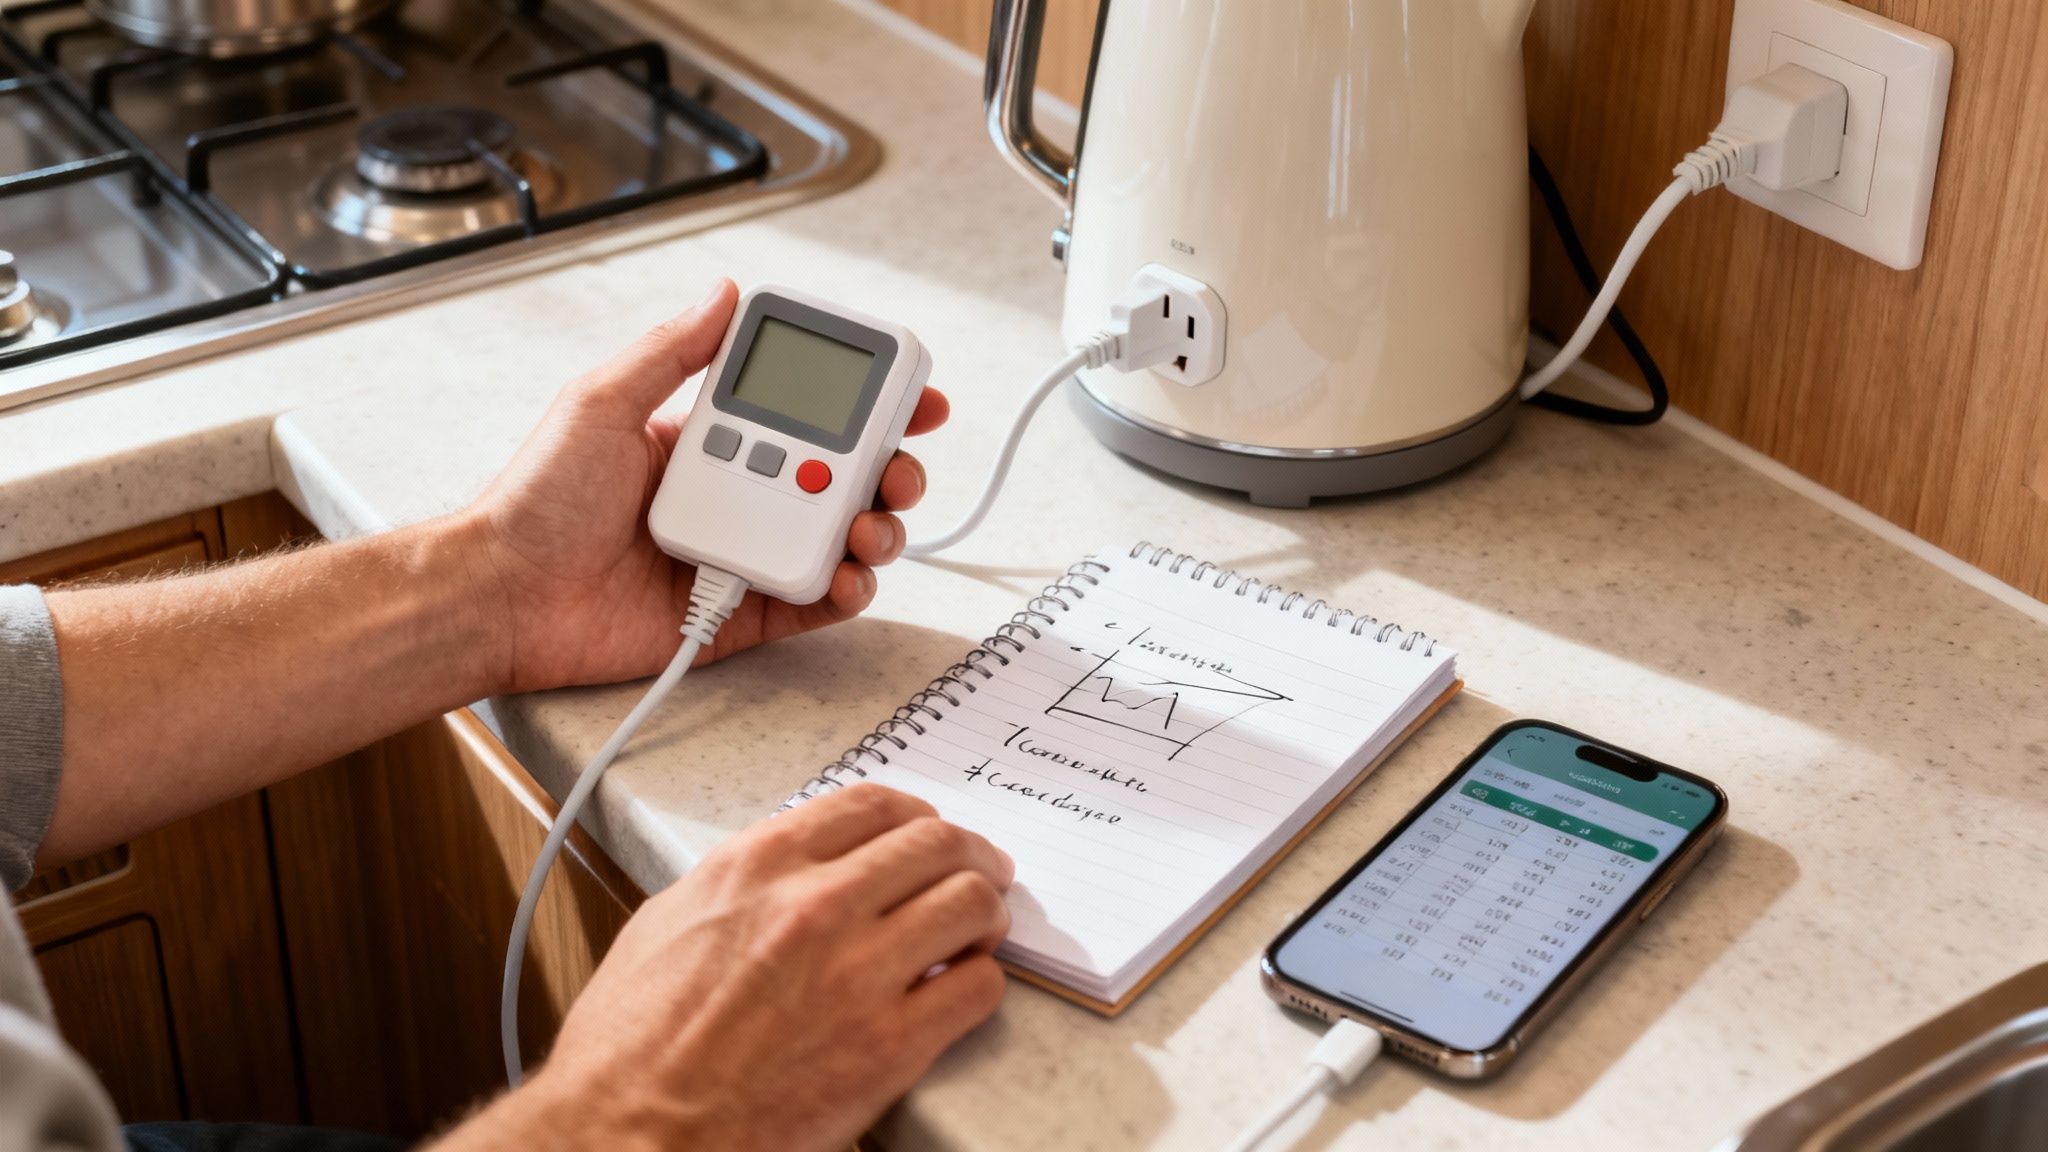
Here’s a pro tip: relying on manufacturer labels can be misleading. A refrigerator, for example, cycles on and off. Its actual energy draw is way lower than its listed running wattage multiplied by 24 hours. This is where a simple tool becomes your best friend.
A plug-in electricity usage monitor, like the classic Kill A Watt meter, is an absolute game-changer. You plug an appliance into the meter, then plug the meter into an outlet. It tells you exactly how many kilowatt-hours (kWh) that device uses over time, completely removing the guesswork. It’s a small investment that prevents huge, costly mistakes.
Run a Kill A Watt meter on your main appliances for a full day or two. This gives you a real-world energy consumption profile, not just a guess. This is the difference between a frustrating, undersized system and a reliable one that just works.
This hands-on approach is so much better than generic online calculators. It lets you build a system based on your actual habits. If you’re also thinking about smaller, more mobile power solutions, our guide on choosing the right portable power sources has some great insights that can complement your main cabin system.
To give you a starting point, here’s a look at what a typical energy audit might look like for an off-grid cabin. Use this as a template, but be sure to measure your own appliances for the most accurate numbers.
Sample Cabin Appliance Energy Audit
| Appliance | Power (Watts) | Daily Hours of Use | Daily Energy (Watt-Hours) |
|---|---|---|---|
| ENERGY STAR Refrigerator | 150 | 8 (cycling) | 1,200 |
| LED Lights (5 bulbs) | 50 (10W each) | 6 | 300 |
| Laptop Charging | 65 | 4 | 260 |
| Cell Phone Charging (2) | 10 (5W each) | 3 | 30 |
| Well Pump (1/2 HP) | 750 | 0.5 | 375 |
| Starlink Internet | 50 | 24 | 1,200 |
| Small TV | 60 | 3 | 180 |
| Total Daily Estimate | 3,545 Wh |
As you can see, even a modest setup requires a significant amount of energy. Your own list will be unique, so take the time to do the math properly. It’s the most important part of the entire process.
Hunting Down Phantom Loads
One of the biggest energy vampires in any home—on or off-grid—is the phantom load. These are devices that suck power even when they’re turned “off.” Think about the glowing clock on the microwave, the TV in standby mode, or any charger plugged into the wall.
These tiny draws add up fast, potentially eating up 10% to 20% of your daily power budget. For a cabin running on a finite amount of solar energy, killing these is non-negotiable. The best way to find them is with your energy meter. You’ll be shocked to discover which gadgets are silently draining your battery bank all night long.
The fix is easy: unplug stuff when you’re not using it. Or, even better, connect them to power strips that you can switch off completely. This simple discipline will conserve precious stored energy for when you actually need it.
Once you have an accurate, lean calculation of your daily watt-hours, you’re ready to start sizing the gear that will meet that demand. This detailed audit is what ensures your investment in solar is both efficient and effective.
Choosing the Right Components for Your Solar System
Now that you know your daily watt-hour needs, it’s time to start picking out the hardware. Think of it like assembling a team—every player has a critical role, and your system is only as strong as its weakest link. Choosing high-quality, correctly-sized components isn’t just a good idea; it’s absolutely essential for long-term reliability when you can’t just call a repairman.
We’re focusing on the four core pieces of the puzzle: the solar panels, batteries, charge controller, and inverter. Each one has to work in harmony with the others to capture, store, and deliver power efficiently and safely. Get this part right, and you’ll have a robust system you can count on, no matter what’s happening in the outside world.
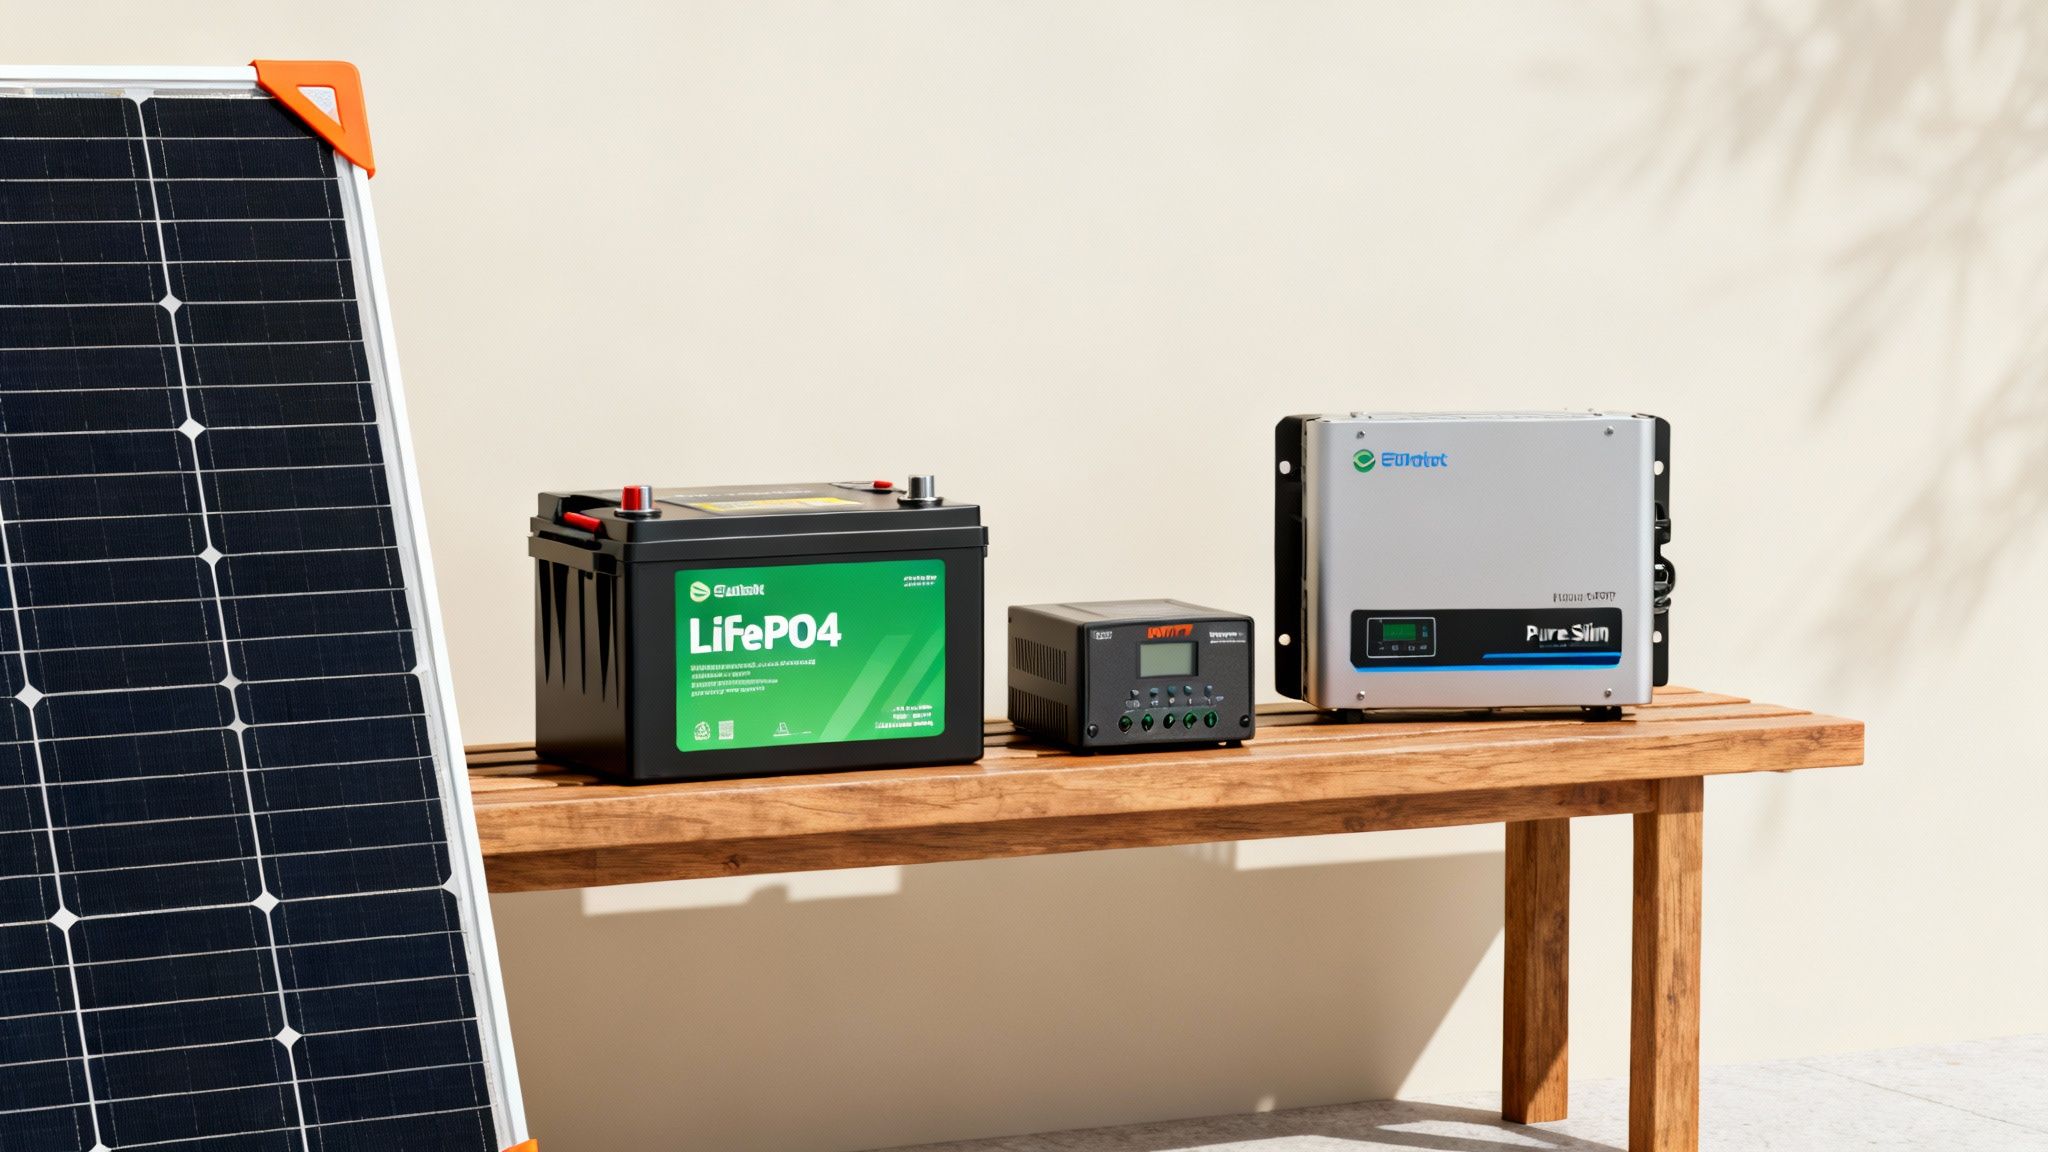
Solar Panels: The Foundation of Your System
Solar panels are where it all begins, turning raw sunlight into usable DC electricity. When you’re shopping for panels, you’ll mainly run into two types: monocrystalline and polycrystalline. While they both do the job, one has a clear advantage for a serious off-grid setup.
- Monocrystalline Panels: These are the sleek, black panels made from a single, pure silicon crystal. They’re more efficient, which means they generate more power in a smaller area. They also perform better in the real-world conditions you’ll face at a cabin—like low light on cloudy days and the high heat of summer.
- Polycrystalline Panels: You can spot these by their blue, marbled look, which comes from melting multiple silicon fragments together. They’re cheaper, but you pay for that with lower efficiency. You’ll need more of them (and more space) to produce the same amount of power as a monocrystalline array.
Bottom line? For a cabin where space might be tight and every watt counts, monocrystalline panels are the superior choice. Their higher efficiency gives you a more powerful system with a smaller footprint, leaving you more room to expand later.
The Great Battery Debate: Lithium vs. Lead-Acid
Your battery bank is the heart of a survival-focused solar system. It’s the energy reservoir that keeps your lights on, your food cold, and your communications running long after the sun has set. The two main players here are old-school lead-acid batteries and modern lithium iron phosphate (LiFePO4).
Lead-acid batteries (like AGM or gel types) have been the standard for decades, mostly because they have a lower upfront cost. But they come with serious drawbacks: they’re incredibly heavy, often require maintenance, and can only be safely drained to about 50% of their rated capacity. Go deeper than that, and you’ll kill them in a hurry.
This is where lithium iron phosphate batteries come in. While they cost more at the outset, they are a far better investment for a resilient cabin. Top-tier brands like Battle Born Batteries are game-changers for a reason:
- Deeper Discharge: You can safely use 80-90% of their stored energy without a problem.
- Longer Lifespan: They last for thousands of charge cycles—often up to 10 times longer than their lead-acid counterparts.
- Lighter Weight: They are a fraction of the weight and much more compact.
- Maintenance-Free: No more checking water levels or worrying about venting corrosive gases.
For a system built to endure emergencies, the durability and raw performance of LiFePO4 batteries make them the clear winner. That initial cost pays for itself over time by eliminating the need for frequent, costly replacements and giving you more usable power every single day. For most preppers, a 10-20kWh lithium bank is the sweet spot, providing 3-5 days of autonomy for critical loads like a freezer, well pump, lights, and radios.
During the 2021 Texas freeze, countless grid-tied homes went dark and cold. In contrast, well-designed off-grid solar cabins stayed lit and warm, highlighting a 99% uptime statistic for properly sized systems. This isn’t just a number—it’s survival insurance.
The Charge Controller: Your System’s Brain
The charge controller is the unsung hero of your solar setup. It’s the smart traffic cop that sits between your solar panels and your batteries, managing the flow of energy. Its main job is to prevent overcharging—which can literally cook your expensive batteries—and to squeeze every last watt of power out of your panels.
You’ll see two types on the market: PWM (Pulse Width Modulation) and MPPT (Maximum Power Point Tracking).
Don’t even consider a PWM controller. An MPPT charge controller is the only serious option for an efficient off-grid system. It intelligently scans your panels to find the optimal voltage and current, boosting your energy harvest by up to 30% over a simple PWM unit. That extra power is absolutely critical on overcast days or in the short days of winter. Brands like Victron Energy have a rock-solid reputation for reliability and advanced features.
The Inverter: Turning DC into Usable AC Power
Finally, we have the inverter. This is the device that takes the low-voltage DC power stored in your batteries and converts it into the standard 120-volt AC power that runs your everyday appliances. The most important choice you’ll make here is between a modified sine wave and a pure sine wave inverter.
Modified sine wave inverters are cheap, but they produce a “dirty,” blocky electrical signal. This choppy power can damage or outright destroy sensitive electronics like laptops, modern refrigerators, Starlink terminals, and medical equipment. It’s also known for causing an annoying buzz in audio gear and making motors run hot and inefficiently.
A pure sine wave inverter, on the other hand, creates clean, stable electricity that’s often better than what the utility company provides. For a cabin system that needs to power anything beyond a simple lightbulb, a pure sine wave inverter is non-negotiable. It protects your gear and ensures everything runs properly. When you’re in a grid-down situation, the last thing you need is your own power system causing another failure. To see how these components fit into a wider preparedness strategy, check out our guide on how to prepare for a blackout.
A Practical Guide to Installing Your System Safely
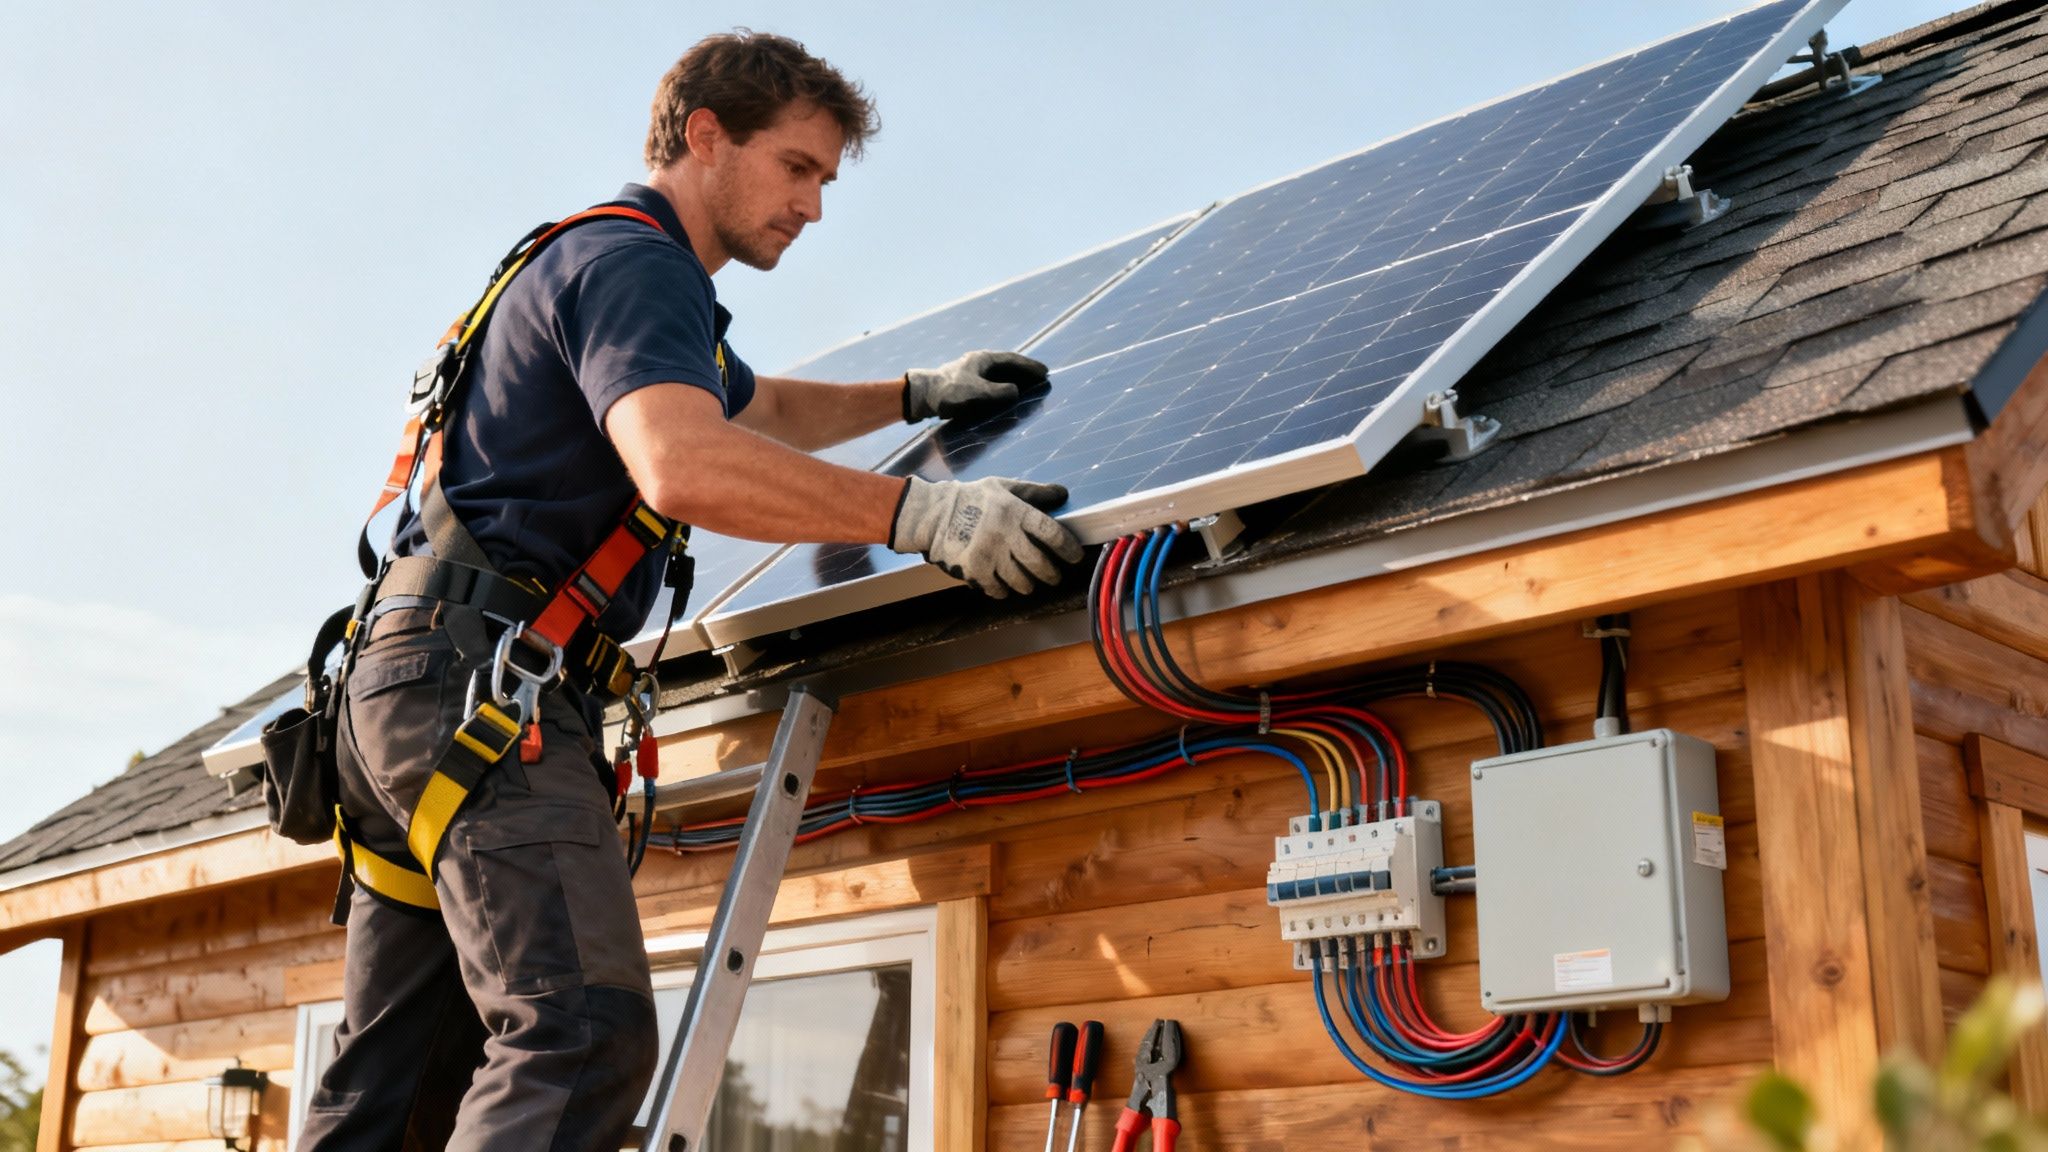
Alright, you’ve got your gear picked out. Now it’s time to put it all together. This is where the rubber meets the road, and paying close attention to safety becomes your most important job. A well-installed system will be a reliable workhorse for decades, but a rushed or sloppy job is a genuine fire hazard that puts your entire cabin at risk.
While I’ll walk you through the essentials here, remember this is a guide, not a substitute for professional hands-on experience. Use this information to confidently tackle a DIY build or to keep an intelligent eye on a contractor’s work. You want to make sure no corners are cut when it comes to the safety of your retreat.
Choosing Your Panel Mounting Location
Where you stick your solar panels has a massive impact on how much power you’ll actually generate. You’re looking for a spot with wide-open, unobstructed sun, especially during the middle of the day. For a typical off-grid cabin, you’ve basically got three choices, each with its own trade-offs.
- Roof Mount: This is what most people picture. It’s a great way to use existing space and keep the panels up and out of the way. The big downside? You have to drill holes in your roof, which has to be strong enough to handle the weight and wind. Plus, working on a roof is inherently dangerous.
- Ground Mount: Setting up an array on the ground is way easier and safer to install and maintain. You can perfectly dial in the angle for your specific latitude, and brushing off snow or dirt is a breeze. The main trade-off is that it eats up yard space and is more exposed to critters or falling branches.
- Pole Mount: Putting your panels up on a tall pole is a fantastic solution if you’ve got ground-level obstacles or deal with heavy snow. It gets them high above any potential shade and you can even add trackers that follow the sun. It’s also, by far, the most expensive way to go.
For most DIY preppers and cabin owners, a ground mount hits the sweet spot between safety, performance, and ease of installation.
Understanding Your Wiring Connections
Getting the wiring right is absolutely critical. The two ways to connect your panels—series and parallel—completely change your system’s voltage and amperage. That, in turn, dictates what kind of charge controller and what size wires you’ll need.
A series connection is like putting batteries in a flashlight, one after another. You connect the positive terminal of one panel to the negative of the next. This makes the voltage add up, but the amperage stays the same. Higher voltage is a good thing for long cable runs from the panels to the controller because it’s more efficient.
A parallel connection means you tie all the positive terminals together and all the negative terminals together. This makes the amperage add up, but the voltage stays the same as a single panel. This setup is common for smaller systems or when using simpler PWM charge controllers.
Many larger, more serious systems use a combination of both. You create several “strings” of panels wired in series, and then you connect those individual strings together in parallel. This gives you a powerful balance of voltage and amperage that high-end MPPT charge controllers love.
The Critical Role of Wires, Fuses, and Breakers
Listen up, because this is the one area where you cannot afford to cheap out. Using wires that are too thin is one of the most common—and most dangerous—mistakes in DIY solar. A wire that’s too small for the amount of current running through it will get hot, melt its plastic coating, and can easily start a fire. It’s that serious.
Always, always use a wire gauge chart to pick the right thickness based on your system’s amperage and the length of the wire run. When in doubt, go one size thicker. It’s cheap insurance.
Just as important are your fuses and breakers. Think of them as your system’s emergency shut-offs. You need to install a fuse or breaker in several key spots to protect your gear and prevent a catastrophe:
- Between the solar panels and the charge controller
- Between the charge controller and the battery bank
- Between the battery bank and the inverter
These devices are designed to instantly break the circuit if there’s a short or if the current spikes beyond a safe level. A good set of wire strippers and crimpers, like the ones from Klein Tools, will help you make solid, reliable connections that are crucial for both safety and efficiency.
One last thing. Before you turn the first screw, call your local county or municipality about permits. Even for a remote, off-grid cabin, there might be basic electrical codes you’re required to follow. Skipping this step can turn into a massive headache later on.
Building Redundancy for Long-Term Reliability
Setting up a solar power system at your cabin is a massive win for self-sufficiency. But let’s be real—true preparedness is about planning for what happens when things go wrong. Equipment fails, a long stretch of dark winter days can drain your batteries, or an emergency might demand way more power than you ever anticipated. Building redundancy into your system isn’t about being a pessimist; it’s about being a realist and making damn sure you have power no matter what.
For any prepper, a single point of failure is a risk you just can’t afford to take. The reliability of your system boils down to two things: smart maintenance and having layered backups. A little regular upkeep can stop most common problems in their tracks, while a solid backup plan means you’re never left in the dark.
Creating a Simple Maintenance Checklist
Think of proactive maintenance as your first line of defense. A simple, seasonal checklist will keep your whole setup running at peak efficiency for years to come. It’s a quick health check-up for your cabin’s power grid.
- Spring & Fall: Give your panels a good cleaning with a soft brush and water. All that dust, pollen, and grime blocks sunlight and hurts your production. While you’re at it, inspect all the wiring for any signs of damage from pests or weather, and make sure every connection is snug.
- Summer: If you have ground-mounted panels, keep the weeds and grass trimmed back so they don’t cast shadows. For roof-mounted systems, just do a quick check to ensure the sealant around the mounting feet is holding up.
- Winter: After a big storm, use a soft-headed snow rake to gently clear heavy snow off your panels. Whatever you do, don’t use hot water or hard tools—you could easily damage the glass.
- Monthly: Glance at your charge controller’s display. Keep an eye on the battery voltage and your daily power production. This is the easiest way to spot a performance dip that could signal a bigger problem.
Regular maintenance is just one component of a complete off-grid strategy—learn more about the full range of off-grid living essentials you’ll need for true self-sufficiency.
This simple routine takes almost no time but pays off big in long-term reliability.
Layering Your Backup Power Sources
Even a perfectly maintained system will run into challenges, like a solid week of cloud cover. This is exactly why having secondary—and even tertiary—power sources is a cornerstone of any resilient off-grid strategy.
A small wind turbine is a fantastic partner to your solar panels. In many places, windy, overcast days go hand-in-hand. When the sun isn’t shining, the wind is often howling, giving you that vital charge to keep the batteries topped off when you need it most.
Data shows that well-designed solar systems have an incredible 99.5% uptime over 25 years, far surpassing generator reliability. For families preparing for disruptions, hybrid solar-wind kits can boost power generation by 40% in cloudy winter months. Read more about these renewable energy insights.
The Ultimate Fail-Safe Power Options
When a true emergency hits, nothing beats the peace of mind that comes from a reliable backup generator. A quiet, fuel-efficient inverter generator like the Aceup Energy is a top-tier choice. It gives you clean AC power to run appliances directly or—even better—to recharge your battery bank through a compatible inverter/charger. Just make sure you have a safely stored and properly rotated supply of fuel.
Another critical layer of redundancy is a portable power station. Something like a ALLWEI or a Anker is basically a self-contained, grab-and-go power source. This is invaluable for keeping critical comms gear, like radios and phones, online if your main system goes down for maintenance. A portable power station also makes an excellent addition to your bug out bag for emergency evacuations when you need reliable power on the move. It also lets you power a tool or light in another part of your property without wrestling with extension cords.
These layers of backup power are an essential part of a complete survival plan. To see how they fit into the bigger picture, check out our comprehensive emergency preparedness checklist for more ideas on building a truly resilient household.
Common Questions About Off-Grid Cabin Solar
Getting into solar for a cabin always stirs up a lot of questions. If you’re going to build a system you can bet your life on, you need clear, no-nonsense answers. Let’s tackle some of the most common questions we get, so you can move forward with confidence.
How Many Solar Panels Do I Need for a Small Cabin?
This is the classic “it depends” question, but we can definitely narrow it down. The answer really comes down to two things: your daily power needs and where you are on the map.
For a simple weekend getaway cabin—maybe running some LED lights and charging a phone or two—you could easily get by with an 800 to 1,600-watt array. That’s just two to four large panels.
But if you’re living there full-time, with an efficient fridge, a well pump, and internet, your needs are much higher. In that case, you’re probably looking at a 3,000 to 5,000-watt setup, which is more like eight to twelve panels.
The only way to know for sure is to do your energy audit first. Once you have your total daily watt-hours, plug it into this formula: (Total Daily Watt-Hours) ÷ (Average Local Sun-Hours) ÷ (Panel Wattage) = Number of Panels. Always add a 25% buffer for cloudy days and other inefficiencies. You’ll thank yourself later.
Can I Actually Run a Well Pump on Solar?
Absolutely, but you have to be smart about it. The big hurdle with a well pump is its startup surge. The instant that pump kicks on, it can pull three to five times its normal running power for a few seconds. Your inverter has to be beefy enough to handle that sudden, massive demand.
For instance, a typical 1/2 HP well pump might run at 750 watts, but it could surge to over 2,200 watts on startup. To manage that, your pure sine wave inverter needs a surge rating of at least 2,500 watts. Just as critical, your battery bank needs to be able to deliver that punch of current without the voltage dropping off a cliff.
Is a DIY Solar Installation for a Cabin a Safe Idea?
You can definitely do it yourself, but only if you are absolutely meticulous about safety. DC electricity, especially at the voltages you’ll see in a solar array, is a different beast than the AC power in your house—and in many ways, it’s more dangerous.
If you go the DIY route, you have to nail these safety checks:
- Always use correctly sized wires. Undersized wires are a fire waiting to happen.
- Install fuses and circuit breakers everywhere they’re needed. They are your system’s lifesavers.
- Ensure every single connection is rock-solid. A loose connection creates resistance, which creates heat—a major fire hazard.
- Cover your panels with a dark tarp before you even think about wiring them. This stops them from producing power while you work.
If you have even the slightest doubt, especially when connecting to an AC breaker panel, just hire a licensed electrician. It’s the smartest money you’ll spend.
What Is the Biggest Mistake People Make with Cabin Solar?
The single most common—and most expensive—mistake is undersizing the battery bank. People get laser-focused on packing their roof with solar panels and then get cheap on the batteries. This is a recipe for disaster.
Without enough storage, all that power you generate on a sunny day has nowhere to go. You’ll be swimming in electricity at noon and completely out of juice by morning.
This traps you in a frustrating cycle of running out of power at night or after a few cloudy days. Even worse, it forces you to drain your batteries too deeply, which absolutely destroys their lifespan and wastes your entire investment.
A solid rule of thumb is to size your battery bank to hold at least two to three days’ worth of your essential power needs. That’s the foundation of true off-grid reliability. You can find more detailed discussions on system sizing in our articles about off-grid power.

