A solid winter shelter isn’t a one-size-fits-all solution. It’s about knowing your most likely survival scenario and preparing for it, whether that means fortifying your home against a long-term power outage or knowing how to build a temporary shelter if you’re forced to evacuate. At the end of the day, it all comes down to a few core principles: insulation, ventilation, and heat retention. Nail those, and you’ll make smart decisions in any situation.
Matching Your Shelter to Your Survival Scenario
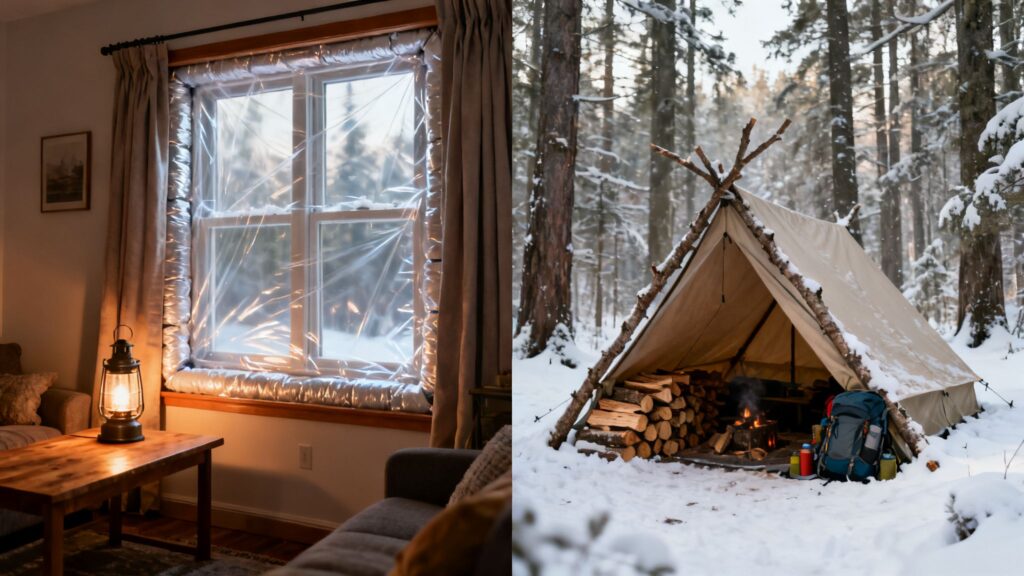
When the temperature drops and a storm warning flashes across your screen, the word “shelter” can mean a couple of very different things. The best strategy isn’t about finding a single perfect answer, but about realistically preparing for the emergency you’re most likely to face.
For most of us, that’s a shelter-in-place scenario. Think of a nasty ice storm that knocks out the power for days, turning your home into a cold trap. The real challenge here isn’t building something new, but adapting what you already have to hold onto heat and stay livable without the grid.
The second, more extreme scenario is getting caught outdoors and needing to improvise a shelter to survive the night. This is a totally different ballgame, demanding skills that focus on using natural materials or the gear on your back to shield yourself from the elements until you can get somewhere safe.
The CORE Principle of Shelter Design
Whether you’re taping plastic over a window or building a debris hut from scratch, a simple framework can guide your efforts. The CORE principle is an easy way to remember the absolute must-haves for any effective winter shelter.
- C – Cover: This is your first line of defense against snow, sleet, or freezing rain. Getting wet is a fast track to hypothermia, so a waterproof or at least water-resistant roof is non-negotiable.
- O – Overhead: This is all about structural integrity. Whatever is above you needs to be strong enough to handle the weight of snow and protect you from falling branches or other hazards.
- R – Retention: A shelter’s primary job is to trap heat. This means insulating yourself from the cold ground below and the frigid air around you. Remember, the smaller the space, the more efficiently your own body heat can warm it up.
- E – Entrance: Your way in and out should be small and, if possible, blocked from the prevailing wind. A smart entrance design cuts down on drafts and stops precious warm air from gushing out.
Getting these fundamentals down is the crucial first step. You can dive deeper into specific designs by exploring different types of emergency shelter options.
Why Your Scenario Determines Your Strategy
Thinking through these two scenarios ahead of time is critical because they demand completely different gear and knowledge.
For a shelter-in-place event at home, you’d stock up on plastic sheeting for windows, insulated curtains, and weatherstripping. A portable power station, like a Jackery Explorer series model, could be a game-changer for keeping a small heater or essential devices running.
But for an outdoor emergency, your focus flips to what you can carry. A high-quality emergency blanket from a brand like SOL (Survive Outdoors Longer) or a durable survival tarp suddenly becomes far more valuable than anything you have at home. The tools in your vehicle or get-home bag—like a Fiskars folding saw or a compact shovel—become your primary means of construction.
By identifying your most likely risk—a grid-down event at home versus being stranded in the wilderness—you can focus your energy, time, and resources on creating a shelter for winter that will actually work when you need it most. This targeted approach moves you from generic prepping to creating a practical, actionable survival plan.
Turning Your Home into a Resilient Winter Fortress
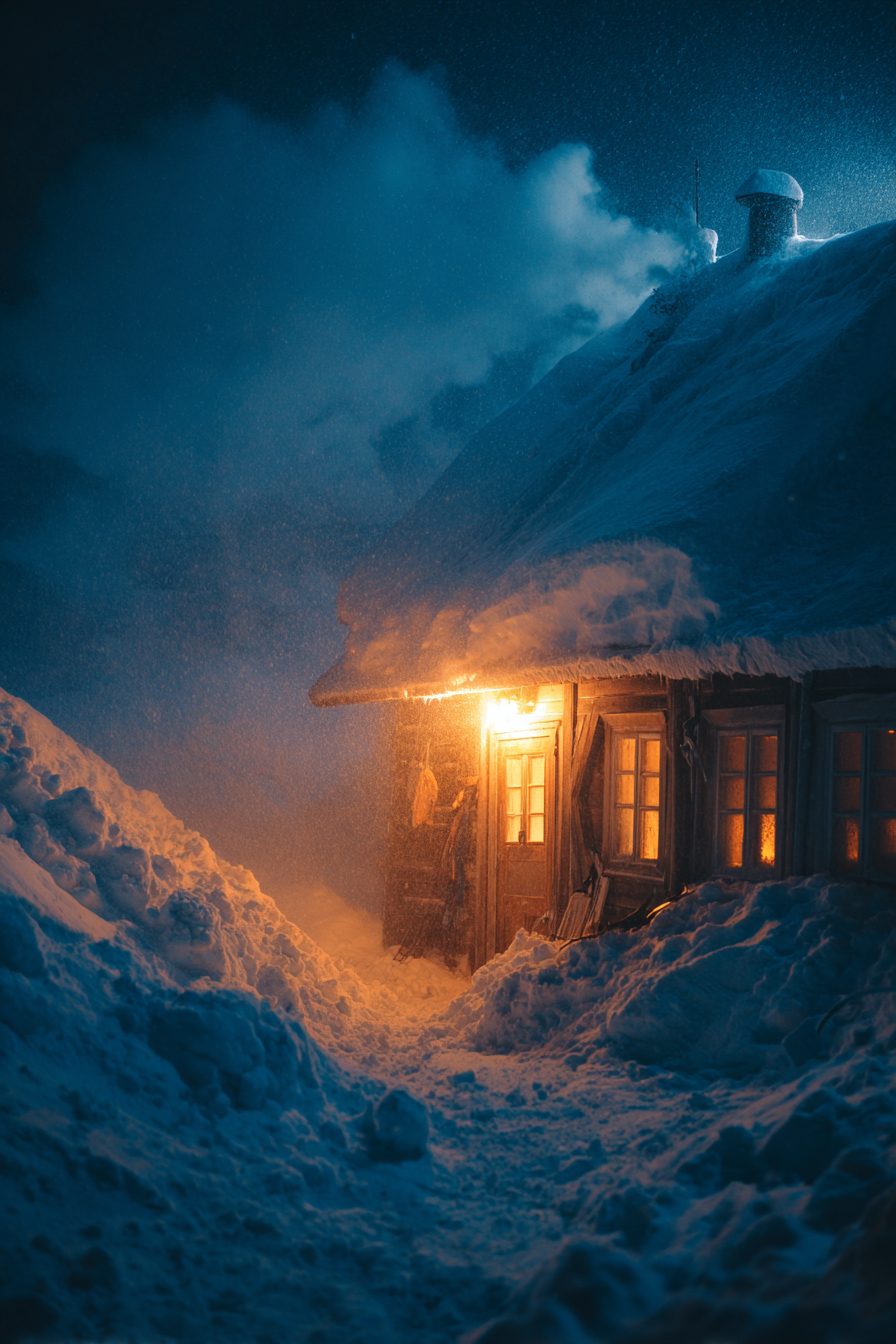
When the power goes out for an extended period, your home stops being a place of modern comfort and becomes your primary survival shelter. The structure is there, but the real challenge is making it hold heat without the grid. Thankfully, some of the best methods are also the cheapest, relying on simple physics instead of complex equipment.
The entire strategy boils down to one goal: stop heat from escaping. Your house is constantly leaking precious warmth through windows, doors, and tiny cracks you’d never normally notice. Plugging these leaks is your first and most critical mission.
To ensure you’re ready for a prolonged power outage, consider reviewing our guide on how to prepare for a blackout to stock the right supplies and plan your response.
Seal and Insulate Your Weak Points
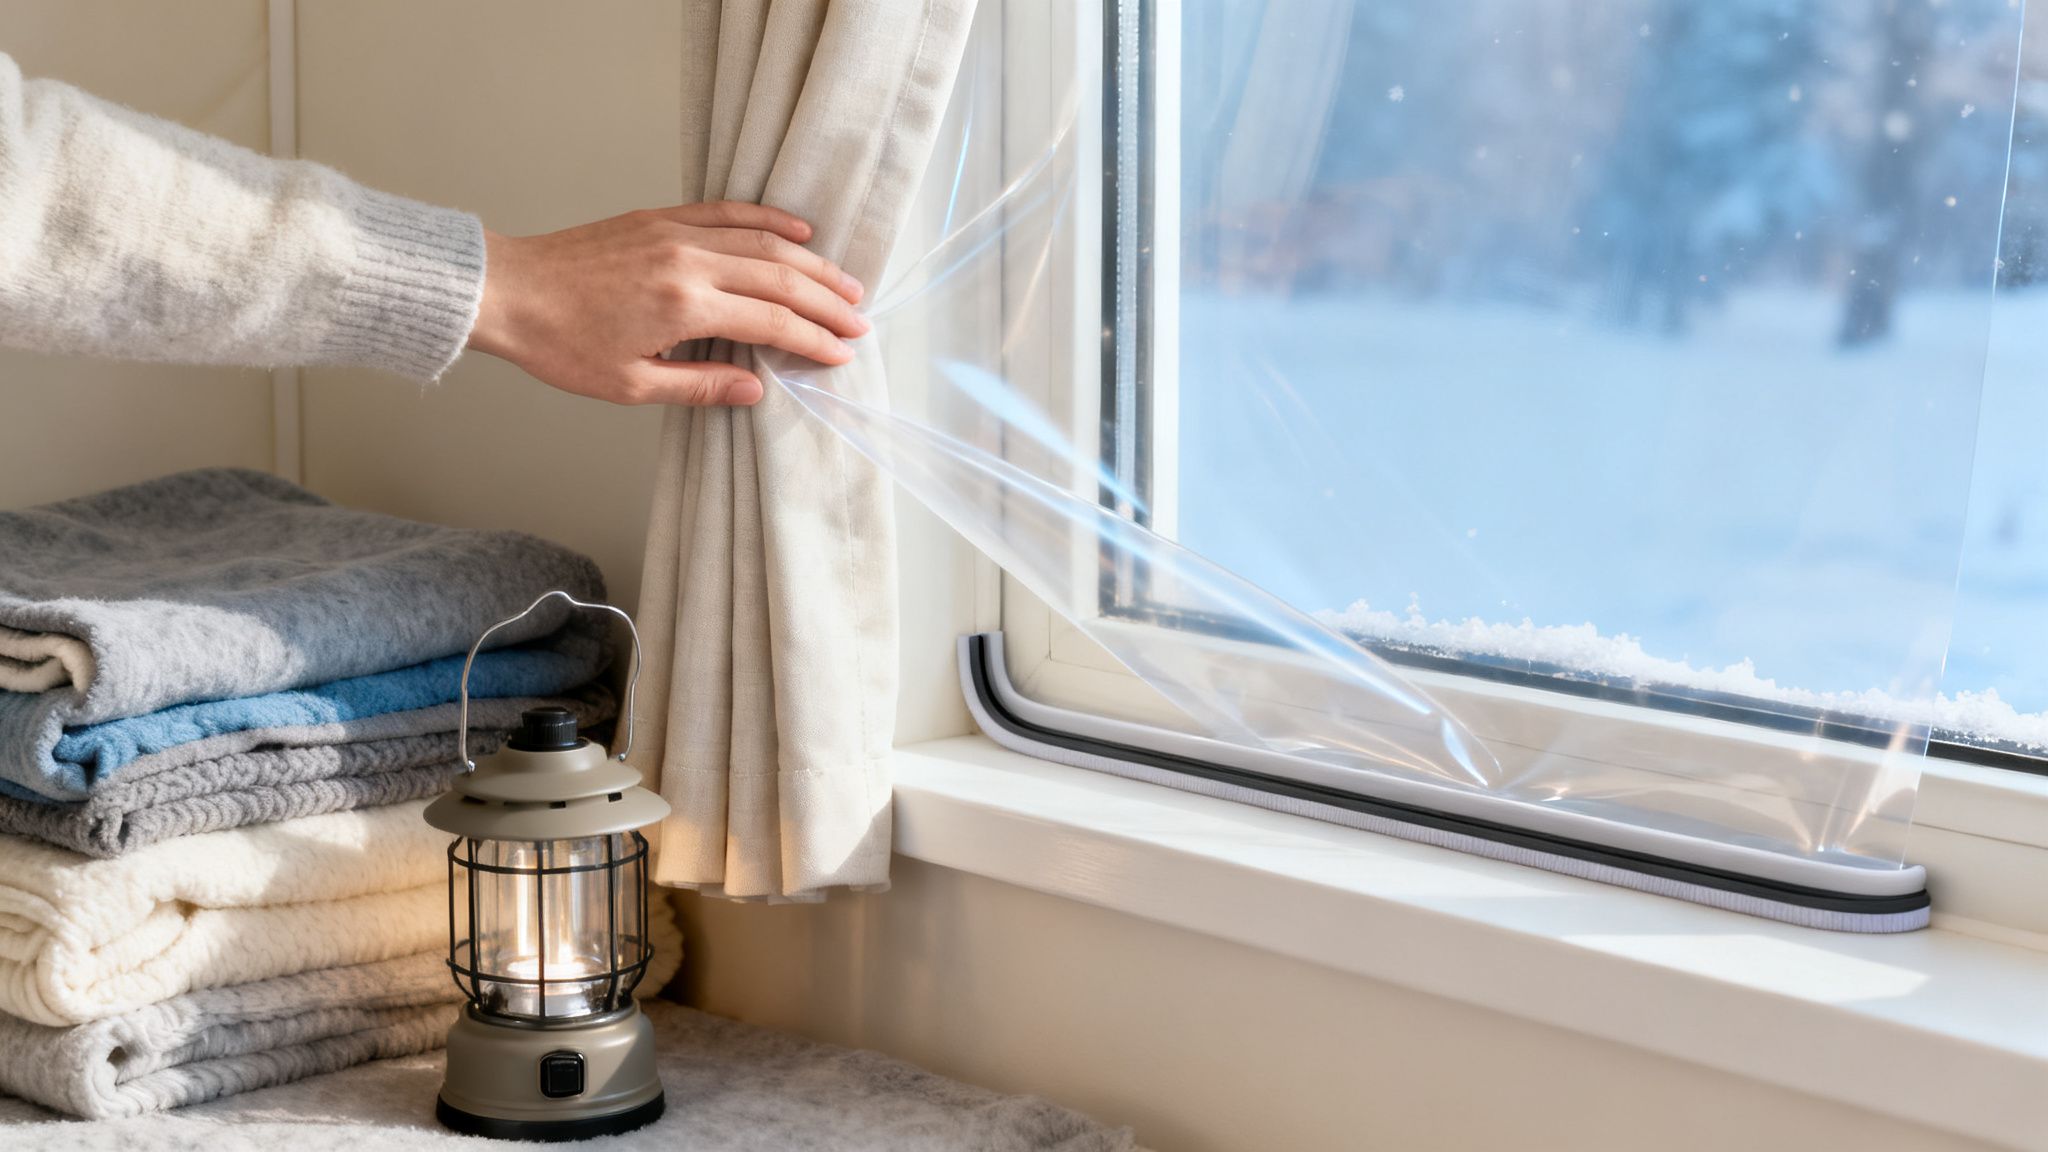
Windows are the number one enemy of a warm house in winter. A single pane of glass offers almost no protection from the biting cold. A cheap and shockingly effective solution is to cover them with a 3M window insulator film kit. This simple plastic sheet creates a pocket of trapped air that acts as a fantastic insulator.
To really double down, hang heavy thermal curtains over your newly sealed windows. This adds another serious layer of insulation, drastically cutting down on heat loss. During the day, throw open the curtains on any south-facing windows to let the sun pour in for some free passive solar heat. Just be sure to close them tight the moment the sun starts to set.
Next, you have to play detective and hunt down every draft. Little gaps around door frames, window sills, and even electrical outlets create a constant flow of cold air. Use weatherstripping or caulk for a permanent fix. In a pinch, a rolled-up towel or blanket shoved against the bottom of a door works wonders.
The importance of a properly winterized home cannot be overstated. During a severe deep-freeze in Eastern Europe in 2012, inadequate housing contributed to thousands of ‘excess winter deaths’ as people were unable to afford heating. You can read more about how housing conditions impact winter survival in this report on fuel poverty.
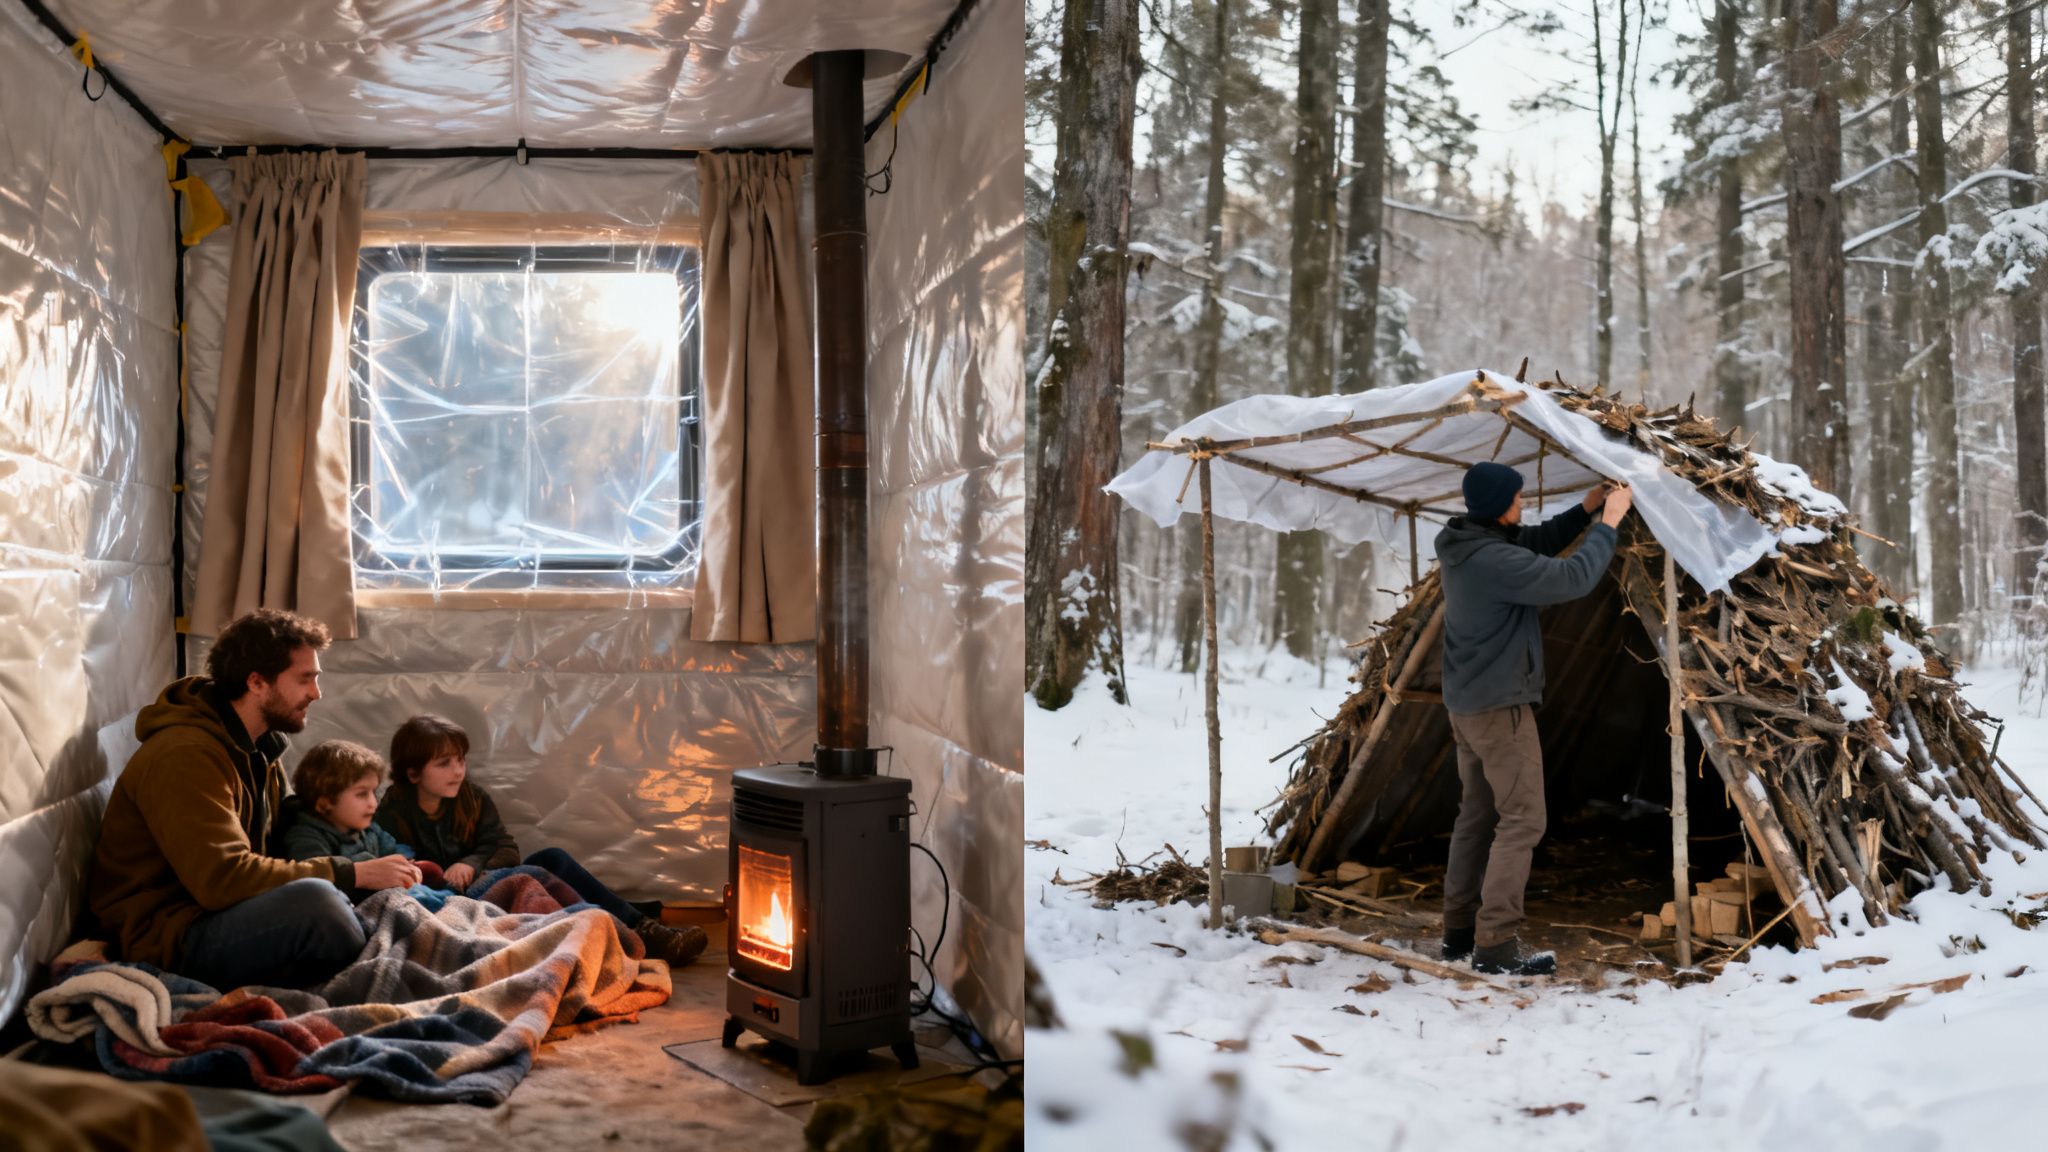
Create a Centralized Warm Room
Trying to heat an entire house without central power is a losing battle. Don’t even try. The smarter move is to consolidate everyone and everything into a single, smaller “warm room.” This strategy shrinks the space you need to keep comfortable, making your heating efforts far more effective.
For those interested in long-term resilience, exploring off-grid living essentials can help you maintain comfort and self-sufficiency during winter emergencies.
The ideal warm room has a few key features:
- Minimal windows: Or at least windows you’ve thoroughly insulated.
- An upstairs location: Heat rises, so an upper-floor room will naturally stay warmer than one on the ground floor or in the basement.
- A solid door: You need to be able to close it securely to seal the room off from the colder parts of the house.
Hang blankets over the doorway for an extra thermal barrier. If you’ve got a cold cellar or crawl space underneath, that can suck a lot of warmth out of the floor. For tips on tackling that problem, check out our guide on how to insulate a cellar ceiling. By concentrating body heat and any supplemental heating into one small space, you create a livable microclimate inside your home.
Prioritize Essential Safety Gear
Once your space is sealed up, having the right gear is critical—especially when it comes to light and heat. A power outage means total darkness, so reliable, non-electric lighting is a must. Options like solar-powered lanterns and power stations from companies like Goal Zero can give you safe, rechargeable light without the fire hazard of candles. At a minimum, keep flashlights and headlamps with fresh batteries stashed in your warm room. A reliable headlamp like a Petzl can be invaluable for hands-free tasks.
The single most important piece of safety equipment is a carbon monoxide (CO) detector. If you plan on using any kind of indoor-safe propane heater or any other flame-based heat source, a battery-operated CO detector is non-negotiable. This gas is colorless, odorless, and a silent killer. Proper ventilation and a working detector are the only ways to stay safe. Make sure you have at least one in your designated warm room, and test it regularly.
How to Build an Outdoor Emergency Shelter That Works
If you’re ever caught out in the cold and can’t get home, your ability to build a shelter from what’s around you becomes the most critical skill you have. This isn’t about building a log cabin. It’s about creating a small, protected space—a microclimate—that shields you from wind and moisture, letting your own body heat do the work of keeping you alive.
The good news? Snow is an incredible insulator. A properly built snow shelter can keep the inside temperature right around freezing (32°F / 0°C), even if it’s a life-threatening -40°F outside. Your best building materials are often right under your feet.
If you’re preparing for long-term emergencies, understanding how to build a fallout shelter can provide an additional layer of protection in extreme scenarios.
Building With Snow: The Quinzee and Snow Cave
One of the most straightforward snow shelters to make is the quinzee. Unlike a snow cave, which is dug into a deep, existing snowdrift, you build a quinzee from scratch by piling up snow and then hollowing it out.
Start by shoveling loose snow into a big mound. Make sure you mix snow from different layers (powdery top snow, denser bottom snow) as this helps it set up, or “sinter.” Let this pile sit for at least 90 minutes. This settling time is crucial for the snow crystals to bond and become stable.
Once it’s hardened, start digging out a small entrance at the bottom. Carve out your sleeping area so it’s higher than the entrance—this simple trick traps the warmer air where you’ll be sleeping.
A snow cave is an even better option if you can find the right spot, like a deep, solid drift on the side of a hill that’s sheltered from the wind. The method is similar: dig in and then up to create that all-important raised sleeping platform.
For both shelters, one safety step is non-negotiable: poke a small ventilation hole through the ceiling with a stick or ski pole. This is absolutely critical for preventing carbon monoxide buildup and making sure you have fresh air.
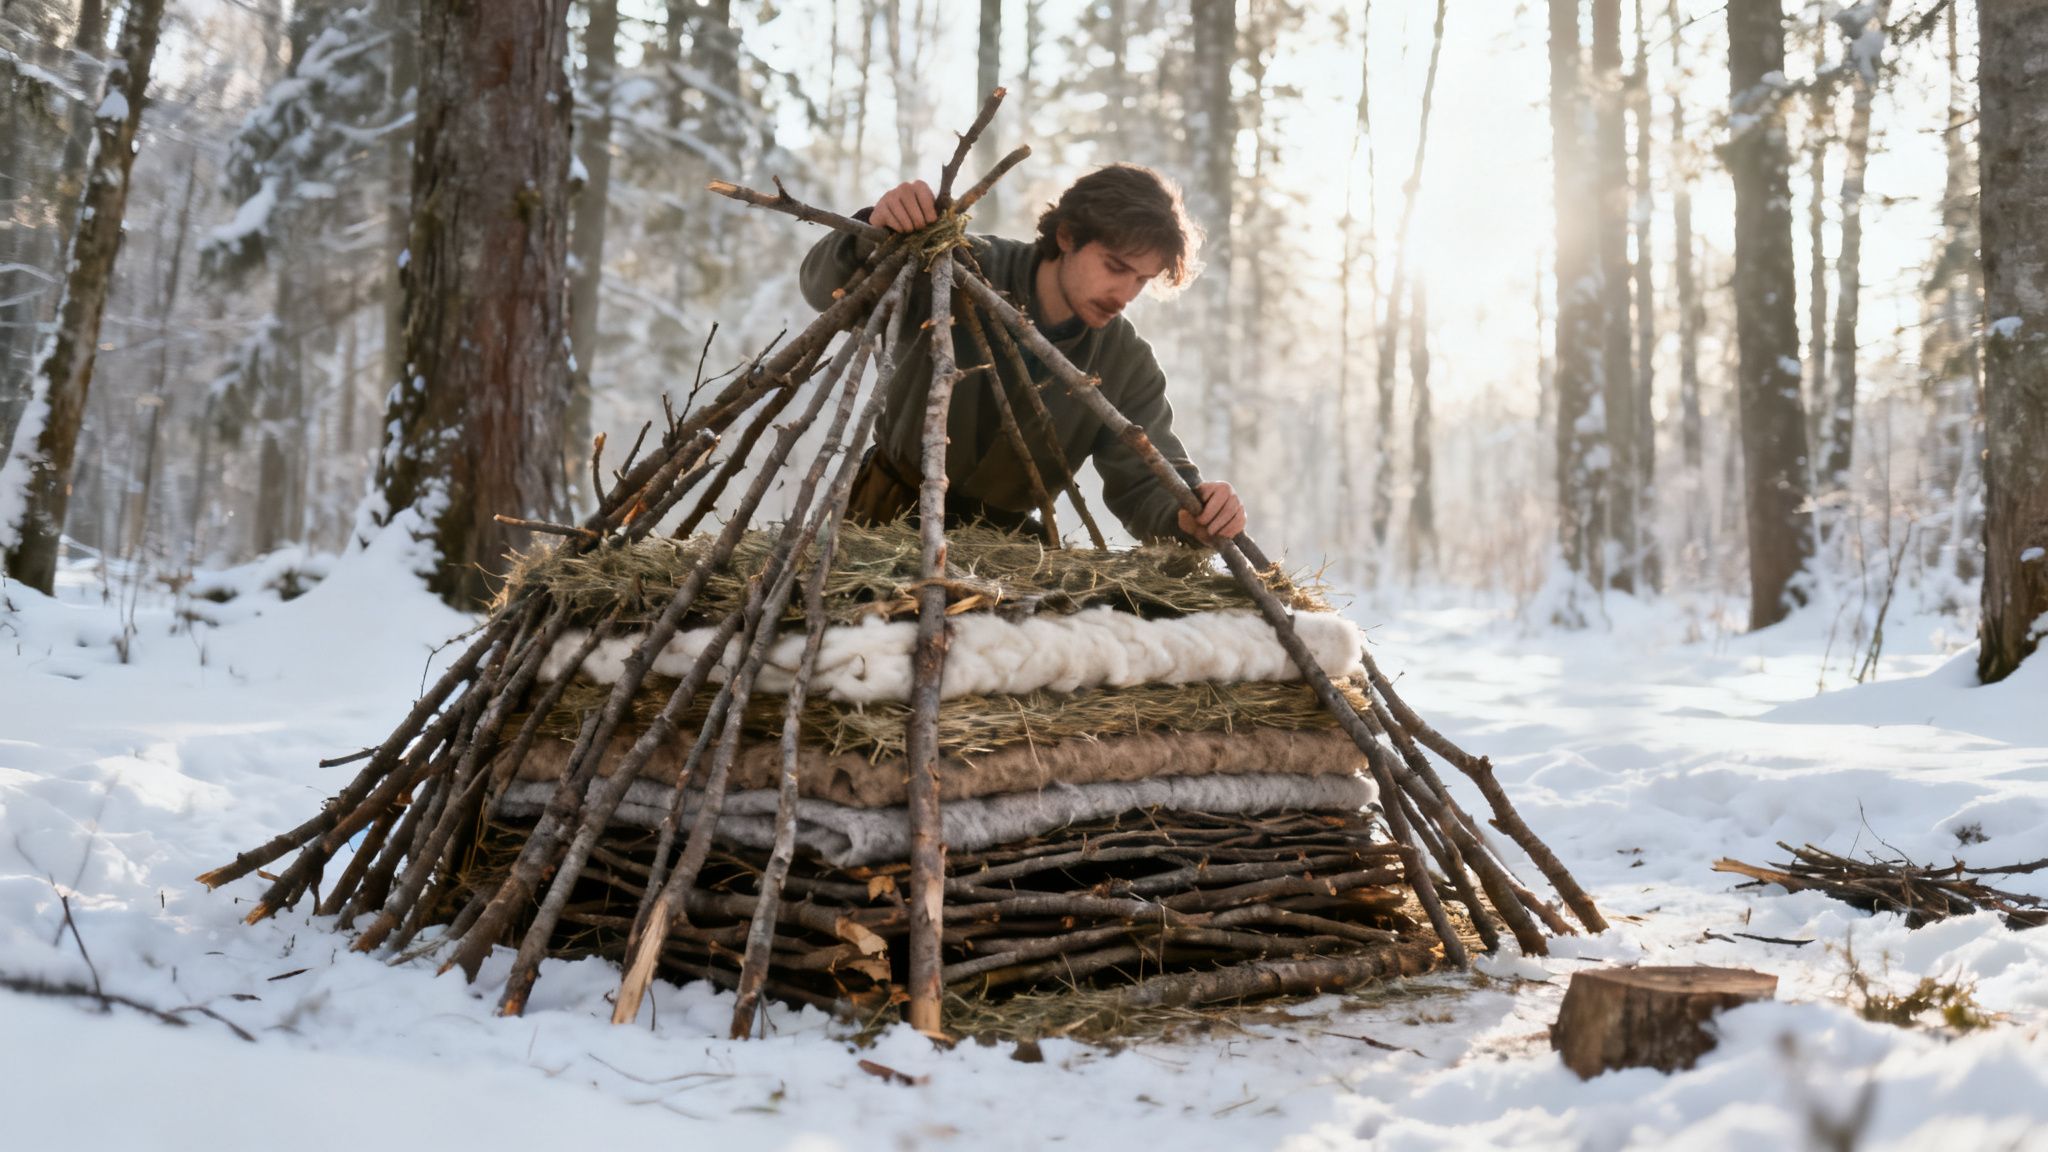
Using Natural Debris: The Debris Hut
When there isn’t enough snow, a debris hut is your go-to. This shelter works by creating a thick blanket of trapped air using whatever natural insulation you can find—leaves, pine needles, moss, you name it.
First, find a solid ridgepole (a long, sturdy branch) and prop one end on a low tree branch, a large rock, or a stump. Next, lean smaller branches against both sides of the ridgepole, creating an A-frame shape that’s just big enough for you to squeeze into. The cozier, the better. A smaller space is much easier for your body to heat.
The next part is where the real work begins. You need to pile on a massive amount of dry debris, aiming for a layer that’s at least 2-3 feet thick all the way around. Don’t pack it down too tight; you want to create as many tiny air pockets as possible. Finish by making a thick bed of the same material inside and plugging the entrance with a backpack or another pile of leaves.
Emergency Winter Shelter Comparison
Deciding which shelter to build depends on your environment, the materials available, and how much time you have. Here’s a quick breakdown to help you choose the right one for your situation.
| Shelter Type | Insulation Value | Build Time (Approx.) | Required Materials |
|---|---|---|---|
| Snow Cave | Excellent | 2-3 hours | Deep, stable snowdrift; digging tool |
| Quinzee | Very Good | 3-4 hours | Abundant snow; digging tool |
| Debris Hut | Good | 2-4 hours | Branches, leaves, pine needles |
| Tarp Lean-To | Fair | 15-30 minutes | Tarp, rope/cordage, trees/anchor points |
While a tarp is fast, nothing beats the insulation of a well-built snow shelter when temperatures plummet. Always assess your surroundings first to determine your best option.
The Power of a Tarp
While natural shelters are incredibly effective, you can’t beat the speed and convenience of a tarp. A simple, lightweight survival tarp from a brand like UST Gear is worth its weight in gold. It gives you a waterproof layer and can be set up in minutes.
Here are a couple of the most reliable configurations:
- A-Frame: This is your classic tent shape. Run a ridgeline (rope) between two trees, drape the tarp over it, and stake out the corners. It’s great for shedding snow and rain.
- Lean-To: Even faster to set up. Tie one edge of the tarp between two trees or to a low branch and stake the other side to the ground. Face the back wall into the wind, and you’ve got an instant windbreak.
The real trick is to use a tarp in combination with your environment. Set it up next to a large boulder or a fallen log to block more wind and to reflect heat from a fire back into your living space. Of course, a fire is only useful if you know how to get one going. To brush up on those skills, check out our guide on how to make fire without matches.
Knowing these shelter designs gives you a toolkit for survival. You can look at what the environment offers and confidently build what you need to make it through the night.
Assembling Your Essential Winter Survival Gear
A solid winter shelter is a fantastic start, but it’s only half the equation. The right gear is what turns that protective shell into a livable space, whether you’re hunkered down at home or stuck in the wild.
An effective winter kit isn’t about having the most stuff; it’s about having the right stuff—gear that serves multiple critical functions. Thinking about your equipment in categories helps make sure you haven’t missed anything vital. It’s a lot like layering your clothes for the cold.
A well-prepared disaster supply kit is essential for any winter survival scenario, whether you’re sheltering at home or stranded outdoors.
Insulation and Warmth
This is your personal defense system against the biting cold, all focused on retaining precious body heat. It’s the absolute foundation of winter survival.
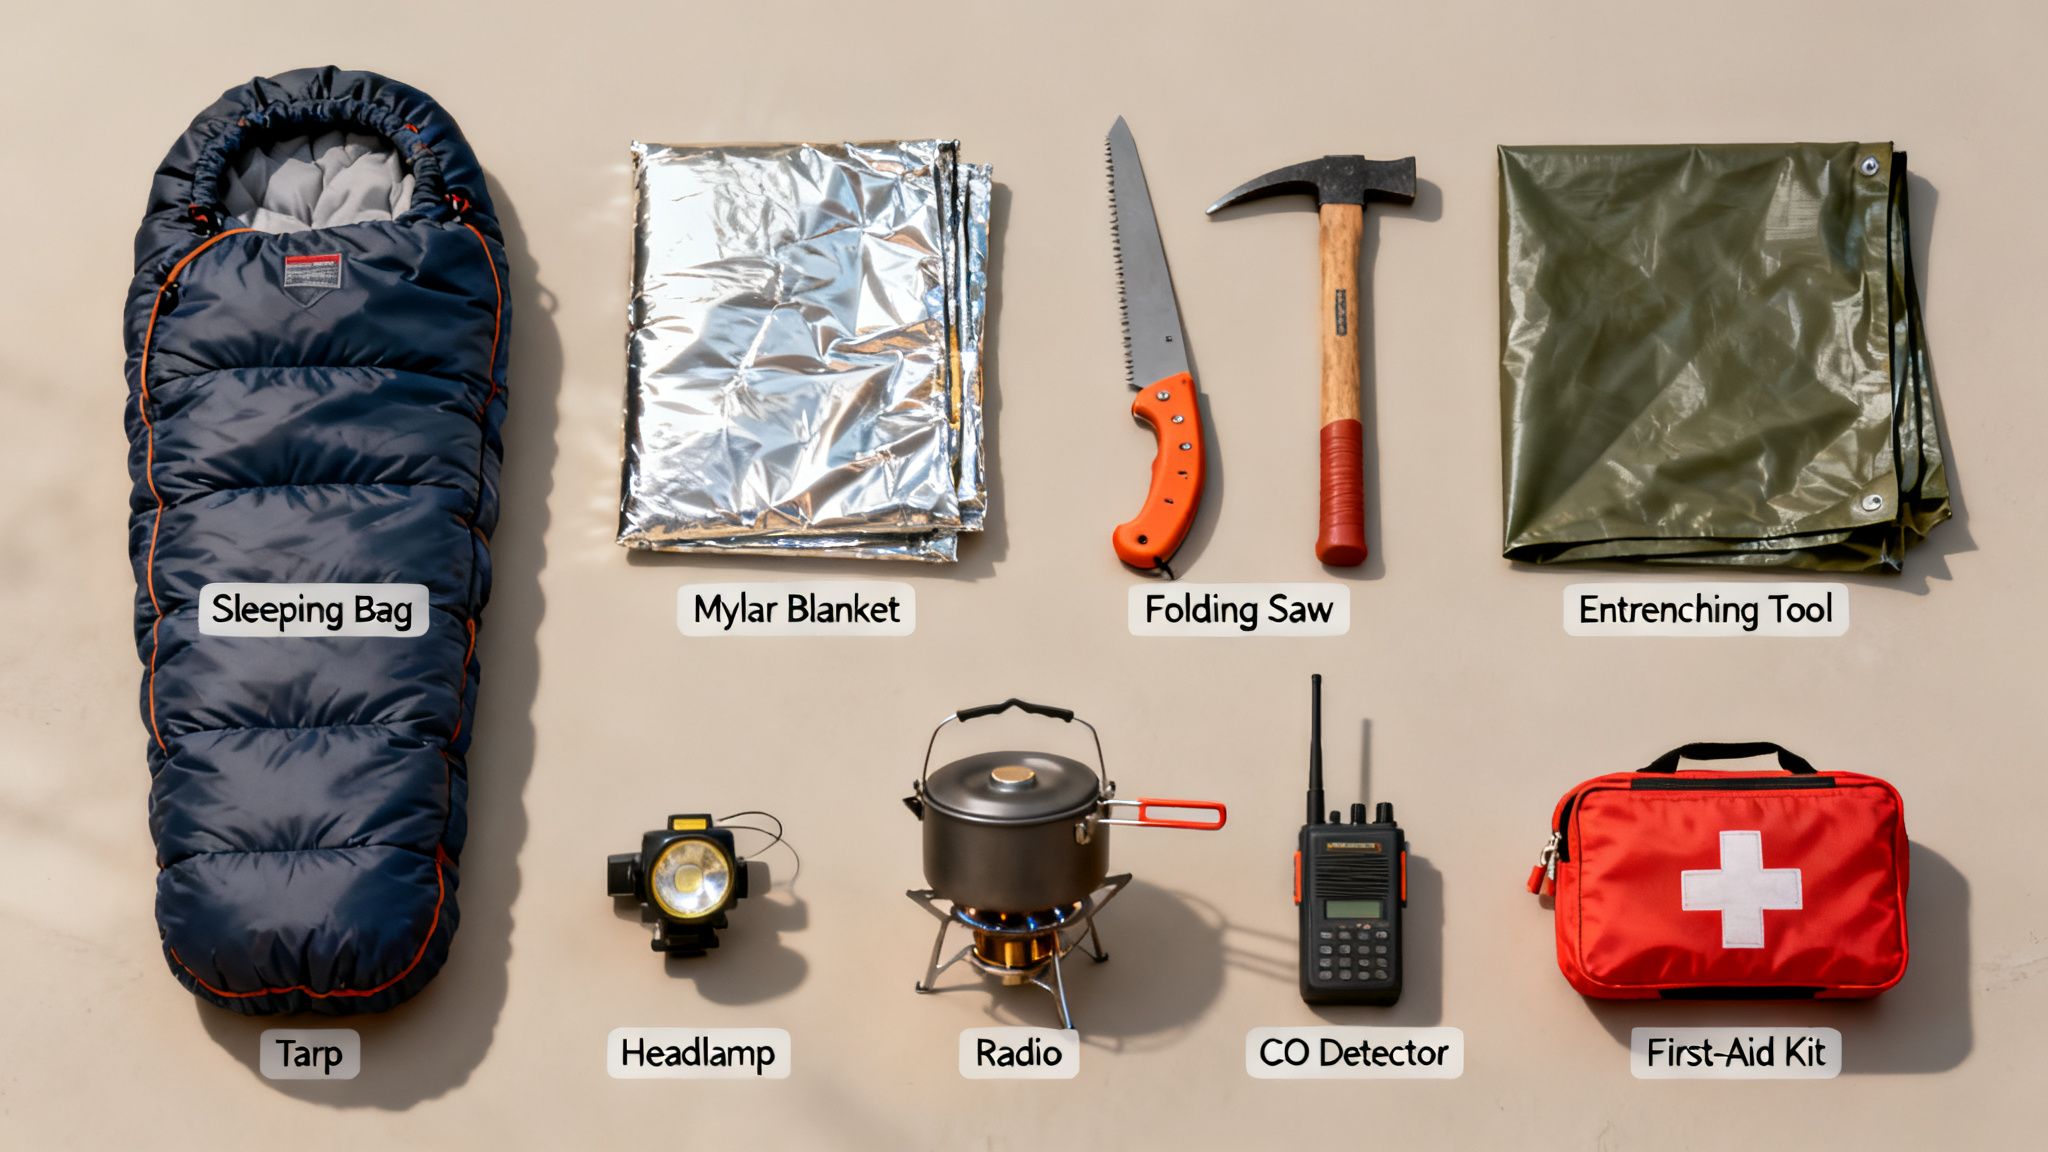
Your core item here is a quality, cold-rated sleeping system. A good sleeping bag designed for sub-freezing temperatures is non-negotiable. Pair it with an insulated sleeping pad, like a Therm-a-Rest NeoAir, and you create a crucial barrier that stops the frozen ground from sucking the warmth right out of you.
Beyond the big items, a few smaller pieces of gear punch way above their weight:
- Emergency Mylar Blankets: These are ridiculously lightweight and can reflect up to 90% of your body heat back at you. I stash them everywhere—in my kit, my car, and my home.
- Layered Clothing: Cotton is your enemy in the cold. You need moisture-wicking base layers (wool or synthetics), an insulating mid-layer like fleece, and a waterproof, windproof outer shell. A base layer from Smartwool is a popular choice for its moisture management and warmth.
- Warm Accessories: A good hat is essential, since you lose a surprising amount of heat through your head. Insulated gloves, wool socks, and a neck gaiter or balaclava complete the setup.
Shelter Tools and Construction
If you suddenly need to build a shelter from scratch or just reinforce the one you have, the right tools make all the difference. They’re force multipliers, turning a long, exhausting struggle into a quick, effective build.
A reliable folding saw is indispensable for cutting branches for a debris hut or gathering firewood. A small, durable shovel or entrenching tool is just as critical for moving snow to build a snow cave or dig out a safe fire pit.
And don’t forget a heavy-duty tarp. It’s one of the most versatile pieces of gear you can own—perfect as a quick A-frame shelter, a ground cover to stay dry, or a windbreak to shield your main shelter from the elements.
Heating and Cooking
Having a reliable heat source is more than just life-saving warmth; it’s a huge psychological boost. It also gives you the ability to melt snow for drinking water and cook food, which are vital for staying energized.
For an outdoor shelter, a safe, controlled fire is usually your best option. Your fire-starting kit should be waterproof and contain multiple ignition sources—think a ferro rod, waterproof matches, and a lighter. A ferro rod from UCO is a reliable option. Don’t forget dry tinder, like cotton balls soaked in petroleum jelly.
When you’re dealing with a larger, more permanent shelter like a wall tent, a portable wood stove is an incredible asset. It offers consistent, contained heat and a flat top for cooking. Just remember, you have to be extremely strict about safety and ventilation.
Safety and Communication
These are your lifelines. They help you monitor your environment and signal for help when things go wrong. A good first-aid kit is a given, but winter survival throws in a few extra demands.
If you plan on using any fuel-burning heater or stove inside your shelter, a battery-operated carbon monoxide (CO) detector is an absolute must-have. CO is a silent killer, and this little device is your only reliable warning.
An emergency radio, preferably one that’s hand-crank or solar-powered, is another key piece of gear. It keeps you connected to weather updates and rescue efforts when the power grid is down. The Midland ER series is a well-regarded example of such a device. Having one means you aren’t operating in an information vacuum.
For a deeper dive into what to pack, our complete survival gear list offers plenty of ideas for building out a truly robust kit.
Winter Shelter Gear Checklist
Having a checklist makes packing and preparation much more straightforward. Here’s a rundown of the essentials, broken down by category, to ensure you’re ready for whatever winter throws your way.
| Category | Essential Item | Primary Use |
|---|---|---|
| Insulation & Warmth | Cold-Rated Sleeping Bag | Primary sleep system for retaining body heat. |
| Insulated Sleeping Pad | Creates a thermal barrier from the cold ground. | |
| Emergency Mylar Blankets | Reflects up to 90% of body heat for emergency warmth. | |
| Layered Clothing System | Manages moisture and traps heat effectively. | |
| Wool Socks & Insulated Gloves | Prevents frostbite on extremities. | |
| Shelter Tools | Heavy-Duty Tarp | Versatile use as a shelter, ground cover, or windbreak. |
| Folding Saw | Cutting wood for shelter construction and firewood. | |
| Entrenching Tool/Shovel | Moving snow for shelter building or digging fire pits. | |
| Heating & Cooking | Waterproof Fire Kit | Multiple ignition sources (ferro rod, matches, lighter). |
| Portable Stove & Fuel | Contained heat and cooking source for larger shelters. | |
| Metal Pot/Container | Melting snow for water and cooking food. | |
| Safety & Comms | First-Aid Kit | Treating injuries and medical emergencies. |
| Carbon Monoxide Detector | Essential safety for any fuel-burning heater. | |
| Emergency Radio | Staying informed of weather and rescue updates. |
This checklist isn’t exhaustive, but it covers the core components you’ll need to stay safe, warm, and self-sufficient in a winter emergency. Double-check your gear before you need it—your future self will thank you.
Mastering Shelter Safety and Ventilation
Building a shelter is a battle against the cold, but winning that fight means nothing if you overlook the hidden dangers. The very things you use to stay warm—heaters, stoves, even your own breath—can create life-threatening situations inside an enclosed space. Balancing warmth and safety isn’t just a good idea; it’s a non-negotiable survival skill.
The most insidious threat is carbon monoxide (CO). It’s a colorless, odorless gas produced by burning fuel, and it’s a silent killer. Without the right gear, you won’t know it’s there until it’s far too late. This is why a reliable, battery-operated CO detector is an absolute must-have for any enclosed shelter, whether it’s a sealed room in your house or a bug-out tent.
A quality device like a First Alert CO detector, placed near your sleeping area, is your only real defense against this invisible poison. Don’t take chances with it.
The Critical Role of Ventilation
When it’s freezing outside, your first instinct is to seal every crack and gap to trap precious heat. While that’s essential for insulation, it can be a fatal mistake without proper ventilation. Every shelter, from a winterized room to a snow cave, needs a constant, controlled exchange of air.
The goal is to create airflow without creating a bone-chilling draft. The solution is simple: you need at least two openings.
- A low vent: This allows fresh, oxygen-rich air to enter.
- A high vent: This lets warmer air, moisture, and potential CO buildup escape.
This simple setup creates a natural cross-ventilation that keeps the air inside safe to breathe. In a snow cave, you can achieve this by poking a small hole through the ceiling and another near the floor. In a tent, slightly unzipping a top vent and a lower flap on the door works perfectly.
Proper ventilation does more than just prevent CO poisoning. It also helps control condensation, keeping your sleeping bag and gear dry. Wet gear is a fast track to hypothermia, making moisture management just as important as heat retention.
Fire Safety Inside and Out
Whether you’re using a portable wood stove or a simple candle for light, fire safety is paramount. The risk of an accident skyrockets when you’re cold, tired, and working in a cramped, unfamiliar space.
Always start by clearing a dedicated, non-flammable area for your heat source. In a natural shelter, this means digging down to bare dirt. Inside a tent or an improvised indoor shelter, use a fire-resistant mat under any heater or stove. Keep all flammable materials—sleeping bags, extra clothes, fuel—at least three feet away at all times.
Never, ever leave a fire or heater unattended. And absolutely never fall asleep with an unvented, flame-based heat source running. If you’re looking for other ways to generate warmth without an open flame, you can explore some effective survival alternatives for heat generation.
Recognizing Cold-Weather Medical Emergencies
Your body is your ultimate shelter, and you need to recognize when it’s in trouble. Hypothermia and frostbite can sneak up on you, especially when you’re focused on other survival tasks.
- Hypothermia: Early signs include the “umbles”—uncontrollable shivering, slurred speech, confusion, and fumbling hands. The shivering will eventually stop, which is a very dangerous sign that the body is losing its ability to generate heat.
- Frostbite: This usually hits the extremities first: fingers, toes, nose, and ears. The first sign is often a “pins and needles” feeling, which gives way to numbness. The skin may look white or grayish-yellow and feel waxy or unusually firm.
If you suspect either condition, getting into a shelter and starting the rewarming process is the top priority. Remove wet clothing immediately and use blankets, body heat, or warm (not hot) drinks to slowly bring the person’s core temperature back up.
The struggle for safe winter shelter is a harsh reality for many. Recent data shows a staggering 18.1 percent increase in homelessness from 2023 to 2024. In places like Los Angeles County, this has had fatal consequences, where at least 14 unhoused individuals froze to death in a single year. This tragic reality underscores the life-or-death importance of having a safe, warm space. You can learn more about the growing demand for community housing and homeless shelters from IBISWorld.
Common Questions About Winter Shelters
Knowing the theory behind a good winter shelter is one thing. Putting it into practice when you’re cold, tired, and under pressure is another entirely. Let’s run through some of the most common questions that pop up in the field to make sure these critical concepts are locked in.
Being prepared for a variety of emergencies is key—learn more about how to prepare for natural disasters to ensure you’re ready for any situation.
What Is the Single Most Important Factor for a Winter Survival Shelter?
Hands down, the most critical factor is staying dry. Getting wet is a fast track to life-threatening hypothermia, even when the temperature is technically above freezing. Your shelter’s number one job is to keep snow, sleet, and melting ice off you.
This starts with a waterproof roof—whether that’s a heavy-duty tarp or a densely packed layer of forest debris. Just as important is what’s underneath you. You need a solid barrier between your body and the frozen ground or snowpack. A simple foam pad or a thick bed of pine boughs is non-negotiable. Everything else, from insulation to size, comes second to keeping moisture out.
How Small Should an Emergency Winter Shelter Be?
Build it just big enough to lie down in, and not an inch bigger. A smaller shelter means less air your body has to heat, which is a massive advantage when your own body heat is the only furnace you have.
A good rule of thumb is to build it just large enough for you and your most essential gear. Every cubic foot of extra space is a tax on your energy reserves, forcing your body to burn precious calories just to stay warm.
If you’re with others, a slightly larger but still snug shelter is the way to go. Huddling together is an incredibly efficient way to share body heat and conserve everyone’s energy.
Can I Safely Use a Propane Heater Inside a Tent or Snow Cave?
Using a portable propane heater, like the popular Mr. Heater Buddy, inside any enclosed space is extremely dangerous without proper, constant ventilation. These heaters chew through oxygen and pump out carbon monoxide (CO)—a silent, odorless killer that can build up to lethal levels frighteningly fast in a sealed shelter.
If you absolutely must use one, you need at least two vents: a low one to draw in fresh air and a high one to let CO and other exhaust gases escape. Never, ever fall asleep with an unvented heater running. A battery-operated CO detector isn’t a luxury; it’s a critical piece of safety gear in this scenario. For any kind of sustained heating, a proper wood-burning tent stove with a flue pipe is a much safer bet.
What Are the First Signs of Hypothermia?
Early-stage hypothermia is often called the “umbles” because of how it impacts coordination and speech. You have to be watching for these signs in yourself and your partners constantly.
- Stumbling or loss of coordination
- Mumbling or slurred words
- Fumbling with simple tasks like zippers or gear
- Grumbling or sudden irritability and poor judgment
Uncontrollable shivering is another classic sign. If the shivering stops, you are in grave danger. That means the body is losing its ability to generate heat, and core temperature is plummeting to a critical level. Get into a shelter, get out of wet clothes, and start the slow rewarming process immediately.

