When the power goes out, your fridge and freezer are just insulated boxes on a countdown to spoilage. For generations, people survived without electricity by mastering time-tested ways to preserve meat. These methods—like salting, smoking, drying, and canning—work by creating an environment where bacteria simply can’t survive, turning perishable food into a reliable, long-term protein source.
Why Meat Preservation Is a Core Survival Skill
In a world that runs on fragile supply chains and an even more fragile power grid, knowing how to keep food from spoiling is more than a rustic hobby. It’s a foundational survival skill. For a comprehensive step-by-step approach, see our complete guide on how to preserve meat without refrigeration. When a natural disaster knocks out power for weeks or a crisis empties grocery store shelves, that expensive meat in your freezer becomes a ticking clock.
Learning to preserve that meat changes the game entirely. It puts you back in control of your food security, turning what would have been a massive loss into a life-sustaining asset for your family. This is about true self-reliance, not just stockpiling.
Beyond the Refrigerator Door
Once you master these techniques, you’re no longer at the mercy of modern conveniences. A successful hunt, a bulk purchase from a local farm, or the entire contents of your now-thawing freezer can be safely processed into shelf-stable food that needs zero electricity. This skill is a lifesaver in a few key scenarios:
- Grid-Down Emergencies: You can salvage every last bit of meat from a dead freezer that would otherwise go to waste.
- Supply Chain Failures: When the stores are bare, your preserved meats provide the high-quality protein your family needs to stay strong.
- Off-Grid Living: For homesteaders or anyone living remotely, these aren’t emergency skills—they’re daily essentials for managing your food.
These aren’t new-fangled tricks; you’re adopting the same strategies our ancestors used for centuries to get through harsh winters and uncertain times. This is the heart of real preparedness.
The ability to preserve a harvest—whether from a hunt or a garden—is what separates simple stockpiling from genuine self-sufficiency. It’s the bridge between having food for a week and having food for a year.
A Skill for Modern Preparedness
Ultimately, preserving meat without refrigeration is about building a food system that can withstand shocks. It diversifies your pantry far beyond store-bought cans and freeze-dried pouches, giving you high-quality, homemade protein that you control from start to finish.
This is a critical piece of a well-rounded preparedness plan, which you can read more about in our guide to survival skills you must master. It ensures that no matter what happens—a storm, an economic downturn, or just a personal choice to live more simply—your family will have the protein needed to stay healthy and strong. It’s a hands-on investment in your household’s security.
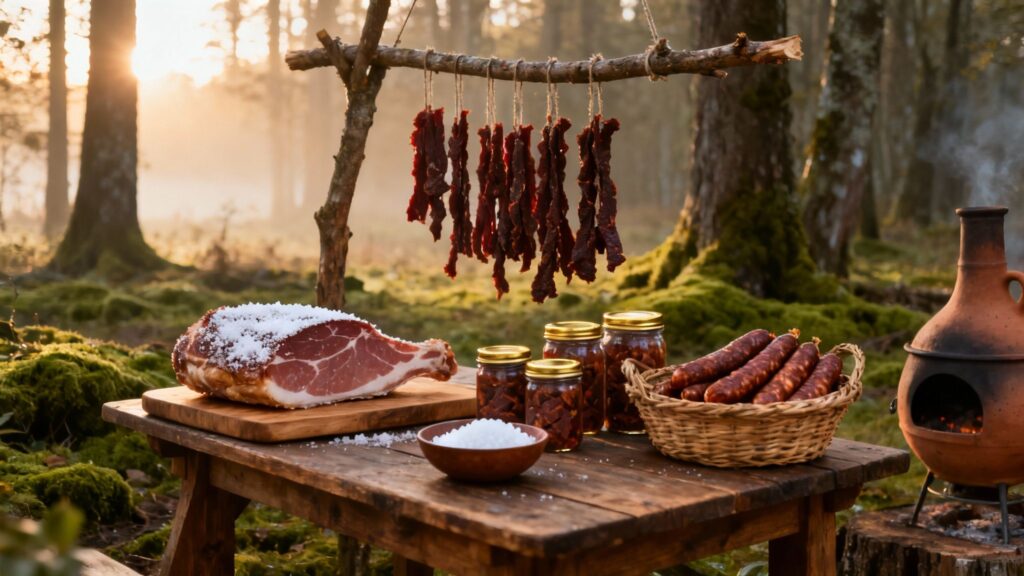
Mastering the Fundamentals of Salt Curing and Smoking
Long before refrigerators were in every kitchen, salt and smoke were the gold standard for preserving meat. These weren’t just about adding flavor; they were a survival science, turning fresh meat into shelf-stable protein that could get a family through the lean months. Getting a handle on these ancient techniques is a cornerstone of true food independence.
For thousands of years, salt has been humanity’s most trusted method for keeping meat from spoiling. Evidence of its use stretches all the way back to ancient civilizations. It’s a simple but brilliant process: salt pulls moisture out of the meat, creating an environment where the bacteria that cause rot simply can’t survive.
Water is life for bacteria, so taking it away stops them in their tracks. Colonial American families relied on packing their butchered animals in salt to last the winter. You can dig deeper into the history of this foundational technique in studies on traditional food preservation.
The Science of Curing with Salt
At its heart, salt curing is just dehydration through osmosis. When you pack meat in salt, you create an intensely saline environment on the surface. This imbalance forces water molecules out of the meat’s cells, drying it from the inside out and making it a terrible place for microbes to grow.
But you can’t just grab any salt from the shaker. Standard iodized table salt will give your cured meat a bitter, metallic taste, and its anti-caking additives can mess with the curing process. For good, reliable results, always go with non-iodized salt.
Recommended Salts for Curing:
- Kosher Salt: The coarse flakes are great for dry rubs because they stick to the meat’s surface so well.
- Sea Salt: This is a pure option with no additives, giving you a clean, straightforward salt flavor.
- Specialized Curing Blends: Products like Morton Tender Quick are a lifesaver for beginners. They come pre-mixed with salt and curing agents (sodium nitrite and nitrate), which simplifies the process and adds a critical layer of safety against botulism while also improving the meat’s color and taste.
These curing salts are your first line of defense against the nasty Clostridium botulinum bacteria, the cause of botulism. For any meat you plan to store long-term, they are absolutely essential.
Practical Application: Dry Curing Pork Belly for Bacon
Let’s get our hands dirty with a real-world example: dry-curing a five-pound pork belly to make bacon. The secret to doing this safely and getting consistent results every time is using precise measurements based on weight. This is called an equilibrium cure, and you’ll need an accurate kitchen scale.
For a basic bacon cure, these are the standard ratios to follow:
- Salt: 2.5% of the meat’s weight.
- Sugar: 1% of the meat’s weight (this helps balance the saltiness).
- Prague Powder #1: 0.25% of the meat’s weight (this is your safety net).
First, weigh your pork belly. Let’s say it’s exactly 2,268 grams (5 lbs). Now, do the math for your cure: 56.7g of salt, 22.7g of sugar, and 5.7g of Prague Powder #1. Mix these ingredients together until the pink curing salt is completely and evenly distributed.
Rub that mixture into every nook and cranny of the pork belly. Get it all over the surface. Then, seal it in a zip-top bag or, even better, a vacuum-seal bag. Let it cure in a cold spot (under 40°F) for about 7-10 days. You’ll know it’s done when the entire belly feels firm to the touch. All that’s left is to rinse off the extra cure, pat it completely dry, and get it ready for the smoker.
Key Takeaway: Precision is everything in curing. Never, ever “eyeball” your measurements. An accurate digital scale isn’t just a nice-to-have; it’s a non-negotiable tool for safely preserving meat without a fridge.
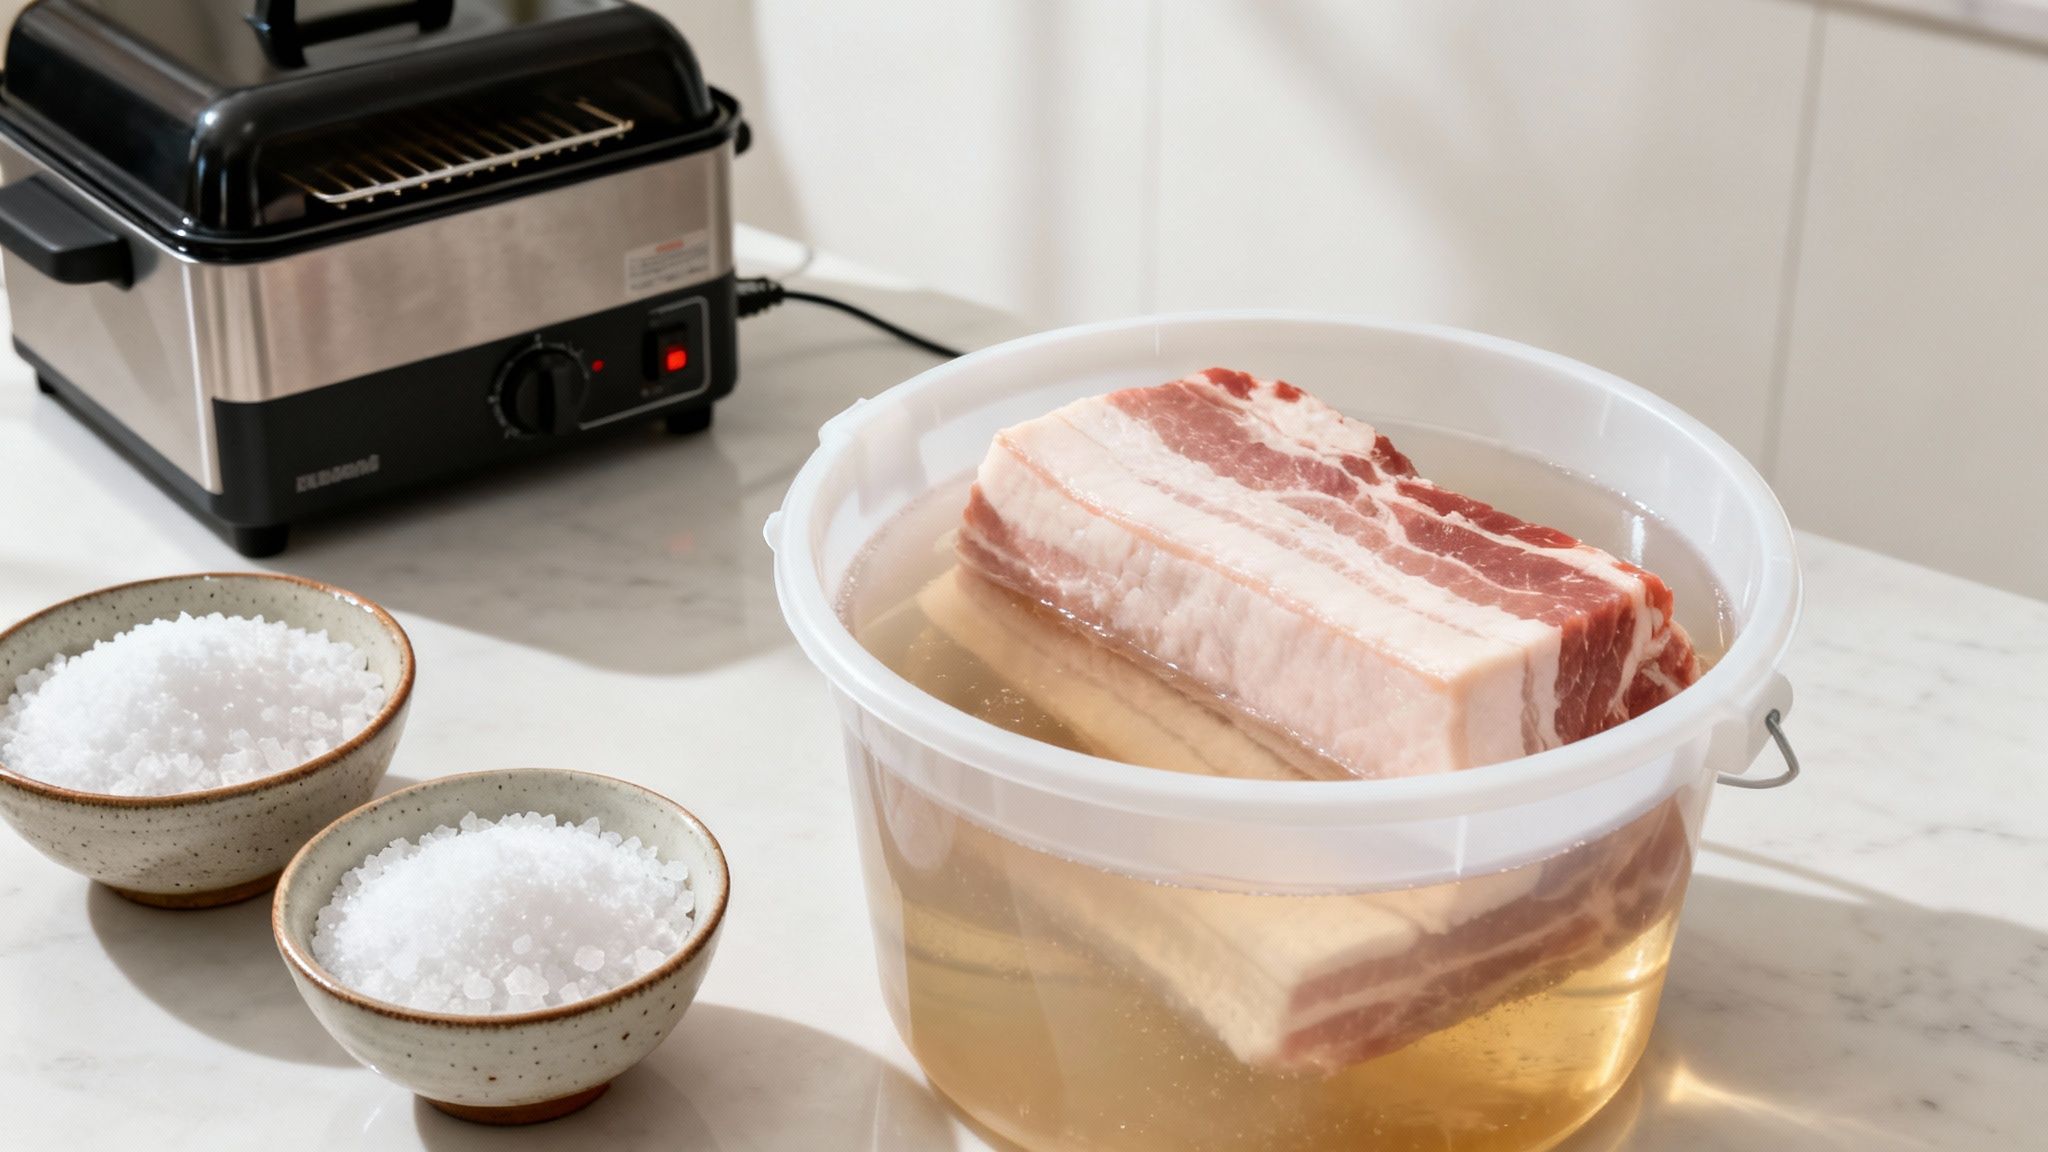
Getting Started with Brining
Brining, or wet curing, means soaking meat in a saltwater solution. It’s a fantastic way to handle bigger cuts, like a pork shoulder destined for pulled pork or a whole ham. A basic brine is just salt and sugar dissolved in water. You’ll need food-grade buckets or other large, non-reactive containers for the job.
A good rule of thumb for a starting brine is one cup of kosher salt and a half-cup of sugar for every gallon of water. The meat needs to be completely underwater—use a plate or rock to weigh it down—to ensure it cures evenly. Just like with dry curing, this has to be done in a cool place to stop spoilage before the salt can work its magic.
Adding a Layer of Protection with Smoking
Smoking and salt curing are the perfect pair. Smoking doesn’t just add that incredible flavor we all love; it provides another layer of preservation. The process works in two ways: the low heat continues to dry the meat, and the chemical compounds in the wood smoke act as natural antimicrobials.
You’ll generally run into two different approaches here.
Hot Smoking vs Cold Smoking
Knowing the difference between hot and cold smoking is critical.
- Hot Smoking: This method actually cooks the meat at temperatures between 200-250°F. It’s what you do for things like ribs or pulled pork. The final product is delicious, but it’s cooked meat, not preserved meat, and it still needs to be refrigerated.
- Cold Smoking: This is the real deal for preservation. Here, the temperature in the smoker stays below 90°F. The goal isn’t to cook the meat at all but to slowly dehydrate it while enveloping it in that preservative smoke. This is how you make bacon, traditional hams, and certain types of sausage.
A modern unit like a Masterbuilt Electric Smoker can make keeping those low temperatures steady a whole lot easier, especially if you’re doing bigger batches. Of course, you can always build your own DIY smoker. The trick is to have enough distance between your fire and your meat so the smoke has time to cool down before it hits the food. A good, consistent fire is the foundation of all smoking, a skill you can brush up on in our guide on how to make fire without matches.
Once that pork belly is cured and cold-smoked, it’s officially bacon. Stored correctly in a cool, dry place, it will last worlds longer than its fresh version. The one-two punch of salt and smoke creates a powerful barrier against spoilage, giving you a reliable source of protein whenever you need it.
Creating Lightweight Rations with Jerky and Biltong
Drying is one of humanity’s oldest and most reliable tricks for preserving meat. It’s the simple science behind jerky and biltong—power-packed, lightweight foods that are perfect for a bug-out bag, a long trek in the backcountry, or just stocking your pantry with protein that doesn’t need a plug.
The concept is brilliantly simple: remove enough moisture from the meat to make it an awful place for bacteria to grow.
This process turns heavy, perishable cuts into portable fuel that can last for months when you do it right. While it’s a straightforward idea, the execution demands attention to detail. That’s what separates safe, delicious dried meat from a wasted batch.
Selecting and Preparing Your Meat
The success of your jerky or biltong starts with the cut of meat you choose. Fat is the enemy of long-term storage. It doesn’t dehydrate properly and will eventually go rancid, ruining all your hard work. Always pick the leanest cuts you can find.
Excellent choices for drying include:
- Beef: Eye of round, top round, or flank steak are perfect because they have very little fat.
- Venison: Any large, lean muscle from the hindquarters is a fantastic choice.
- Other Game: Lean cuts from elk or bison work just as well.
Once you’ve got your meat, meticulously trim off every last speck of visible fat. A little extra time spent here pays off big time in shelf life.
To make slicing easier, pop the meat in the freezer for 1-2 hours to firm it up. This lets you cut consistent, thin strips, about ¼-inch thick. How you slice it matters, too. Slicing with the grain gives you that classic chewy, tough jerky, while slicing against the grain creates a more tender, brittle piece that’s easier to chew.
The Key Differences Between Jerky and Biltong
While people often lump them together, jerky and biltong are not the same. Their preservation methods are totally different, which leads to distinct textures, flavors, and even shelf stability. Knowing the difference helps you pick the right method for your situation.
Jerky is usually made from thin meat strips marinated in a salty, often acidic solution before being dried with low heat. That heat might come from an electric dehydrator, an oven on its lowest setting, or the gentle heat from a low fire.
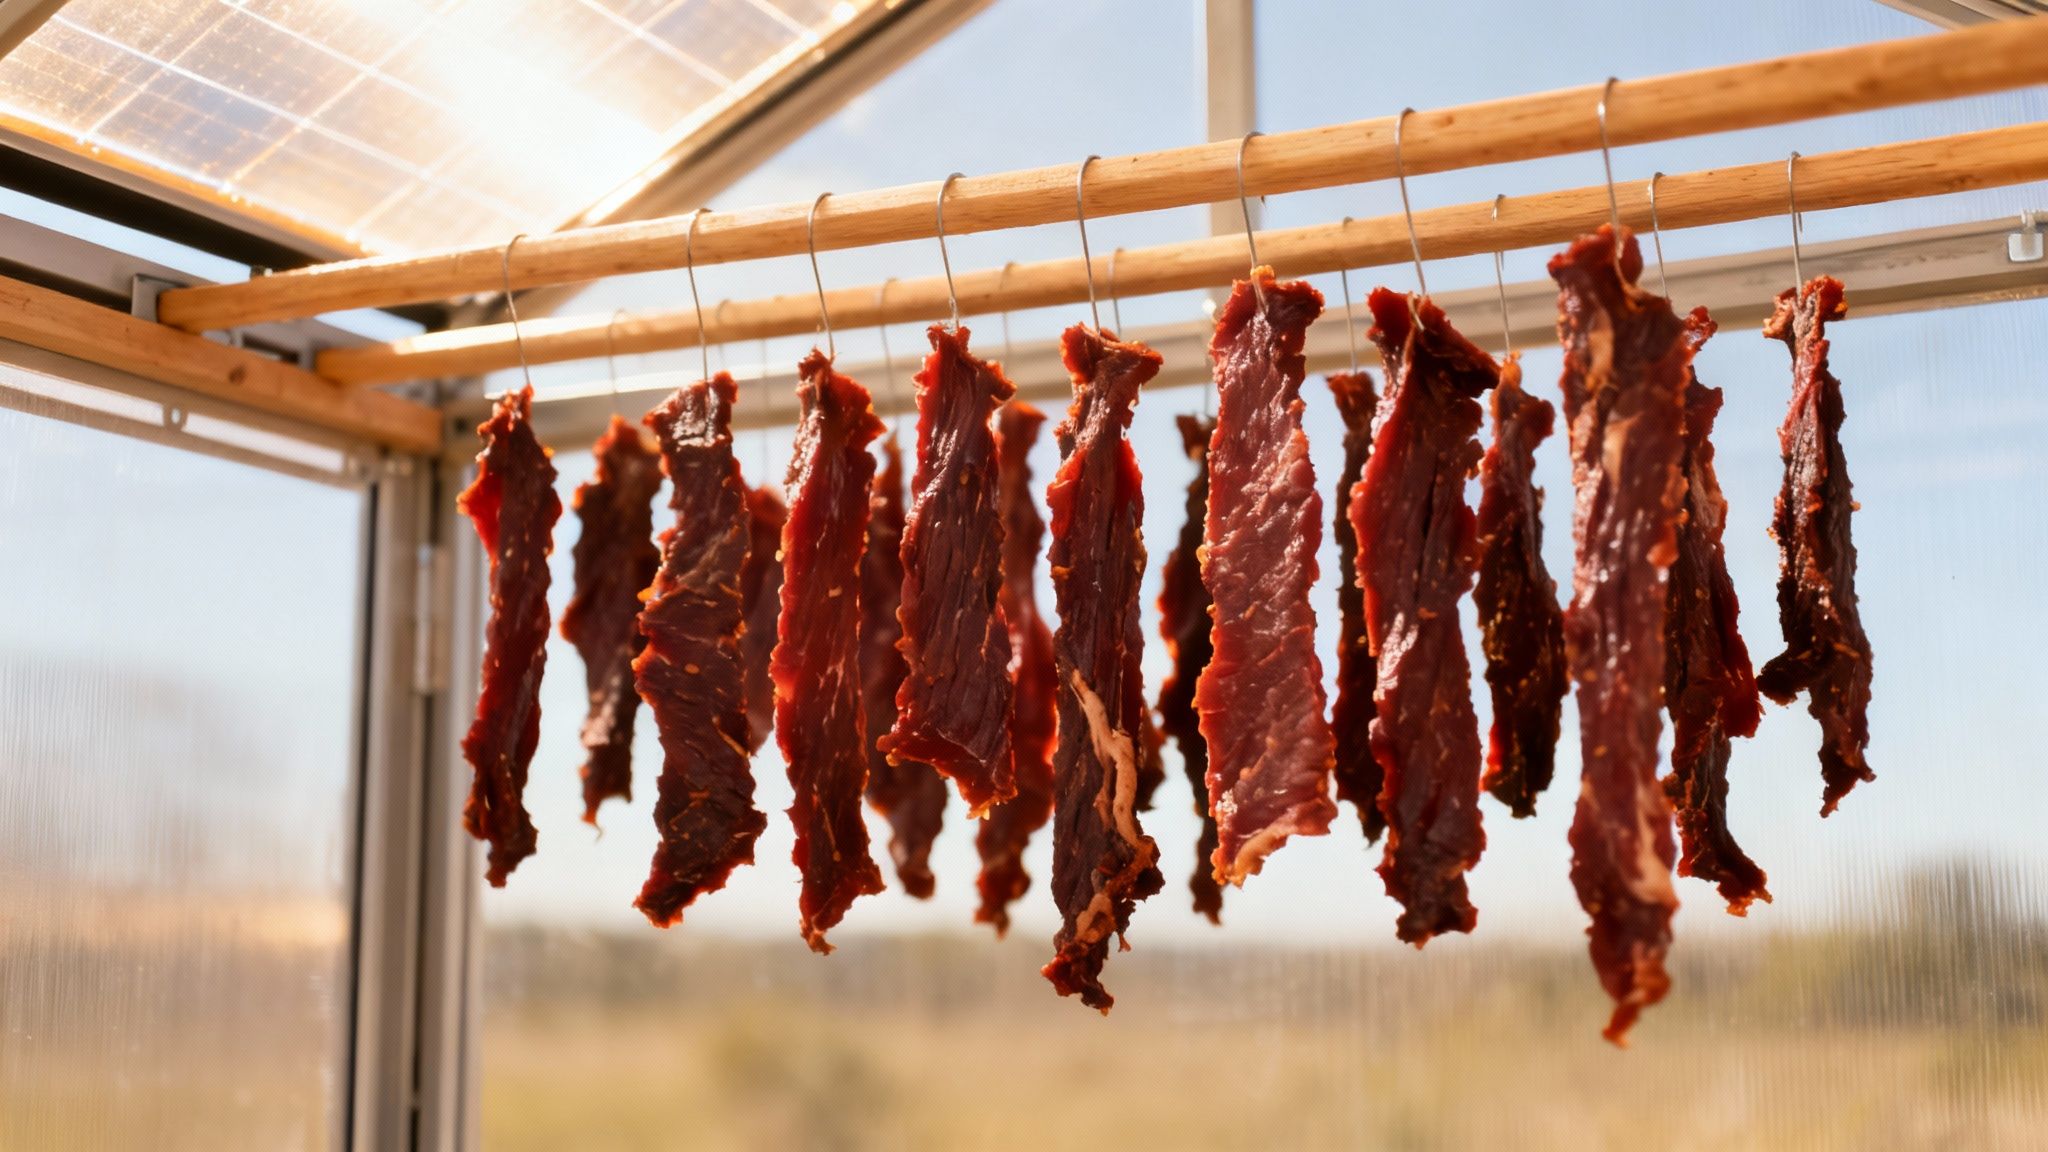
Biltong, a South African tradition, takes a different approach. It involves curing thicker cuts of meat in a mix of vinegar, salt, and spices (coriander is classic) before hanging it to air-dry in a cool, breezy spot. There’s no heat involved at all—it relies on air circulation and the protective barrier of the vinegar and salt cure. This slow, cool process results in a tender product that’s incredibly shelf-stable.
Biltong’s reliance on a vinegar cure and air-drying makes it a fantastic off-grid preservation method. It requires no electricity and its acidic barrier offers a robust defense against spoilage during the drying process.
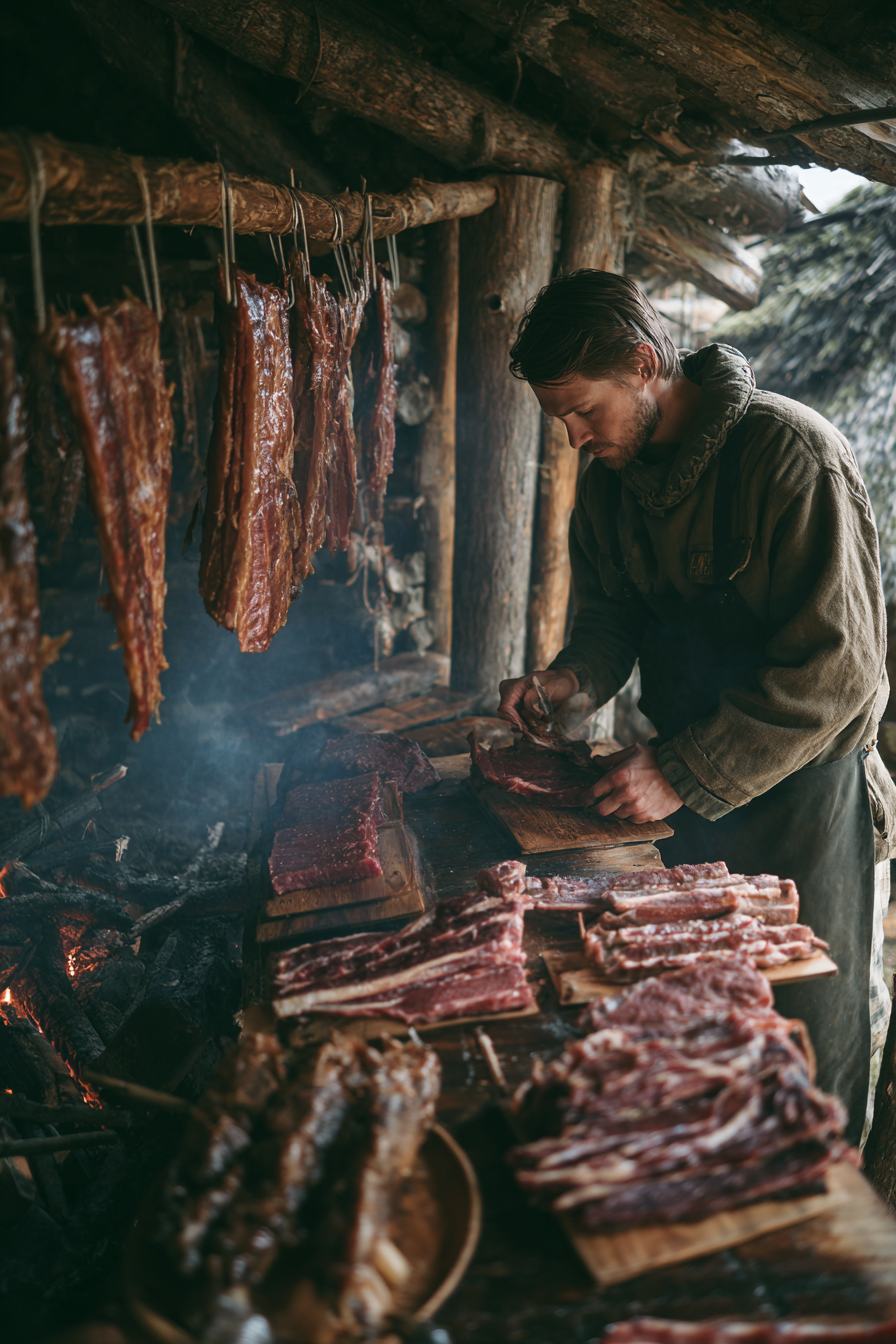
Off-Grid Drying Techniques
You don’t need fancy gear to dry meat. For centuries, our ancestors used the sun and wind, and you can too. A solar oven, which you can build from a cardboard box and some aluminum foil, works great for creating a low-heat environment for jerky strips.
Another solid method is using a very low, smoky fire. The trick is to hang the meat far enough from the heat source that it dries slowly instead of cooking. You want to keep the temperature below 140°F. This gentle warmth, combined with the antimicrobial properties of smoke, creates a beautifully preserved final product.
Of course, if you have a generator or another power source, a purpose-built appliance makes things much easier and more consistent. A unit like a Nesco Food Dehydrator gives you precise temperature control, ensuring your meat dries safely and evenly every time. If you’re looking to invest in one, our guide on choosing the best food dehydrator can point you in the right direction.
No matter which method you use, the final safety check is always the same. Properly dried meat should feel leathery and tough. When you bend a piece, it should crack but not snap in half. If it snaps, it’s over-dried. If it just bends without cracking, it still has too much moisture and needs more time. Getting it to that perfect state is your guarantee of a safe, long-lasting food source.
Pressure Canning and Fermentation: The Gold Standard for Long-Term Storage
When you’re ready to move beyond jerky and smoked meats, it’s time to tackle the skills that unlock true long-term food security: pressure canning and fermentation. These aren’t just preservation methods; they’re the gold standard for creating meal-ready foods that can sit on your shelf for years, completely independent of the power grid.
Pressure canning stands alone as the only method certified by food safety experts for preserving low-acid foods like meat, poultry, and fish at home. Fermentation, on the other hand, is an ancient art, using beneficial bacteria to create a protective, acidic shield where dangerous pathogens simply can’t survive.
Before we dive in, understanding the strengths of each method is key to choosing the right approach for your family’s needs.
Choosing Your Meat Preservation Method
This table breaks down the primary meat preservation techniques, outlining their best use cases, the skill and equipment required, and what you can expect in terms of shelf life. It’s designed to help you decide where to focus your efforts.
| Method | Best For | Skill Level | Equipment Needed | Shelf Life |
|---|---|---|---|---|
| Drying/Jerky | Lightweight, portable protein for bug-out bags and snacks. | Beginner | Dehydrator, oven, or sun/air drying setup. | 1-2 months (homemade) |
| Smoking | Adding flavor and creating semi-preserved cuts (bacon, hams). | Intermediate | Smoker (hot or cold), curing salts. | Weeks to months |
| Salt-Curing | Dense, long-lasting cured meats like prosciutto and salt pork. | Intermediate | Curing salts, non-reactive container, cool/humid space. | 6 months+ |
| Pressure Canning | Shelf-stable, meal-ready meats (cubed beef, ground pork, chicken). | Advanced | Pressure canner, jars, lids. | 2-5 years |
| Fermentation | Creating shelf-stable sausages like salami and pepperoni. | Advanced | Meat grinder, stuffer, starter cultures, curing chamber. | 6 months+ |
Ultimately, a combination of these methods will give you the most resilient and versatile food storage system. Now, let’s get into the specifics of the two most durable methods.
Why Pressure Canning Is Non-Negotiable for Meat
Let’s get one thing straight right away: you cannot safely can meat in a boiling water bath. It’s a dangerous myth that could have fatal consequences. Meat is a low-acid food, which creates the perfect oxygen-free environment for Clostridium botulinum spores to wake up and produce their deadly neurotoxin.
Boiling water only ever reaches 212°F (100°C). That’s not nearly hot enough to kill those incredibly tough spores. A pressure canner, however, is a game-changer. By trapping steam, it builds pressure and raises the internal temperature to a scorching 240-250°F (116-121°C). This intense heat is the only way to guarantee every single spore is destroyed, making your canned meat absolutely safe for years.
Investing in a reliable, heavy-duty unit like an All American Pressure Canner is a direct investment in your family’s well-being.
The core principle of pressure canning is sterilization, not just preservation. You are creating a commercially sterile product in a jar, free from the microorganisms that cause spoilage and deadly illness.
When you’re ready to start, you’ll choose between two main ways to pack your jars.
- Raw Pack: This is the quicker way to get started. You simply pack raw meat directly into your clean jars. The downside is the meat tends to shrink more during processing, which can look less appealing.
- Hot Pack: Here, you partially cook the meat first—browning, searing, or boiling it—before packing it into hot jars. This extra step is worth it. It shrinks the meat ahead of time and pushes air out of the tissue, giving you a much better final product.
For any fatty meat, like ground beef or pork sausage, hot-packing is the only way to go. It allows you to render and drain off all that excess fat that could otherwise prevent your jars from sealing properly.
The Art of Fermentation for Shelf-Stable Sausages
Fermentation is one of the oldest and most fascinating ways to preserve meat without a refrigerator. It’s the ancient alchemy behind shelf-stable sausages like salami, pepperoni, and soppressata. This process doesn’t use heat for safety; it uses biology. You intentionally introduce beneficial bacteria, known as starter cultures, to the meat mixture.
These helpful microbes go to work consuming the sugars in the meat and producing lactic acid as a byproduct. This process dramatically drops the meat’s pH, creating an environment so acidic that spoilage pathogens can’t survive. It’s a brilliant biological defense mechanism that humans have perfected over thousands of years.
Fermentation represents one of the oldest and most scientifically sophisticated meat preservation methods, with evidence of its use spanning millennia across numerous cultures. Before the commercialization of starter cultures in the 1950s, artisans relied on a technique called ‘back slopping,’ where a small portion of a successfully fermented batch was added to fresh meat in subsequent batches, allowing natural environmental bacteria to establish consistent preservation conditions. Research on fermented and dried pepperoni inoculated with dangerous E. coli O157:H7 demonstrated that a thermal process of 53°C (128°F) held for 60 minutes, combined with fermentation and drying parameters, achieved adequate pathogen lethality. Discover more insights about this fascinating research on meat science.
Step-by-Step Pressure Canning Cubed Beef
Ready to try it? Let’s walk through canning cubed beef using the hot-pack method. It’s a fantastic, versatile staple to have in any pantry.
Preparing Your Jars and Meat
- Prep Your Station: Get your pint or quart jars clean and place them in simmering water to keep them hot. Add 2-3 inches of simmering water to your pressure canner itself.
- Pre-cook the Beef: Cut your beef into one-inch cubes and brown them in a skillet. You’re just looking to sear the outside, not cook them all the way through.
- Pack the Jars: Using a jar funnel makes this part much cleaner. Pack the hot beef cubes into your hot jars, making sure to leave 1 inch of headspace at the top. Add salt if you like (½ tsp for pints, 1 tsp for quarts).
- Add Hot Liquid: Ladle boiling beef broth, water, or even tomato juice over the meat, maintaining that crucial 1-inch headspace.
- Get the Bubbles Out: Slide a plastic bubble remover or a thin spatula around the inside walls of the jar. You’ll be surprised how many air pockets are trapped down there.
- Seal It Up: Wipe the jar rims with a clean cloth dipped in a little white vinegar. This cuts through any grease and ensures a perfect seal. Place a new, clean lid on top and screw the band on until it’s just fingertip-tight—don’t crank it down.
- Process in the Canner: Place the jars on the rack inside your canner. Lock the lid and let the canner vent a steady stream of steam for 10 full minutes before you put the weight on. Bring it up to the right pressure for your altitude (10 lbs for a weighted gauge at 0-1,000 feet). Process pints for 75 minutes and quarts for a full 90 minutes.
Processing in the Pressure Canner
When the time is up, turn off the heat and just let the canner be. It needs to depressurize naturally on its own. Once the pressure gauge hits zero, wait another five minutes, then carefully open the lid away from your face. Let the jars sit in the hot water for another 10 minutes before moving them to a towel-lined counter to cool for 12-24 hours.
Mastering these skills is a huge step toward real food independence. It gives you the power to preserve large amounts of meat safely and for the long haul. For a broader look at off-grid preservation, check out our guide on how to preserve food without electricity.
How to Store Preserved Meats for Maximum Longevity
You’ve put in the hard work to cure, can, or dry your meat—that’s a huge win. But the job isn’t over yet. How you store that bacon, canned venison, or jerky is what ultimately dictates its shelf life and safety. Think of proper storage as your final, critical line of defense.
The golden rule is beautifully simple: keep it cool, dark, and dry. These three conditions are the sworn enemies of spoilage. Heat accelerates the chemical reactions that make fats go rancid, light degrades nutrients, and moisture is an open invitation for mold and bacteria. Your mission is to shield your hard-won food from all three.
Tailoring Storage to the Preservation Method
Different preservation methods call for slightly different storage tactics. What works for a jar of pressure-canned beef isn’t the best approach for a batch of jerky.
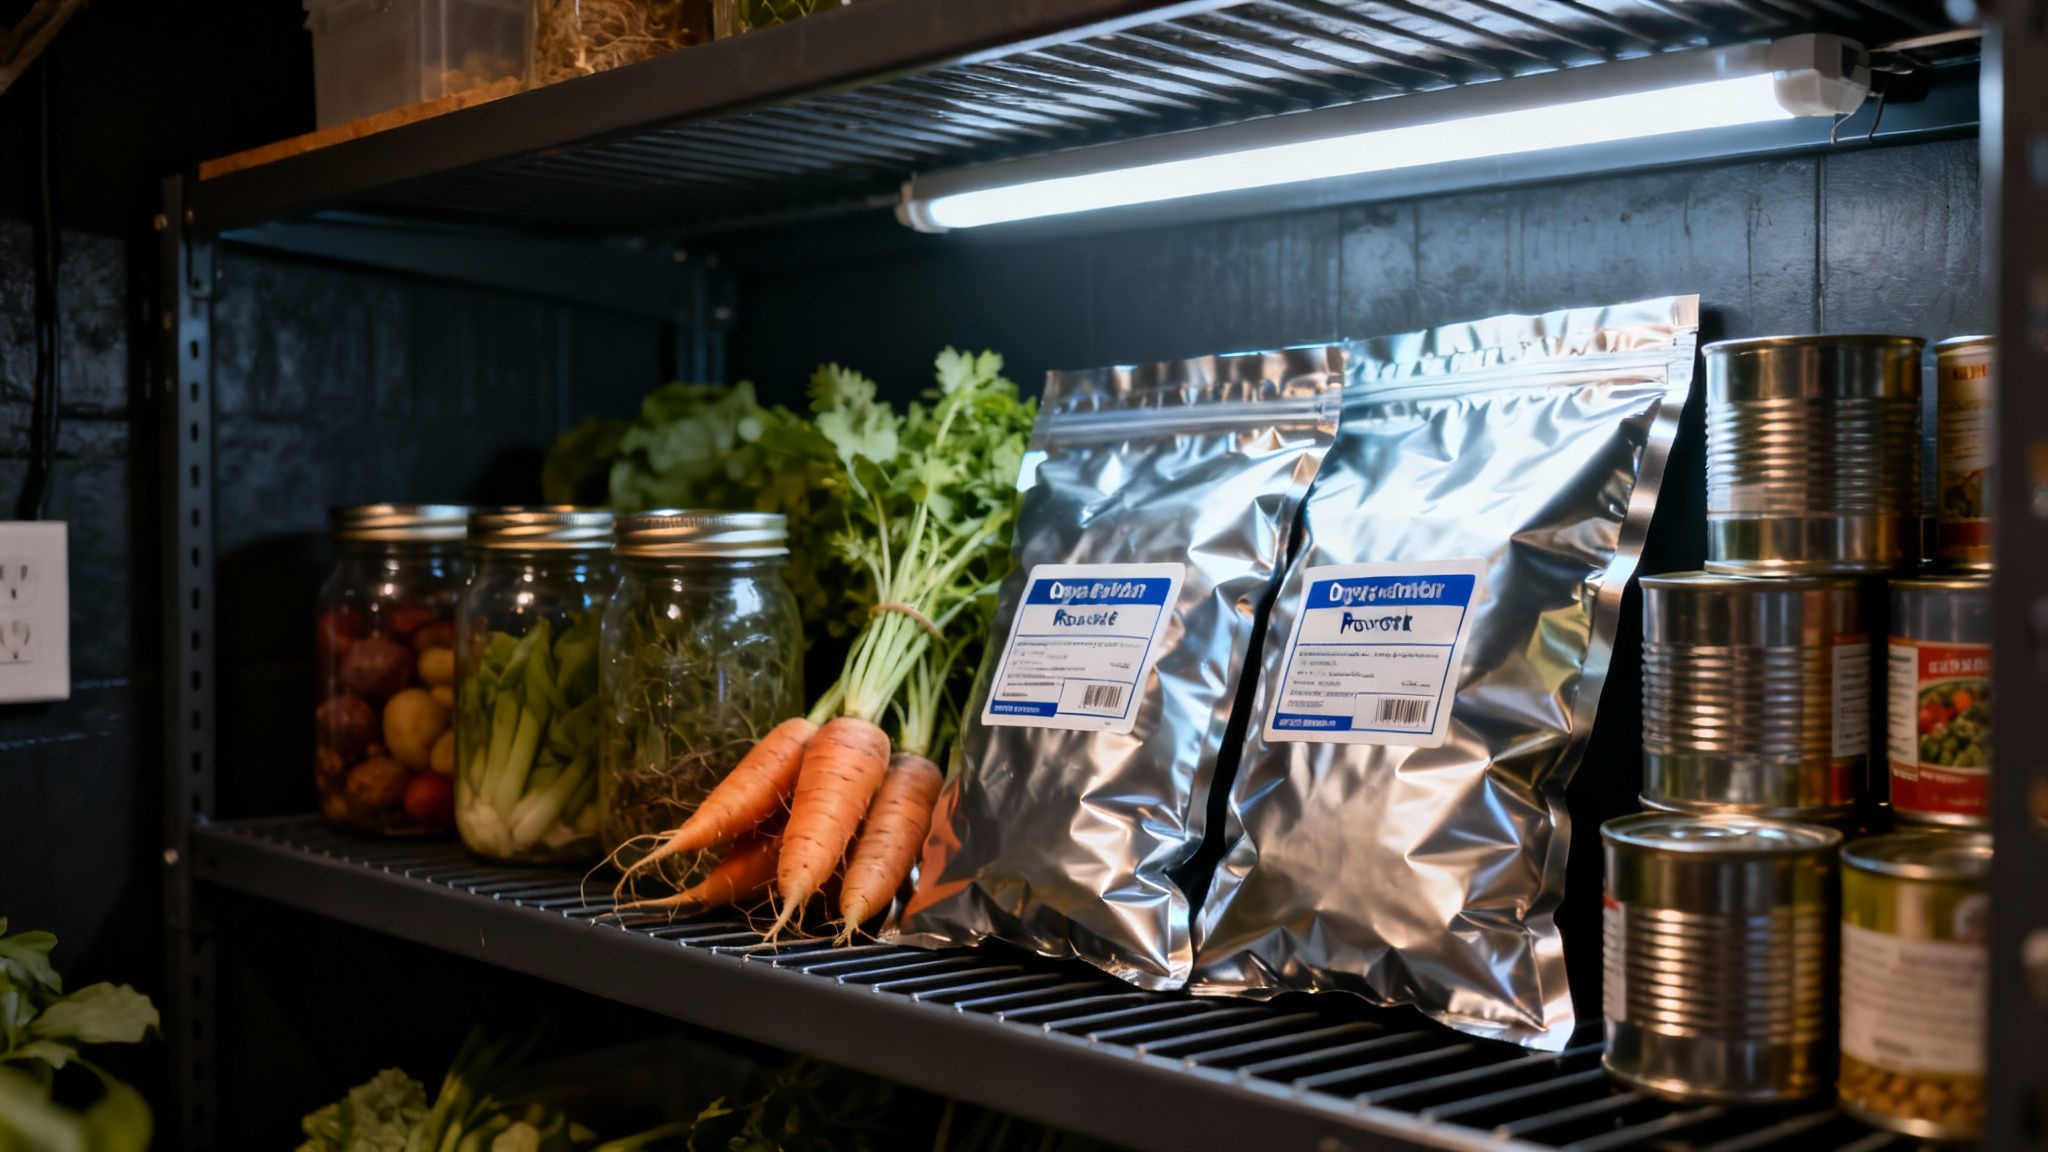
Canned Meats: Keep your jars in a single layer on sturdy shelving, far away from temperature swings. A basement, pantry, or root cellar is perfect. Resist the urge to stack them directly on top of each other, as the weight can stress and weaken the vacuum seals over time.
Dried Meats (Jerky & Biltong): Oxygen is your biggest enemy here. It’s what causes any leftover fat in the meat to turn rancid. The absolute best solution is vacuum sealing. A FoodSaver system is a popular and reliable tool for this, but pairing it with mylar bags and an oxygen absorber in each one offers superior protection. This simple combination can take jerky from lasting a few months to well over a year. For a deep dive, check out our complete guide to using a vacuum sealer for food storage.
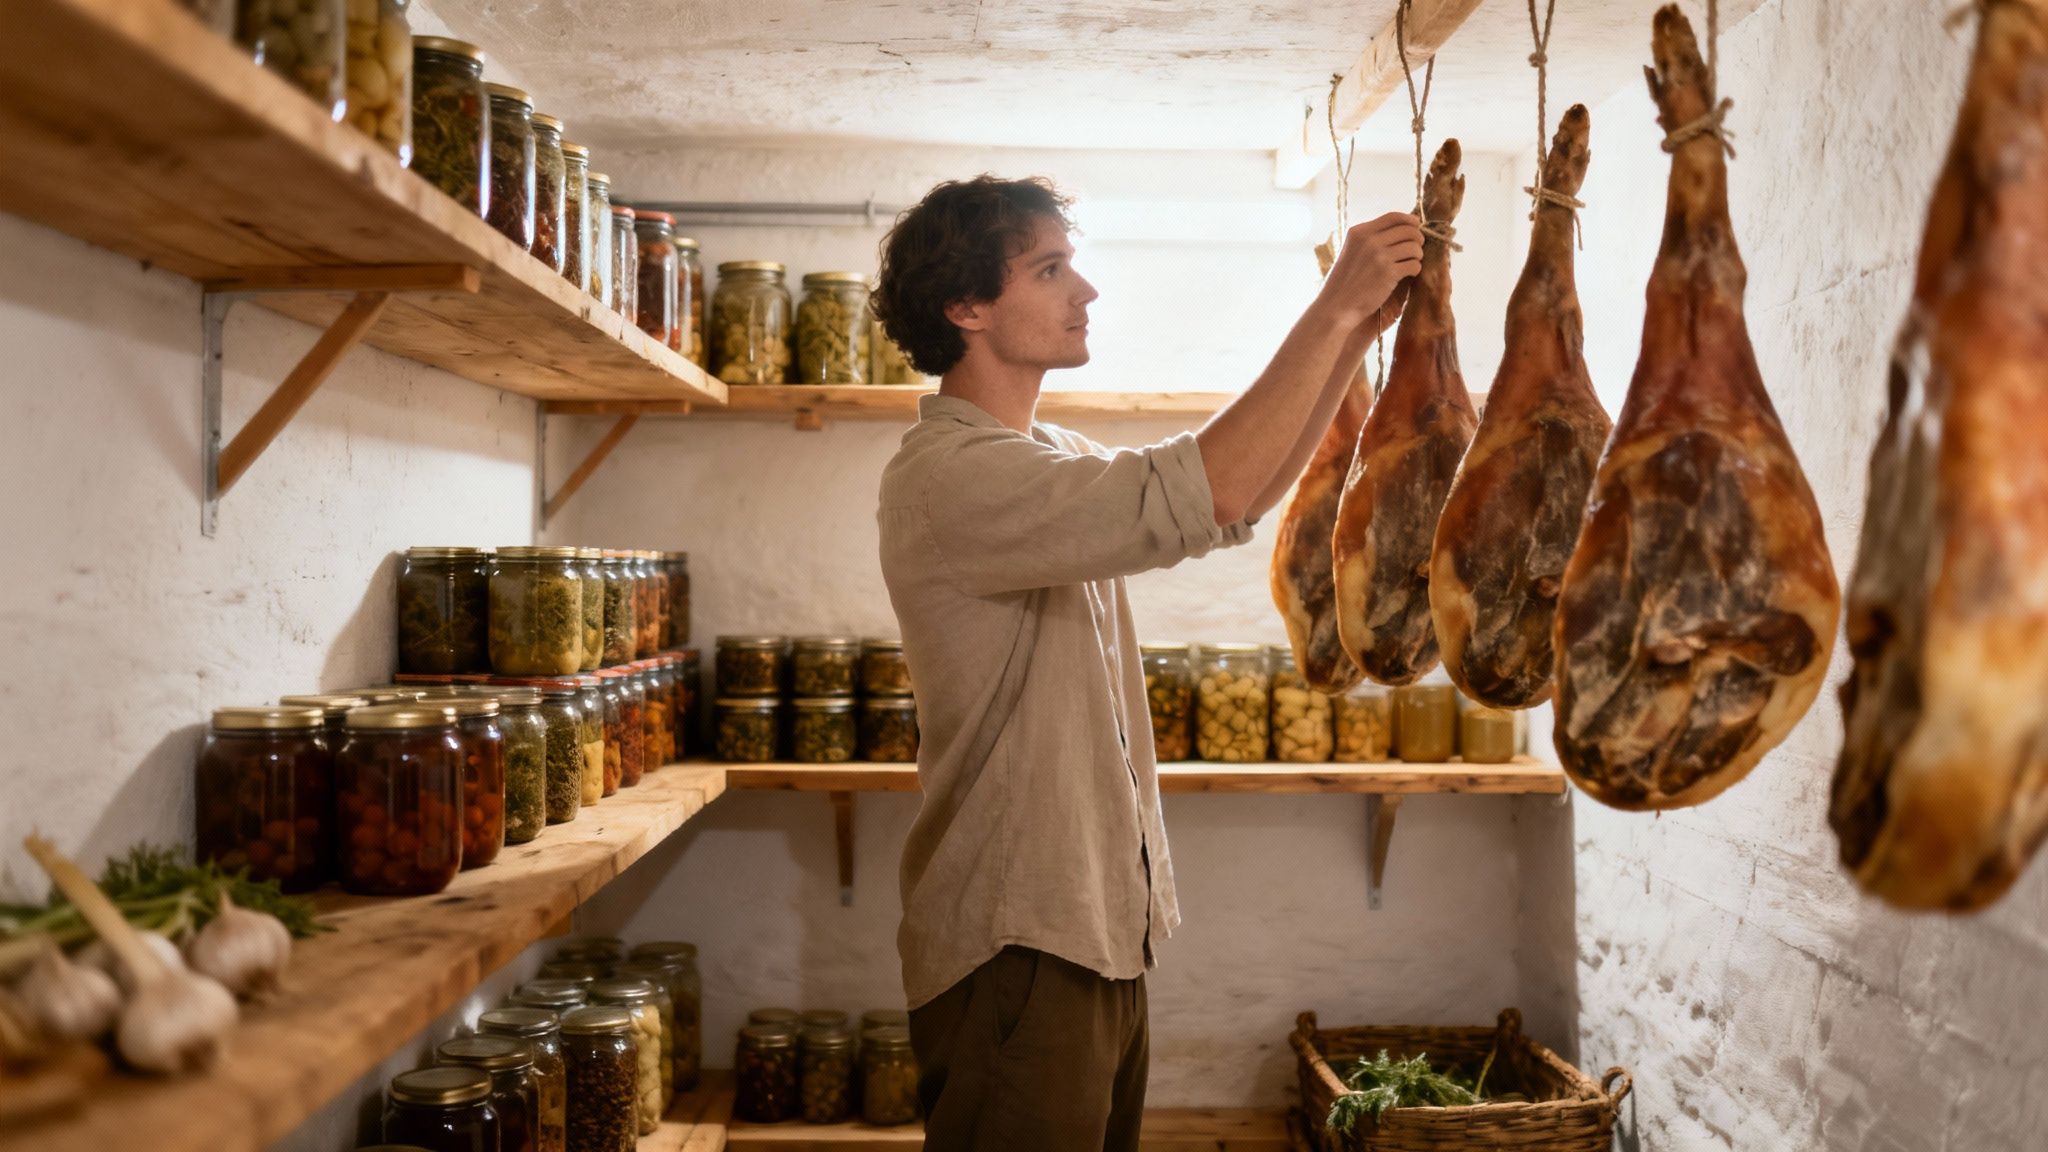
Salt-Cured and Smoked Meats: For whole-muscle cures like country hams or slabs of bacon, the old ways are often the best. Hang them in a cool, humid spot like a cellar. To keep pests off, wrap them loosely in breathable material like cheesecloth or a muslin bag. For serious long-term storage, some old-timers would even pack a fully cured ham in lard or clean wood ash to create a perfect airtight barrier.
Key Insight: The quality of your storage area is just as crucial as your preservation technique. A well-organized, climate-controlled space turns your preserved food from a short-term success into a long-term asset.
While preserved meats offer excellent protein sources, diversifying your pantry with foods that last 25 years creates a truly resilient food storage system.
Best Practices for Your Food Stores
Beyond finding the right spot, a few organizational habits will make all the difference in maintaining a safe and usable food supply. These aren’t just suggestions; they’re essential practices that prevent waste and ensure you’re always using your oldest stock first.
First, label everything. I can’t stress this enough. Every single jar, bag, or wrapped cut of meat needs to be clearly marked with what it is and the date it was preserved. This simple step eliminates all guesswork.
Next, live by the “first in, first out” (FIFO) rule. When you add new items, put them at the back of the shelf. Move the oldest items to the front. This systematic rotation guarantees nothing gets lost in the back only to be discovered long after it’s expired.
Finally, make inspections a regular habit. Once a month, take five minutes to look over your stores. Check your canned goods for any bulging lids or broken seals. Squeeze vacuum-sealed bags to ensure they’re still tight. Give cured meats a quick inspection for any off smells, mold, or sliminess. Catching a problem early can save the rest of your batch from contamination.
Common Questions About Off-Grid Meat Preservation
As you start preserving meat without a fridge, you’re going to have questions. This is a skill with a real learning curve, and getting the right answers is how you build confidence—and make sure your food is safe to eat. Let’s tackle some of the most common hurdles people run into.
What Is the Safest Method for a Beginner?
If you’re just getting your feet wet, making jerky is the most forgiving place to start. The process is simple, you don’t need much equipment, and it’s easy to tell when it’s done right. You’re just looking for that classic leathery texture—the meat should crack when bent but not snap clean in two.
Salt curing is another fantastic option, though it demands more attention to detail. You have to be meticulous about weighing your salt and any curing agents. While pressure canning gives you the longest shelf life, it also has the steepest learning curve and the most severe consequences if you mess up. I always tell people to get comfortable with drying or salt-curing before they even think about buying a pressure canner.
Can I Use Regular Table Salt for Curing?
You can, but you really shouldn’t. Most table salt has iodine and anti-caking agents mixed in, which can throw off the curing process, leave behind a metallic aftertaste, and mess with the final texture of the meat.
For a clean flavor and a reliable cure, stick with non-iodized salts. Your best bets are:
- Kosher Salt: The coarse flakes are great for creating a salt crust on whole cuts.
- Sea Salt: It’s pure, with no additives, giving you a clean, straightforward saltiness.
- Pickling or Curing Salt: This is what the pros use. It’s fine-grained and dissolves easily, ensuring an even cure.
Using one of these guarantees the only thing you taste is the meat and whatever spices you decided to add.
When it comes to your health, the rule is simple and non-negotiable: “When in doubt, throw it out.” The risk of getting seriously sick is never worth saving a questionable batch of meat.
How Do I Know if My Preserved Meat Has Spoiled?
Your senses are your best defense. Before you even think about tasting something, give your preserved meat a good, hard look. Trust your eyes, nose, and hands—they’ll tell you what you need to know.
Be on the lookout for the obvious red flags: fuzzy mold spots, a slimy film on the surface, or any kind of funky smell. If it smells sour, rancid, or like ammonia, it’s garbage.
With pressure-canned goods, you need to be even more careful. First, check the lid. It should be concave, sucked down tight in the middle. If the lid is bulging, flat, or makes a popping sound when you press it, that seal has failed. Any aggressive hiss or liquid spraying out when you open the jar is another major warning sign.
Are Nitrates and Nitrites Necessary for Curing?
For any cure that’s going to be aged long-term and not cooked at high temperatures—think salami, prosciutto, or country ham—using curing salts with sodium nitrite is a non-negotiable safety measure. It is your single best defense against the growth of Clostridium botulinum, the nasty bacteria that causes botulism.
There’s a reason products like Prague Powder #1 (for things like bacon) and Prague Powder #2 (for long, dry-aged projects) are the industry standard. They work. While some folks advocate for celery powder as a “natural” source, commercially prepared curing salts give you tested, predictable protection. For faster methods like jerky, they aren’t strictly required, but they do add an extra layer of safety and that familiar cured flavor and color.

