Learning how to start prepping is about taking smart, logical steps toward self-reliance. It’s not about some unlikely doomsday scenario; it’s about being ready for real-world events like a week-long power outage or a sudden winter storm. The idea is to gradually build up essential supplies and skills, giving you and your family empowerment and peace of mind.
Why Prepping Is More Practical Than Ever

Let’s be honest—the word “prepping” can conjure up images of underground bunkers and extreme survivalists. But modern prepping is much simpler. At its heart, it’s about being self-reliant enough to handle the common disruptions we all see on the news. Think about recent supply chain hiccups, unexpected power outages that last for days, or severe weather that cuts off a whole community.
This isn’t about living in fear; it’s about empowerment. Having a basic plan and the right supplies on hand brings a profound sense of security. It means you aren’t totally dependent on overwhelmed emergency services or scrambling for the last loaf of bread at the store. It’s practical insurance you hope you never need, but you’ll be incredibly grateful for it if you do.
Adopting a Readiness Mindset
The key to getting started is to shift your perspective. Don’t try to prepare for every disaster at once—that’s a recipe for burnout. Instead, focus on the most likely interruptions to your daily life. The best mindset is to start small, building skills and resources that have immediate, practical value.
This common-sense approach is gaining a lot of traction. The global disaster preparedness systems market hit $201.83 billion in 2024 and is expected to climb to $308.73 billion by 2029. That growth is a direct reflection of a wider understanding that major events are happening more often. Just look at something like Hurricane Katrina, which caused $125 billion in damage and displaced over a million people. You can find more insights on this growing market over at Research and Markets.
Preparedness is a journey, not a destination. It’s about making steady, consistent progress toward self-sufficiency. Each small step, from storing extra water to learning a new skill, builds resilience and confidence.
Starting Your Prepping Journey
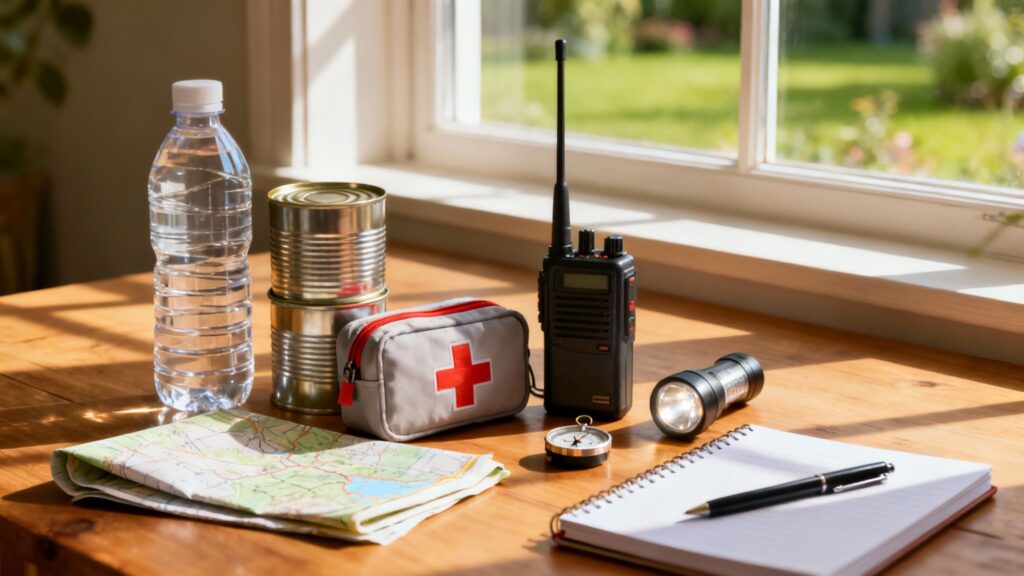
The best way to begin is by focusing on immediate, high-impact actions. Forget about buying expensive gear you might never use. Concentrate on the basics that will cover the first 72 hours of any emergency. That initial buffer is critical—it gives you and your family breathing room while larger systems get back on their feet.
Building this foundation really just involves a few key areas:
- Water Security: Making sure you have enough clean drinking water for everyone in your household.
- Food Stability: Starting a small pantry of non-perishable foods your family will actually eat.
- Power and Light: Putting together a simple kit for when the lights inevitably go out.
- Communication Plan: Figuring out how you’ll contact loved ones if cell service is down.
By tackling these areas one by one, you make the whole process feel manageable instead of overwhelming. For a detailed breakdown of exactly what to gather, check out our comprehensive guide on building an emergency preparedness kit
Conducting Your Personal Risk Assessment
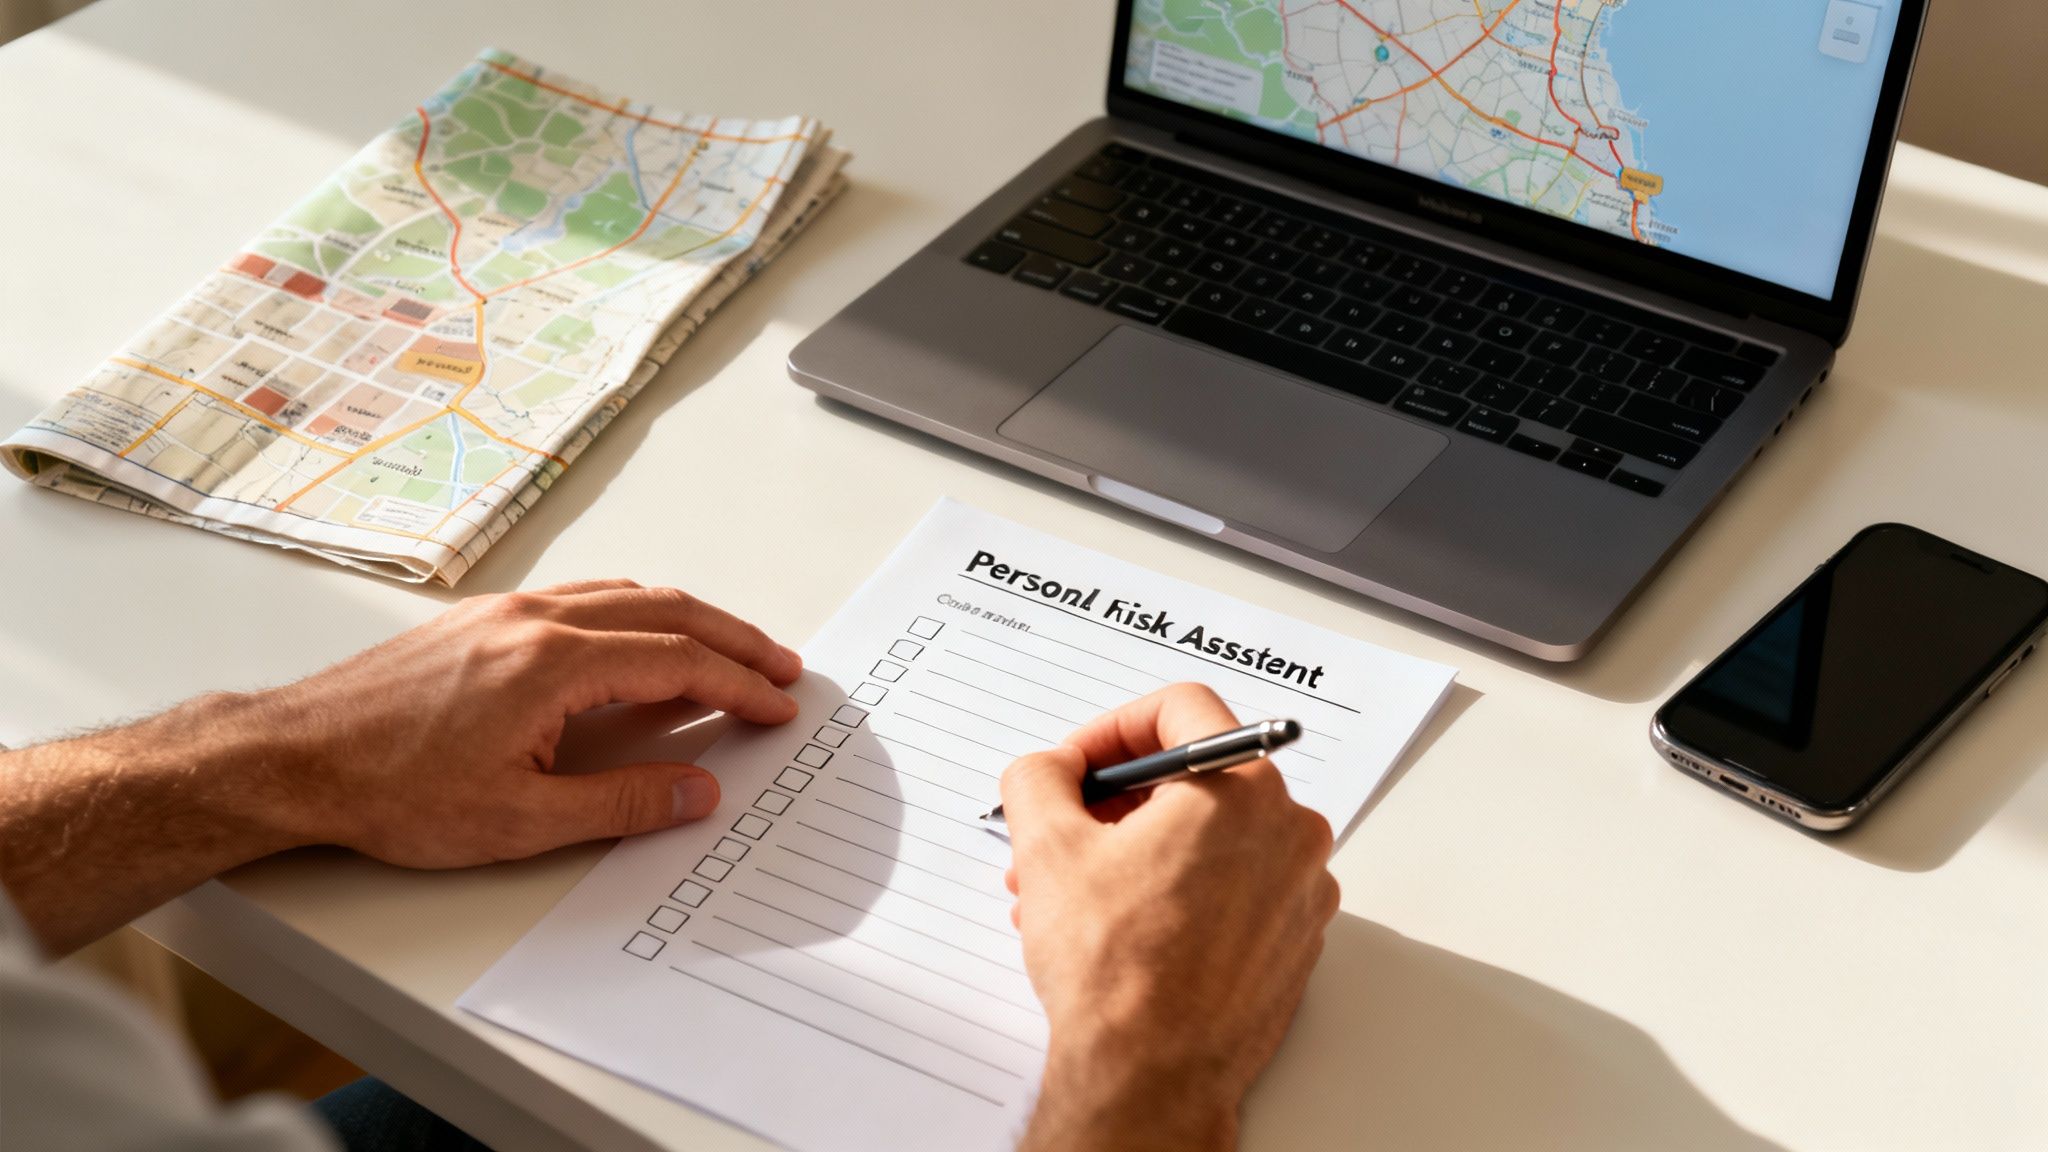
Before you buy a single can of beans or your first flashlight, you need to figure out what you’re actually preparing for. This is the absolute most critical step. Forget about vague, Hollywood-style disasters; we’re talking about your specific, personal reality.
A focused plan keeps you from blowing money on gear you’ll never use. It ensures every dollar you spend and every skill you learn is genuinely useful. The goal here is to nail down your top 3-5 most likely disruptions. This simple exercise shifts you from a state of unfocused anxiety to one of directed, confident action.
Analyze Your Geographic Location
Where you live is the single biggest factor determining your most probable risks. Someone living in coastal Florida faces a vastly different set of threats than a person in the mountains of Colorado or the plains of Oklahoma.
Start by asking yourself some basic questions about your environment:
- Are you in a severe weather zone? This means hurricanes, tornadoes, blizzards, or brutal heat waves.
- Is your area known for natural disasters? Think about the odds of earthquakes, wildfires, floods, or landslides.
- How stable is your local infrastructure? Is your power grid reliable? Are the local roads and bridges in good shape?
This line of thinking helps you prioritize. If you live in “Tornado Alley,” a storm shelter or a designated safe room is a much smarter first step than prepping for an earthquake. Likewise, if ice storms knock out your power every winter, a solid blackout kit with something like a Jackery portable power station becomes non-negotiable.
Don’t just guess, either. The frequency of these events is climbing. Natural disasters have jumped 83% since the 1980s. In 2024 alone, the U.S. saw 28 separate billion-dollar weather events. This makes a clear-eyed assessment more critical than ever.
It’s shocking, but around 60% of families don’t have a formal evacuation plan. Just running a few simple drills can cut down the chaos during a real emergency by 40%. For a global perspective on this, the United Nations Office for Disaster Risk Reduction has some eye-opening data.
Evaluate Your Personal Circumstances
Beyond geography, your individual and family situation plays a massive role in shaping your plan. A single person in a city apartment has totally different needs than a large family on a rural homestead. Thinking through these personal factors is non-negotiable.
Consider these key points:
- Household Members: Do you have young kids, elderly parents, or anyone with chronic medical conditions who needs specific medications or equipment?
- Your Home: Are you in a high-rise where elevators might fail? Or a single-family home with a yard for a potential garden?
- Job and Commute: What are the risks tied to your job? Could a long commute leave you stranded far from home?
- Community Resources: How close are you to hospitals, grocery stores, and first responders?
Answering these questions brings instant clarity. A family with an infant needs to stockpile formula and diapers. Someone who depends on refrigerated medication absolutely needs a reliable backup power plan. For a complete walkthrough on how to structure all this, check out our guide on creating an emergency preparedness plan template. It gives you an excellent framework to build on.
To bring this all together, I recommend using a simple risk matrix. It’s a powerful tool for turning abstract worries into a concrete action plan.
Personalized Risk Assessment Matrix
Use this table to identify and prioritize potential threats based on likelihood and impact for your specific situation.
| Potential Risk | Likelihood (Low/Med/High) | Potential Impact (Low/Med/High) | Top 3 Priority Actions |
|---|---|---|---|
| Example: Severe Winter Storm | High | High | 1. Build 2-week winter blackout kit. 2. Weatherproof windows. 3. Buy backup generator. |
| Example: Job Loss | Medium | High | 1. Build 6-month emergency fund. 2. Update resume. 3. Learn a side-hustle skill. |
| Example: Wildfire | Low | High | 1. Create defensible space around home. 2. Pack go-bags. 3. Practice evacuation route. |
Filling this out forces you to be honest about what you face. It takes the guesswork out of prepping and shows you exactly where to focus your time, money, and energy. This is the foundation of smart, sustainable preparedness.
Building Your Foundational Preparedness Layers
Alright, you’ve pinpointed the most likely threats in your area. Now it’s time to move from theory to action and start gathering the physical gear that will see you through a crisis.
We’re going to lean on a classic survival principle to guide us: the “Rule of Threes.” It’s a simple framework that prioritizes what your body needs to survive. A person can typically last about three minutes without air, three hours without shelter in harsh weather, three days without water, and three weeks without food.
For our purposes, we’ll assume the air is breathable. That leaves shelter, water, and food as the cornerstones of our preps. We’ll tackle these in order of importance, starting with the one you absolutely cannot live without. This layered approach keeps the process from feeling overwhelming.
The Absolute Priority: Water Security
Let’s be crystal clear: water is your number one priority. Nothing else matters if you don’t have safe water to drink.
The standard guideline is to have one gallon of water per person, per day. A three-day supply is the bare minimum, but aiming for a two-week supply gives you a much more comfortable buffer.
Getting started is as easy as picking up a few extra cases of bottled water on your next grocery run. For a more permanent solution, look into food-grade, stackable WaterBrick containers. They’re incredibly durable and make efficient use of storage space.
But storing water is only half the battle. You also need a way to purify questionable water sources. This is where a high-quality water filter becomes one of the most powerful tools you can own. A portable filter like the Sawyer Squeeze is a no-brainer—it’s inexpensive, weighs next to nothing, and can attach to a standard plastic bottle, making it perfect for your car or a get-home bag.
For your home, a larger gravity-fed system like a Berkey is the gold standard. It can purify gallons of water for your whole family without any electricity. With a good filter, potential water sources expand dramatically—rainwater from a barrel, a nearby stream, or even the water in your hot water heater becomes viable in a true emergency.
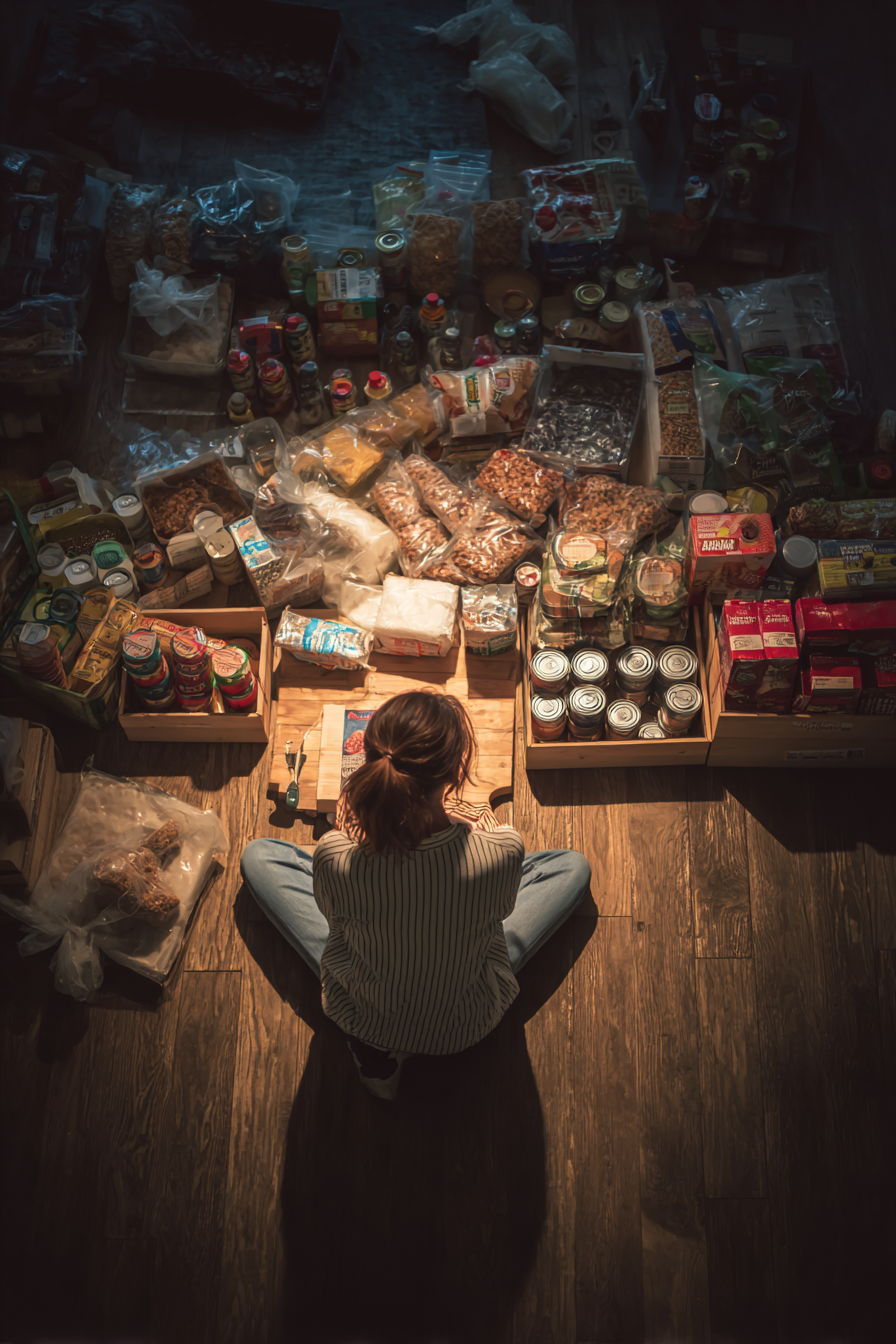
Building Your Two-Tier Food Pantry
With water sorted, we move on to food. Forget the idea of immediately buying a pallet of freeze-dried survival meals. Your first goal is much simpler: build a two-week supply of food your family actually eats. This is your short-term pantry.
Think about what you’d cook if the power went out for a week. Canned soups, vegetables, chili, and tuna are fantastic options. Add in staples like pasta, rice, peanut butter, and crackers. The trick is to “stock what you eat, and eat what you stock.” Just add a few extra items to your cart each time you go shopping.
A classic rookie mistake is stockpiling weird “survival food” that no one in the family has ever tried. In a high-stress situation, familiar comfort foods provide a massive morale boost, especially for kids. Rotate your stock every six to twelve months to keep everything fresh.
Once that two-week supply feels solid, you can start layering in long-term storage. This is where you focus on bulk staples with a serious shelf life:
- White rice
- Dried beans
- Oats
- Flour and sugar
- Dehydrated or freeze-dried meals
When stored correctly in Mylar bags or buckets with oxygen absorbers, these items can last 20-30 years. They are the foundation for riding out a longer-term event, like a prolonged supply chain breakdown or a job loss.
Learn the proper techniques and best practices in our detailed guide on how to store food long-term.
Shelter and Power: Your Blackout Kit
The “shelter” part of the Rule of Threes is usually about staying protected from the elements. For most of us, our home is our primary shelter. The real challenge is keeping it livable when the grid goes down. That’s why every home needs a dedicated blackout kit.
This kit should cover lighting, warmth, communication, and basic power needs. Start with multiple light sources that don’t depend on electricity. Fenix headlamps are fantastic because they keep your hands free, and battery-powered lanterns are much safer than candles.
A small portable power station can be a complete game-changer during an outage. Something like an Anker power station can keep phones charged, run a radio, or even power essential medical equipment for hours. Pair it with a compatible solar panel, and you’ve got a renewable source of energy.
Your Get-Home Bag
What happens if disaster strikes while you’re at work, in traffic, or running errands? That’s what a get-home bag is for. It’s a compact kit designed to give you everything you need to get back to your home and your main supplies.
This isn’t a massive “bug-out bag” for living in the woods. Think of it as a 24-hour survival kit focused on mobility and self-reliance.
Essential items include:
- A water bottle and a portable filter
- High-calorie snacks like protein bars or trail mix
- A small first-aid kit
- A reliable multi-tool like a Gerber
- A flashlight or headlamp
- A physical map of your local area
- A portable phone charger/power bank
- A comfortable pair of walking shoes (if you don’t wear them daily)
Putting this foundational kit together is one of the most important steps you can take on your preparedness journey. To see a comprehensive checklist, check out our complete guide on how to assemble a disaster supply kit. By methodically working through these layers—water, food, and shelter/power—you’ll build a solid foundation for genuine resilience.
Developing Skills That Outlast Your Gear
Stockpiling gear is a big part of prepping, but let’s be honest: the most valuable asset you’ll ever have is what’s between your ears. Knowledge is weightless, can never be taken from you, and it doesn’t run on batteries. This is where we shift our focus from what you have to what you can do.
Building a solid skill set is what turns you from someone who just owns supplies into a real problem-solver. It’s the difference between hoping your gear holds up and knowing you can figure things out even if it fails. The best part? Many of these skills are free or cheap to learn, often with resources you already have.
Critical Medical and First Aid Skills
When things go sideways, you can’t count on a 911 call bringing help in minutes. It could be hours, days, or not at all. Knowing how to handle common injuries isn’t just a nice-to-have—it’s a non-negotiable for anyone serious about being prepared.
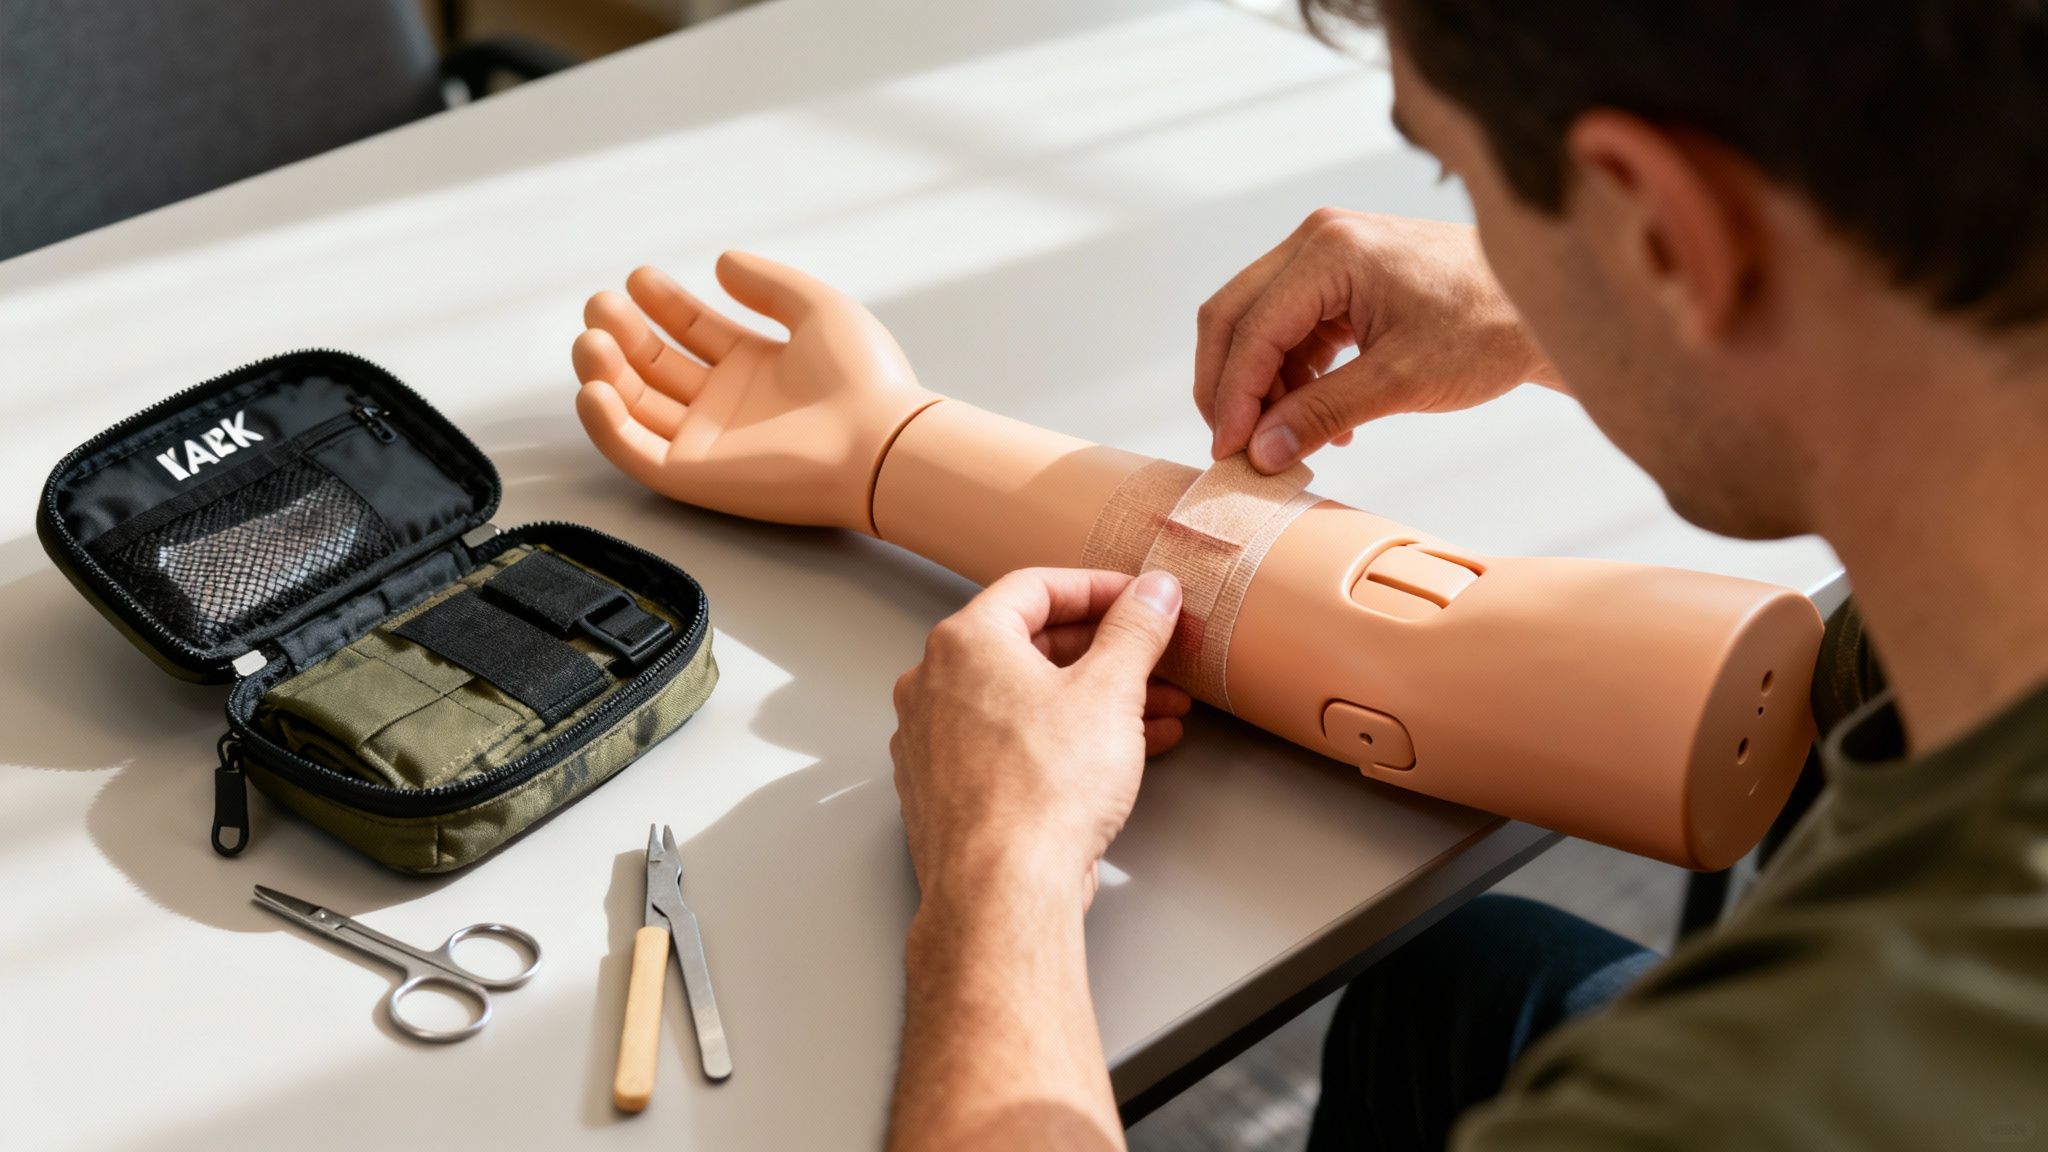
Your first move should be to find a basic first aid and CPR course. From there, I highly recommend “Stop the Bleed” training. It teaches you how to control severe bleeding, which is the number one cause of preventable death after a traumatic injury. This is the bedrock knowledge you need before you can effectively use an IFAK (Individual First Aid Kit).
An IFAK isn’t your average boo-boo kit. It’s built to handle life-threatening trauma. A solid one should include:
- Tourniquets: To stop catastrophic bleeding on an arm or leg. The CAT tourniquet is a widely trusted option.
- Hemostatic Gauze: This is special gauze packed with an agent that helps blood clot fast.
- Chest Seals: Used to treat sucking chest wounds from a puncture.
- Pressure Dressings: For applying firm, direct pressure right on the wound.
Having these tools is only half the battle. You have to know how to use them when your hands are shaking and adrenaline is pumping. Get training versions of your gear and practice until it becomes second nature.
Food Preservation and Self-Sufficiency
That pantry you’re building is a finite resource. Learning how to preserve food is a game-changer; it stretches your supplies, cuts down on waste, and gives you a deep sense of security. You don’t need a huge garden to get started—practice on produce from a local farmer’s market or even sale items at the grocery store.
Water bath canning is a great entry point for high-acid foods like fruits, jams, and pickles. For low-acid stuff like meat, beans, and most vegetables, you’ll need to step up to a pressure canner. A food dehydrator, like a popular Excalibur model, is another fantastic tool for making jerky, fruit leathers, and dried veggies that are lightweight and last for ages.
The real win with food preservation isn’t just the jars on the shelf. It’s about understanding the whole process, reconnecting with your food, and reclaiming a skill our grandparents knew by heart.
Discover more traditional self-reliance techniques in our guide on lost Amish skills that can enhance your preparedness.
Basic Repair and Communication Skills
Let’s face it, modern life has made most of us dependent on specialists for simple fixes. Learning some basic DIY skills will save you time, money, and a world of hurt in a grid-down scenario. Start small: learn to patch drywall, fix a leaky faucet, or just get comfortable with your home’s circuit breaker.
Vehicle maintenance is just as critical. Knowing how to change a tire, check your fluids, and jump-start a battery is basic stuff that can keep you from being stranded.
And what happens when the cell towers go down? Having a backup plan is vital. Amateur (ham) radio is an incredible tool for off-grid communication. A simple handheld radio like a Baofeng can be a cheap way to get into it. You’ll need an FCC license to transmit, but studying for the Technician exam is the perfect way to learn how radio actually works.
Developing these abilities is all about turning head knowledge into muscle memory through practice. For a deeper dive, check out our guide covering the essential survival skills you must master. This is how you build true, lasting resilience.
Your Phased Action Plan for Getting Prepared
Looking at the big picture of preparedness can feel like trying to drink from a firehose. It’s overwhelming. To keep that from happening, we need to break this whole journey down into a clear, structured timeline.
This isn’t a race. It’s about making steady, consistent progress toward real self-reliance. By mapping out what to focus on and when, you create small, achievable milestones. This turns a huge task into a series of manageable wins, which feels a lot more rewarding as you start checking things off your list.
Let’s build your roadmap.
The First 72 Hours: Your Immediate Action Window
The first three days after a major event are almost always the most chaotic. Emergency services are stretched thin, maybe even non-existent, and the power grid could be down. Your only goal in this initial phase is to build the core foundation that gives your family a critical buffer.
This isn’t about long-term survival just yet. Forget about buying a year’s worth of food or a massive generator. Right now, it’s all about immediate stability. Focus entirely on the essentials that will get you through this initial window.
Here’s what to tackle first:
- Lock Down Your Water Supply: This is priority number one. Store a minimum of one gallon of water per person, per day, for at least three days. This can be as simple as grabbing a few cases of bottled water on your next grocery run or filling some sanitized two-liter bottles from the tap.
- Assemble a Get-Home Bag: This is a small, portable kit that lives in your car. Its only job is to help you get home safely if a crisis hits while you’re at work or out running errands. Think walking shoes, a water bottle, a snack, and a small first-aid kit.
- Create a Household Blackout Kit: Gather your essential lighting, communication, and first-aid supplies in one easy-to-grab spot, like a plastic tote. This should include flashlights, plenty of extra batteries, a hand-crank radio like the Midland ER310, and a well-stocked first-aid kit.
Just by finishing these three tasks, you’ve given yourself an incredible head start and a huge boost in confidence. You’ve just covered the most likely short-term problems with a few simple, focused actions.
The First Two Weeks: Building Your Buffer
With your 72-hour foundation solid, it’s time to stretch your timeline. The goal now is to build up enough resources to comfortably handle a more extended disruption—think a regional power outage from a nasty winter storm or a local supply chain hiccup.
During this phase, we’ll deepen your reserves and get your family’s emergency plans on paper. This is where you move beyond just getting by and start building genuine resilience.
Key goals for the two-week mark:
- Expand Your Pantry: Systematically build a two-week supply of non-perishable food that your family actually enjoys eating. Each time you go to the store, just add a few extra cans of soup, bags of rice, or jars of peanut butter to your cart.
- Finalize a Family Communication Plan: What happens if you’re all separated when things go sideways? Designate an out-of-state contact everyone can call to check in, and establish a local meeting point if getting home isn’t an option.
- Secure Your Important Documents: Make digital and physical copies of critical papers—birth certificates, passports, insurance policies, deeds. Store the copies in a waterproof, fireproof location. A sturdy document bag from a brand like JUNDUN is a fantastic investment here.
The First Month and Beyond: Creating Long-Term Resilience
Once you have a solid two-week buffer, you can start thinking longer-term. This is where you begin layering in more advanced supplies, skills, and systems that turn your home into a truly resilient hub. The focus shifts from merely surviving a crisis to thriving right through it.
Preparedness is about building layers of self-reliance. Your 72-hour kit gets you through the initial shock, your two-week supply handles common disruptions, and your long-term preps provide security against more serious events.
Now you can start working on these bigger objectives:
- Long-Term Food Storage: Start investing in bulk staples like rice, beans, and oats. Learn how to properly store them using five-gallon buckets and Mylar bags for a multi-decade shelf life. You can learn more about what to prioritize by reading our detailed guide on essential items you should be stockpiling.
- Backup Power and Cooking: Figure out your needs for a backup power source, whether it’s a small solar generator for charging devices or a traditional gas generator for bigger loads. You’ll also need a way to cook without electricity, like a simple propane camp stove from Coleman or a rocket stove.
- Skill Development: Make a point to actively learn one new preparedness skill each month. This could be anything from taking a “Stop the Bleed” class to learning basic water purification techniques or starting a small container garden on your patio.
To make this even easier, here is a table that breaks down these goals into a clear, step-by-step checklist.
Your Phased Prepping Action Plan
| Timeframe | Water & Food Goals | Gear & Supplies Goals | Skills & Planning Goals |
|---|---|---|---|
| First 72 Hours | Store 3 gallons of water per person. Stock 3 days of no-cook food. | Build a Get-Home Bag for each vehicle. Assemble a household blackout kit. | Create a basic family rally point plan. |
| First 2 Weeks | Expand pantry to 14 days of easy-to-prepare food. | Secure important documents in a fire/waterproof bag. | Write and practice a family communication plan. |
| First Month | Grow pantry to a 30-day supply. Start buying bulk staples (rice, beans). | Purchase a quality water filter (e.g., Sawyer Squeeze). | Learn basic first aid and CPR. |
| First 3 Months | Begin long-term food storage (Mylar bags, buckets). | Acquire a backup cooking method (camp stove). | Take an advanced first aid or “Stop the Bleed” class. |
| First 6 Months | Build food supply to cover 3-6 months. Plant a small garden. | Invest in a backup power solution (solar generator). | Practice a “bug out” drill with your family. |
| First Year | Aim for a 1-year food supply for the entire household. | Add specialty gear (comms, security, sanitation). | Network with like-minded neighbors; learn a trade skill. |
By following a phased plan like this one, you build momentum without getting overwhelmed or burning out. Each step flows logically into the next, creating a comprehensive system that protects your family from a wide range of potential disruptions.
Got Questions? Let’s Tackle the Common Sticking Points
Jumping into prepping for the first time can feel like you’re staring up at a mountain. It’s natural to have a ton of questions swirling around. Let’s cut through the noise and tackle some of the biggest hurdles beginners face, so you can move forward with a clear plan.
Isn’t This Going to Cost a Fortune?
This is probably the number one question I hear, and it’s the biggest myth out there. The answer is a hard no. Prepping isn’t about a weekend shopping spree that drains your bank account. It’s about building resilience slowly and deliberately.
Start small. The next time you’re at the grocery store, just grab an extra can of soup or a bag of rice. That’s it. That’s the first step. A solid 72-hour kit can easily be put together for under $100, especially if you get creative and use items you already have. Consistency beats a big initial spend every single time. Think of it as a small, weekly investment in your family’s future safety.
I Live in a Tiny Apartment. Where Will I Put Everything?
You don’t need a sprawling farmhouse to be prepared. Living in a small space just means you have to be smarter and more efficient. It’s totally doable.
Look for dead space. Under the bed is a goldmine for sliding in water bricks or flat-packing canned goods. What about the top shelf of your closet? Go vertical with some cheap, sturdy shelving. Every little nook and cranny is a potential storage spot.
Focus on gear and food that pulls double duty or packs a big punch in a small package.
- Calorie-dense foods are your best friend: think protein bars, peanut butter, and dehydrated meals from proven brands like Mountain House.
- A vacuum sealer is a game-changer. It can shrink down bulky items like rice and beans to a fraction of their original size.
The goal isn’t to build a doomsday bunker in your studio apartment. It’s about being intentional. Optimize every square inch you have, and you’ll be amazed at how much you can comfortably store.
How Do I Talk to My Family About This Without Sounding Crazy?
This is a delicate one, but it’s crucial. The key is to frame the conversation around realistic, everyday disruptions, not some far-fetched apocalypse. Talk about a nasty winter storm that knocks out the power for a few days or a local water main break. Position it as simple family insurance—a way to make sure you’re all safe, warm, and fed no matter what.
The absolute best way to get them on board is to involve them. Make it a team effort.
- Let your kids pick out their favorite non-perishable snacks for the “adventure kit.”
- Turn your fire escape plan practice into a game instead of a scary lecture.
- Ask your partner to help research a solid piece of gear. A quality multi-tool, like a classic Leatherman, is a great non-intimidating item to start with.
When prepping becomes a family project focused on teamwork, it builds a sense of security, not fear.
Okay, I’m In. What’s the Absolute First Thing I Should Do?
Water. Full stop.
You can survive weeks without food, but only about three days without water. It is, without question, the most critical resource in any emergency. Your first mission is simple: store one gallon of water per person, per day, for at least three days.
Once that’s done, your very next step should be getting a reliable water filter. That two-pronged approach—store what you need for the short term, and have a way to purify more for the long term—is the foundation of everything. Get that right, and you’re already ahead of the game.

