When the power goes out, the clock starts ticking on everything in your fridge and freezer. True food security isn’t about having a full freezer—it’s about knowing how to keep your food safe and edible without relying on a plug. This is where time-tested preservation skills come into play.

At their core, these methods are brilliantly simple. They work by either removing moisture (like in drying), creating an environment hostile to bad bacteria with salt and sugar, or introducing beneficial bacteria (like in fermentation). Mastering these techniques turns your pantry into a reliable, long-term food source, completely independent of the power grid.
Building a Resilient Off-Grid Pantry
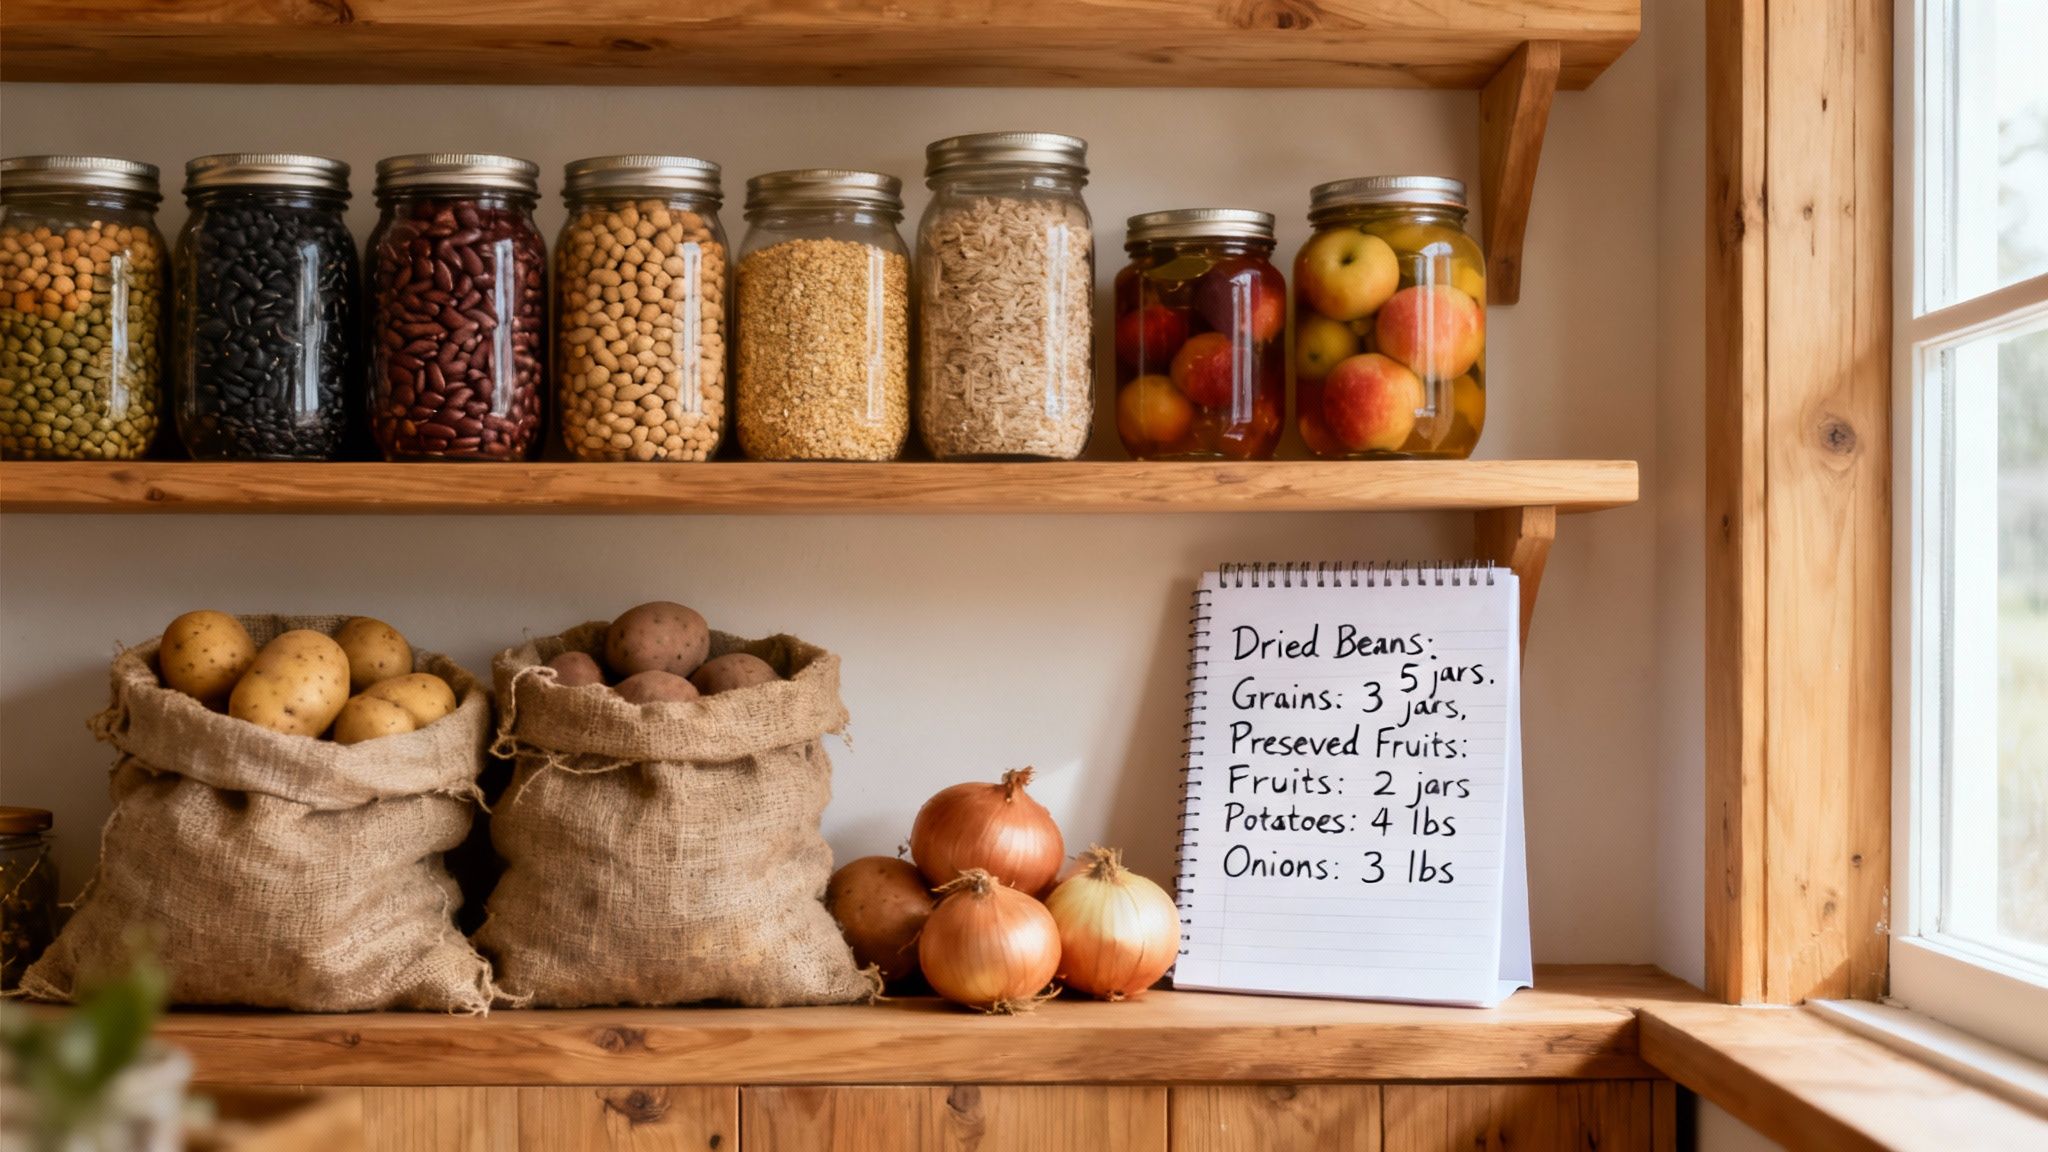
Forget the complex chemistry for a minute. The real goal here is making your food last, period. Learning to preserve food without electricity is a foundational skill for anyone serious about self-reliance, whether you’re homesteading off the beaten path or just want to be ready for the unexpected.
It’s about rediscovering the practical wisdom our ancestors used to survive long winters and lean times. This guide is all about actionable steps you can take today—transforming a fresh harvest or a grocery run into a pantry that will see you through anything.
Why These Skills Matter More Than Ever
We’ve become incredibly dependent on appliances that have a single point of failure: the electrical grid. A bad storm, a grid failure, or any number of crises can render our most important food storage tools useless. When that happens, a full freezer becomes a liability, not an asset.
Mastering off-grid preservation is the key to genuine food independence.
These are more than just “survival” skills; they’re heritage skills. They reconnect us to our food on a fundamental level. When you learn how to properly salt a ham or ferment a crock of cabbage, you gain a powerful appreciation for where your food comes from and take back control of your own sustenance.
A Roadmap to Your Off-Grid Pantry
To help you figure out where to start, the table below gives a quick overview of the non-electric methods we’ll be covering. Use it to match the right technique to the foods you have on hand and the time you can invest. Even mastering one or two of these can make a huge difference in your preparedness.
And remember, you don’t need a massive budget to get going. For more tips on stocking up without breaking the bank, check out our guide on creating a survival pantry on a budget.
Food Preservation Methods At a Glance
This table gives you a high-level look at the most common non-electric preservation methods, helping you choose the best starting point for your needs.
| Preservation Method | Best For | Estimated Shelf Life | Effort Level |
|---|---|---|---|
| Dehydration/Drying | Fruits, vegetables, lean meats, herbs | 6 months to 2 years | Low to Medium |
| Curing & Smoking | Fatty meats (bacon), fish, jerky | 3 months to 1 year+ | Medium |
| Fermentation | Cabbage, cucumbers, root vegetables, dairy | 2 to 6 months | Low |
| Pickling (Vinegar) | Most vegetables, eggs | 1 year+ | Low |
| Off-Grid Canning | Most foods, including meats and vegetables | 1 to 5 years | High |
| Root Cellaring | Root vegetables, apples, winter squash | 3 to 9 months | Low |
Each of these methods offers a unique way to build a robust and varied food supply that will be there when you need it most, no electricity required.
Mastering Dehydration: The Original Preservation Method
Drying is the oldest trick in the book for a reason—it works. Long before we had refrigerators or freezers, our ancestors were using the sun and wind to make their harvests last through the lean months.
The science behind it is beautifully simple. If you remove enough water from food, the bacteria, yeast, and mold that cause spoilage just can’t survive. This ancient technique transforms perishable foods into lightweight, nutrient-dense staples that can sit on a shelf for months, or even years.
Best of all, you don’t need much to get started, making it one of the most accessible ways to preserve food off-grid.
Getting Started With Sun and Air Drying
The most basic form of dehydration is completely free. All it takes is a good stretch of warm, dry, and breezy weather. You’re looking for temperatures consistently above 85°F (29°C) with humidity below 60%.
You’ll need a surface that lets air circulate freely. I’ve used old window screens, cooling racks from the kitchen, and even a clean sheet stretched taut over a wooden frame. The goal is to elevate the food so air can flow all around it, which speeds up the process and keeps mold from getting a foothold.
Pro Tip: Drape some cheesecloth or fine mesh over your drying racks. It’s the perfect way to keep curious insects and birds away from your food without trapping any moisture.
Just remember to bring everything inside at night. The morning dew can reintroduce moisture, undoing a whole day of the sun’s hard work.
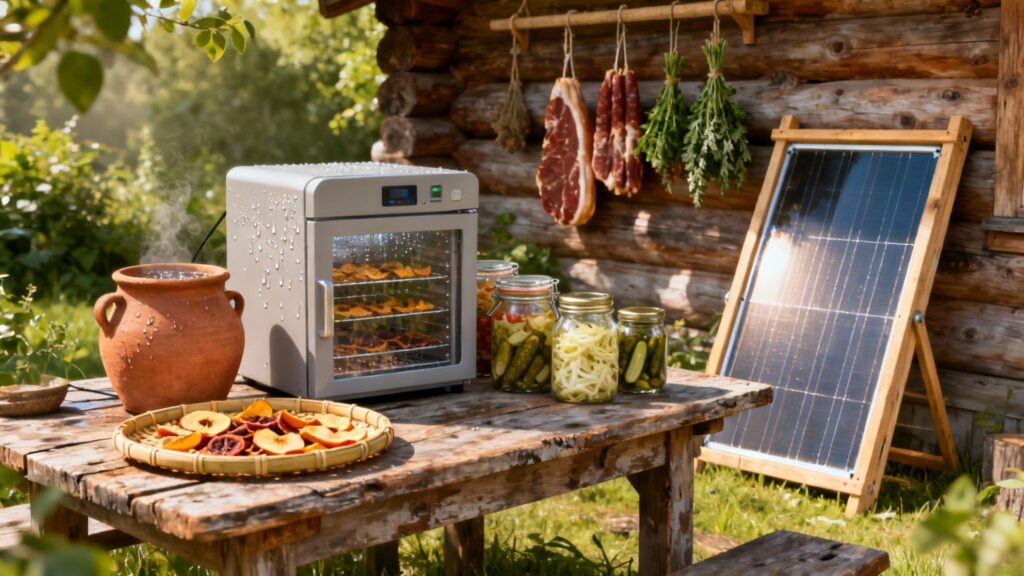
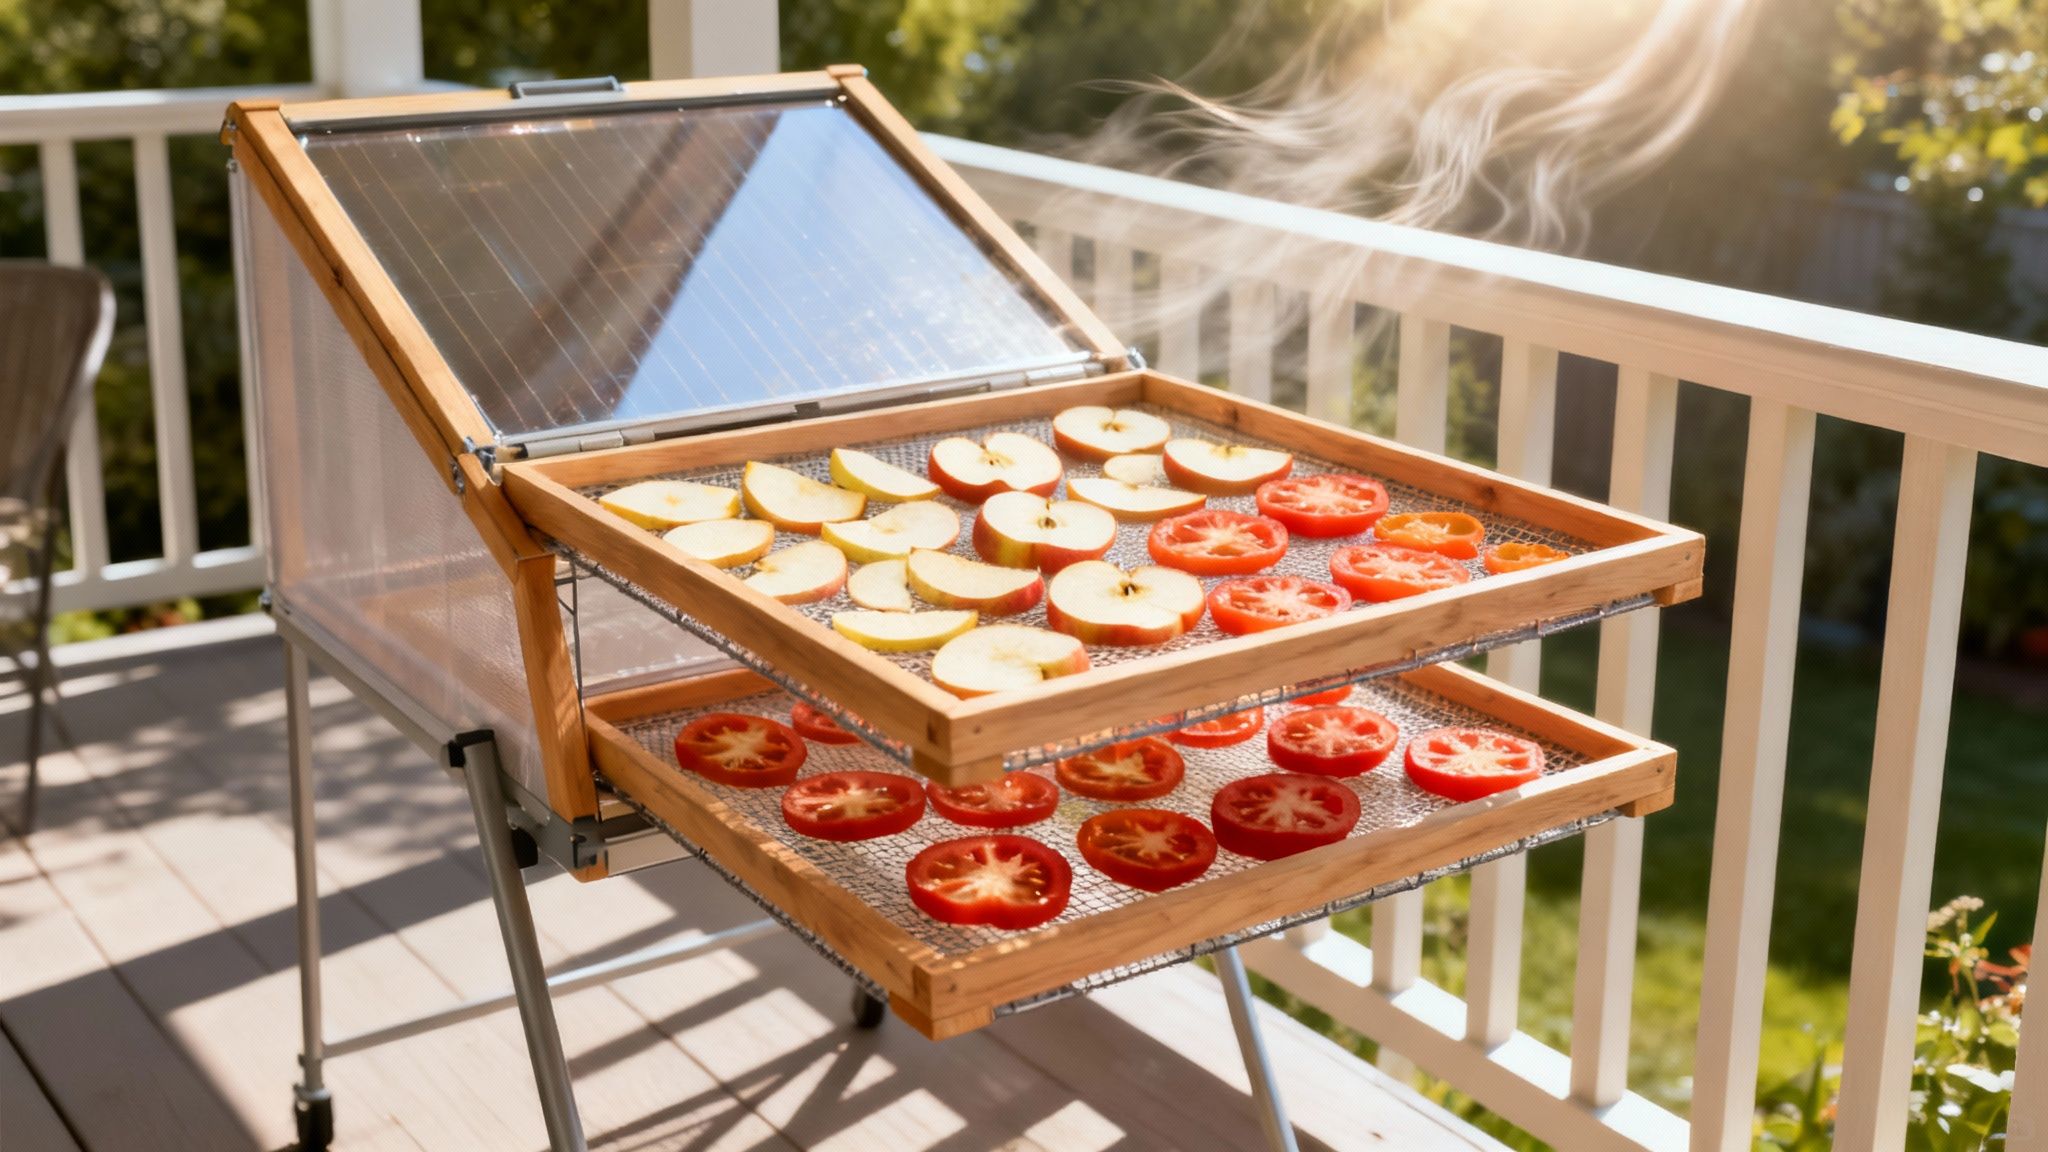
Build a Simple Solar Dehydrator
If you want more consistent results, building a basic solar dehydrator is a great weekend project. It’s essentially a hot box designed to use the sun’s energy to heat the air and create a natural convection current that pulls moisture away from your food.
Here’s a quick rundown of how to build one:
- The Box: Start with a shallow wooden box or even a repurposed drawer. Paint the inside black to absorb as much heat as possible.
- The Glazing: Cover the top with something clear like glass, plexiglass, or a heavy-duty plastic sheet. This creates a greenhouse effect to trap heat.
- The Vents: This is the critical part. Cut vents near the bottom and the top of the box. Cool, dry air gets drawn in through the bottom, heats up, pulls moisture from the food, and exits through the top. That airflow is what does the work.
- The Racks: Place your food on mesh racks inside the box to let that warm air circulate around every single piece.
A simple DIY setup like this can dramatically cut down your drying times and offers much better protection from pests and surprise rain showers than open-air drying.
Food Preparation Is Key
How you prep your food before drying makes all the difference in the final product. You can’t just toss whole apples on a rack and expect good results.
- Uniform Slicing: Cut everything to a uniform thickness, somewhere between 1/4 and 1/2 inch. This is crucial for ensuring everything dries at the same rate. A tool like an OXO Good Grips mandoline slicer is a lifesaver here, making the job fast and precise.
- Pre-treatment for Fruits: To stop fruits like apples, pears, and bananas from turning an unappetizing brown, give them a quick dip in a lemon juice solution. I use about one tablespoon of juice per quart of water and let them soak for a few minutes.
- Blanching Vegetables: Some veggies—like carrots, green beans, and broccoli—do much better if you blanch them first. That’s just a quick dunk in boiling water followed by an ice bath. It stops the enzymes that would otherwise cause them to lose color and flavor during storage.
Modern Tools for Off-Grid Setups
While sun drying is a fantastic, time-tested skill, it’s completely dependent on the weather. If you’re looking for more reliability, a modern dehydrator is a phenomenal tool. Even if you’re off-grid, an efficient model can easily run off a solar generator or other backup power source.
The Excalibur Food Dehydrator is considered the gold standard by many in the homesteading and preparedness communities for its reliability and even airflow. If you’re curious about different models, you can find a detailed breakdown in our guide to the best food dehydrators.
No matter what tool you use, the goal is the same. You’ll know your food is ready when it has the right texture. Fruits should feel leathery and pliable, while vegetables ought to be brittle and crisp. For things like jerky, you want it to be tough but still able to bend without snapping.
Once everything is dried, let it cool completely before packing it away in airtight containers. Store them in a cool, dark place, and you’ll have delicious, preserved food ready whenever you need it.
The Art of Curing and Smoking Meats
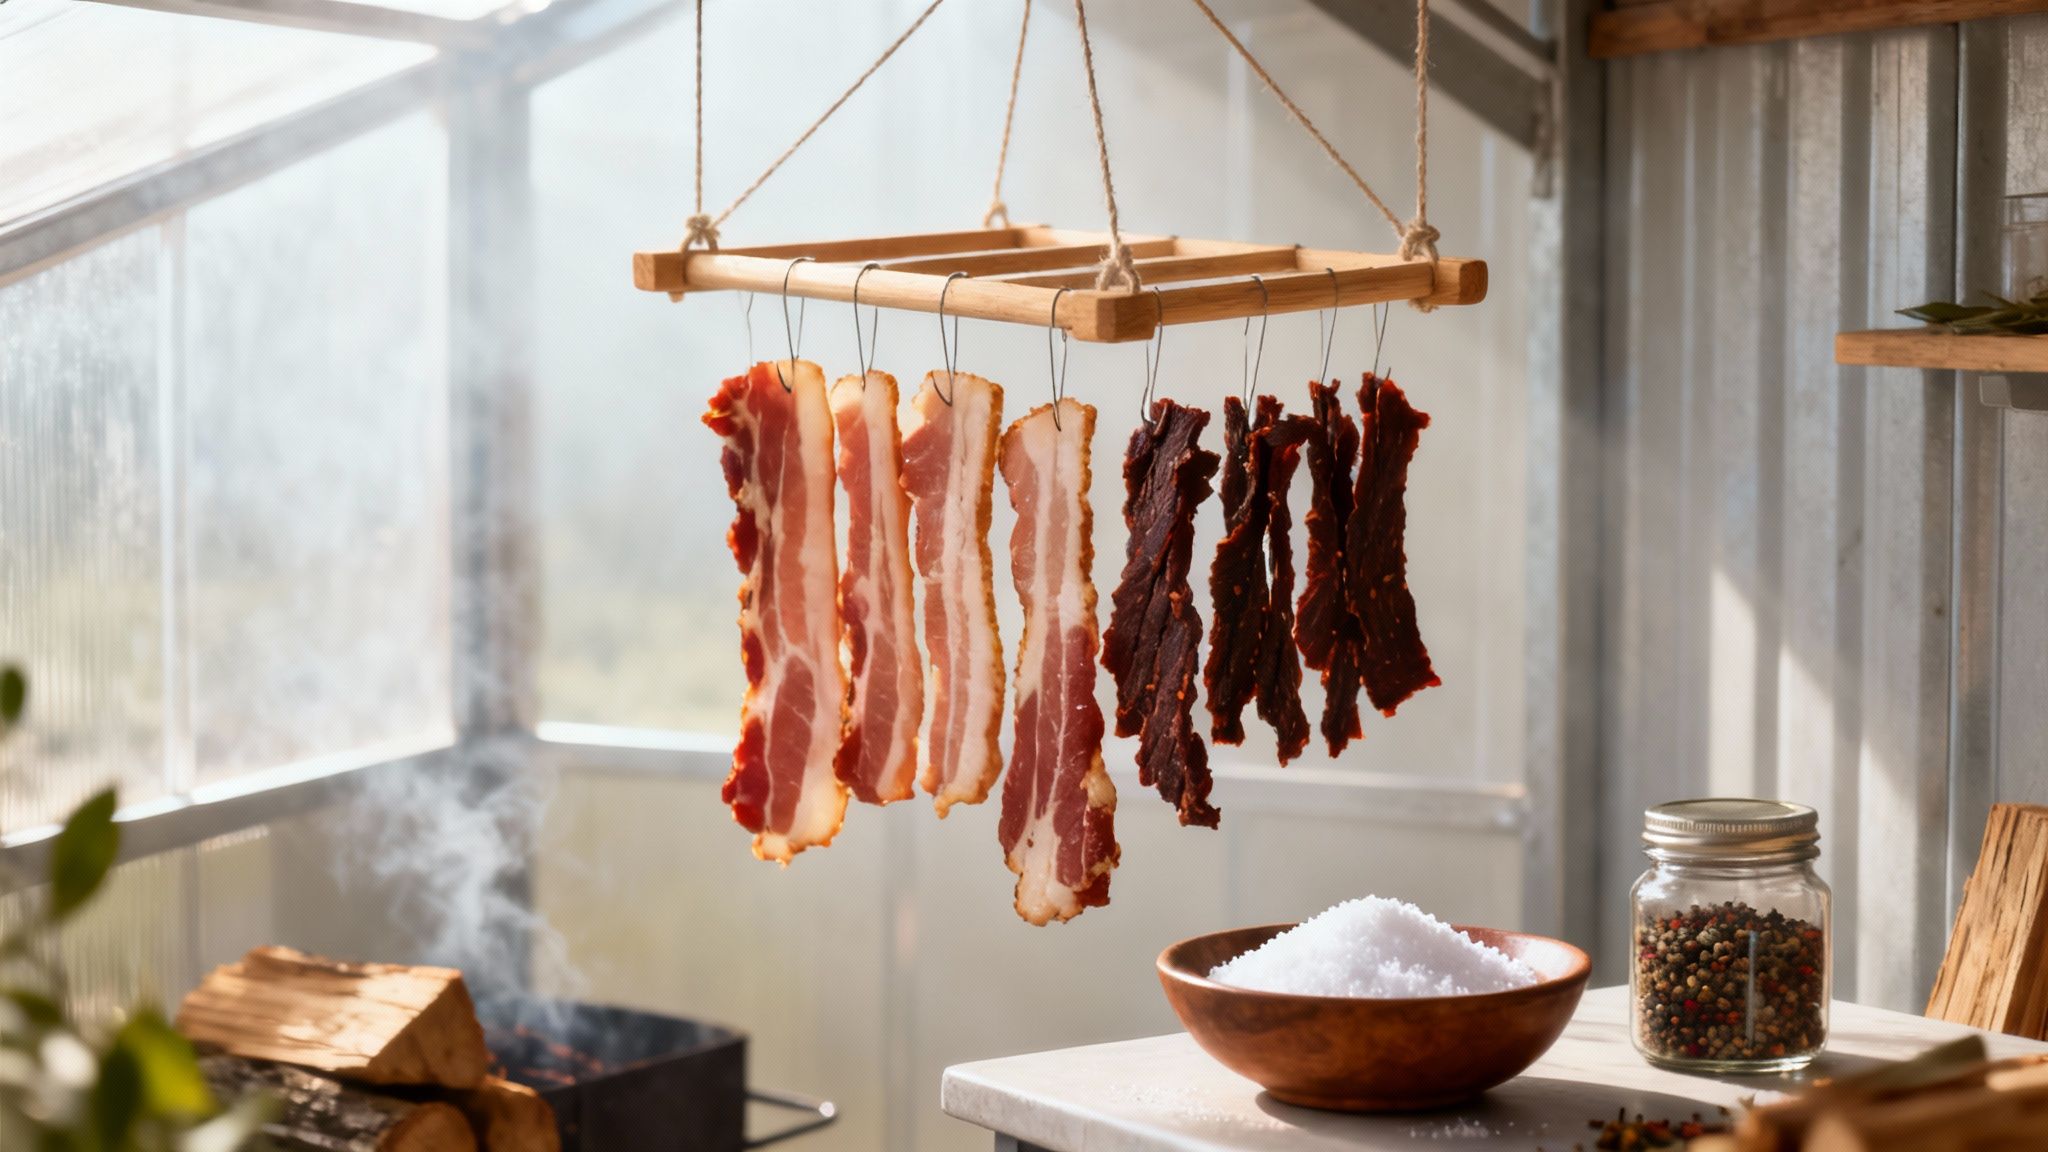
While drying is fantastic for lean meats and fruits, nothing beats curing and smoking for preserving those rich, fatty cuts like bacon or oily fish. These aren’t just survival techniques; they’re ancient traditions responsible for some of the most incredible flavors on earth.
At its most basic, curing is all about salt. The salt draws moisture out of the meat through osmosis, creating an environment where the bacteria responsible for spoilage just can’t get a foothold. For anyone serious about living off-grid, this is a cornerstone skill.
Curing Salt and Safety The Non-Negotiable Basics
The simplest way to start is with a dry cure, which just means packing your meat in a salt mixture. You can get by with a basic blend of salt and sugar, but this is where the fun begins—adding spices like black pepper, paprika, or garlic powder for extra flavor. The salt does the heavy lifting of pulling out water, while sugar balances the saltiness and adds its own preservative qualities.
For bigger projects like making bacon from pork belly or curing a whole ham, you’re looking at a process that takes days, sometimes even weeks. You’ll need a cool, steady environment. That’s a challenge without a fridge, but a well-insulated box in a root cellar or even a cool, shaded spot outdoors can work wonders in the right climate.
A critical safety note: for longer cures, you absolutely need to use curing salts. Products like Morton Tender Quick or Prague Powder #1 contain sodium nitrite, which is essential for stopping the growth of Clostridium botulinum—the nasty bacteria that causes botulism. Don’t even think about skipping this step.
Your First Projects: Jerky and Bacon
Making jerky is the perfect gateway into the world of curing. You’ll want to start with lean cuts like beef round or venison, sliced paper-thin. These strips get a nice long soak in a salt-based marinade before being dried, often with a little smoke thrown in for good measure.
Bacon is the next step up, starting with a fatty cut like pork belly.
- Mix the Cure: Combine kosher salt, sugar, and Prague Powder #1. You can easily find proven recipes online that give you the right ratios based on the weight of your meat.
- Rub it Down: Get in there and rub that cure mixture over every single inch of the pork belly. Don’t be shy.
- Let it Cure: Seal the belly in a non-reactive container (a big zip-top bag works great) and let it cure for 5-7 days in a cool spot. Make sure to flip it once a day.
- Rinse and Dry: After a week, the belly will feel much firmer. Rinse all the excess cure off under cold water and let it air dry until a sticky “skin,” called a pellicle, forms. This is what helps the smoke stick.
At this point, you’re ready to smoke. If you want to dive deeper into the fundamentals, exploring different ways to preserve meat without refrigeration is a great next step.
The Magic of Smoke: Hot vs. Cold
Smoking adds that final layer of flavor and preservation. The compounds in wood smoke act as an antimicrobial and antioxidant shield, protecting the meat even further. There are two ways to go about it.
Hot Smoking: This is done at temperatures between 200-250°F (93-121°C). It cooks the meat through while infusing it with smoke. It’s delicious, but the final product is not fully preserved—it needs to be eaten within a few days or refrigerated.
Cold Smoking: This is the true preservation method. The key is to keep the temperature below 85°F (29°C). The goal is to lay down layers of smoke without actually cooking the meat. A properly cured and cold-smoked piece of bacon or fish can last for months without refrigeration.
You can rig up a smoker with a big cardboard box, a metal drum, or even by digging a trench. The trick is to have a chamber for the food and a separate, connected firebox so that only cool smoke drifts over the meat. For a super consistent, low-temp smoke that’s perfect for beginners, a tube smoker like the A-MAZE-N Pellet Smoker is a fantastic tool that can run for hours on wood pellets inside any grill or smokehouse.
Choosing your wood is part of the art. Hickory and oak deliver that classic, bold smoke flavor that’s perfect for pork. Fruitwoods like apple and cherry give a milder, sweeter smoke that works beautifully with chicken and fish.
Fermentation and Pickling: Preserving with Live Cultures
Drying and curing are fantastic, but now we’re getting into the world of living preservation. Fermentation and pickling are ancient arts that don’t just stop food from spoiling—they completely transform it, creating bold new flavors and loading it with beneficial probiotics.
These methods are some of the best for preserving food without electricity. You’re not just removing moisture; you’re cultivating a very specific environment where good bacteria thrive, pushing out the bad bacteria that cause rot. It’s a brilliant way to turn a garden surplus into shelf-stable, gut-healthy staples for your pantry.
This isn’t some new-age health trend; it’s a cornerstone of how humans have eaten for millennia. Evidence suggests people were pickling cucumbers in India over 3,000 years ago. The process creates acidic conditions that are hostile to spoilage microbes. Even better, fermentation can generate new vitamins that weren’t even in the original food, making the final product more nutritious. You can find more details on these ancient preservation methods at MadgeTech.com.
The Magic of Lacto-Fermentation
At the heart of real pickles, kimchi, and sauerkraut is lacto-fermentation. This process hinges on naturally occurring Lactobacillus bacteria, which already live on the surface of fresh vegetables. When you submerge those vegetables in a saltwater brine, you create the perfect little playground for these good bacteria to get to work.
The Lactobacillus eats the natural sugars in the veggies and converts them into lactic acid. This acid is a powerful natural preservative, giving fermented foods their signature tangy flavor and making the environment too acidic for harmful organisms to survive.
Your First Batch of Sauerkraut
Sauerkraut is the perfect gateway to fermentation. It’s unbelievably simple and requires just two ingredients: cabbage and salt. You don’t even need water; the salt pulls all the liquid you need right out of the cabbage.
Here’s the basic rundown to get started:
- Shred and Salt: Finely shred a head of cabbage and dump it in a large, non-reactive bowl. A good rule of thumb is 3 tablespoons of non-iodized salt for every 5 pounds of cabbage. Iodine can mess with the bacteria, so stick to pure sea salt or Morton Kosher Salt.
- Massage and Pound: This is the most critical part. Get your hands in there and massage and squeeze the salted cabbage for about 10 minutes. You’ll feel it start to soften and release its water. A wooden pounder can speed this up.
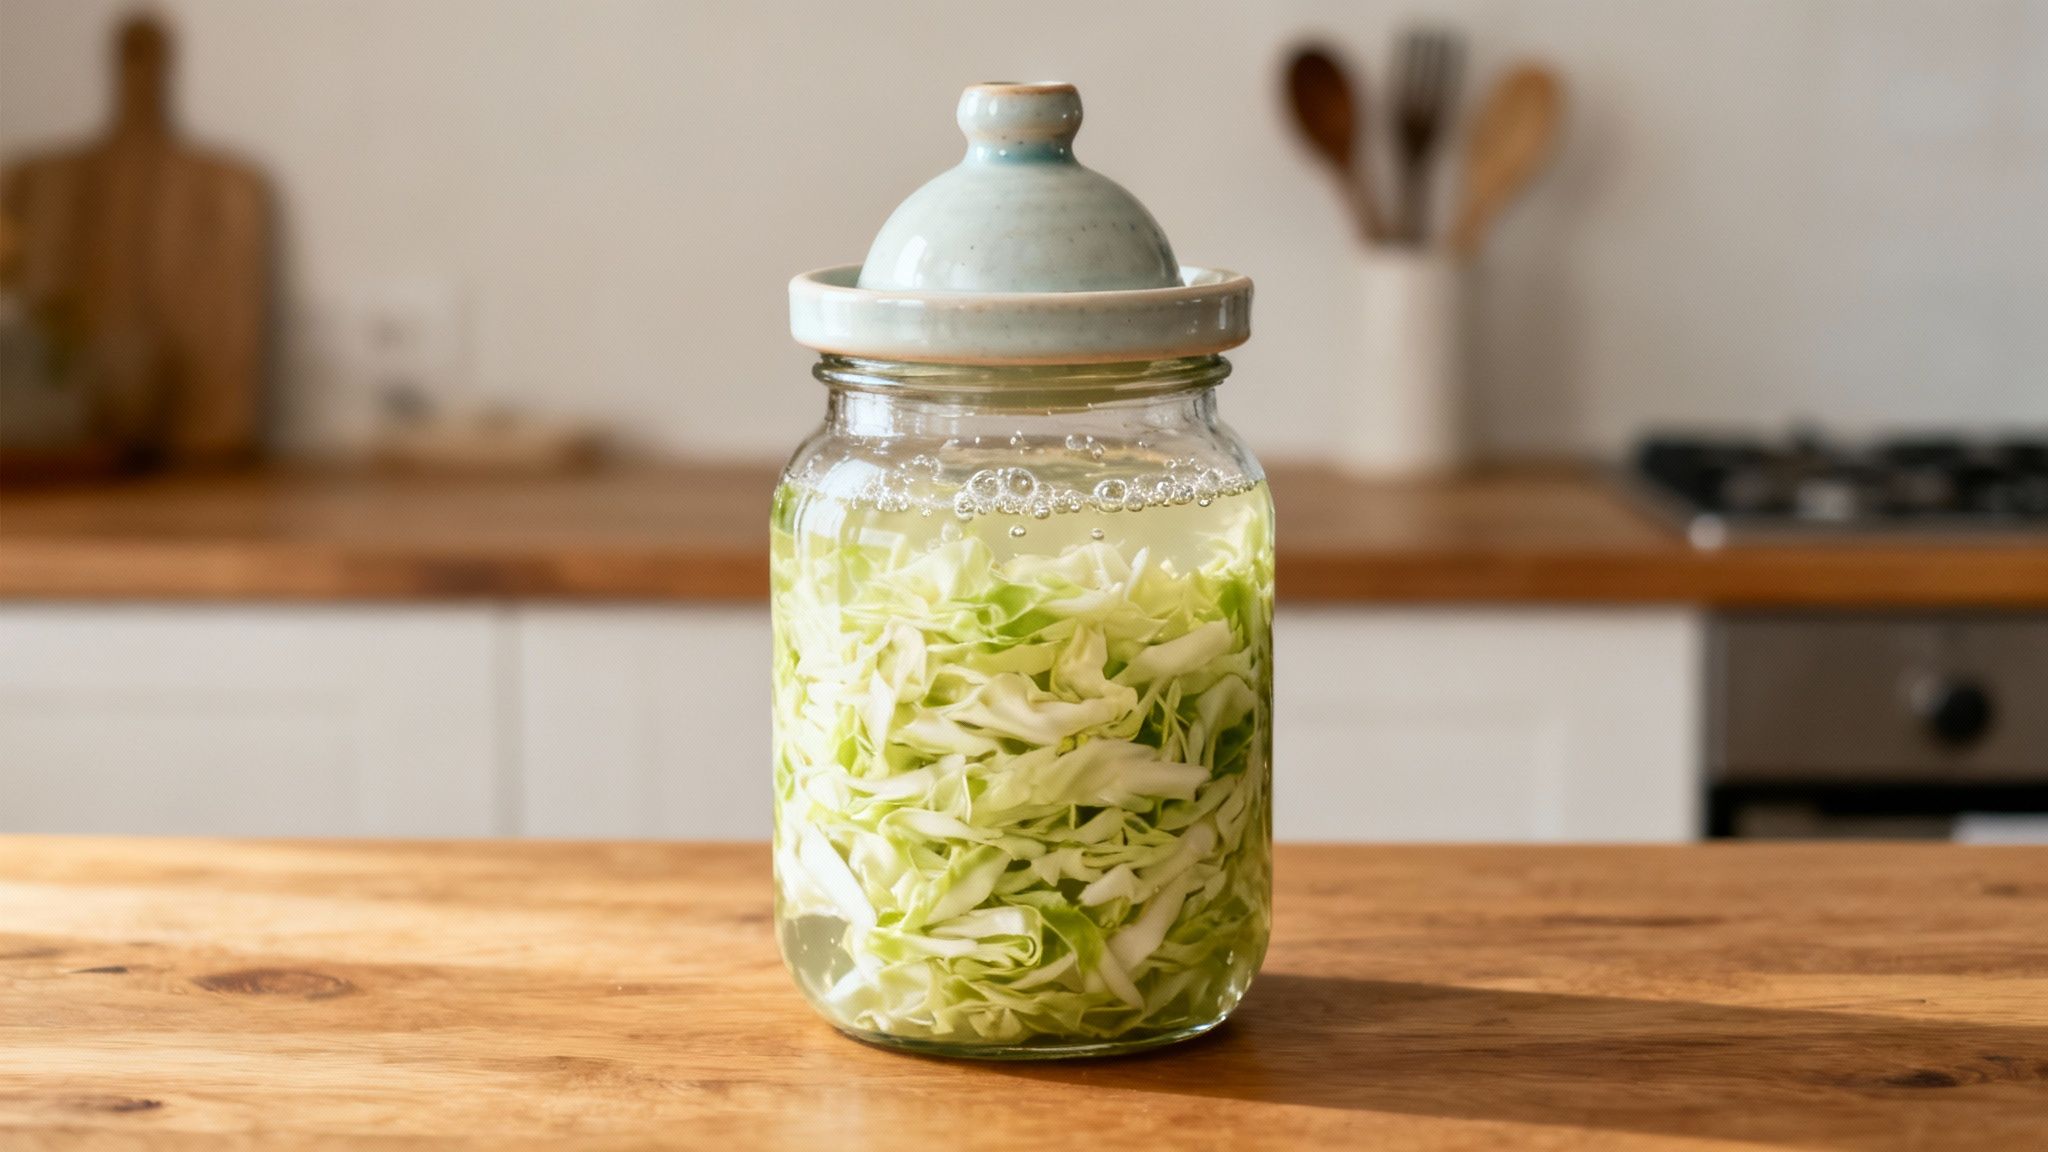
- Pack the Jar: Tightly pack the cabbage into a clean glass jar, pressing it down hard to eliminate air pockets. Pour every last drop of the released brine over the top. The cabbage must stay completely submerged under the liquid.
- Weigh It Down: Use a fermentation weight, a small plate, or even a clean rock to keep the cabbage below the brine. Cover the jar with a cloth or, even better, an airlock lid.
The magic will happen over the next one to four weeks, depending on your room’s temperature. You’ll start to see bubbles forming, which is the best sign that your friendly bacteria are busy working. To see how this fits into a broader strategy, check out our other articles on food preservation.
A Few Tools for Success
You can definitely get by with basic kitchen gear, but a couple of simple tools make fermentation much more reliable and nearly foolproof.
- Fermentation Weights: Glass or ceramic weights are perfect for keeping everything submerged. This one thing is the key to preventing mold.
- Airlocks: These are one-way valves that let the carbon dioxide from fermentation escape without letting oxygen or contaminants get in. Silicone tops like Masontops Pickle Pipes are awesome—they fit on standard Mason jars and make the whole process incredibly easy.
Healthy vs. Spoiled Ferments
Trust your senses. A healthy ferment should smell pleasantly sour and tangy, like a good pickle. If you open the jar and it smells rotten, putrid, or just plain wrong, don’t risk it—toss it. Look out for fuzzy mold, especially if it’s black, pink, or blue. A little bit of white film (called kahm yeast) on the surface is usually harmless and can be scraped off, but colored mold means the batch is spoiled. When in doubt, throw it out.
The Simplicity of Vinegar Pickling
If you want a faster, more straightforward method, there’s always vinegar pickling. Instead of waiting for bacteria to create acid, you just add the acid yourself. This is how most of the pickles you find at the grocery store are made.
The process is quick. You just create a brine of vinegar, water, salt, and maybe some sugar, bring it to a boil, and pour it over your veggies in a jar. These “quick pickles” are usually ready to eat in a day or two. While they don’t have the same probiotic benefits as fermented foods, they’re a fantastic and reliable way to preserve your harvest without any electricity.
Off-Grid Canning With Alternative Heat Sources
When you think of canning, you probably picture a modern kitchen with a shiny electric stove. But the truth is, the core principles of canning are perfectly suited for off-grid living. The goal is always the same: use intense heat to kill off harmful microorganisms and create a powerful vacuum seal that keeps contaminants out.
You can do this just as effectively over a propane burner, a wood fire, or a big outdoor cooker. The real skill lies in managing your heat source to maintain consistent, safe temperatures. Whether you’re water bath canning high-acid foods like peaches and tomatoes or pressure canning low-acid vegetables and meats, the process is completely adaptable.
Canning has been a game-changer in food preservation since the 1790s, combining high heat with an airtight seal. It’s a vital skill because once the hard work of heating is done, the sealed jars need zero electricity to keep food safe and sound for years. If you’re interested in the deep dive, you can learn more about the history and science of canning at NCBI.
Water Bath vs. Pressure Canning Off-Grid
Getting the difference between these two methods right isn’t just a suggestion—it’s absolutely critical for safety.
Water Bath Canning: This is your go-to method for high-acid foods only. Think fruits, jams, jellies, pickles, and most tomato products. Their natural acidity prevents the growth of nasty stuff like Clostridium botulinum spores. The jars are submerged in boiling water (212°F or 100°C), which is hot enough to destroy mold, yeast, and most bacteria.
Pressure Canning: This is the only safe method for low-acid foods. That includes all fresh vegetables (like green beans and corn), meats, poultry, and fish. These foods don’t have the acid to stop botulism spores, which can easily survive boiling temperatures. A pressure canner traps steam to hit temperatures of 240°F (116°C) or higher—the only way to reliably kill those dangerous spores. A good, reliable workhorse like a Presto Pressure Canner is non-negotiable for anyone serious about off-grid preserving.
You cannot safely can low-acid foods in a water bath canner. Ever. No shortcuts, no “old family tricks,” no exceptions. Trying to do so creates a serious risk of botulism, a potentially deadly illness. Don’t take the chance.
Choosing Your Off-Grid Heat Source
Your success with off-grid canning comes down to how well you can control your heat. You need something that can bring a massive pot of water to a rolling boil and keep it there, or maintain steady pressure in a canner for over an hour. It’s worth exploring different survival alternatives for heat to figure out what fits your setup.
A simple propane camp stove like a Coleman Triton is often the easiest and most reliable option. It gives you consistent, adjustable heat that works a lot like a gas range. A well-managed wood fire on a sturdy cooking grate can also get the job done, but it demands constant attention to keep the temperature even.
Let’s break down the most common choices to help you decide.
Alternative Heat Sources for Off-Grid Canning
Here’s a look at some of the most common heat sources for canning when you’re off the grid, along with their strengths and weaknesses.
| Heat Source | Pros | Cons | Best For |
|---|---|---|---|
| Propane Camp Stove | Excellent heat control and consistency. Easy to set up and use. | Requires a finite fuel supply (propane tanks). May struggle with very heavy canners. | Beginners and anyone who values precise temperature and pressure management. |
| Wood Fire / Rocket Stove | Uses renewable, easily sourced fuel. Can generate very high heat. | Difficult to regulate temperature precisely. Creates soot on pots. | Experienced canners comfortable with fire management; ideal for water bath canning. |
| Outdoor Cooker / Turkey Fryer | Very stable base for heavy canners. Puts out a massive amount of heat. | Consumes a lot of propane quickly. Can be overkill for small batches. | Large-batch pressure canning where high, sustained heat is necessary. |
No matter which heat source you use, remember that the fundamentals don’t change. Always use clean, inspected jars and new lids for every batch, and stick to tested recipes from reliable sources.
Mastering off-grid canning is a powerful skill. It unlocks a whole new level of food security, giving you the ability to preserve almost any harvest for years to come.
Common Questions About Off-Grid Food Preservation
Getting started with preserving food without electricity is exciting, but it naturally brings up a lot of questions. As you move from reading about it to actually doing it, you’ll hit little roadblocks and need clear answers. Let’s tackle some of the most common hurdles to help you get started with confidence.
What Are the Most Common Mistakes to Avoid?
The biggest mistakes almost always come down to two things: safety and patience. One of the classic errors is under-salting meat during the curing process. That salt isn’t just for flavor—it’s what pulls moisture out and stops bacteria from taking hold. The same goes for canning; if you don’t get a hard, concave seal on that jar, the food inside isn’t safe.
Another simple but frequent mistake is storing your beautifully dried foods somewhere damp. All that hard work is undone when humidity sneaks back in, creating a perfect home for mold.
But the most dangerous mistake of all? Impatience. Rushing the process is a recipe for disaster. Pulling jerky from the dehydrator before it’s truly dry, cutting a curing time short, or ignoring the specific processing times for canning can lead to seriously unsafe food. Always stick to trusted recipes, especially for pressure canning, and live by this rule: when in doubt, throw it out. Never eat anything that looks, smells, or just feels off.
Which Method Is Easiest for a Beginner?
If you’re just dipping your toes in, sun drying and vinegar pickling are fantastic starting points. Both are incredibly forgiving, don’t require a bunch of specialized gear, and are perfect for understanding the basic principles at play.
- Sun Drying: It doesn’t get much simpler than this. Laying thinly sliced fruits or herbs out on a screen in the hot sun teaches you the fundamental concept of moisture removal with almost zero risk.
- Vinegar Pickling: Making a batch of “quick pickles” is incredibly satisfying. You’re just creating a simple vinegar brine, pouring it over fresh veggies in a jar, and letting it work its magic. It’s a fast, reliable way to save your harvest.
Once you get a feel for these, you’ll have the confidence to tackle more complex skills like fermentation or pressure canning.
How Do I Know If My Preserved Food Is Safe to Eat?
Your own senses are your most reliable tools. Before a preserved food ever gets near your mouth, give it a good look and a good sniff. The signs of spoilage are usually pretty obvious if you know what you’re looking for.
When it comes to canned goods, the seal is non-negotiable. A properly sealed lid will be firm to the touch and curved slightly inward (concave). If you see a lid that’s bulging, leaking, or makes a loud hiss when you open it, that’s a major red flag. Discard it immediately without tasting it.
For dried and cured foods, your eyes and nose are key. Look for any fuzzy spots of mold, weird discoloration, or any areas that feel soft or damp. It should smell like the food it’s supposed to be—not musty, rancid, or sour. For long-term storage, a vacuum sealer like a FoodSaver combined with oxygen absorbers is a great way to remove that last bit of air and protect your hard work.
With fermented foods, you’re looking for a clean, pleasantly sour smell. If it smells rotten, cheesy (for something that isn’t cheese), or just plain putrid, the wrong bacteria took over. It’s spoiled and needs to be tossed.
Can I Reuse Canning Lids?
This is one of the most important safety rules in home canning, so the answer is a hard no. You cannot reuse standard flat canning lids. Period.
That little ring of sealing compound on the lid is designed for one-time use. The first time you process a jar, it softens and forms a perfect, airtight vacuum seal. Trying to use it a second time creates a huge risk of a “false seal”—where the lid feels sealed but has microscopic gaps. Those tiny openings are all it takes for dangerous bacteria, including the kind that causes botulism, to get inside and multiply.
The few cents you’d save are not worth the severe risk of foodborne illness. Always, always start every canning batch with brand-new lids.

