Knowing how to start a fire without matches is more than a party trick; it’s one of the most fundamental survival skills you must master. When you’re in a tough spot, this knowledge can literally be the difference between life and death.
The core methods boil down to three things: friction, sparks, or concentrated sunlight. Whichever you choose, the goal is the same—create a glowing ember or a hot spark, then carefully transfer it to a waiting tinder bundle and nurse it into a self-sustaining flame.
Understanding the Fundamentals of Fire
Before you even think about generating that first spark, you need to get the basics down cold. You probably remember the “fire triangle” from science class—heat, fuel, and oxygen. That’s the theory. In the real world, success hinges on how well you can find, prepare, and layer the right materials.
Proper preparation is everything. It’s what separates a life-saving fire from a whole lot of frustrating, wasted effort. We take modern tools for granted, but their impact was huge. When the self-igniting match was invented in 1826, it was a game-changer. Surveys from the 19th century showed it slashed fire-making time by an incredible 88%, from over five minutes down to just 30 seconds.
Without that convenience, we have to rely on skill, and that starts with understanding our fuel.
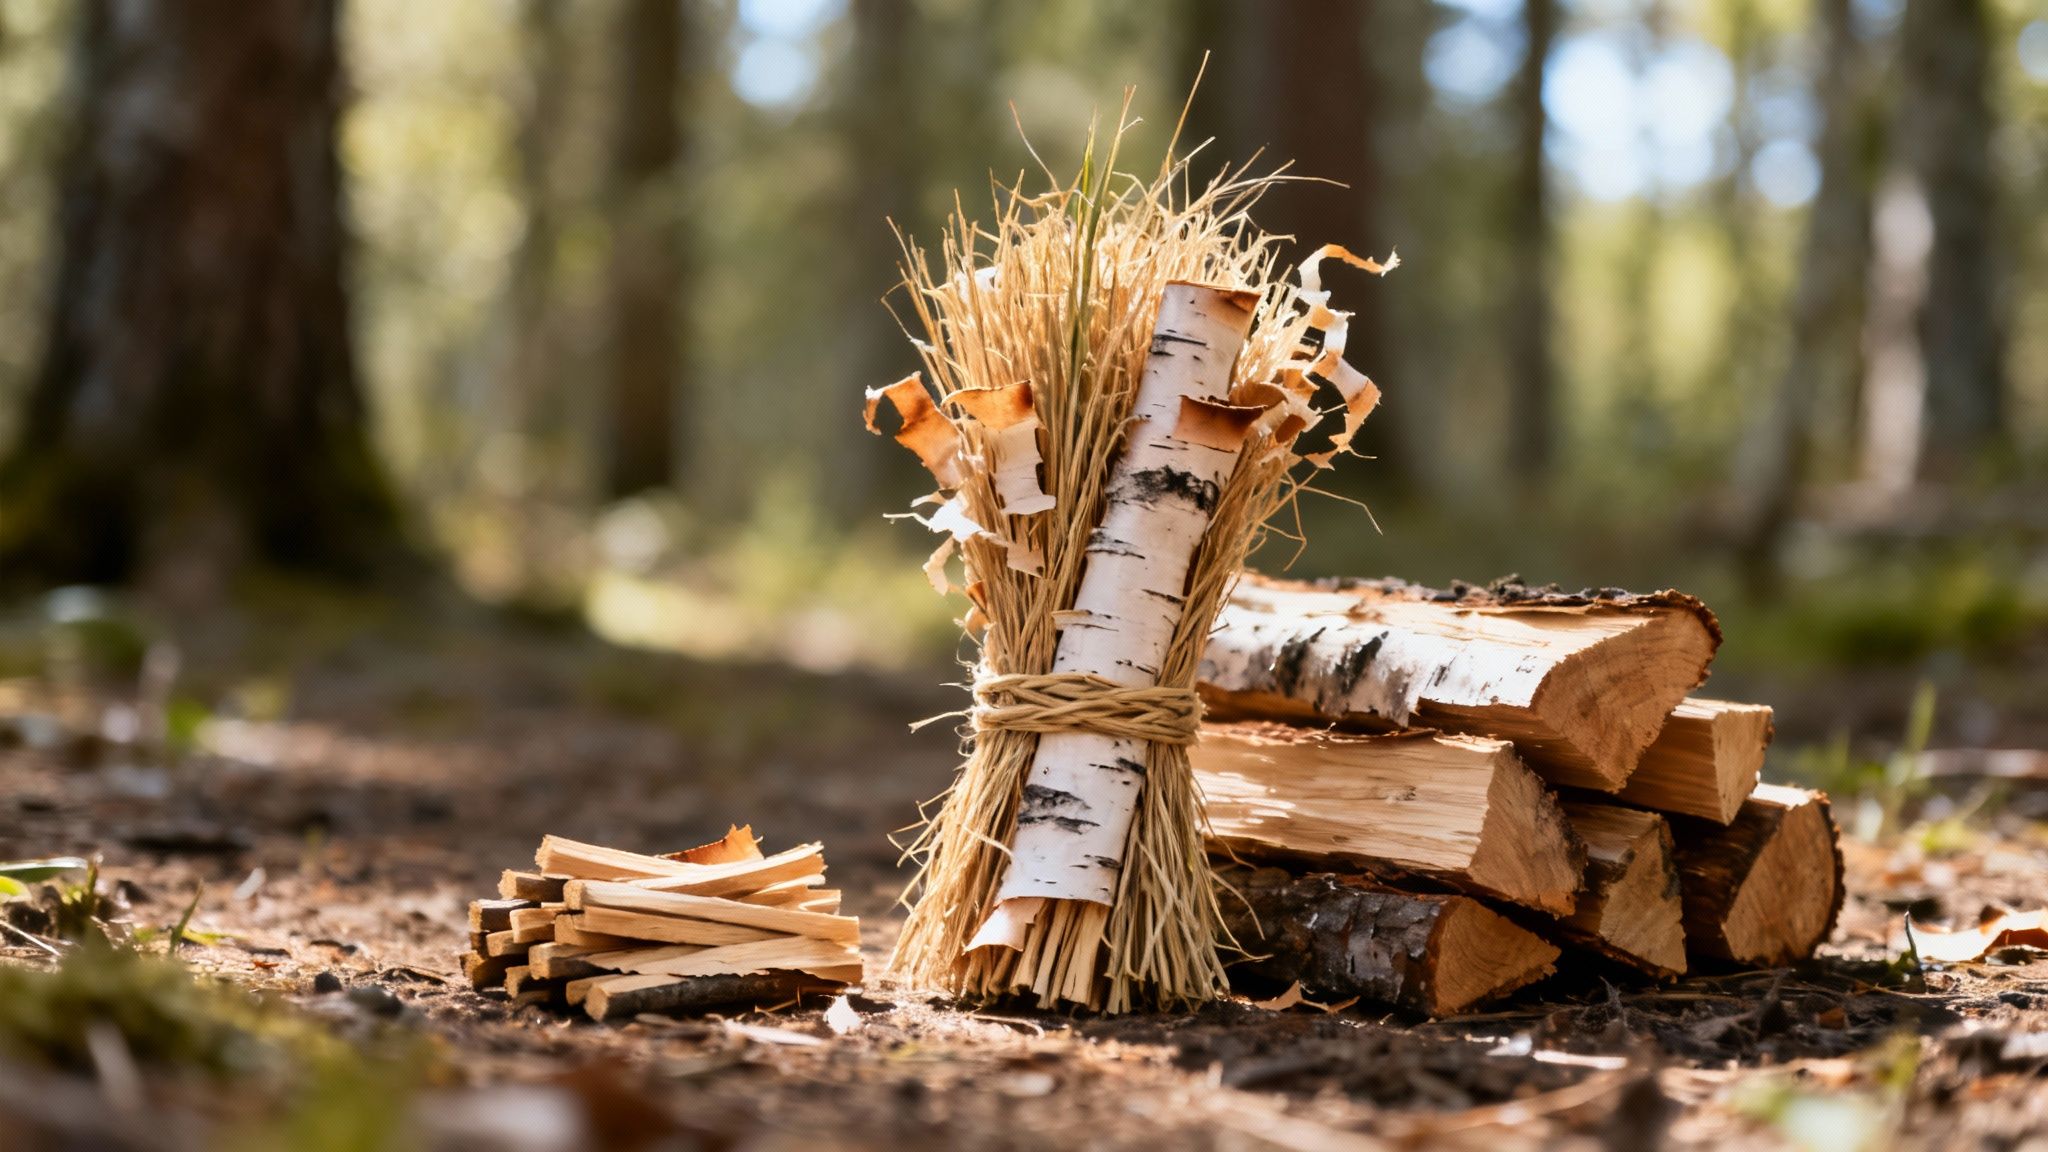
The Three Tiers of Fuel
A lasting fire isn’t just a pile of wood. It’s a carefully constructed ladder that your flame will climb, starting with the most delicate materials and moving up to the big stuff. Get this sequence right, and your job becomes infinitely easier.
Tinder: This is the cradle for your newborn flame. It has to be bone-dry, fluffy, and have a massive amount of surface area to catch that initial spark or tiny ember. Think cattail fluff, shredded birch bark, or even pocket lint. Commercially, products like Insta-Fire Fire Starter are great because they’re designed to light even in nasty, wet conditions. Another popular option are WetFire tinder cubes, which are individually wrapped and waterproof.
Kindling: These are the intermediaries. They take the small flame from your tinder and build it into a hotter, more stable fire. You need a big bundle of small sticks, ranging from the thickness of pencil lead up to about the size of your thumb
Fuel Wood: This is the main course—the larger logs that provide sustained heat and create a lasting bed of coals for warmth or cooking through the night.
One of the most common rookie mistakes is not gathering enough kindling. A good rule of thumb? Gather what you think you need, and then double it. There’s nothing more heartbreaking than watching your precious ember die because you ran out of small sticks to feed it.
Before you start building, it’s worth having a solid grasp of your fuel options.
Fire Building Material Comparison
This quick guide breaks down the role of each fuel type. Think of it as your cheat sheet for building a fire that lasts.
| Material Type | Description & Purpose | Best Examples | Preparation Tip |
|---|---|---|---|
| Tinder | The initial fuel source. Must be ultra-fine, dry, and fluffy to catch a spark or ember. | Cattail fluff, birch bark shavings, fatwood dust, dry grass, pocket lint, cotton balls with petroleum jelly. | Shred, fluff, or grind it into the finest possible consistency to maximize surface area and airflow. |
| Kindling | Small sticks that build heat from the tinder’s flame. They act as a bridge to your main fuel. | Twigs from “pencil lead” to “thumb” thickness. Dry pine needles, small pieces of split wood. | Snap twigs to test for dryness—they should break with a clean, sharp “crack,” not bend. |
| Fuel Wood | Larger logs that sustain the fire, providing long-lasting heat and a bed of coals for cooking or warmth. | Seasoned, dry hardwood (like oak or maple) for slow-burning coals; softwood (like pine) for a fast, hot fire. | Split larger logs to expose the dry inner wood, especially in wet conditions. Stack near the fire to pre-dry. |
Having all three types gathered and sorted before you start makes the entire process smoother and far more likely to succeed.
Preparing Your Fire Site
Where you build your fire is just as important as how you build it. A poorly chosen spot can let wind snatch your ember away or let ground moisture suck the heat right out of your flame.
First, find a sheltered location. Look for a spot next to a large rock, a fallen log, or in a ditch that can serve as a natural windbreak.
Once you have your spot, you need to clear a circular area at least 10 feet in diameter right down to the bare dirt. Scrape away all the leaves, dry grass, twigs, and anything else that could accidentally catch fire. This firebreak is non-negotiable for safety.
If the ground is wet, snowy, or frozen, don’t build directly on it. Your fire will waste all its energy just drying the ground. Instead, build a small platform of green logs or flat rocks to insulate your fire and reflect the heat upwards where you need it.
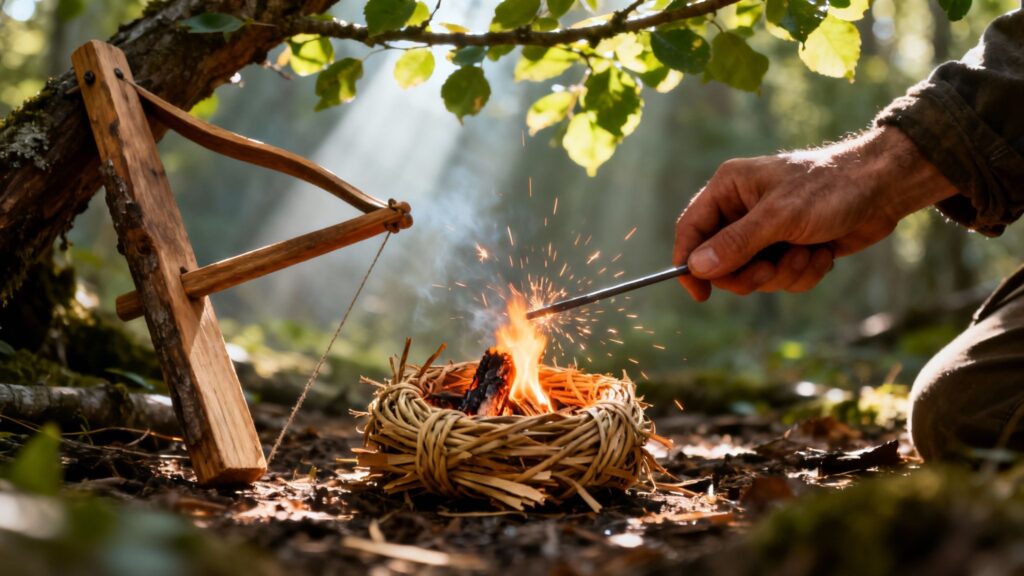
Creating Fire with the Bow Drill Method
The bow drill is the quintessential friction fire technique. It’s an iconic skill that feels like a direct link to our resourceful ancestors. Honestly, mastering this method is less about brute force and more about finesse and physics, but getting that first ember is an incredibly empowering experience. While it demands patience and plenty of practice, it’s a completely self-reliant way to make fire using only materials from the landscape around you.
This isn’t just some forgotten relic. Its principles are still taught today as a viable survival skill. Think about it: among the 2 million people who go through FEMA programs annually, there’s a 75% proficiency rate in friction and flint methods. That proves just how teachable these ancient techniques still are.
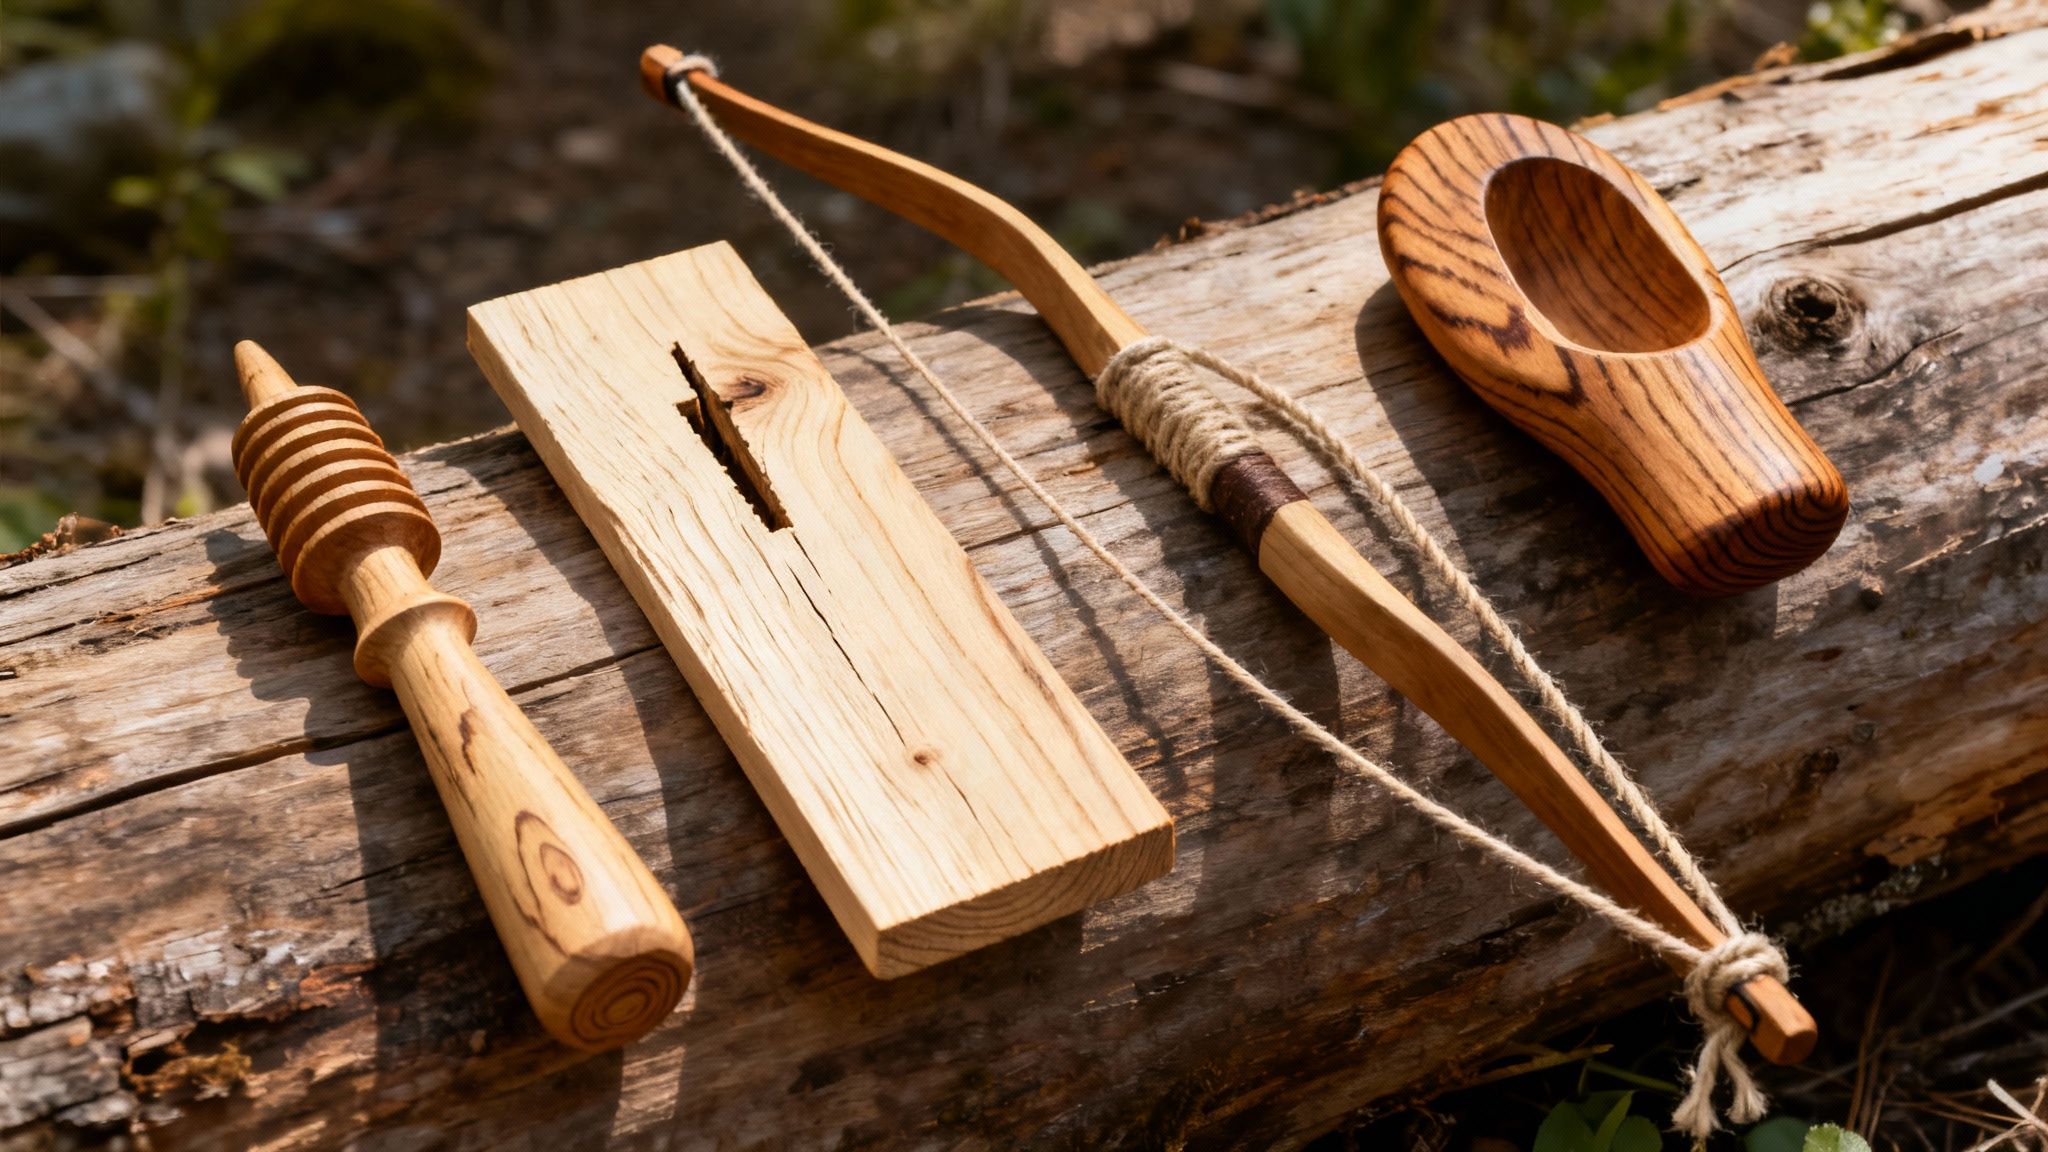
Assembling Your Bow Drill Kit from Nature
Your success with the bow drill starts long before you ever start spinning. It begins with selecting the right materials. Each component has a specific job, and believe me, choosing the wrong type of wood is a guaranteed path to frustration.
You’ll need to find or craft four key pieces:
- The Fireboard (or Hearth Board): This is your base. Look for a flat piece of soft, non-resinous wood about an inch thick.
- The Spindle: This is the stick you’ll be spinning. It must be made from the same type of soft wood as your fireboard and should be perfectly straight, about the diameter of your thumb.
- The Handhold (or Socket): This piece applies downward pressure on the spindle. It can be a hard piece of wood, a smooth rock with a nice divot, or even a dense piece of bone if you can find one.
- The Bow: A sturdy, slightly curved branch about the length of your arm will do the trick. For the cordage, you can use paracord from a survival bracelet like the Wazoo Survival Gear Bushcraft Necklace, a shoelace, or cordage you make yourself from natural fibers.
The most common mistake I see is impatience during material selection. Take the extra 30 minutes to find bone-dry, ideal wood. Trying to force damp or hardwood materials to work will waste hours of energy and leave you with nothing but smoke and disappointment.
Selecting the Right Wood
Choosing the correct wood is, without a doubt, the most critical factor. You’re looking for soft woods that will create a fine, flammable dust when you apply friction. Hardwoods like oak or maple will just polish each other smooth and won’t generate the necessary char dust to form an ember.
Here are some of the best woods to keep an eye out for:
- Cedar: Often considered the gold standard. It’s soft, has a low ignition point, and grinds into a perfect, fluffy dust.
- Basswood: A fantastic choice for beginners because it’s exceptionally soft and really easy to work with.
- Yucca Stalk: If you’re in the right region, the dry flower stalk of a yucca plant is incredibly lightweight and works phenomenally well.
- Cottonwood: Look for dead, dry branches. The wood is ideal for generating the necessary heat very quickly.
These skills connect deeply to a more self-sufficient way of life. For those interested in this mindset, exploring the principles behind these timeless techniques can be incredibly rewarding; you might be interested in our guide on some of the lost amish skills that emphasize resourcefulness.
The Mechanics of Creating an Ember
Once you have your kit, it’s time to put it all together. First, carve a small depression near the edge of your fireboard. Loop the bowstring around the spindle once, then place one end of the spindle into that depression and the other into your handhold.
Now, apply gentle downward pressure and begin a smooth, steady sawing motion with the bow. This initial “burning in” process will create a perfectly matched, blackened socket on both the fireboard and the spindle tip. Don’t skip this.
Next comes the most important step: carving a V-shaped notch from the edge of the fireboard right into the center of your newly burned-in socket. This notch is where the magic happens—it’s the collection point for the hot dust that will eventually form your ember.
Position your tinder bundle directly beneath this notch to catch the goods. Place one foot firmly on the fireboard to hold it steady. Now, begin your sawing motion again. Start slowly and gradually increase your speed and pressure. You’ll see smoke begin to curl up—don’t stop! Accelerate until the smoke is thick, heavy, and smells acrid.
When you feel you’ve generated enough hot dust, carefully pull the spindle away. If you’ve done everything right, you will see a tiny, glowing red coal smoldering in your pile of black dust. You have just created fire.
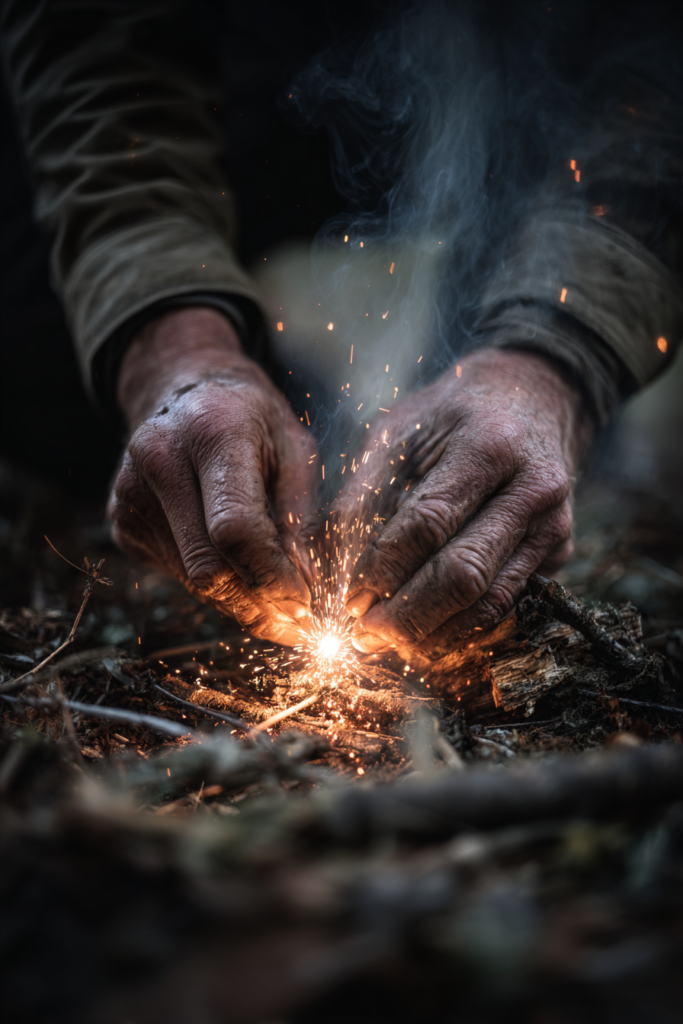
Using Percussion Tools Like Flint and Ferro Rods
If you find friction methods a bit too labor-intensive, percussion is your go-to. This approach is all about creating incredibly hot sparks by striking two specific materials together. It’s a fast, reliable way to get a flame going when you’re short on time and energy.
First, we’ll dive into the classic flint and steel, a technique that connects us to our ancestors. Then, we’ll move on to its modern, super-charged successor: the ferrocerium rod. Both are essential skills for anyone serious about preparedness.
Mastering the Timeless Flint and Steel
There’s something deeply satisfying about using flint and steel—an old-school method linking you to centuries of human ingenuity. It requires more finesse than modern tools, but the principles are simple. You need three things: high-carbon steel, a sharp-edged rock like flint, and spark-catching tinder like char cloth.
The real magic happens when you strike the steel sharply against the rock’s edge. This shaves off tiny particles of steel, which instantly ignite when they hit the air, creating a shower of sparks.
This is one of the oldest and most proven fire-starting methods out there, with evidence of its use dating back at least 400,000 years. Even Ötzi the Iceman, the famous mummy from 5,300 years ago, carried a fire-making kit with flint and pyrite. Modern tests show that someone skilled with this technique can get an ember going in under 30 seconds.
To get started, you’ll need to gather your materials:
- High-Carbon Steel: You can buy a dedicated steel striker, but the spine of a good high-carbon steel knife works just as well. A common choice for bushcrafters is the Morakniv Companion. Don’t bother with stainless steel; it’s too hard and won’t throw the right kind of sparks.
- Sharp-Edged Rock: Flint is the classic choice, but chert or quartzite will also get the job done. The key is finding a hard rock with a razor-sharp edge that can effectively shave off bits of the steel.
- Tinder: Char cloth is the perfect partner for flint and steel. It’s designed to catch a spark and hold a glowing ember without bursting into flame, giving you time to work. You can easily make your own from 100% cotton cloth and a small metal tin.
Your motion is everything. Hold the char cloth on top of the flint and strike downward with the steel in a glancing blow. The goal is to aim the sparks directly onto the cloth. Once a single spark catches, it will start to glow. Now you have a precious ember ready to be transferred into your main tinder bundle.
The Modern Power of the Ferrocerium Rod
When it comes to pure, brute-force reliability, nothing beats a modern ferrocerium rod. Often just called a “ferro rod” or firesteel, this tool has become a non-negotiable piece of gear for serious preppers and outdoorsmen. Unlike traditional flint and steel, a ferro rod works perfectly even when it’s soaking wet, making it a true all-weather fire starter.
These rods are a man-made alloy of iron, cerium, and other metals that throw off an incredible shower of sparks when scraped. And these aren’t just any sparks—they burn at a blistering 5,400°F (3,000°C).
Tools like the überleben Zünden are popular for a reason. They’re thick, durable, and throw a massive amount of molten material with every single strike. A quality ferro rod is the cornerstone of any serious wilderness survival kit, giving you a dependable fire source when you need it most.
The most common mistake people make with a ferro rod is using a quick, flicking motion. This throws weak sparks and often blows your tinder away before it can catch. Instead, you want to apply firm, steady pressure to shave off curls of the rod. Think of it more like carving a piece of wood than striking a match.
Proven Techniques for Ferro Rod Success
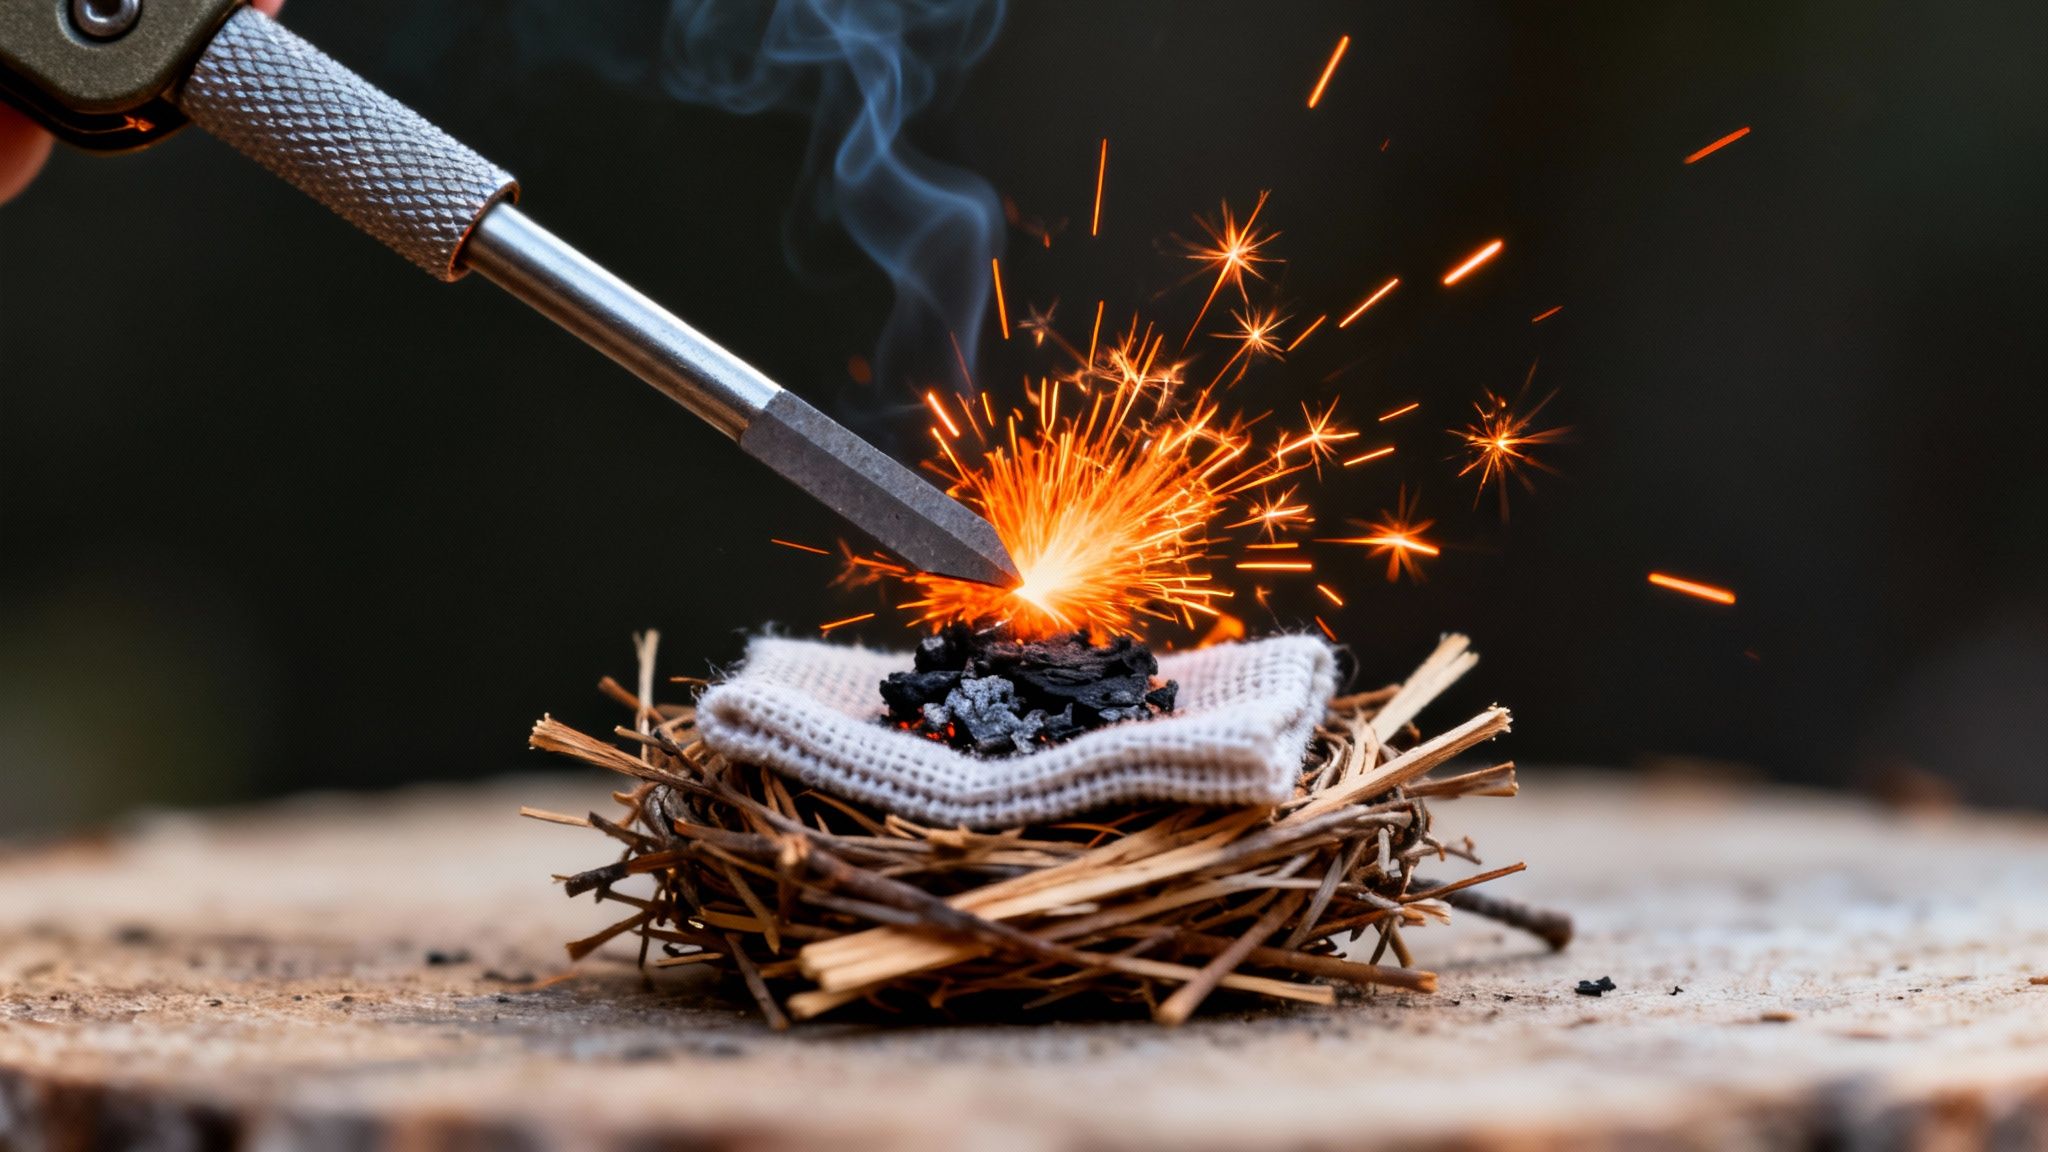
Getting a fire with a ferro rod is surprisingly easy once you get the technique down. The entire game is about directing that super-hot shower of sparks precisely into your prepared tinder bundle. Forget about wild, hopeful strikes—this is all about precision.
For maximum control, give this method a try:
- Anchor the tip of the ferro rod directly into your tinder bundle at a shallow angle. This keeps it steady and ensures the sparks have nowhere to go but into the fuel.
- Grab your scraper. The sharp, 90-degree spine of a knife or a dedicated carbide scraper works best.
- Press down firmly and pull the ferro rod back along the scraper, away from the tinder. This motion keeps the scraper from disturbing your tinder nest and channels the full force of the sparks straight down.
That one simple change—pulling the rod instead of pushing the scraper—dramatically increases your odds of getting ignition on the first or second try. With a well-fluffed tinder bundle, the material should ignite almost instantly, giving you a strong flame to build on.
Tapping into Modern Tools for Fire
While the ancient friction-fire skills are essential, let’s be realistic: sometimes the fastest way to get a fire going is by using items you might already have on you. In a pinch, your cleverness is your best asset. The methods we’re about to cover rely on simple, reliable principles of electricity, optics, and chemistry to generate that life-saving heat.
These techniques are a great reminder that survival is often about looking at everyday objects through a different lens. Knowing how to MacGyver a solution with what’s in your pockets or your pack can turn a scary situation into a manageable one, giving you warmth, the ability to purify water, and a huge mental boost.
The Battery and Steel Wool Trick
This is one of the most shockingly effective modern methods out there, and all it takes is a battery and a bit of steel wool. The science is simple. When you touch the battery terminals to fine steel wool, you create an electrical short. The current surges through the tiny steel filaments, causing them to heat up and ignite almost instantly.
The trick is using the right stuff. A 9-volt battery is your best bet because its positive and negative terminals are conveniently right next to each other. For the steel wool, you need the finest grade you can get your hands on—#0000 is the gold standard. Coarser grades can work, but they’re not nearly as reliable and take more coaxing.
Here’s how you do it:
- First, pull apart and fluff up a small piece of the steel wool. You want to increase its surface area and let more air get in.
- Get your tinder bundle ready and place it on the ground. It needs to be right there, waiting for the spark.
- Take your fluffed-up steel wool and firmly press it across both terminals of the 9-volt battery at the same time.
- The wool will immediately start to glow and send off tiny sparks. Don’t hesitate—plunge it straight into your tinder bundle and blow gently to coax it into a full flame.
This method is incredibly fast, often giving you a flame in under five seconds. The catch? The steel wool burns out just as quickly. You have to have your tinder ready to go. There’s no time to waste once the reaction starts.
Focusing Sunlight with a Lens
On a bright, sunny day, you’ve got a massive, unending source of fire-starting energy hanging in the sky. All you need is a way to concentrate its rays into a single, scorching-hot point. This is where a little basic optics comes in handy, and you probably have more tools for the job than you think.
A magnifying glass is the classic choice, of course, but you can improvise with plenty of other common items:
- The lens from a camera, a pair of binoculars, or even a rifle scope. A quality compass, like a Suunto MC-2, often has a built-in magnifying lens for this purpose.
- A pair of prescription glasses, especially those for farsightedness (the ones that make things look bigger).
- Even a clear plastic bottle filled with clean water can work as a crude but effective lens in a real bind.
Once you’ve got your lens, the technique is straightforward. Angle it toward the sun, adjusting its height and tilt until you see the light focus into the smallest, brightest dot you can manage on your tinder. Now, hold it rock-steady. It might take a minute or two, but that tinder will start to smoke, then smolder. Keep that beam locked on until you have a solid, self-sustaining ember.
No lens? You can even use the polished bottom of a soda can. The concave bottom acts like a parabolic mirror. A piece of chocolate or even toothpaste works as a fine abrasive to polish the can’s bottom until it’s shiny enough to reflect and focus sunlight onto your tinder.
Kicking Off a Chemical Reaction
For a truly powerful and surefire method, you can turn to chemistry. Combining potassium permanganate with glycerin (or antifreeze, which contains ethylene glycol) creates a powerful chemical reaction that leads to spontaneous combustion. These might sound like obscure lab chemicals, but you’ll often find them in well-stocked first-aid kits, as potassium permanganate is an old-school antiseptic and water purifier.
You need to be extremely careful with this one.
First, pour a small pile of potassium permanganate powder onto a dry, non-flammable surface like a flat rock or a piece of bark. Use a stick to make a small dent in the center of the pile.
Next, carefully add just a few drops of glycerin into that depression. Don’t stir it. Just step back and give it a moment. After about 30-60 seconds, the mixture will start to smoke before suddenly erupting into a hot, lilac-colored flame. This intense heat is perfect for igniting even tinder that’s a little on the damp side.
Knowing these modern fire-starting methods is a key part of any solid preparedness plan. If you’re putting together your own gear, our guide on creating a compact survival kit has practical advice on which essential items are worth carrying.
Starting a Fire in Wet and Windy Conditions
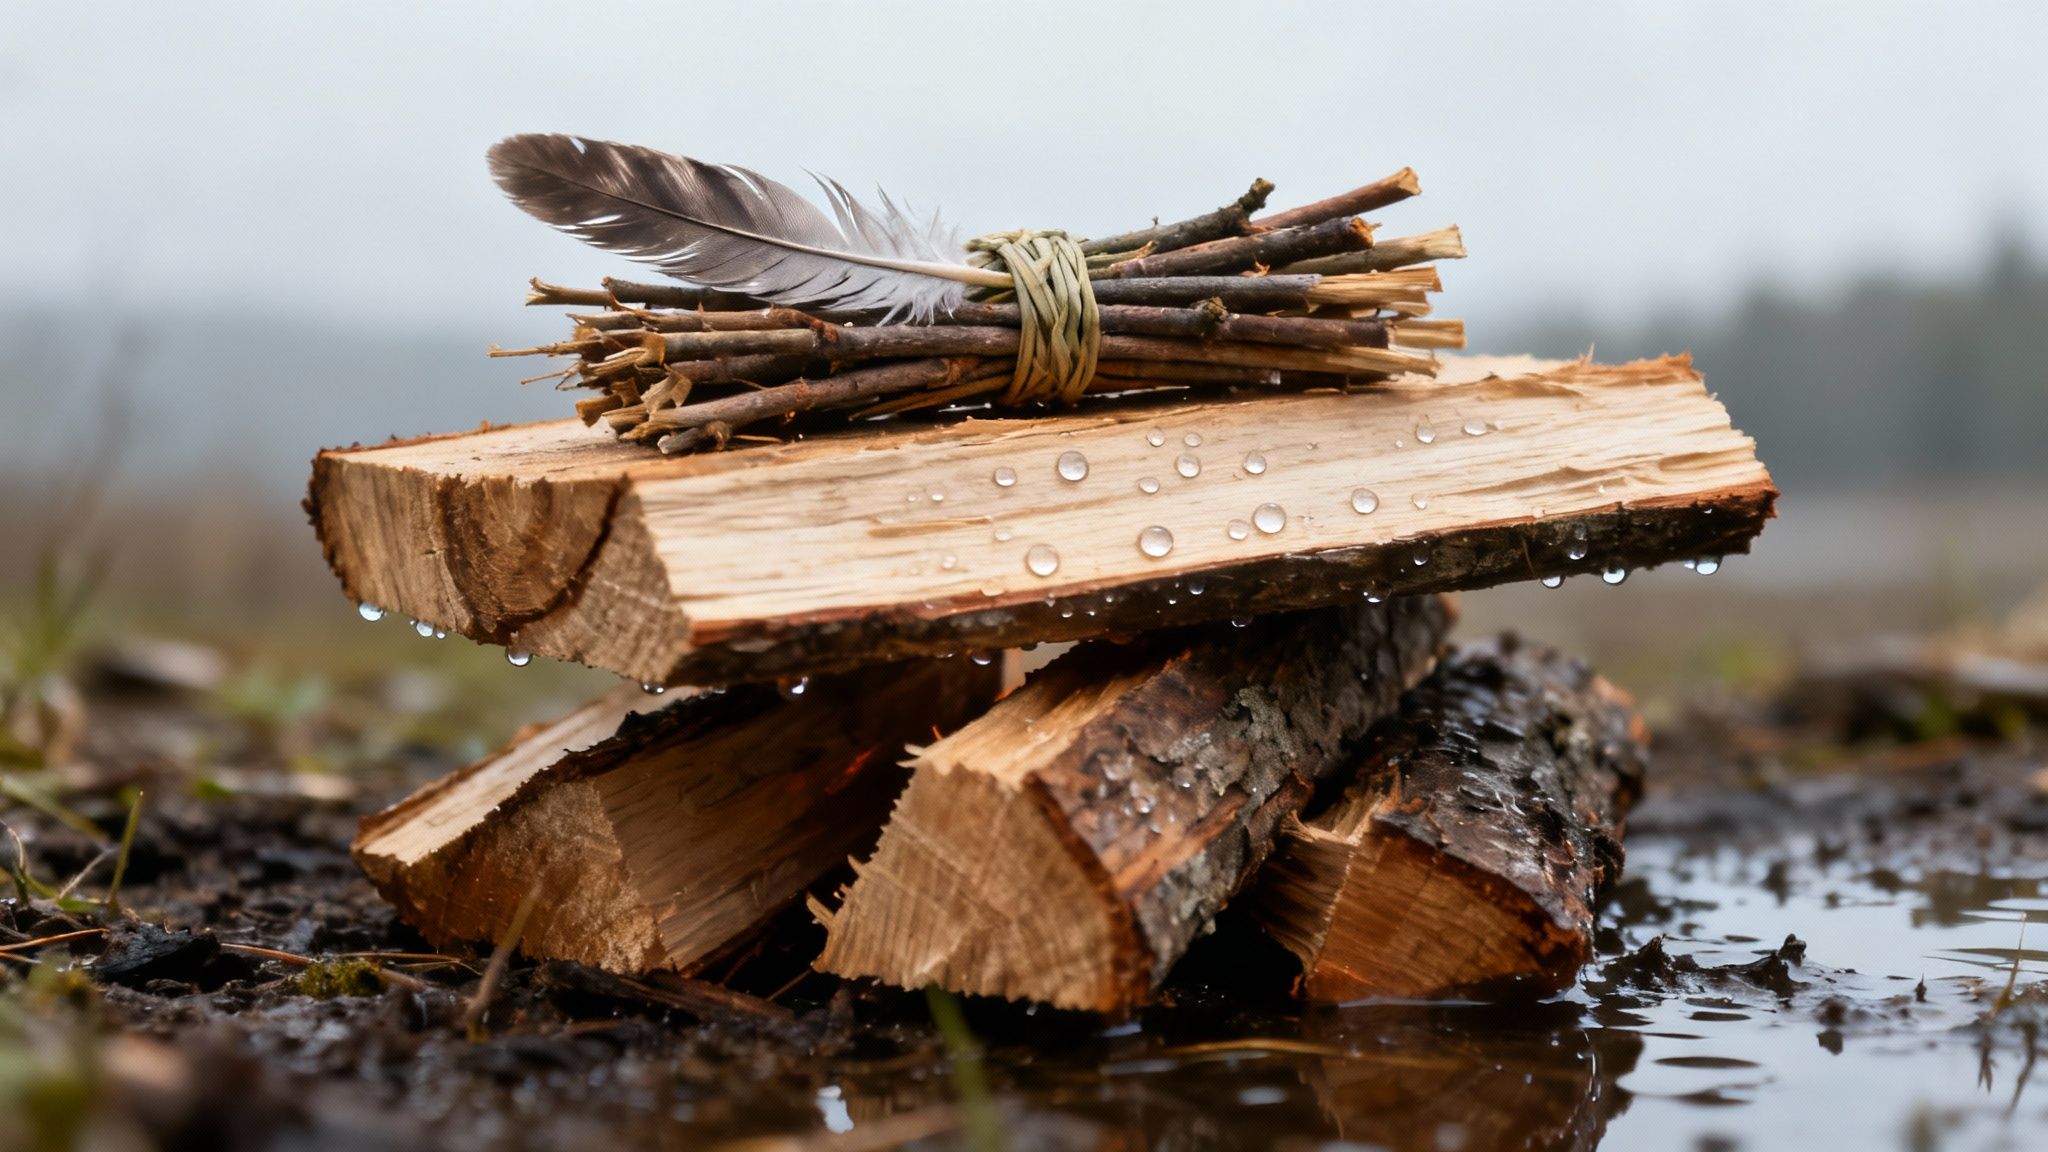
Anyone can get a fire going on a calm, dry day. That’s just practice. The real test comes when the wind is howling and everything around you is soaked. That’s when fire-starting transforms from a skill into an art. Adverse conditions stack the deck against you, demanding a smarter, more patient approach to every single step.
Wind and moisture are your primary enemies, so your first job is to find or build a shelter for your fledgling flame. Tuck yourself behind large boulders, a fallen log, or into a dense thicket of trees. Anything that can serve as a natural windbreak is your new best friend.
Finding and Processing Dry Fuel
When the forest floor is a saturated sponge, you have to change your perspective. Look up. The driest wood is almost always found on dead-standing trees or in branches that are still hanging, protected from the wet ground. The outer bark might be damp, but the heartwood inside is often bone-dry.
This is where a good knife proves its worth. By splitting open these larger pieces of wood, you can get to the dry core. From there, it’s a painstaking but critical process of creating your tinder and kindling.
- Feather Sticks: This is a classic woodsman’s trick for a reason. Take a stick and use your knife to shave long, thin curls along its length, leaving them attached at the base. A well-made feather stick looks like a fuzzy wooden flower and is designed to catch a spark with ease.
- Fatwood: Keep your eyes peeled for old pine stumps. The resin-soaked heartwood, or fatwood, is a gift from nature. It’s naturally waterproof and incredibly flammable, making it one of the absolute best natural fire starters you can find.
- Inner Bark: The fibrous inner bark from trees like cedar or birch can be scraped off and fluffed into an excellent tinder bundle, even when the outer bark is damp.
The Importance of a Fire Platform
Building a fire directly on wet, cold, or snowy ground is a recipe for failure. The moisture will act like a giant heat sink, sucking the life out of your ember before it ever has a chance to grow into a flame. You need to create a barrier.
A simple platform of green logs or flat stones will insulate your fire from the damp earth, reflecting heat upward where you need it most. This one step can be the difference between success and a cold, miserable night. For a deeper dive, check out our complete guide to fire-starting in wet conditions.
A critical mistake is underestimating how much fuel you need. In wet weather, you’ll burn through kindling much faster just to dry out your larger fuel wood. Gather at least twice as much as you think is necessary before you even attempt to create a spark.
When Commercial Fire Starters Are Worth It
As much as we value bushcraft skills, there are times when conditions are so relentlessly awful that a reliable commercial fire starter becomes a potential lifesaver. When natural tinder is hopelessly soaked and hypothermia is knocking at the door, having a backup is just smart planning.
Products like UCO Stormproof Sweetfire are designed for these exact scenarios. They are essentially tinder and kindling in one, burning hot for several minutes—giving you that crucial window to dry out and ignite damp kindling.
Knowing how to make fire is a crucial skill, but so is knowing when to use every advantage you have. This ties into the broader responsibility of fire management. A shocking 21-year study found that human-started wildfires in the U.S. account for 84% of the total, burning seven times more land than lightning-caused fires. It’s a sobering statistic that highlights why skill and sound judgment are non-negotiable in all conditions.
Method Suitability for Different Conditions
Not every fire-starting method is created equal, especially when the weather turns against you. Some techniques that work beautifully on a sunny afternoon become nearly impossible in a downpour. Understanding the strengths and weaknesses of each method helps you choose the right tool for the job.
The table below breaks down how different methods perform in ideal versus adverse conditions, giving you a realistic idea of what to expect.
| Method | Effectiveness in Dry Conditions | Effectiveness in Wet Conditions | Skill Level Required |
|---|---|---|---|
| Ferrocerium Rod | Excellent | Very Good | Beginner |
| Flint & Steel | Good | Poor | Intermediate |
| Bow Drill | Good | Poor | Advanced |
| Hand Drill | Fair | Very Poor | Expert |
| Magnifying Glass | Good (with sun) | Poor (no sun) | Beginner |
| Battery & Steel Wool | Excellent | Good | Beginner |
As you can see, modern tools like a ferro rod or even a simple battery offer a huge advantage when conditions are tough. While mastering friction fire is an incredible skill, it’s also the most vulnerable to moisture. Always be prepared with multiple options.
Got Questions About Making Fire? We’ve Got Answers.
When you’re learning these skills, questions are going to pop up. It’s just part of the process. Here are some of the most common ones I hear, with straight-to-the-point answers to help you get that fire going.
What’s the Easiest Way for a Beginner to Start a Fire Without Matches?
If you’re just starting out, grab a ferrocerium rod. Hands down, it’s the easiest and most reliable modern tool for the job.
A good ferro rod is cheap, works even when it’s soaking wet, and throws a massive shower of incredibly hot sparks without much effort. Pair it with some solid tinder—like petroleum jelly-soaked cotton balls or a commercial fire plug—and your odds of success are through the roof. It takes minutes to learn, not the hours or days of practice required for something like a bow drill.
Can You Really Make a Fire With Just a Couple of Sticks?
Absolutely. People have been doing it for thousands of years using friction methods like the bow drill and hand drill. It’s not a myth, but it does take skill and the right materials.
The secret is in the wood. You need something soft, non-resinous, and bone-dry to create that fine, hot dust that becomes your ember. Think woods like cedar, basswood, yucca, or poplar. It takes a ton of practice to nail the form, pressure, and speed, but it’s a proven survival skill that works when you have nothing else.
What Should I Put in My Fire-Starting Kit?
Think in layers. A good fire kit is all about redundancy—having multiple tools that work in different conditions so you’re never caught out.
A solid, well-rounded kit should have:
- A quality ferrocerium rod and a sharp striker.
- A small, waterproof container packed with guaranteed-dry tinder (dryer lint is free and works like a charm).
- A reliable stormproof lighter, like one of the butane models from Exotac.
- A small stash of waterproof matches as your absolute last resort. Many people prefer UCO Stormproof Matches because they can relight even after being submerged in water.
This layered approach gives you multiple paths to a flame. The ferro rod works when it’s wet, the lighter is fast and easy, the tinder is a sure thing, and the matches are your final failsafe.
How Do You Make Char Cloth for Flint and Steel?
Making char cloth is a fantastic old-school skill that turns plain cotton into tinder that can catch even the faintest spark. All you need are three things: 100% natural fiber cloth (an old cotton t-shirt is perfect), a small metal tin with a tiny hole poked in the lid (an Altoids tin works great), and a fire.
First, cut your cotton into small squares and lay them inside the tin. Don’t stuff it full; leave a little room.
Next, place the tin directly on the hot coals of a fire. Almost immediately, you’ll see smoke jetting out of the little hole. That’s not the cloth burning—it’s the water and other impurities cooking off in an oxygen-starved environment.
Just wait it out. Once the smoke completely stops, carefully pull the hot tin off the fire and let it cool all the way down before opening it. Inside, you’ll find blackened, brittle squares of cloth that will catch a spark in an instant.

