Knowing how to make a splint is a critical survival skill. At its core, it’s about stabilizing an injured limb with something rigid and securing it with bindings. The goal is simple but crucial: immobilize the joints above and below the injury to stop all movement. This prevents more pain and damage when professional medical help is hours—or days—away. It’s the skill that turns everyday items into life-saving tools.
Why Splinting Is a Non-Negotiable Survival Skill

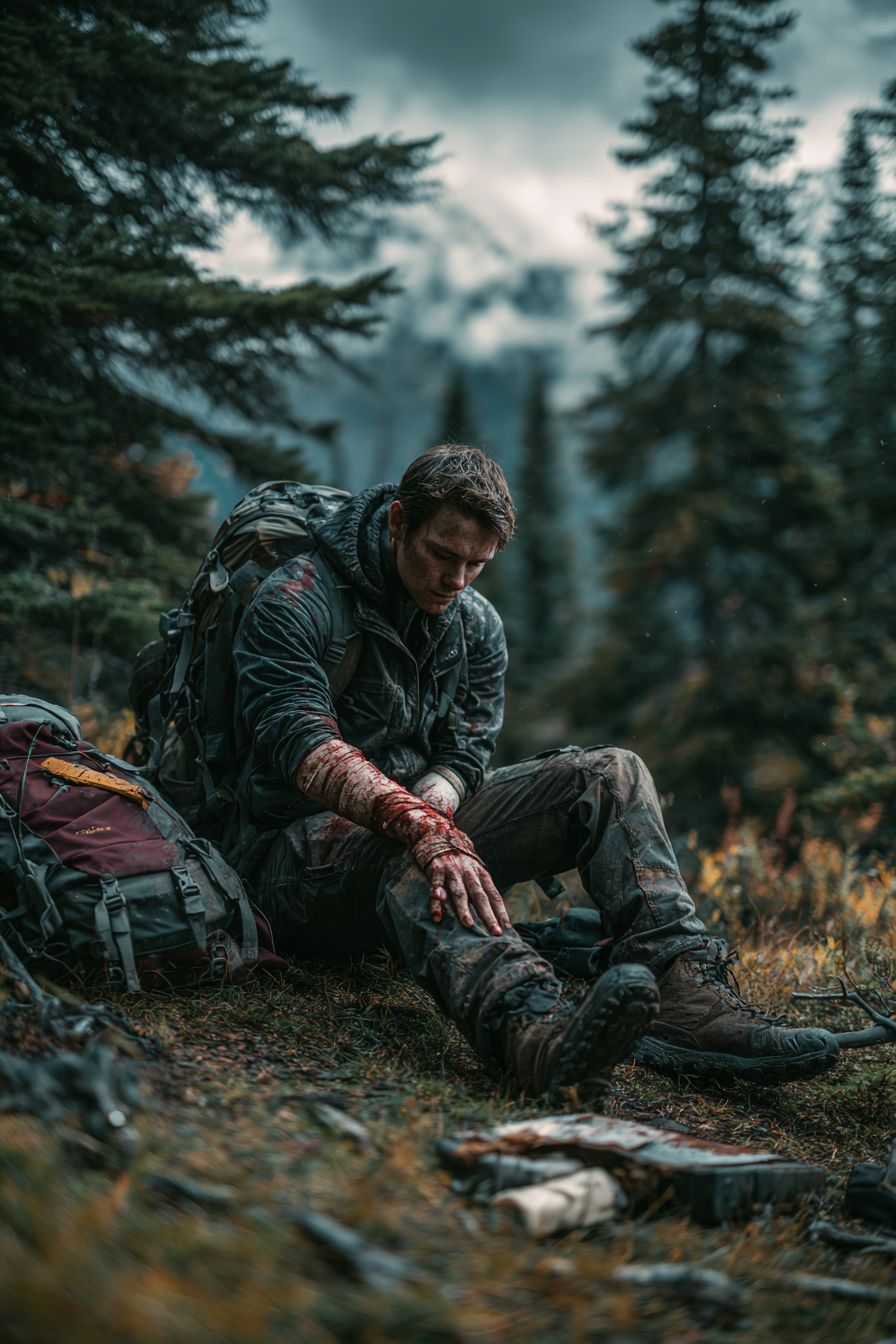
Picture this: you’re on a simple day hike that suddenly turns serious. Your buddy takes a hard fall on an outstretched hand. You’re miles from the trailhead with zero cell service, and their forearm is already swelling and bent at an unnatural angle. In that moment, knowing how to improvise a splint isn’t just helpful—it’s the most important skill you have.
In scenarios where professional medical help might be delayed or unavailable—whether you’re deep in the backcountry or facing a crisis situation like preparing for martial law—your ability to provide effective first aid can mean the difference between a manageable injury and a life-threatening emergency.
Splinting is the practice of immobilizing an injured body part, usually a suspected fracture or a nasty sprain. Its main purpose is to keep a manageable injury from turning into a catastrophic one. Without that stability, the sharp edges of a broken bone can shift, potentially slicing through arteries, shredding nerves, or tearing up muscle tissue.
This simple act of stabilization accomplishes a few critical things in an emergency.
- Pain Management: By stopping movement, a splint dramatically reduces the blinding pain of a fracture. This is huge for managing shock, which can be just as dangerous as the injury itself.
- Damage Control: A good splint acts like a shield. It prevents the broken bone ends from grinding against each other or causing more internal harm.
- Safe Transport: Whether you need to help someone limp out of the backcountry or just move them to a safer spot, a splint makes that transport possible and a whole lot less hazardous for the injured person.
From Ancient Knowledge to Modern Preparedness
The basic idea behind splinting isn’t new; it’s one of humanity’s oldest medical tricks. Ancient Egyptian splinting techniques, documented as far back as 2500 BC, show a surprisingly deep understanding of fracture care. Archaeologists have dug up splints made from wooden bark and grass wrapped in linen—a method that looks a lot like what we improvise today. This knowledge spread, with Romans using corn starch to stiffen bandages and Greeks using waxes and resins. For anyone serious about being prepared, it’s incredibly empowering to know these ancient methods still work.
This same principle of learning foundational skills applies across all areas of preparedness—whether you’re mastering how to insulate a cellar ceiling for food preservation or understanding ancient medical techniques that still save lives today.
A splint doesn’t heal the bone. It creates the perfect environment for the body to start healing itself without interruption and stops the injury from getting worse. That’s the entire foundation of pre-hospital fracture care.
Recognizing the Need for a Splint
Trying to tell a minor sprain from a fracture in the field is tough without an X-ray. Because of that, your safest bet is to always treat a suspected fracture like it’s the real deal.
Look for these key signs that tell you a splint is needed:
- An obvious deformity or a limb bent at a weird angle.
- An audible snap or cracking sound when the injury happened.
- Severe, focused pain that gets way worse with any movement.
- Major swelling and bruising right at the injury site.
- The person can’t put weight on it or use the limb at all.
Having the right knowledge is just as important as having the right gear. A well-stocked first-aid kit is a great start, but it’s your ability to assess an injury and act with confidence that truly makes a difference. As you learn how to make a splint, you’ll see how this skill fits into a bigger picture of self-reliance, which often starts with assembling the right bug out bag items.
Assembling Your Splinting Materials
When an injury happens out in the field—or even at home—having the right stuff on hand can turn a full-blown crisis into a manageable problem. A solid first aid kit is your best starting point, but the real game-changer is training your brain to see potential splinting materials everywhere. That’s what separates someone who feels helpless from someone who takes control.
Every splint boils down to three key parts: a rigid support for structure, padding to protect the skin, and bindings to lash it all together. You can either pack dedicated gear for this or learn to improvise with what’s around you.
Commercial Gear vs. Improvised Tools
Let’s be clear: dedicated medical gear is always the best-case scenario. It’s designed for the job and it’s reliable. If you’re serious about being prepared, a SAM Splint is non-negotiable. This thing is a lightweight, moldable workhorse that can stabilize everything from a broken finger to a fractured femur. There’s a reason it’s a staple in professional trauma kits.
But nobody can carry an entire ambulance in their pack. The true test of your skills is knowing how to build a splint from scratch. Your car, your backpack, and the woods around you are overflowing with potential tools if you just know how to look.
Just as proper preparation means knowing how to vacuum seal food for long-term storage, being ready for medical emergencies means having the right supplies accessible and protected from the elements.
The goal isn’t just to carry the right gear; it’s to train your brain to recognize the properties of the gear you need. Rigidity, softness, and length are everywhere once you start looking.
Understanding what makes a complete kit is the first step. For a deeper dive, check out our guide on essential first aid kit supplies to make sure you’re not missing anything critical.
Commercial vs Improvised Splinting Materials
When you’re facing an injury, you use what you have. Sometimes that’s a high-tech medical device, and other times it’s a sturdy stick and a t-shirt. Both can get the job done if you understand the principles. This table breaks down how you can source the core components of a splint from either a pre-packed kit or your immediate environment.
| Component | Commercial Option (e.g., in a first aid kit) | Improvised Option (e.g., found in the field/home) |
|---|---|---|
| Rigid Support | SAM Splint, aluminum splint, rigid plastic splints | Sturdy tree branches, trekking/tent poles, rolled-up magazine, broom handle, cardboard |
| Padding | Rolled gauze, sterile pads, foam padding | Extra clothing (fleece, socks), sleeping pad, moss, dry leaves, towels, blankets |
| Bindings | Elastic (ACE) bandage, medical tape, cohesive wrap | Duct tape/Gorilla Tape, paracord, belts, bandanas, shoelaces, strips of cloth |
The takeaway here is that resourcefulness is your greatest asset. While commercial gear offers convenience and reliability, a creative mind can find effective substitutes almost anywhere.
Finding Your Rigid Support
The backbone of any splint is the rigid support. Its one job is to completely immobilize the injury, which means it must be long enough to span the joints above and below the break. This is the non-negotiable part.
In the Outdoors: Look for straight, sturdy branches. Give them a quick stress test—if you can snap them easily, they’re no good. Trekking poles are fantastic for this, as are tent poles or even the internal frame from a backpack.
In an Urban Setting: A tightly rolled-up magazine or newspaper can become surprisingly solid. Other great options include a broom handle, a heavy-duty ruler, thick cardboard, or the tire iron from your car’s trunk kit.
If you can, find two supports to place on either side of the limb. This creates a much more stable setup than relying on just one.
The Importance of Padding
Never, ever place a hard, rigid object directly against an injured limb. It’s already swelling and painful, and adding a pressure point is a recipe for more agony and potential skin damage. Padding is the crucial buffer between the skin and the support.
Good padding cushions the injury, helps distribute pressure, and prevents nasty pressure sores from forming. Do not skip this step. It makes a world of difference for the injured person’s comfort and safety.
From Your Pack: Extra clothing is your best friend here. A spare fleece, wool socks, or even a rolled-up t-shirt will do the trick. A foam sleeping pad is gold if you have one—you can easily cut a piece off for durable padding.
From Nature: If you’re in a real bind, you can use what nature provides. Gather up big handfuls of dry leaves, soft grasses, or moss. Just make sure it’s as clean and dry as you can get it before packing it around the injury.
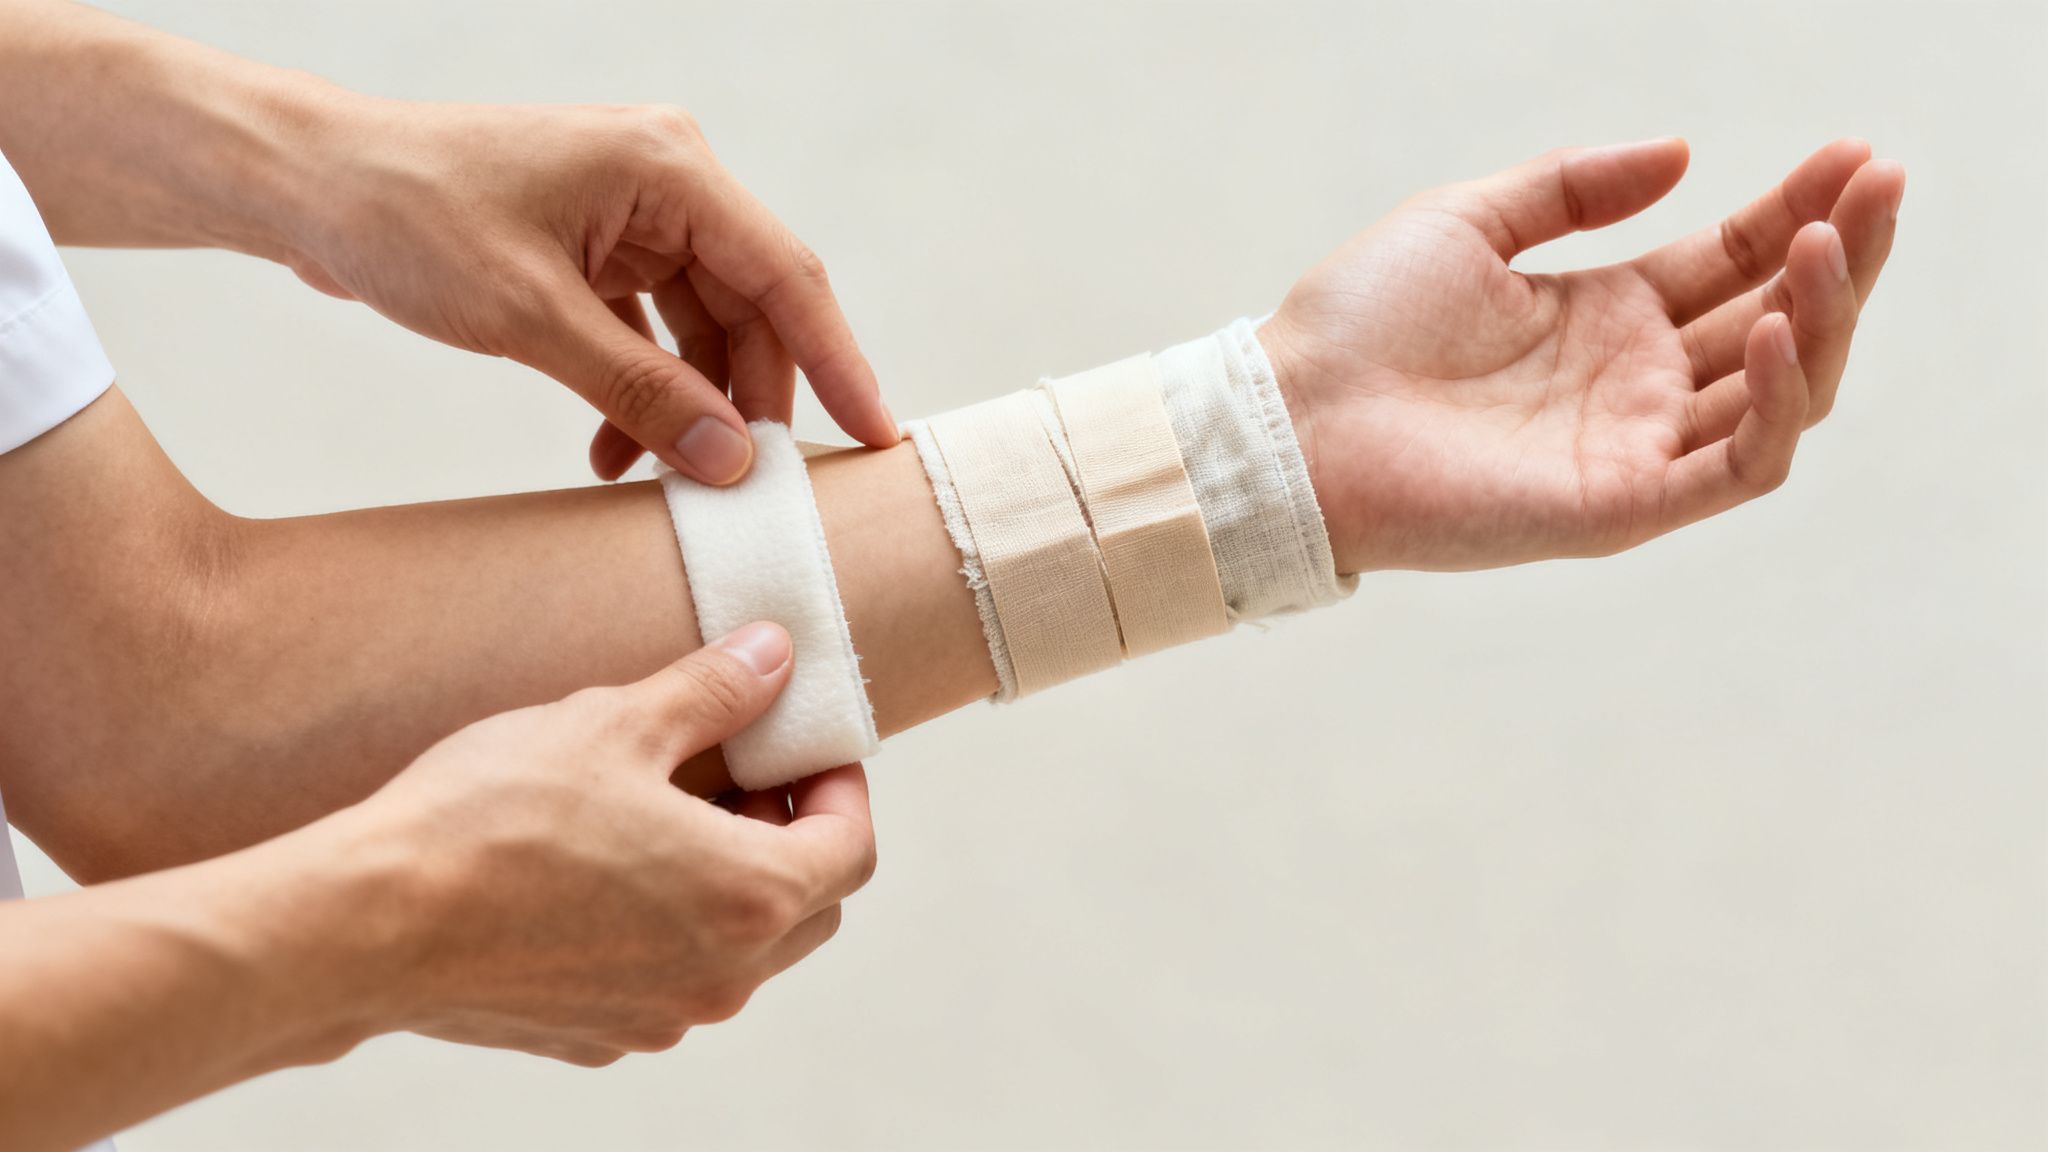
Securing the Splint with Bindings
With your support and padding in place, you need to tie it all together. Your bindings need to be snug enough to keep everything from shifting, but not so tight that they cut off circulation. This is a dangerously common mistake.
As a rule of thumb, you should always be able to slip one finger comfortably between the binding and the person’s skin.
Dedicated Gear: Medical tape and elastic bandages (like an ACE bandage) are ideal because they provide firm, even pressure.
Everyday Items: A roll of Gorilla Tape or duct tape is a must-have for any kit—it has a million uses, and this is one of them. Paracord is another great multi-tool, but be extra careful not to overtighten it. In a pinch, belts, bandanas, shoelaces, or even strips torn from clothing will work perfectly.
Applying a Splint The Right Way
You’ve gathered your materials, whether from a well-stocked trauma kit or scavenged from your surroundings. Now comes the moment that matters most—putting theory into practice. Properly applying a splint is more than just strapping a stick to a limb; it’s a measured process that balances stabilization with safety.
Getting this right can drastically reduce pain and prevent a bad situation from getting much, much worse. Rushing through these steps or missing a key detail can have serious consequences out in the field.
The Initial Injury Assessment
Before you even think about placing a splint, you have to get a baseline reading of the limb’s condition. This is done through a quick but critical check known as CSM: Circulation, Sensation, and Movement. This initial check gives you a snapshot of the limb’s health before you intervene.
Failing to do this means you’ll have no way of knowing if your splint is helping or harming the person. It’s a non-negotiable first step.
The CSM check is straightforward:
- Circulation: Check for a pulse downstream from the injury (e.g., at the wrist for a forearm injury, or the top of the foot for an ankle injury). Gently press on a fingernail or toenail until it turns white, then release. It should return to its normal pink color in less than two seconds. If it’s slow, pale, or blueish, circulation is already compromised.
- Sensation: Ask the person to close their eyes while you lightly touch their fingers or toes below the injury. Ask them which one you’re touching. If they can’t feel it or report numbness or a “pins and needles” feeling, there could be nerve involvement.
- Movement: Gently ask the person if they can wiggle their fingers or toes. Do not ask them to move the injured area itself. Any movement, however small, tells you about nerve and muscle function.
Make a mental note of what you find. This baseline is your reference point for comparison after the splint is applied.
Preparing the Splint for a Perfect Fit
One of the most common errors when learning how to make a splint is using supports that are too short. This completely defeats the purpose of immobilization. Your rigid support must be long enough to immobilize the joints both above and below the injury site.
For example, if you suspect a forearm fracture, your splint needs to run from the elbow past the wrist. If the lower leg is injured, the splint must extend from above the knee to below the ankle.
The rule is simple: if the joint can still move, the bone ends can still move. Measure your rigid supports against the uninjured limb to get an accurate length without causing the person more pain.
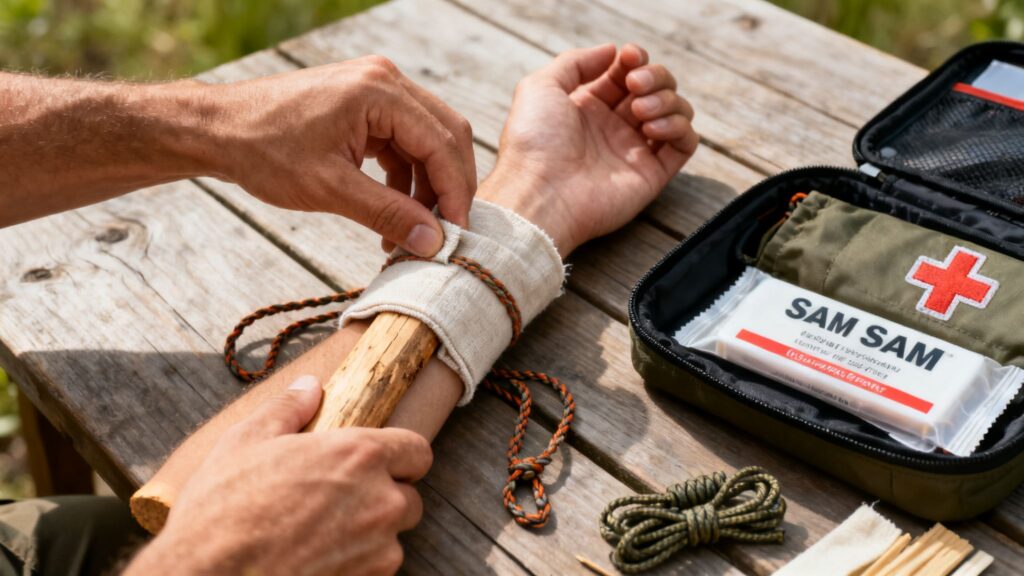
Once you have your supports measured, generously apply your padding. Wrap the entire length of each rigid support with your chosen material—be it a fleece jacket, rolled gauze, or handfuls of dry moss. The goal is to eliminate any hard edges or pressure points that could dig into the skin, especially over bony areas like the wrist, ankle, and elbow.
Securing the Limb with Precision
With your padded supports ready, gently slide them into position on either side of the injured limb. If you only have one support, place it alongside the limb. Have a helper hold everything steady while you prepare your bindings.
Your goal is to secure the splint firmly without creating a tourniquet. Start by tying your first binding at the point farthest from the heart.
- Avoid the Injury Site: Never tie a binding directly over the suspected fracture. This will cause intense pain and could displace the bone. Secure the splint above and below the injury first, then add more bindings as needed for stability.
- Check Your Knots: Use knots that are secure but can be released quickly if needed. For an in-depth guide, learning how to tie a square knot is an excellent skill to master for any survival application. It’s reliable under tension but easy to untie.
- The Finger Test: After tying each binding, you must be able to slide one finger comfortably between the wrap and the person’s skin. If you can’t, it’s too tight and needs to be loosened immediately.
A simple, commercially available product like an elastic ACE bandage is excellent for this, as it distributes pressure evenly. However, strips of a t-shirt, paracord, or a roll of Gorilla Tape work just as well if you’re careful about the tension.
Final Checks and Monitoring
You’re not done just because the splint is on. The final, and arguably most important, step is to repeat your CSM check.
Post-Splint CSM Assessment
- Re-check Circulation: Is the pulse still there? Does the nail bed still turn pink in under two seconds?
- Re-check Sensation: Can they still feel you touching their fingers or toes? Has any numbness gotten worse?
- Re-check Movement: Can they still wiggle their digits?
If anything has worsened—for example, the pulse is weaker or their fingers are now numb—your splint is too tight. Do not hesitate. Immediately loosen the bindings until CSM returns to the baseline you established earlier, then re-secure them more gently.
After the initial application, continue to check CSM every 15 to 20 minutes. Swelling can increase dramatically in the hours following an injury, and a splint that was perfectly fine at first can quickly become dangerously constrictive. Continuous monitoring is the key to preventing permanent tissue damage.
Advanced Techniques for Complex Injuries
While a straightforward splint works great for a clean break in the middle of a bone, things get a lot trickier with injuries to joints or those with severe deformities. Wrists, elbows, knees, and ankles are marvels of engineering, and immobilizing them the wrong way can make a bad situation much worse.
When you master these more advanced techniques, you’ll be ready to handle those ugly injuries with confidence, especially when the simple methods just won’t cut it.
The single most critical rule for these complex injuries is to splint the limb in the position you find it. Seriously. If you come across a limb that’s bent at a horrifying angle, your first instinct will be to straighten it out. You have to fight that urge.
Forcing a badly angled fracture back into alignment can shred nerves, tear blood vessels, or even poke the bone right through the skin, turning a closed fracture into an open one. Your job isn’t to play orthopedic surgeon; it’s to stabilize the injury exactly as it is. This means building your splint around the deformity and using padding to fill every gap, creating a snug, custom cradle. A SAM Splint is your best friend here—its moldable design is perfect for shaping around an angled joint.
Managing Joint Injuries
Joints are designed to move, which makes them a real challenge to immobilize. Your goal is to stop that movement completely, and that often calls for some creative thinking.
Elbow Injuries: An injured elbow is almost always most comfortable when bent. To splint it, you’ll essentially build an “L” shape. Run one rigid support along the upper arm and another along the forearm, securing them at the elbow. Pack plenty of padding into the inner bend of the elbow. Finish it off with a sling to take the weight off the arm and a binder—a wide cloth wrap—around the chest to stop it from swinging around.
Knee Injuries: Your approach here depends on how you find the leg. If it’s straight, you can place long, rigid supports on either side of the leg, extending from the upper thigh to below the ankle. But if the knee is bent, you must splint it that way. Pack padding into the space behind the knee and secure your supports along the thigh and lower leg.
Anatomical and Support Splints
Sometimes, the best tool for the job is the body itself. These methods are brilliant because they use uninjured body parts to support the injured one, giving you stability without needing a lot of gear.
Anatomical Splints
This is a simple but incredibly effective technique, usually for fingers or toes. The idea is to tape the injured digit to the healthy one right next to it.
- First, place a small piece of gauze or cotton between the digits. This prevents blisters and soaks up sweat.
- Use medical tape to loosely secure the injured finger or toe to its neighbor. A couple of small strips above and below the injured joint should do it.
- Make sure the tape isn’t too tight. Digits can swell up quite a bit.
Sling and Binder for Upper Body Injuries
For injuries to the collarbone, shoulder, or even some rib fractures, a traditional splint is useless. Instead, you need to support the arm’s weight and stop it from moving. A sling supports the forearm and hand, while a binder wraps around the upper arm and chest, pinning it securely against the body. This combo effectively locks down the entire shoulder girdle.
Thinking historically can provide a valuable perspective. The delayed splint technique, introduced by Persian physician Rhazes centuries ago, showed that waiting for initial swelling to subside before splinting could improve outcomes. For preppers, this reinforces a crucial lesson: the best action isn’t always the most immediate one. You can find more historical context on this medical principle in this detailed overview.
This kind of thoughtful approach to first aid is vital in all survival scenarios. For instance, knowing how to handle environmental hazards is just as important as fracture care, which is why our guide on how to treat snake bites is another essential read for anyone venturing outdoors. These advanced skills in how to make a splint move you beyond simple first aid and into a more capable level of emergency response.
Common Splinting Mistakes to Avoid
Even with the best intentions, a high-stress injury scenario can lead to simple errors that have serious consequences. Knowing how to build a splint is only half the battle; knowing what not to do is just as important. Avoiding these common pitfalls ensures your efforts actually help the injured person.
The single most dangerous mistake is wrapping the bindings too tight. It’s a natural instinct to want everything locked down and secure, but overtightening can turn a splint into a tourniquet. This cuts off blood flow to the limb, which can lead to agonizing pain, permanent nerve damage, and even tissue death.
A good rule of thumb is the one-finger rule: you should be able to slide one finger comfortably between each binding and the person’s skin. If you can’t, it’s way too tight.
Forgetting Crucial Steps in the Rush
When you’re dealing with an injury, adrenaline is pumping, and it’s easy to overlook the fundamentals. Two mistakes pop up constantly when people are rushing or panicking, and both can make a splint useless or even harmful.
Inadequate Padding: Never place a hard object like a stick or trekking pole directly against a swollen, injured limb. This creates intense pressure points that are not only incredibly painful but can also cause skin breakdown, blisters, and sores, especially if you have a long evacuation ahead. Be generous with your padding—make sure no part of the rigid support directly touches the skin.
Splinting Too Short: A splint that only covers the break itself does almost nothing. The entire goal is to stop movement, and that means you have to immobilize the joints above and below the injury. For a broken forearm, your splint needs to go from the elbow past the wrist. For a lower leg injury, it has to run from above the knee to below the ankle. This is a non-negotiable rule of proper splinting.
Remember, the point of a field splint isn’t to set the bone. It’s to prevent further injury during transport. A poorly applied splint can be worse than no splint at all, creating a false sense of security while allowing harmful internal movement.
The Critical Post-Splint Check-Up
Putting the splint on isn’t the last step. An injury can swell up significantly in the hours that follow, turning a perfectly good splint into a dangerously tight one. This is why you have to keep monitoring the situation.
Your most important job after the splint is on is to immediately re-check CSM (Circulation, Sensation, Movement). Compare these results to the baseline you took before you started. Are the fingers or toes now pale or blueish? Is there any new numbness or tingling? If anything has gotten worse, your splint is too tight. Loosen the bindings immediately.
You need to keep performing this CSM check every 15-20 minutes. Swelling is a dynamic process, and being vigilant is the only way to catch a problem before it causes irreversible damage. This kind of attention to detail is a hallmark of good emergency preparedness and is part of a broader mindset you can develop by mastering other core survival skills you must master.
Field Questions: Answering the “What Ifs” of Splinting
Even with the best training, things get complicated out in the field. When you’re dealing with a real injury, questions pop up fast. Having the answers ready beforehand is what builds the confidence to act when it really counts. Let’s cover some of the most common things people ask when the pressure is on.
How Can I Tell If a Splint Is Too Tight?
This is probably the most critical question, and the answer is all about paying attention to the patient. If they tell you about new or worsening numbness, tingling, or a sharp increase in pain after you’ve applied the splint, that’s a huge red flag.
Your best visual check is to look at their fingers or toes—whatever is downstream from the injury. Are they cold? Do they look pale or bluish compared to the other side? If so, circulation is being cut off. You need to loosen the bindings immediately.
A good rule of thumb is that you should be able to slide one finger comfortably between the binding and the limb. And remember, swelling is a process, not a one-time event. It can get worse over the next hour. Re-check circulation, sensation, and movement (what we call CSM) every 15-20 minutes until you can get them to professional care.
What Should I Do If Bone Is Sticking Out?
First, take a deep breath. This is an open or compound fracture, and it’s a serious emergency, mainly because the risk of infection just went through the roof. Your number one job is to control any significant bleeding.
Using a clean cloth or a sterile dressing from a kit like the MyFAK from My Medic, apply firm pressure around the wound. Do not press directly on the exposed bone.
Never, ever try to push the bone back in. You’ll just be forcing dirt, clothing fibers, and bacteria deep into the wound, which can cause devastating infections and more tissue damage.
If you can, gently cover the exposed bone and the surrounding wound with a sterile dressing. Now, you have to build your splint around the injury, immobilizing the limb in the exact position you found it. Don’t try to straighten it or adjust it. This scenario demands immediate evacuation and professional medical help.
Should I Use a Splint for a Severe Sprain?
Yes. Without a doubt, yes. Out in the woods or on the side of a trail, you don’t have an X-ray machine. It’s nearly impossible to tell the difference between a severe sprain and a closed fracture just by looking. The symptoms—agonizing pain, rapid swelling, and the inability to put any weight on it—are practically identical.
Because you can’t be sure, you have to default to the safest option. Always treat it like a fracture. Applying a splint will immobilize the joint, which helps control the pain, prevents further tearing of damaged ligaments, and provides the stability needed to move the person to safety.
When in doubt, splint it. It’s the single best thing you can do to prevent a bad situation from getting much, much worse.

