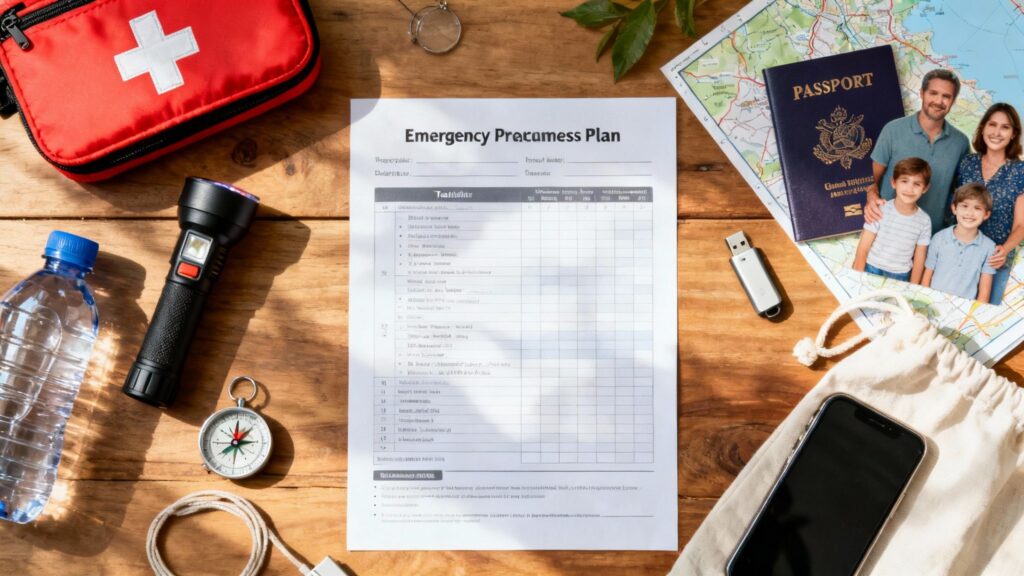
Having an emergency preparedness plan template isn’t just about filling out a form. It’s about creating a structured framework that turns abstract worries into a concrete, actionable guide for your family. This document organizes everything you need to know for any crisis, from a sudden natural disaster to an extended power outage. It ensures everyone knows exactly what to do, where to go, and how to stay in touch when it matters most.

Why A Written Plan Is Critical For Your Family’s Safety

When a real crisis hits, our brains are wired for a “fight or flight” response. Adrenaline spikes, rational thought goes out the window, and it’s easy to freeze up or make poor decisions. This is where a written plan becomes your most valuable tool. It’s a pre-made decision-making guide, letting you bypass that initial shock and move straight to effective action.
It’s about having the answers ready before the questions are even asked.
Moving From Fear to Actionable Steps
The simple act of sitting down and filling out a plan template can dramatically reduce anxiety. It takes the overwhelming idea of “disaster prep” and breaks it down into small, manageable tasks. Instead of just worrying about a hypothetical flood, you’re methodically mapping out evacuation routes and deciding on a family meeting spot.
This process gives you a powerful sense of control in a world that often feels unpredictable. It’s the difference between reacting with fear and responding with confidence. A simple document empowers every member of the family with a clear purpose and role.
“A plan that exists only in your head is just a collection of good intentions. A documented plan is a tool for survival. It ensures that critical details aren’t forgotten under duress and that everyone is operating from the same script.”
The Growing Need for Personal Preparedness
The need for families to be self-reliant is more obvious than ever. The global incident and emergency management market was valued at USD 137.48 billion and is projected to skyrocket to USD 250.01 billion by 2034. This isn’t just a number; it reflects a world with more frequent natural disasters and fragile supply chains. In the U.S. alone, weather and climate disasters caused over USD 603.1 billion in damages between 2019 and 2023. You can read more about these incident management market trends to understand the bigger picture.
A physical, written plan gives you a real edge.
- Clarity Under Pressure: It eliminates the need to remember vital details like emergency contacts or medication lists during a high-stress event.
- Unified Family Response: Everyone, including kids, knows the protocol. This reduces confusion and the heartbreaking risk of getting separated.
- Strategic Resource Management: Your plan guides you in building and maintaining the right supplies, from a simple Leatherman multi-tool to reliable water purification, so you aren’t scrambling at the last minute.
Ultimately, this plan is more than a checklist—it’s the foundation of your family’s safety net. For a deeper dive into what supplies to gather, our comprehensive emergency preparedness checklist is the perfect place to start.
Building Your Plan’s Foundation With A Household Profile
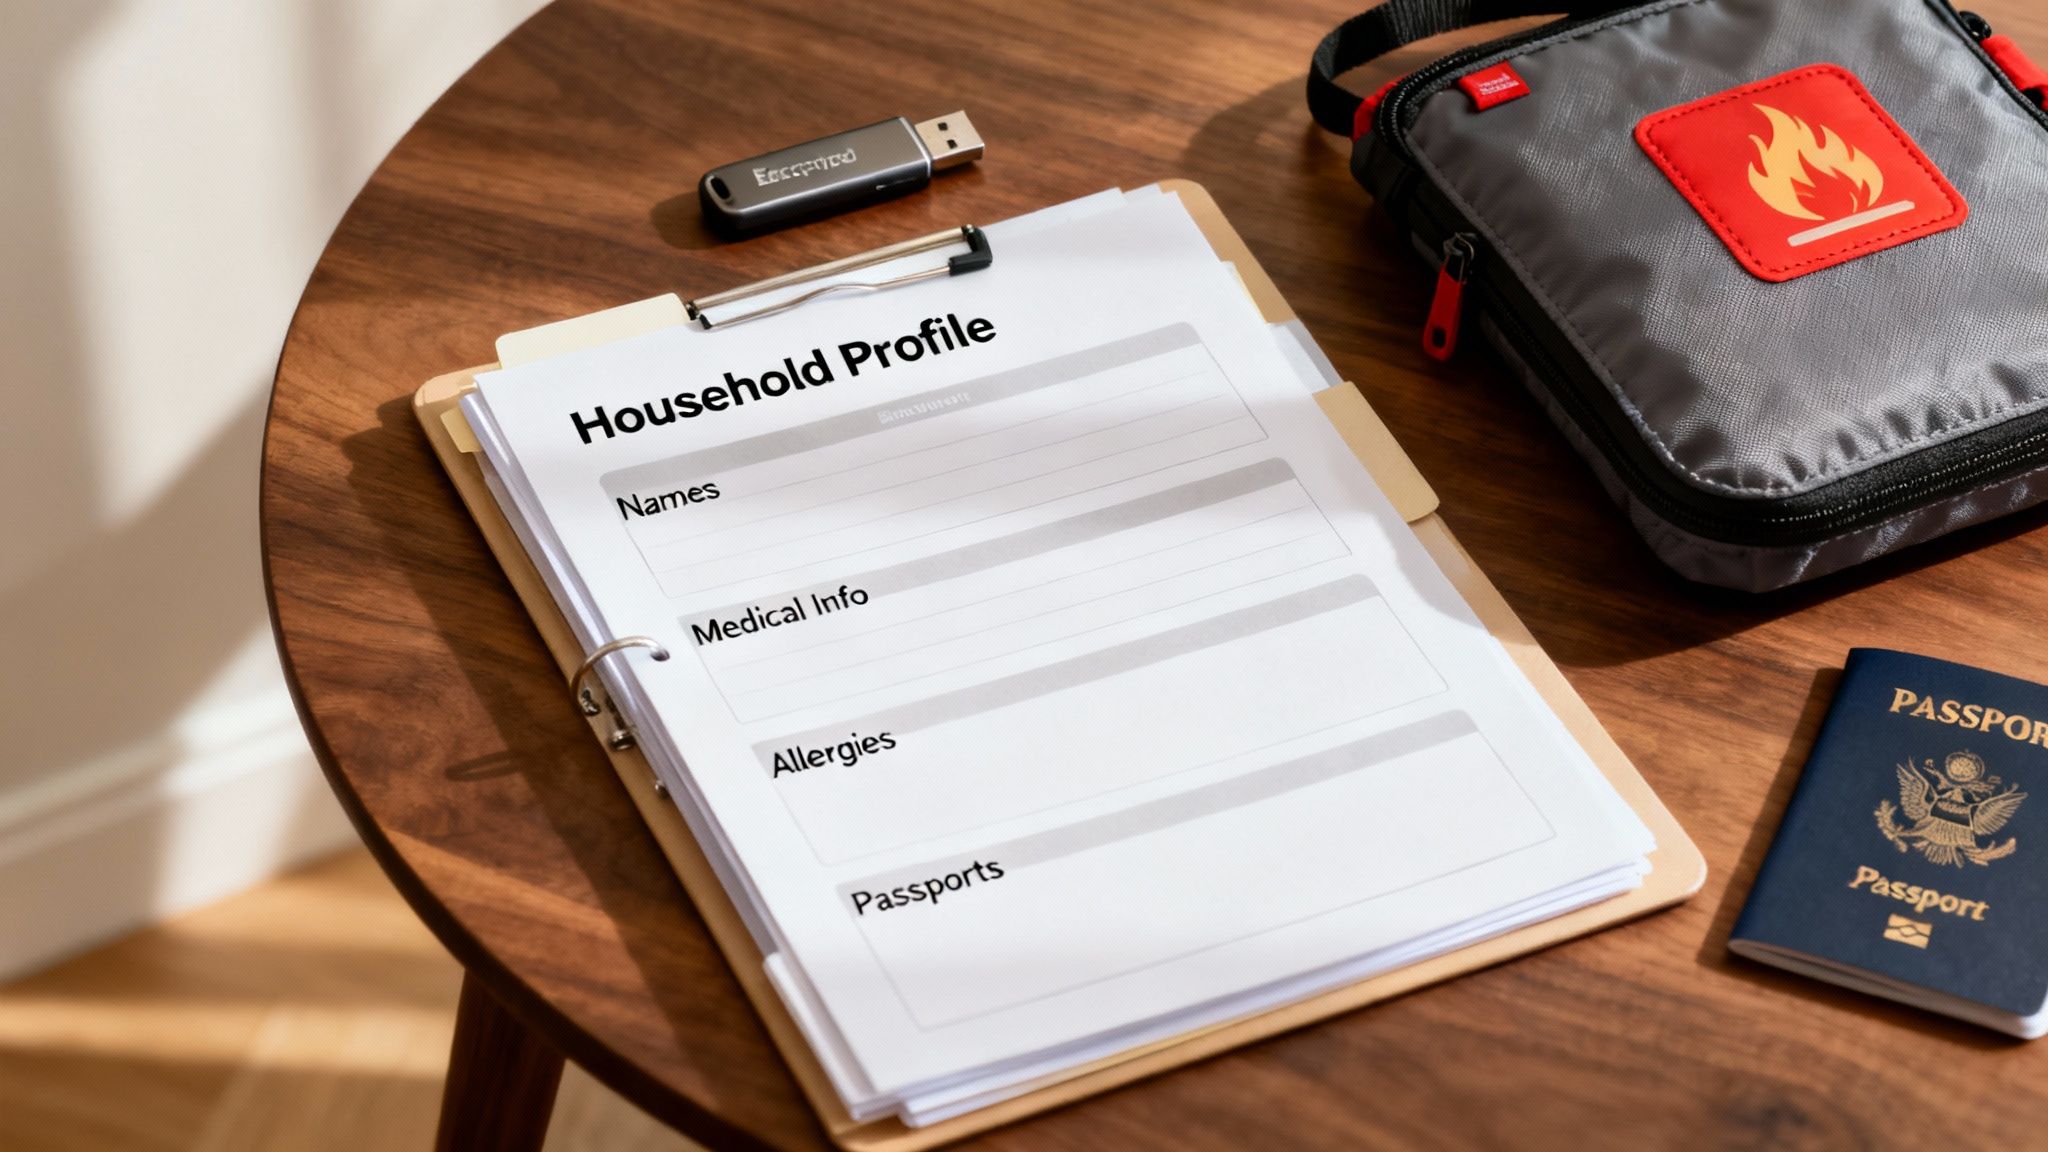
A truly effective emergency plan isn’t about fancy gear or complicated strategies. It’s built on one simple idea: knowing exactly who and what you are protecting. Before you even think about evacuation routes or supply lists, you need to create a detailed household profile.
This isn’t just a list of names. It’s the foundational document that turns abstract planning into a personalized, actionable strategy. Think of it as the “who” that gives purpose to all the “what ifs.”
Cataloging Every Member of Your Household
The first layer of your profile is a master list of every person and pet under your roof. You need to go way beyond names and birthdays—this is where you capture the details that will guide your entire preparedness effort.
For each person, your plan should include specific, life-saving information.
- Medical Conditions: Write down any chronic illnesses like diabetes or asthma, along with severe allergies to food, medicine, or insects.
- Prescription Medications: List every single medication. Include the name, dosage, prescribing doctor’s name, and pharmacy contact info. A good rule of thumb is to have at least a two-week supply on hand at all times.
- Special Needs: Be specific. Note any mobility challenges, strict dietary needs, or developmental considerations. This directly impacts everything from your food stockpile (do you need a specific baby formula?) to your evacuation plan (do you need to pack a walker?).
And don’t forget the pets. List their species, breed, age, and any medications they need. It’s also smart to have a copy of their vaccination records and a recent photo packed away in case you get separated. In a high-stress situation, you won’t have the mental clarity to recall this information from memory.
Securing Your Most Important Documents
Once you know who you’re protecting, the next critical step is gathering the vital records you’ll need to rebuild your life after a disaster. When an evacuation order comes, you won’t have time to hunt for birth certificates or insurance policies. Having them organized and ready to grab is a game-changer.
These documents are the administrative backbone of your life. Losing them can turn a difficult recovery into a bureaucratic nightmare. The goal here is redundancy—create both physical and digital copies for maximum security.
Your most important documents prove your identity, ownership, and financial standing. Protecting them is not just a suggestion—it is a critical component of ensuring your family can rebuild and recover with minimal friction after a crisis.
I recommend a two-pronged approach for this. First, make high-quality digital scans of every document and save them on an encrypted USB drive. It’s small, portable, and easy to toss in your go-bag. Second, place the original physical copies somewhere secure but accessible. Many people use a fireproof and waterproof safe, like a SentrySafe model, to protect these at home.
For even better organization, you can create a dedicated emergency documents folder that has everything you need in one grab-and-go binder.
What to Include in Your Vital Records Kit
Compiling all of this might seem overwhelming, but breaking it down makes it manageable. Focus on documents that fall into a few key categories: identity, property, and finances.
Identification and Personal Records:
- Driver’s licenses and passports
- Birth and marriage certificates
- Social Security cards
- Pet vaccination and registration records
Property and Financial Documents:
- Deeds or titles for your home and vehicles
- Rental or lease agreements
- Insurance policies (home, auto, life, health)
- Bank account and credit card information
- Recent tax returns and pay stubs
By centralizing this information, you create a powerful, single source of truth for your family. This foundation ensures that when a crisis forces you to act, every critical detail you need is right at your fingertips.
Mapping Your Risks And Planning Your Evacuation Routes
An emergency plan is useless if it doesn’t account for the ground beneath your feet. It’s not just about who you’re protecting, but what you’re protecting them from. This means getting brutally honest about the specific disasters most likely to hit your area and creating smart, practical evacuation plans long before a crisis hits.
A generic, one-size-fits-all plan is a recipe for failure when a wildfire is cresting a nearby ridge or a hurricane is barreling toward your coastline. You need a strategy built for the world right outside your door.
Identifying Your Local Threats
Every region has its own flavor of disaster. A family in Florida lives under the shadow of hurricanes; a household in California has to respect earthquakes and wildfires. The very first step is to get real about what could happen where you live.
You don’t have to guess. Your best sources are official ones like the Federal Emergency Management Agency (FEMA) and your local city or county emergency management agency. Their websites are goldmines, often packed with detailed maps and historical data on local hazards.
- Natural Disasters: What’s the primary risk here? Is it tornadoes, blizzards, floods, or earthquakes?
- Technological Hazards: Look around you. Are you near industrial plants, major highways, or railways where a chemical spill is a real possibility?
- Human-Caused Events: While harder to predict, consider potential disruptions like an extended power grid failure or serious civil unrest.
Taking stock of these threats is the cornerstone of your plan. It stops you from prepping in a vacuum and helps you focus your time and money on the gear and skills that will actually matter for your situation.
To Bug Out or Shelter in Place
Once you know the risks, you face the big question: do you evacuate (“bug out”) or stay put (“shelter in place”)? This can’t be an emotional, in-the-moment decision. It needs to be a pre-determined protocol based on specific, non-negotiable triggers.
A “shelter in place” order usually comes during events like a nearby chemical spill or a severe tornado, where going outside is far more dangerous than staying inside. A “bug out” order is common for slow-moving disasters like hurricanes or advancing wildfires that give you some warning.
The decision to evacuate is often the single most stressful part of a crisis. By establishing clear triggers in your plan—like a mandatory evacuation order from authorities or floodwaters reaching a specific landmark—you take the guesswork and emotion out of it. That clarity leads to faster, safer action.
Global disaster costs have skyrocketed to over USD 2.3 trillion annually when you factor in the ripple effects, which shows just how much is at stake. Despite this, only 53% of organizations update their plans yearly, and a shocking 28% never test them at all. This is a gamble you can’t afford to take, especially when the U.S. alone recently saw 28 separate billion-dollar disasters in a single year. You can learn more about global risk from the UNDRR to see the bigger picture.
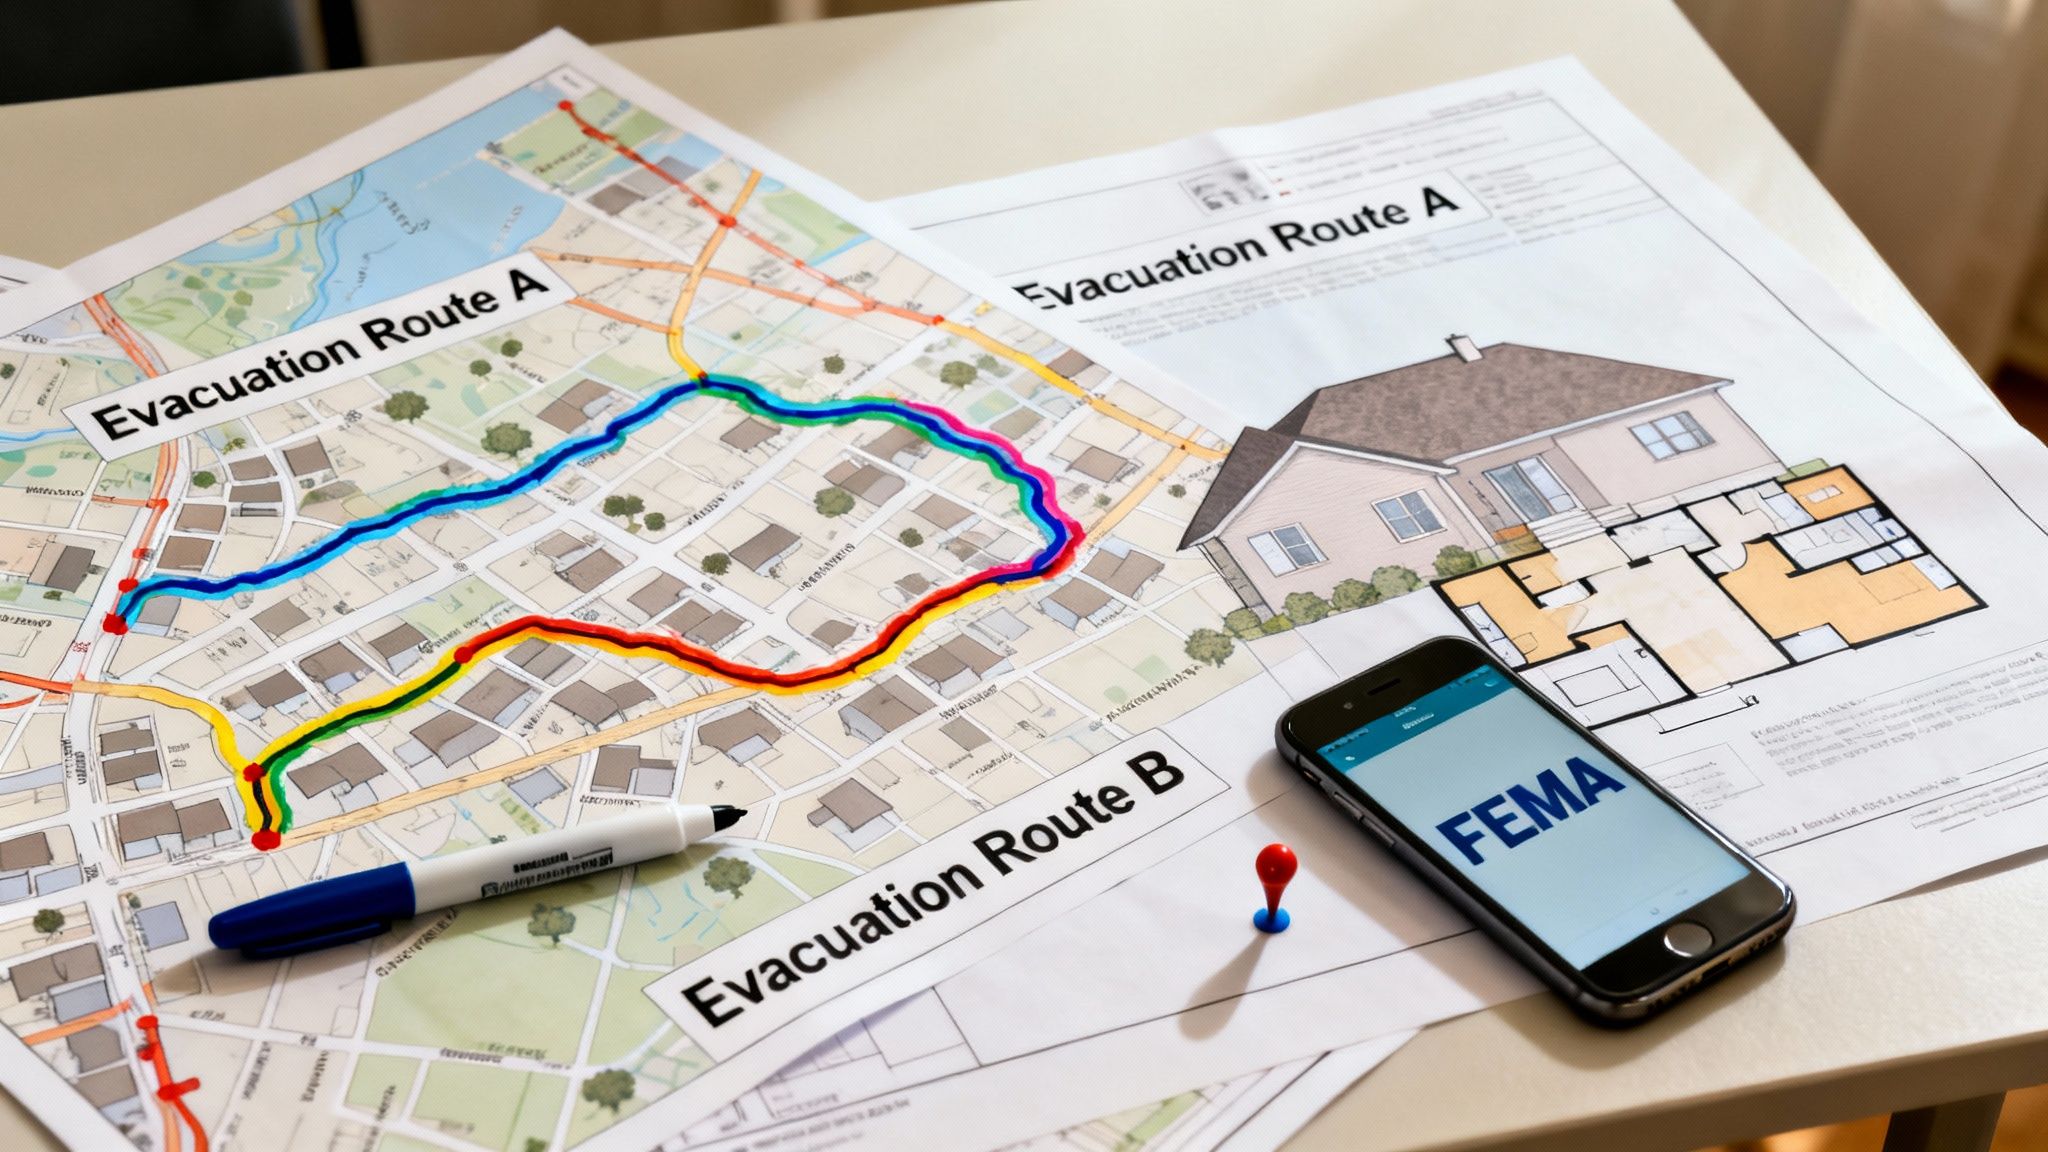
Mapping Multiple Escape Routes
Never, ever rely on a single way out. Your main route—the one everyone else will be using—could easily become a parking lot, or be blocked by floodwaters or debris. A truly resilient plan needs at least three distinct evacuation routes mapped from your home, your workplace, and your kids’ schools.
Don’t just rely on your phone. Digital maps are fantastic until the cell towers go down. Get physical maps. A good old-fashioned Rand McNally road atlas or a detailed, custom-printed map from a service like MyTopo could be a lifesaver. Grab a highlighter and mark your routes clearly.
- Primary Route: The most direct, obvious path.
- Secondary Route: An alternate that avoids major highways and potential bottlenecks.
- Tertiary Route: A “back roads” option that might be slower but could be wide open when the main arteries are choked.
Don’t just map them—drive them. Get a feel for the terrain and identify potential chokepoints ahead of time. That familiarity is a massive advantage when panic sets in. For a more detailed walkthrough, our comprehensive evacuation plan checklist will make sure you don’t miss a single step.
Establishing Rally and Meeting Points
What happens if you get separated and the phones are dead? Your plan needs to answer that with two pre-determined meeting points that everyone knows by heart.
- Immediate Rally Point: This is for getting out of the house fast, like in a fire. It should be right outside your home—a specific neighbor’s mailbox, a big oak tree across the street. A spot where you can quickly do a headcount.
- Neighborhood Meeting Point: This spot needs to be farther away, outside your immediate neighborhood, in case the whole area is blocked off. Think of a specific library, a park, or a trusted friend’s house in the next town over.
Drill these locations with your family. Make sure everyone knows the addresses and has a small, printed map tucked into their go-bag. It’s a simple step that provides a clear, calming objective when chaos is swirling all around you.
Assembling Your Essential Emergency Kits And Supplies
A solid emergency plan is your roadmap, but your supplies are the fuel. Without the right gear staged and ready, even the most brilliant plan will stall out when things get real. I’ve seen it happen.
The thought of stockpiling everything can feel overwhelming, so let’s get strategic. We’ll break it down into a practical, three-tiered system. This approach keeps things manageable by organizing your gear for specific scenarios, making sure you have exactly what you need, right where you need it.
The three kits every family should have are the 72-hour “Go-Bag,” the vehicle-based “Get-Home Bag,” and the long-term “Shelter-in-Place” kit.
Before diving into each kit type, you might want to review our complete guide on building an emergency preparedness kit to understand the full scope of what’s needed.
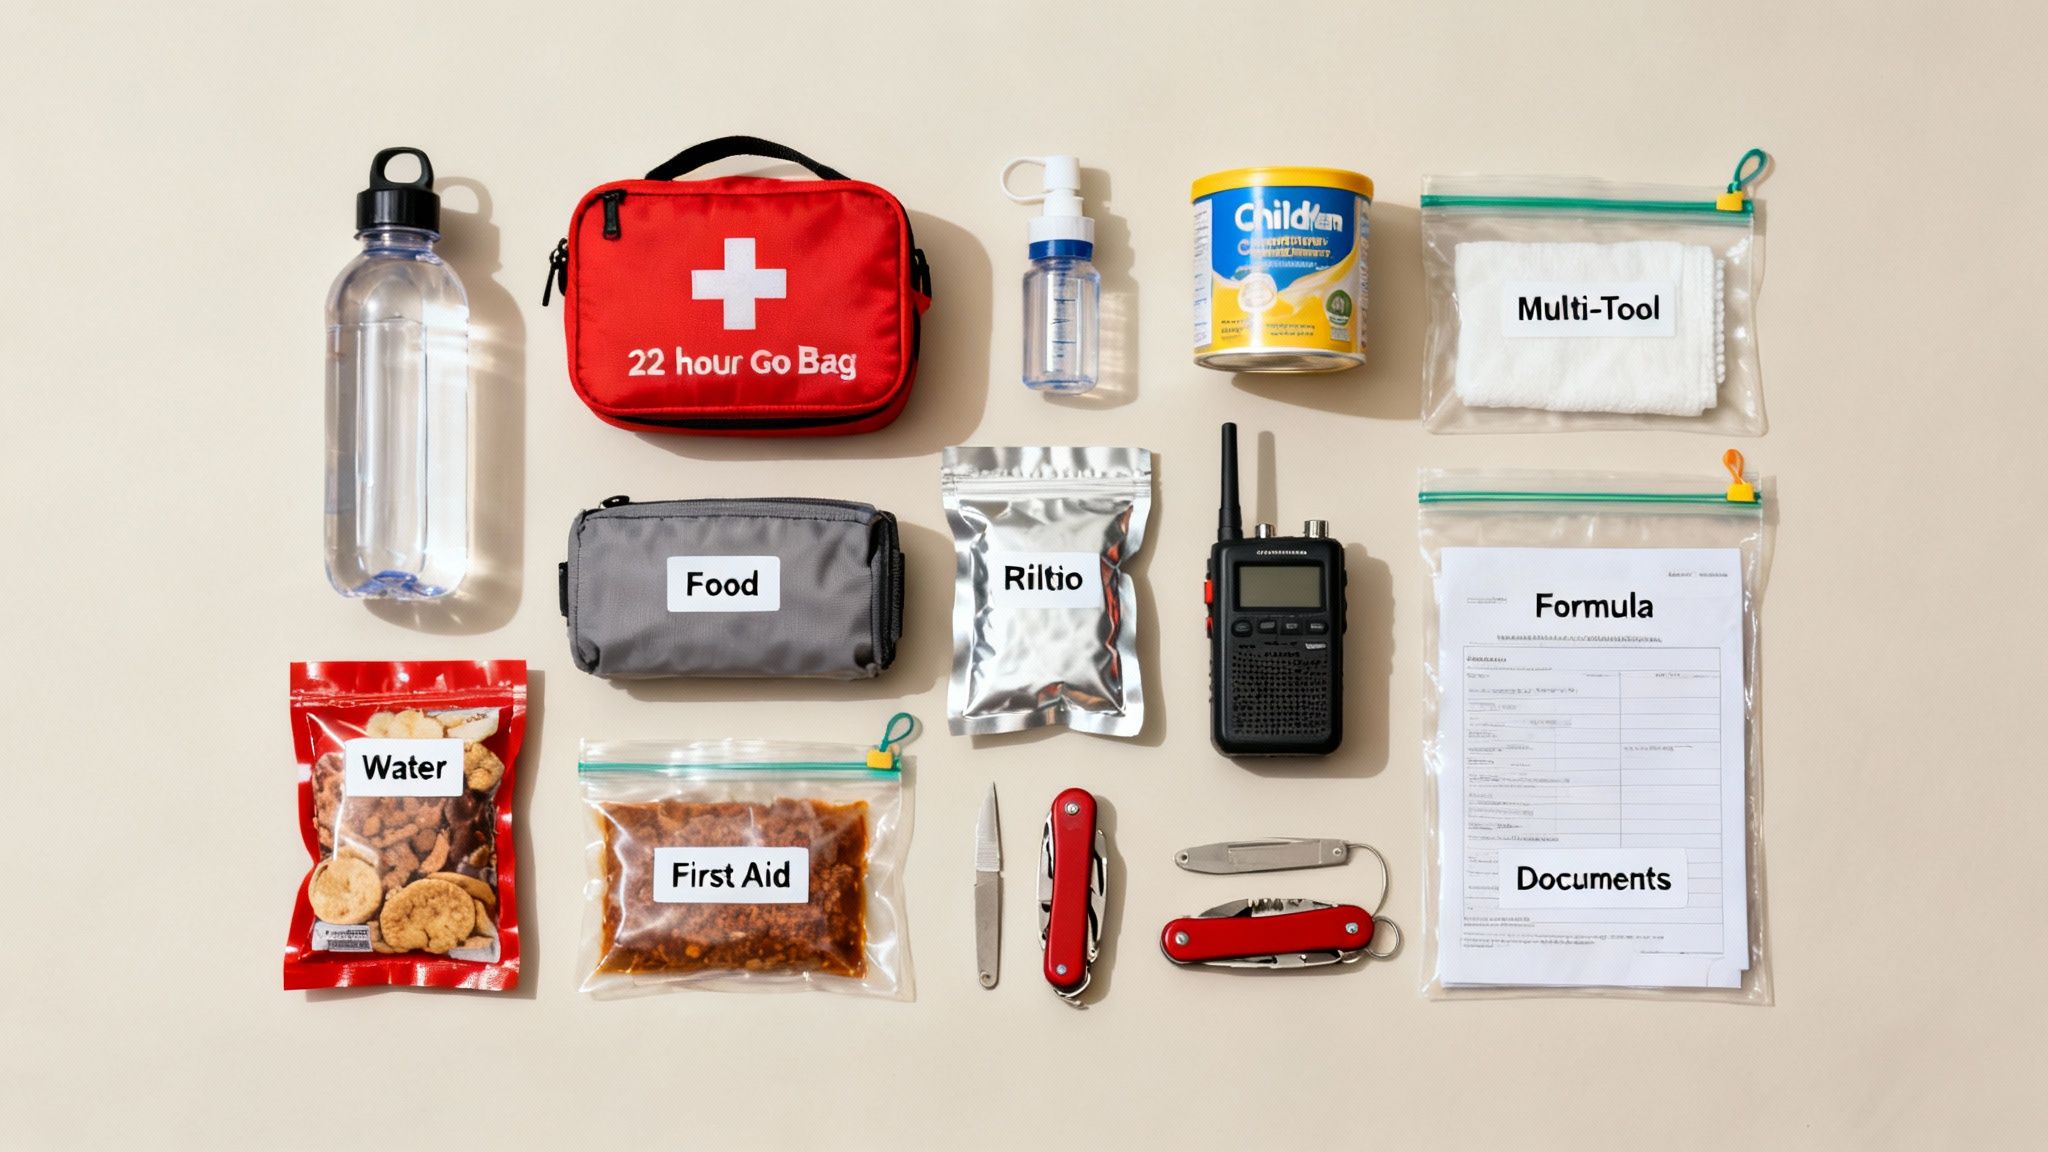
The 72-Hour Go-Bag: Your Immediate Lifeline
This is your grab-and-go survival pack, often called a bug-out bag. It’s built to keep one person going for a bare minimum of 72 hours after an evacuation order drops. Every single person in your family, even older kids, needs their own. It builds redundancy and lets you customize for personal needs.
Ask yourself this: if you had five minutes to leave your home forever, what would you take? The Go-Bag is your pre-packed, thought-out answer to that terrifying question. It needs to be light enough to carry on foot but dense with absolute essentials.
The heart of any good Go-Bag is built around the non-negotiables.
- Water: This is priority one, always. Pack at least three liters per person, but a far better strategy is to include a proven water filter like the Sawyer Squeeze. It lets you process water from sketchy sources and dramatically cuts down on your carry weight.
- Food: Think high-calorie, no-cook, and ready to eat. Energy bars, jerky, and nuts are solid choices. For a real meal that boosts morale, lightweight freeze-dried pouches from brands like Mountain House are incredible—they have a massive shelf life and only need hot water.
- First Aid: Your kit needs to be more than just a box of cartoon bandages. A proper individual first aid kit (IFAK) should include trauma dressings, a tourniquet, blister care, and a supply of any personal prescription meds. Brands like MyMedic offer well-organized kits for this purpose.
- Shelter & Warmth: An emergency blanket, a simple rain poncho, and a spare pair of wool socks are non-negotiable. Hypothermia is a silent killer and can set in even in temps you’d consider mild.
The Get-Home Bag: For When Disaster Strikes Away From Home
Trouble rarely waits for you to be comfortable at home. A Get-Home Bag (GHB) is a smaller kit you keep in your vehicle. Its sole purpose is to help you get from wherever you are—the office, the store—back to your family.
This bag isn’t a full-blown survival kit. It’s a specialized tool designed to solve short-term problems you might face on your way home. That could be anything from a city-wide gridlock that forces you to walk, to a freak storm that makes the roads impassable.
The hard truth of a regional disaster is that your 30-minute drive home could easily become a 12-hour trek on foot. Your Get-Home Bag is the bridge that turns a potential crisis into a manageable challenge.
Essential gear for a GHB is all about mobility and problem-solving.
- A pair of comfortable, already broken-in walking shoes or boots.
- A physical map of your area with several routes home highlighted. Don’t rely on your phone.
- A quality multi-tool and a powerful flashlight with extra batteries.
- A portable power bank like one from Anker to keep your phone alive.
- Cash in small bills. Electronic payments will be the first thing to fail.
- A couple of water bottles and some high-energy snacks.
The Shelter-in-Place Kit: Your Two-Week Fortress
While Go-Bags are for leaving, this kit is for staying put. This is your deep supply for riding out an event at home, like a crippling blizzard, a multi-week power outage, or a public health lockdown. The goal is simple: be completely self-sufficient for a minimum of two weeks.
This is where you can store all the heavy, bulky supplies that would be impossible to carry. Think of it as your own private, well-stocked convenience store.
Key Stockpile Categories:
- Water: The gold standard is one gallon of water, per person, per day. For a family of four, that’s 56 gallons for two weeks. You can buy commercially bottled water or properly store tap water in sanitized, food-grade containers like WaterBrick stackable containers.
- Food: Stock what you eat, and eat what you stock. Canned goods, rice, pasta, beans, and peanut butter are the foundation. Crucially, don’t forget a manual can opener (or two).
- Communication: When the power goes out, information is gold. A hand-crank or battery-powered emergency weather radio, like the ones made by Midland, is absolutely essential for getting official alerts when the internet and cell towers are down.
- Light & Power: Stockpile flashlights, headlamps, and lanterns with plenty of extra batteries. For keeping phones and small devices running, a small solar generator from a brand like Jackery, and Grid Doctor EMP 3000 is a game-changer.
- Sanitation: If water and sewer services are out, things get dangerous fast. You’ll need trash bags, disinfectant wipes, hand sanitizer, and a plan for an emergency toilet—even a simple bucket with a toilet seat lid works.
Each type of kit serves a unique and critical purpose. Understanding what to pack in each one ensures you’re ready for the most likely scenarios.
For those looking to simplify their food storage, our review of the best survival food kits can help you choose pre-packaged options with long shelf lives that require minimal preparation.
The Three Tiers Of Emergency Kits
Here’s a quick breakdown to help you visualize how these three kits work together to create a comprehensive preparedness system.
| Kit Type | Primary Purpose | Key Water/Food Supply | Essential Gear Examples | Location |
|---|---|---|---|---|
| 72-Hour Go-Bag | Immediate evacuation on foot | 3 liters of water, water filter, high-calorie bars, freeze-dried meals | First aid kit, emergency shelter, fire starter, knife, headlamp | Staged by an exit |
| Vehicle Get-Home Bag | Getting home from work/school | 2-3 water bottles, energy bars, snacks | Walking shoes, paper map, power bank, multi-tool, cash | Kept in your vehicle |
| Two-Week Shelter-in-Place Kit | Surviving at home without utilities | 1 gallon per person/day, canned goods, rice, beans, pasta | Emergency radio, lanterns, sanitation supplies, bulk first aid | Basement, closet, garage |
Think of these kits not as a one-and-done task, but as a living part of your family’s safety plan.
Assembling these kits is a foundational step in any real emergency plan. It takes time, but it’s an investment in your family’s safety and peace of mind. For a much deeper dive, you can use our comprehensive checklist for building a disaster supply kit to guide you, item by item.
Creating A Resilient Communication And Reunification Plan
When a disaster hits, communication is one of the first things to go. Cell towers get jammed or damaged, the power goes out, and in the chaos, it’s frighteningly easy for families to get separated. That’s why the communication section of your emergency plan is one of the most important parts—if not the most important.
A truly solid plan knows that technology will fail and builds in smart workarounds. It’s about more than just a list of phone numbers; it’s about creating a tough, layered system that keeps you connected when modern conveniences let you down.
The Out-Of-State Contact Strategy
One of the smartest, most reliable strategies is to designate a single out-of-state contact. Think about it: during a local disaster, everyone is trying to call someone across town, and the local lines get completely gridlocked. But making a long-distance call to another state? That often goes through without a problem.
This person becomes your family’s communication hub. The game plan is simple: if you get separated, everyone’s first job is to call or text this contact to check in and report their location and status. That person can then pass messages between family members who can’t get ahold of each other directly.
- Who to Choose: Pick a reliable relative or a close friend who lives far enough away they won’t be caught in the same emergency.
- What to Share: Give this person a copy of your plan, including the names and phone numbers of everyone in your household.
- How to Practice: Run a drill! Have everyone in the family practice calling or texting your contact. It builds muscle memory and makes the process feel natural.
This one simple move creates an information clearinghouse for your family, which can make all the difference in a quick, safe reunification.
Having a plan is the single greatest factor in successful family reunification. FEMA reports that the number of reunited families surges by 50% when a pre-set communication plan is in place, proving its life-saving value.
Even businesses struggle with this. While 76% of American employees say their companies have a written emergency plan, a full 24% are left without one. It just goes to show you can’t rely on anyone else—taking personal responsibility for your family’s safety by setting up clear communication rules is essential. For a broader view, you can see how these strategies are applied by looking at global response plans.
Building Redundancy With Off-Grid Communication
Putting all your faith in cell phones is a recipe for disaster. Real resilience means having multiple ways to communicate, especially options that don’t need the power grid or cell towers to work.
For staying in touch over long distances when nothing else works, a satellite messenger like the Garmin inReach Mini is a game-changer. These devices use satellite networks, so you can send and receive texts from almost anywhere on Earth, no cell service required.
For keeping your family or neighborhood group connected locally, General Mobile Radio Service (GMRS) radios are a fantastic choice. Brands like Midland or BaoFeng are popular options. They have much better range and clarity than the cheap walkie-talkies you find at big-box stores. With a good set of handhelds, you can create a reliable private network that works when everything else is down.
Finalizing Your Communication Card
The last step is to get all this critical information onto a physical, pocket-sized card for every family member. This is a non-negotiable part of your plan.
Information for Each Card:
- Full name, date of birth, and a recent photo.
- Key medical info (allergies, chronic conditions, medications).
- Your primary and secondary in-case-of-emergency (ICE) contacts.
- The name and number of your out-of-state contact.
- Your two designated meeting places (the nearby rally point and the farther rendezvous location).
Print these cards, laminate them to make them waterproof, and stick one in every wallet, backpack, and Go-Bag. In a crisis, this small card is a lifeline. It’s got everything needed to bring your family back together.
Keeping Your Plan Alive With Drills And Maintenance
Putting together your emergency plan is a huge win, but its real power comes from treating it like a living, breathing part of your family’s routine. A plan that just sits in a binder collecting dust is nearly as useless as no plan at all. The goal is to move beyond the paper and turn your strategy into muscle memory through regular practice and updates.
This doesn’t have to be some high-stress, boot camp-style exercise. In fact, the most effective drills are often the simplest.
Start by walking your primary evacuation route as a family. Point out the landmarks, talk about potential roadblocks, and make sure everyone knows the way without needing GPS. Another great mini-drill? Take 15 minutes and have everyone test the communication plan by sending a check-in text to your out-of-state contact. Simple actions build real confidence.
Establishing A Maintenance Schedule
Consistency is what turns preparedness from a one-off project into a sustainable habit. A practical maintenance schedule keeps your plan from going stale and ensures your supplies are always ready. The trick is to break it down into smaller, manageable tasks so it never feels overwhelming.
A good rhythm works on a few different timelines.
- Full Annual Walkthrough: Once a year, make it a point to sit down together and go through the entire plan, page by page. This is the perfect time to update it for big life changes. Did someone start at a new school? Did you get a new pet? Has your primary meeting spot changed?
- Seasonal Check-ins: Use the changing seasons as a natural reminder for smaller, focused reviews. As you head into spring, you might run through your tornado or severe weather shelter plan. In the fall, before winter storms hit, test the batteries in all your flashlights, headlamps, and emergency radios.
“An untested plan is an unreliable plan. Regular drills and maintenance are what build the muscle memory and confidence your family will rely on when seconds count. It’s the difference between knowing what to do and having a vague idea of what you should do.”
Keeping Supplies And Information Current
Your supplies and critical information all have a shelf life. Food expires, batteries lose their charge, and phone numbers change. Staying on top of this isn’t just a good idea—it’s non-negotiable if you want your plan to actually work when you need it.
Set recurring reminders on your phone or calendar right now. Make it impossible to forget.
Every six months, pull out all of your kits and do a full inspection. This is where you’ll check expiration dates on food, water, medications, and first-aid supplies. Rotate anything that’s getting close to its “use by” date into your daily pantry and replace it with fresh stock. For a step-by-step checklist, our guide on emergency kit maintenance walks you through the entire process.
At least once a year, go through your binder and update every piece of contact information, all medical records, and your insurance policies. A crisis is the absolute worst time to realize you have an old phone number for your nearest relative or an expired insurance card. This proactive check ensures that when things get chaotic, you’re working with current, accurate information, which can make all the difference.
Many families unknowingly compromise their food stockpiles through improper storage—learn about common food storage mistakes to ensure your supplies remain safe and effective when you need them most.
Questions We Hear All The Time
Let’s tackle some of the most common questions people have when putting together a solid emergency plan. These are the details that often get overlooked but can make a huge difference when it counts.
How Often Should I Update My Plan?
Think of your plan as a living document. You should give it a full review at least once a year—I like to tie it to a holiday or a season change to make it memorable.
But some things need more frequent attention. Check your food, water, and medical supplies every six months. Things expire, and you don’t want to discover your water purification tablets went bad in the middle of a crisis. Life changes also trigger an immediate update. New baby? New pet? Did you move? Update your plan right away. A simple calendar reminder is your best friend here.
What Is The Most Important Go-Bag Item?
If I had to pick just one thing, it’s water. Hands down. You can go for weeks without food, but you’ll only last a few days without water.
Your go-bag absolutely must have either bottled water (aim for one gallon per person, per day) or a bulletproof water filter like a LifeStraw and a sturdy bottle to go with it. Get this part right before you even think about anything else. It’s the foundation of your immediate survival.
Dehydration is a silent threat in an emergency. It hits fast, clouds your judgment, and drains your strength, turning a manageable situation into a dangerous one. Your water strategy has to be rock-solid.
How Do I Adapt The Template For Special Needs?
A generic plan is a useless plan. You have to customize it for the real people (and pets) in your household.
- For pets: Pack their food, water, medications, leashes, and copies of vet records. Don’t forget a favorite toy to reduce their stress.
- For family members with medical needs: This is critical. Include a detailed list of their conditions, all medication dosages, and doctor’s contact info. You need at least a two-week supply of any essential medications.
- For medical equipment: If someone relies on equipment that needs power, a backup source like a small generator or a portable power station isn’t a luxury—it’s a necessity. Brands like Goal Zero or EcoFlow specialize in this type of equipment.
Your plan fails if it doesn’t account for the unique needs of every single person you’re trying to protect.

