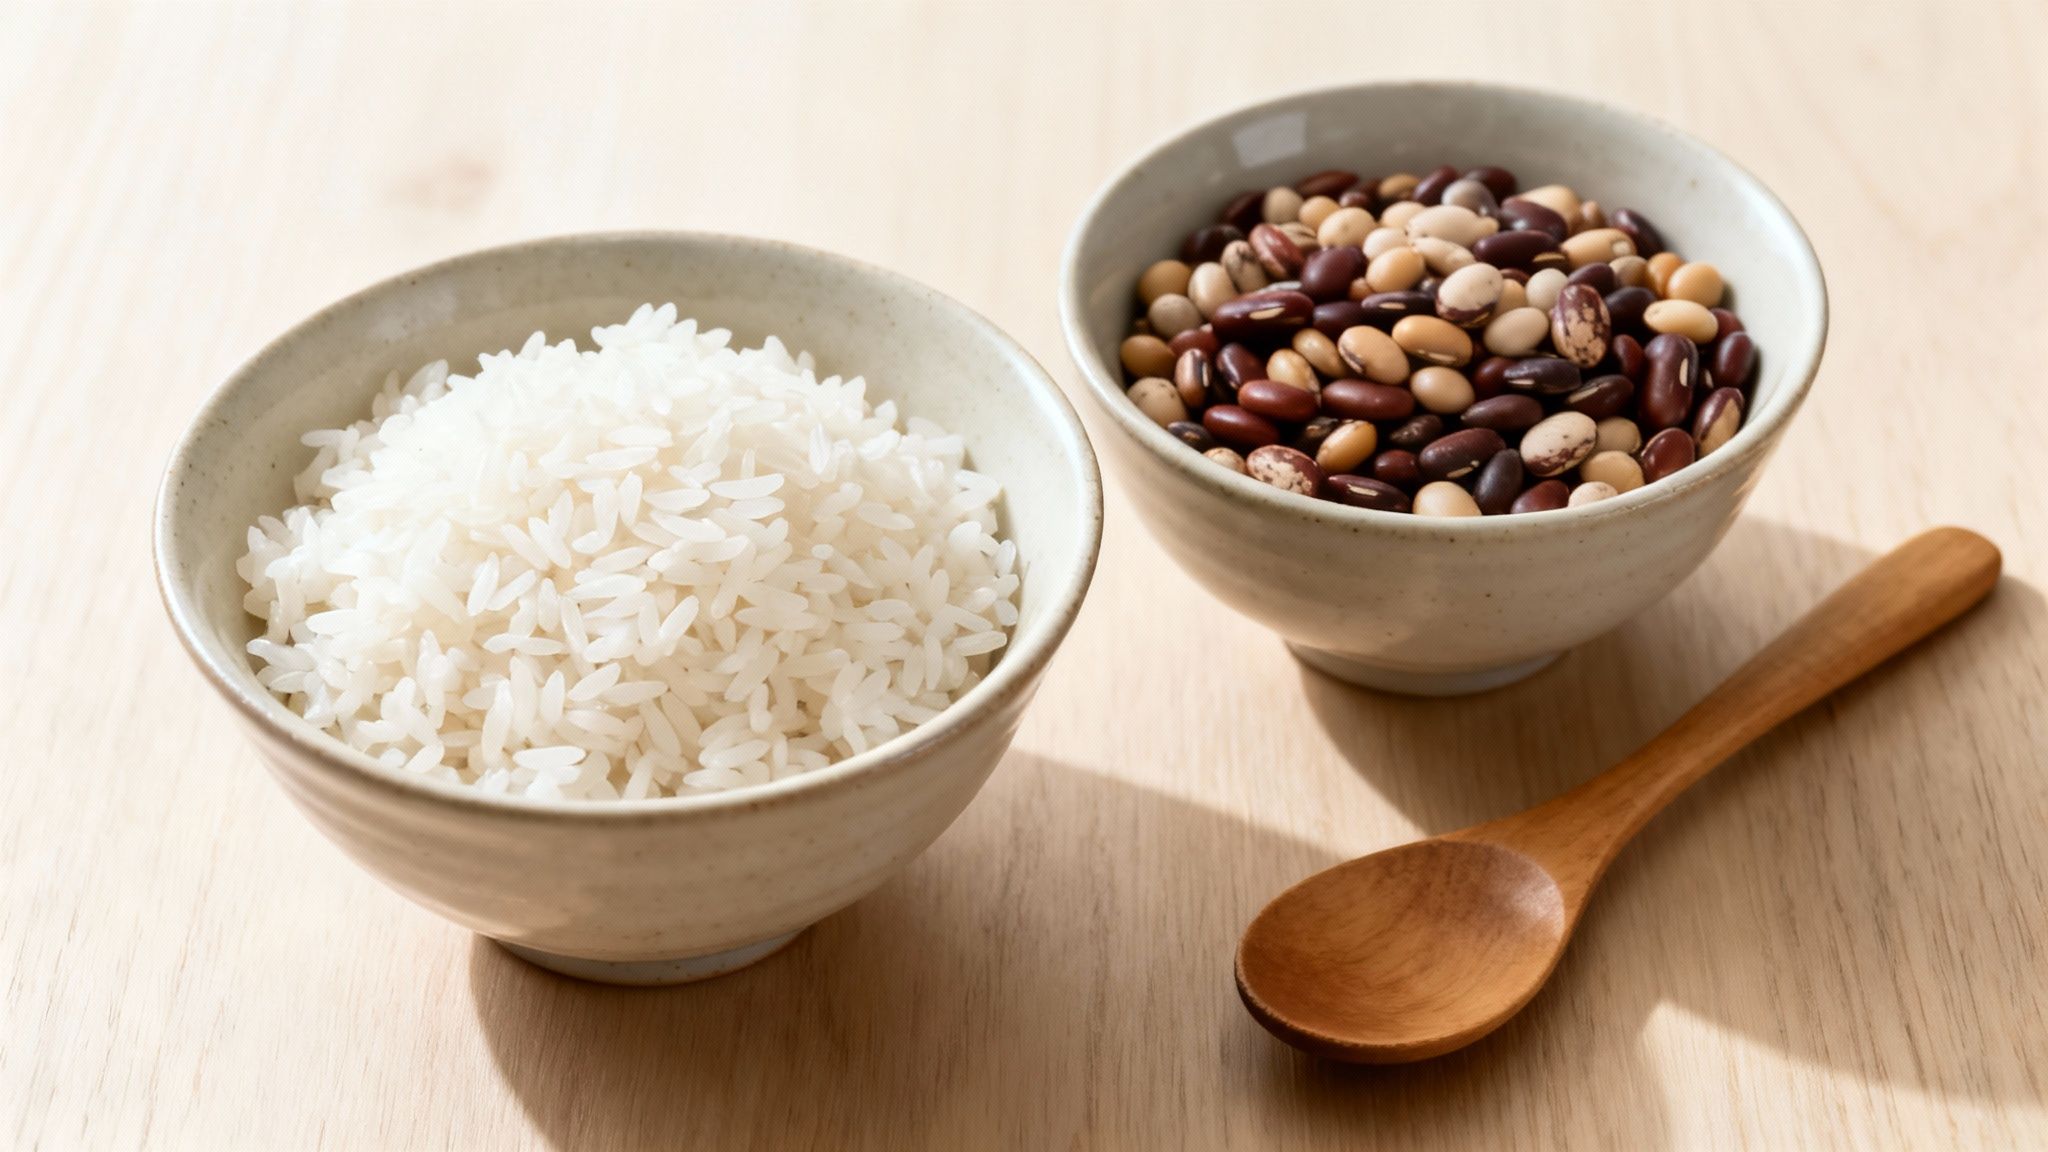
When you’re serious about long-term food planning, everything starts with two humble staples: bulk rice and beans. This isn’t just prepper folklore; it’s the undisputed foundation of any reliable food supply. For centuries, this combination has been the go-to survival food for a reason—it delivers a complete protein, offers incredible caloric bang for your buck, and is built to last.
The Foundation of Your Emergency Pantry
Stocking up on rice and beans is more than just a box-checking exercise. It’s a strategic move toward real self-reliance. Think about it: when supply chain hiccups can empty grocery shelves in a matter of hours, having this core food source at home brings a profound sense of security.
You’re essentially taking control of a critical variable—your family’s next meal. It breaks the dependency on just-in-time delivery systems and creates a buffer against the unexpected, whether that’s a winter storm, a job loss, or a wider-scale crisis.
Why This Combination Works
The magic of rice and beans lies in their nutritional synergy. On their own, each is an incomplete protein. But when you eat them together, they provide all nine essential amino acids your body can’t produce itself, forming a complete protein that can sustain you for the long haul.
It’s a simple, powerful partnership.
- Cost-Effective Calories: Nothing else even comes close to offering this many calories per dollar. This is what makes building a substantial emergency pantry achievable, even on a tight budget.
- Exceptional Shelf Life: When stored properly, we’re talking 20-30 years for white rice and dry beans. This is the definition of a “store it and forget it” solution you can count on for decades.
- Versatility: Let’s be honest, they’re bland on their own. But that’s their strength. They are a blank canvas for countless meals. Add some spices, herbs, or other stored goods, and you can create a huge variety of satisfying dishes.
Stockpiling these staples is the first and most critical step in building a resilient household. It’s not about doomsday scenarios; it’s about practical readiness for everyday uncertainties.
This isn’t some fringe idea; it’s proven on a global scale. Over 50% of the world’s population relies on rice for its daily calories, a testament to its ability to sustain entire nations through every imaginable disruption. It’s a reliable, stable commodity for a reason.
Of course, rice and beans are just the beginning. A truly robust pantry has variety. To see what else you should be adding to your shelves, check out our guide on other essential items you should be stockpiling. Building a well-rounded supply is the key to being prepared for anything.
Calculating How Much Food Your Family Needs
Trying to figure out just how much rice and beans to put away can feel like a shot in the dark. It’s easy to get overwhelmed. But it’s really just a simple math problem, and moving from that vague sense of anxiety to confident preparation starts with a clear, calculated plan based on your family’s actual needs.
A solid starting point is to aim for around 2,000 calories per adult, per day.
This number gives you a great baseline for a crisis scenario where you might be much more active than usual. You can always adjust this down a bit for kids, seniors, or less active adults, but believe me, it’s always better to have a little extra than to come up short when it really counts.
Establishing Your Baseline
A common and really effective ratio for storing rice and beans is 2:1 by weight. For every two pounds of rice you store, you should have one pound of beans. Following this ratio gives you a great balance of carbohydrates for pure energy and protein to keep you going.
So, what does a 2,000-calorie daily ration look like for one adult? It breaks down like this:
- 0.8 pounds of dry white rice (which is about 1,320 calories)
- 0.4 pounds of dry beans (giving you another 630 calories)
These two numbers are the foundational building blocks of your entire food storage plan. From here, you just scale everything up depending on how many people are in your family and how long you want your supply to last.
Scaling for Different Timelines
Once you have that daily per-person amount nailed down, figuring out what you need for longer periods is just simple multiplication. Whether you’re building a three-month buffer or a full year’s supply, the process is exactly the same. You just multiply the daily requirement by the number of people, and then by the number of days.
Let’s run the numbers for a one-month supply for one person:
- Rice: 0.8 lbs/day x 30 days = 24 lbs
- Beans: 0.4 lbs/day x 30 days = 12 lbs
Just like that, “stocking up” goes from a vague idea to a specific, actionable goal. Your mission is now to get 24 pounds of rice and 12 pounds of beans for each person, for every month you want to cover.
The goal isn’t just to have food, but to have a known quantity of calories you can rely on for a specific duration. This calculated approach removes the uncertainty and provides genuine peace of mind.
To make things even easier, here’s a quick-reference table that does the math for you. This is a great cheat sheet for seeing how much you’ll need for common timelines, scaled for an individual and a family of four.
Annual Rice and Beans Storage Per Person
This table helps you quickly estimate the total pounds of bulk rice and beans needed, assuming an average adult caloric intake from these staples.
| Timeline | Dry Rice (per adult) | Dry Beans (per adult) | Total for Family of 4 |
|---|---|---|---|
| 3 Months | 72 lbs | 36 lbs | 432 lbs |
| 6 Months | 144 lbs | 72 lbs | 864 lbs |
| 1 Year | 288 lbs | 144 lbs | 1,728 lbs |
Remember, these are baseline figures. If you have a couple of highly active teenagers, you might want to bump your total by 10-20%. On the other hand, for a family with very young children, you can probably adjust downward a bit.
It’s also smart to consider that in a real emergency, you might find yourself helping out neighbors or extended family. A small surplus is never a bad idea. And one last practical tip: when you’re dealing with older beans that take forever to soften, a good pressure cooker, like the classic Presto 4-Quart model, can be an invaluable tool to save precious time and fuel. This is especially true for beans that have been sitting in storage for a few years.
Choosing the Best Rice and Beans for Storage
Getting your long-term supply of bulk rice and beans started on the right foot means picking the right staples from day one. This is a critical step. Not all rice and beans are built for decades of storage, and a poor choice now can lead to spoiled food and a completely wasted investment down the line. The mission is simple: choose the varieties with the best natural staying power.
Why White Rice Is the Long-Term Champion
When it comes to rice, the choice is clear and, frankly, non-negotiable for anyone serious about a multi-decade shelf life. You have to go with white rice. Brown rice might be the healthier pick for your dinner tonight, but it’s a terrible candidate for your emergency pantry.
The reason is pure science. Brown rice still has its bran and germ, which are loaded with natural oils. Over time, those oils oxidize and turn rancid, giving the rice a nasty, chemical-like smell and taste. Even with perfect storage, you’re lucky to get 3-5 years out of brown rice before it goes bad.
White rice, on the other hand, has had the bran and germ milled off, removing those problematic oils. That one difference is what lets it last an incredible 20-30 years when you store it correctly.
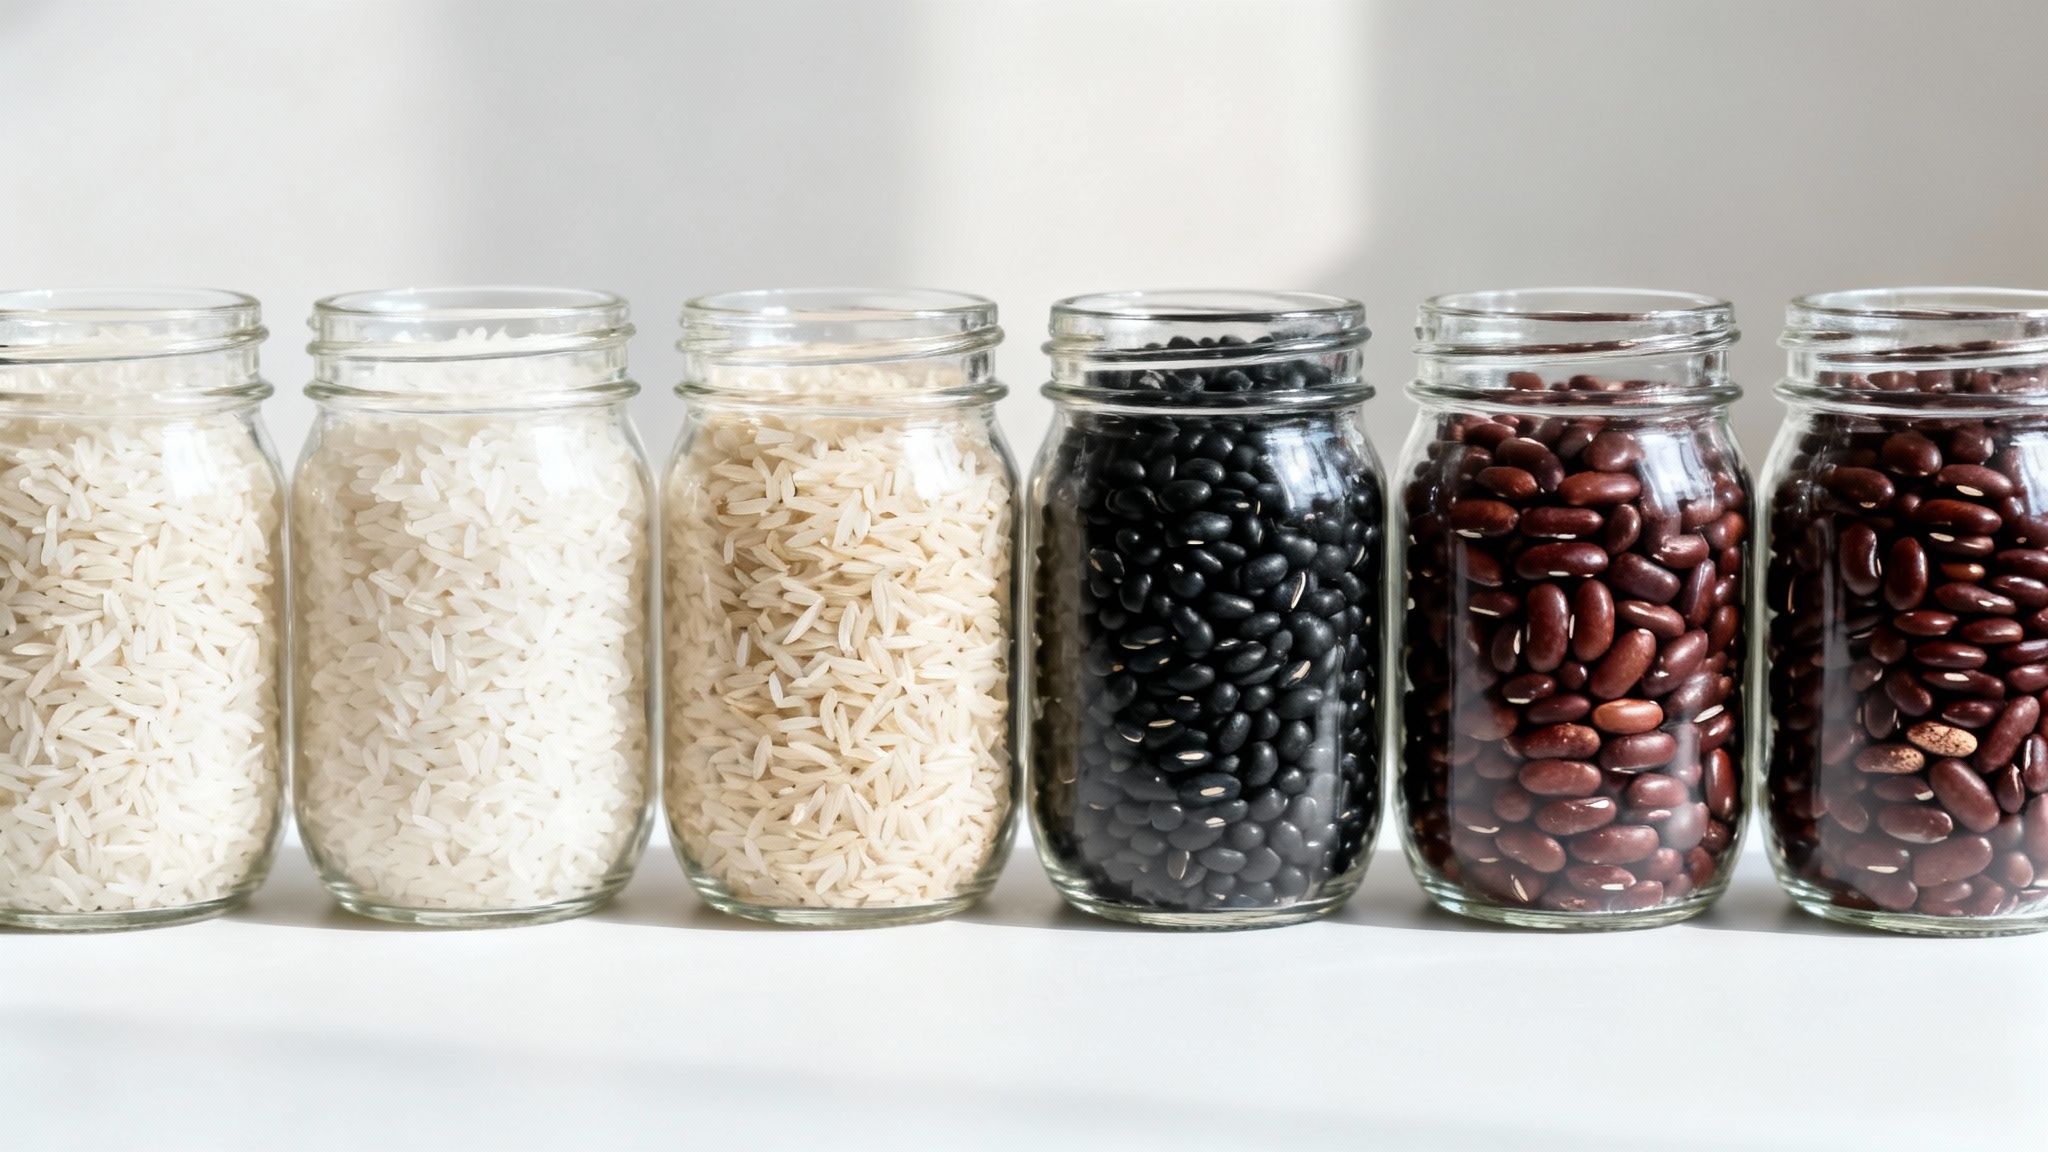
- Best Varieties for Storage: Long-grain white rice, Jasmine, and Basmati are all top-tier choices. They’re low in moisture, store like a dream, and are versatile enough for any meal you can think of.
- What to Avoid: Stay far away from brown rice. You should also skip instant, parboiled, or “converted” rice, as they either have higher oil content or have been processed in a way that slashes their maximum shelf life.
Selecting the Best Beans for Your Stockpile
The good news is that with beans, you have a lot more flexibility. Unlike rice, most varieties of dry beans are fantastic for long-term storage. They are naturally low in fat and moisture, which makes them incredibly stable over the years. The main things to focus on are choosing beans that are versatile and making sure you’re buying good quality from the start.
Pinto, black, and kidney beans are the workhorses of the prepper pantry because they’re nutritionally dense and are the foundation for countless recipes. Great Northern beans and navy beans are also excellent, especially for hearty soups and stews.
When you’re buying, give the bags a good look. You want to see whole, unbroken beans that are consistent in color and size. A bag with a lot of dust, broken bits, or signs of pests is a definite red flag. High-quality beans simply rehydrate better and last longer. For more ideas on what to store, check out our guide on foods that last 25 years, which offers more insight into building a resilient pantry.
The quality of the food you put into storage directly impacts the quality of the food you’ll get out of it years later. Starting with the best possible ingredients is a non-negotiable first step.
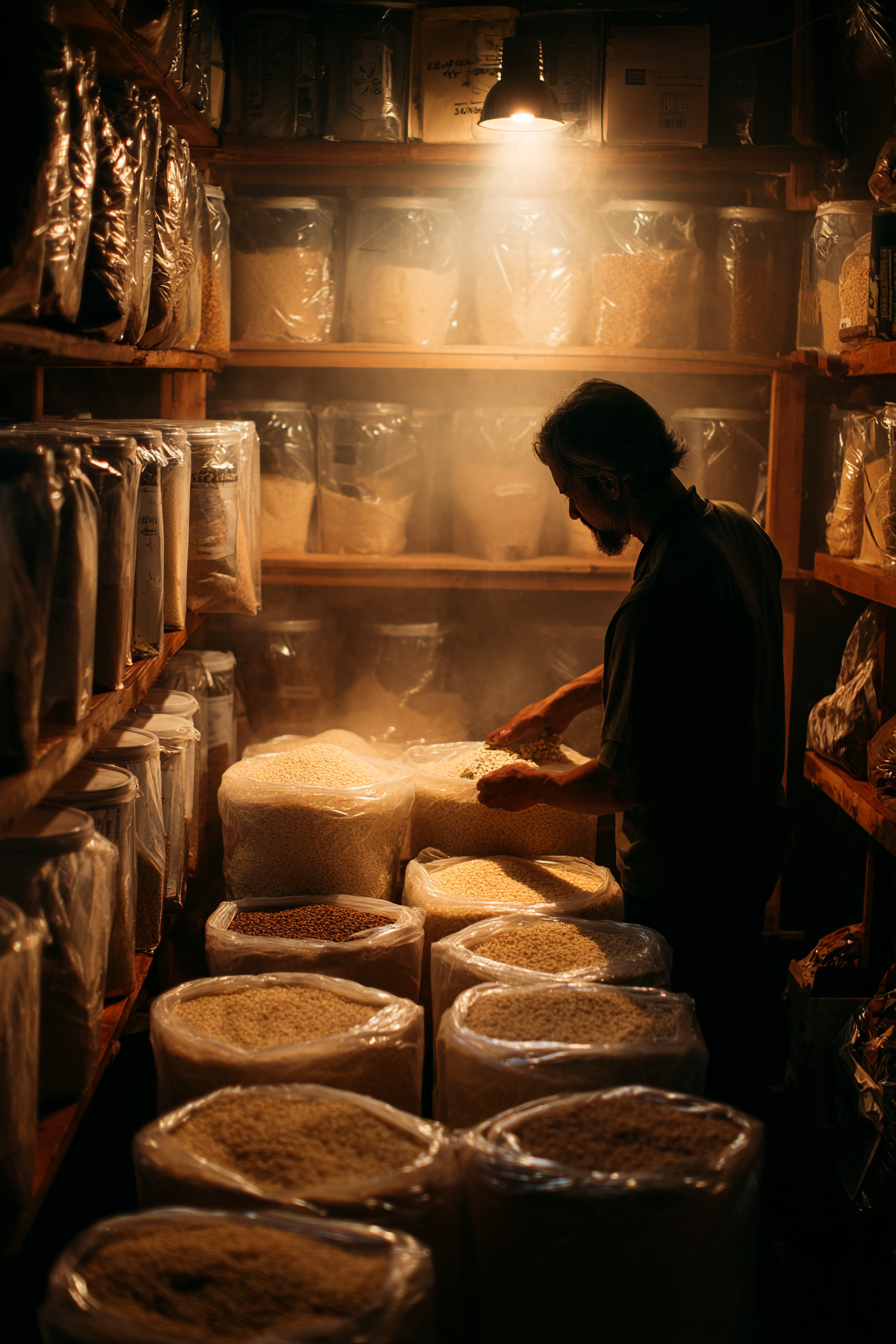
Sourcing Your Bulk Rice and Beans
Where you buy your staples really does matter. To maximize storage potential, you want the freshest product you can get from a source you trust. There are a few solid options, each with its own advantages and disadvantages.
Comparing Your Sourcing Options
| Source | Pros | Cons |
|---|---|---|
| Big-Box Stores | Convenient and always available. Prices on 25-50 lb bags are often good. | Stock might sit for a while, meaning the product could already be a year old. |
| Restaurant Suppliers | An amazing source for fresh, high-quality staples in massive quantities. | Usually requires a business membership or has hefty minimum purchase requirements. |
| Agricultural Co-ops | Potentially the freshest you can get, sometimes direct from growers. | Can be hard to find and might operate on seasonal buying schedules. |
| Online Retailers | Huge variety and the convenience of home delivery. | You can’t inspect the quality beforehand. Always check reviews and seller ratings. |
If you’re looking for a grab-and-go solution, some companies specialize in prepping food for you. Augason Farms, for example, sells bulk staples already sealed in buckets. It’s a convenient route for beginners, though you’ll pay a premium for it. No matter where you decide to buy, the goal remains the same: get your hands on high-quality, low-moisture staples that are ready for the long haul.
How to Properly Store Food for Decades
You’ve done the hard work of calculating your needs and tracking down quality staples. Now comes the most important part: making sure that investment lasts. The goal here is to build a fortress against the three big enemies of long-term storage: oxygen, light, and moisture.
The method trusted by seasoned preppers is a straightforward, three-part system. Get this right, and you’ll create an environment where your food stays safe and edible for an incredible 20-30 years.
The Gold Standard Storage System
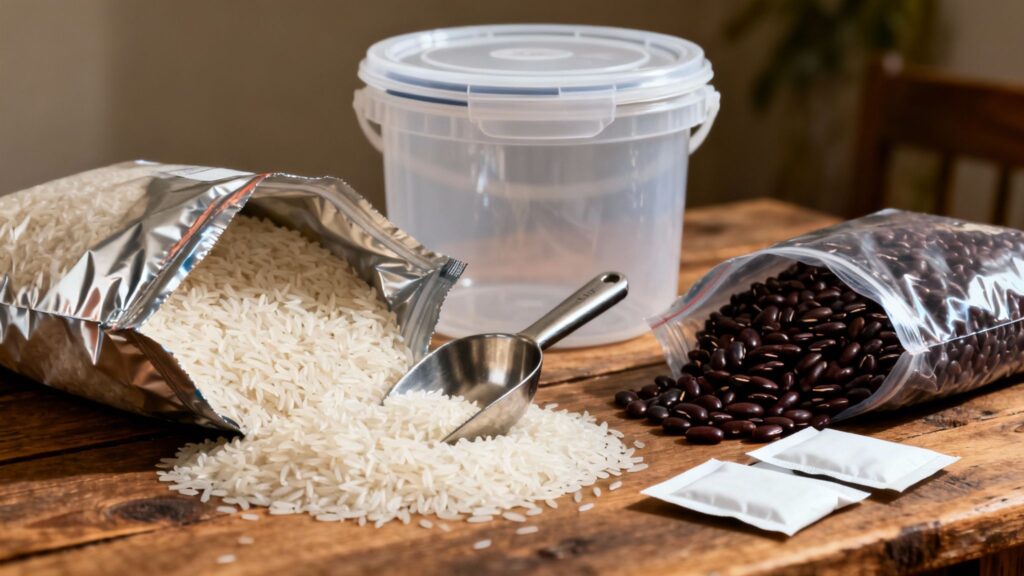
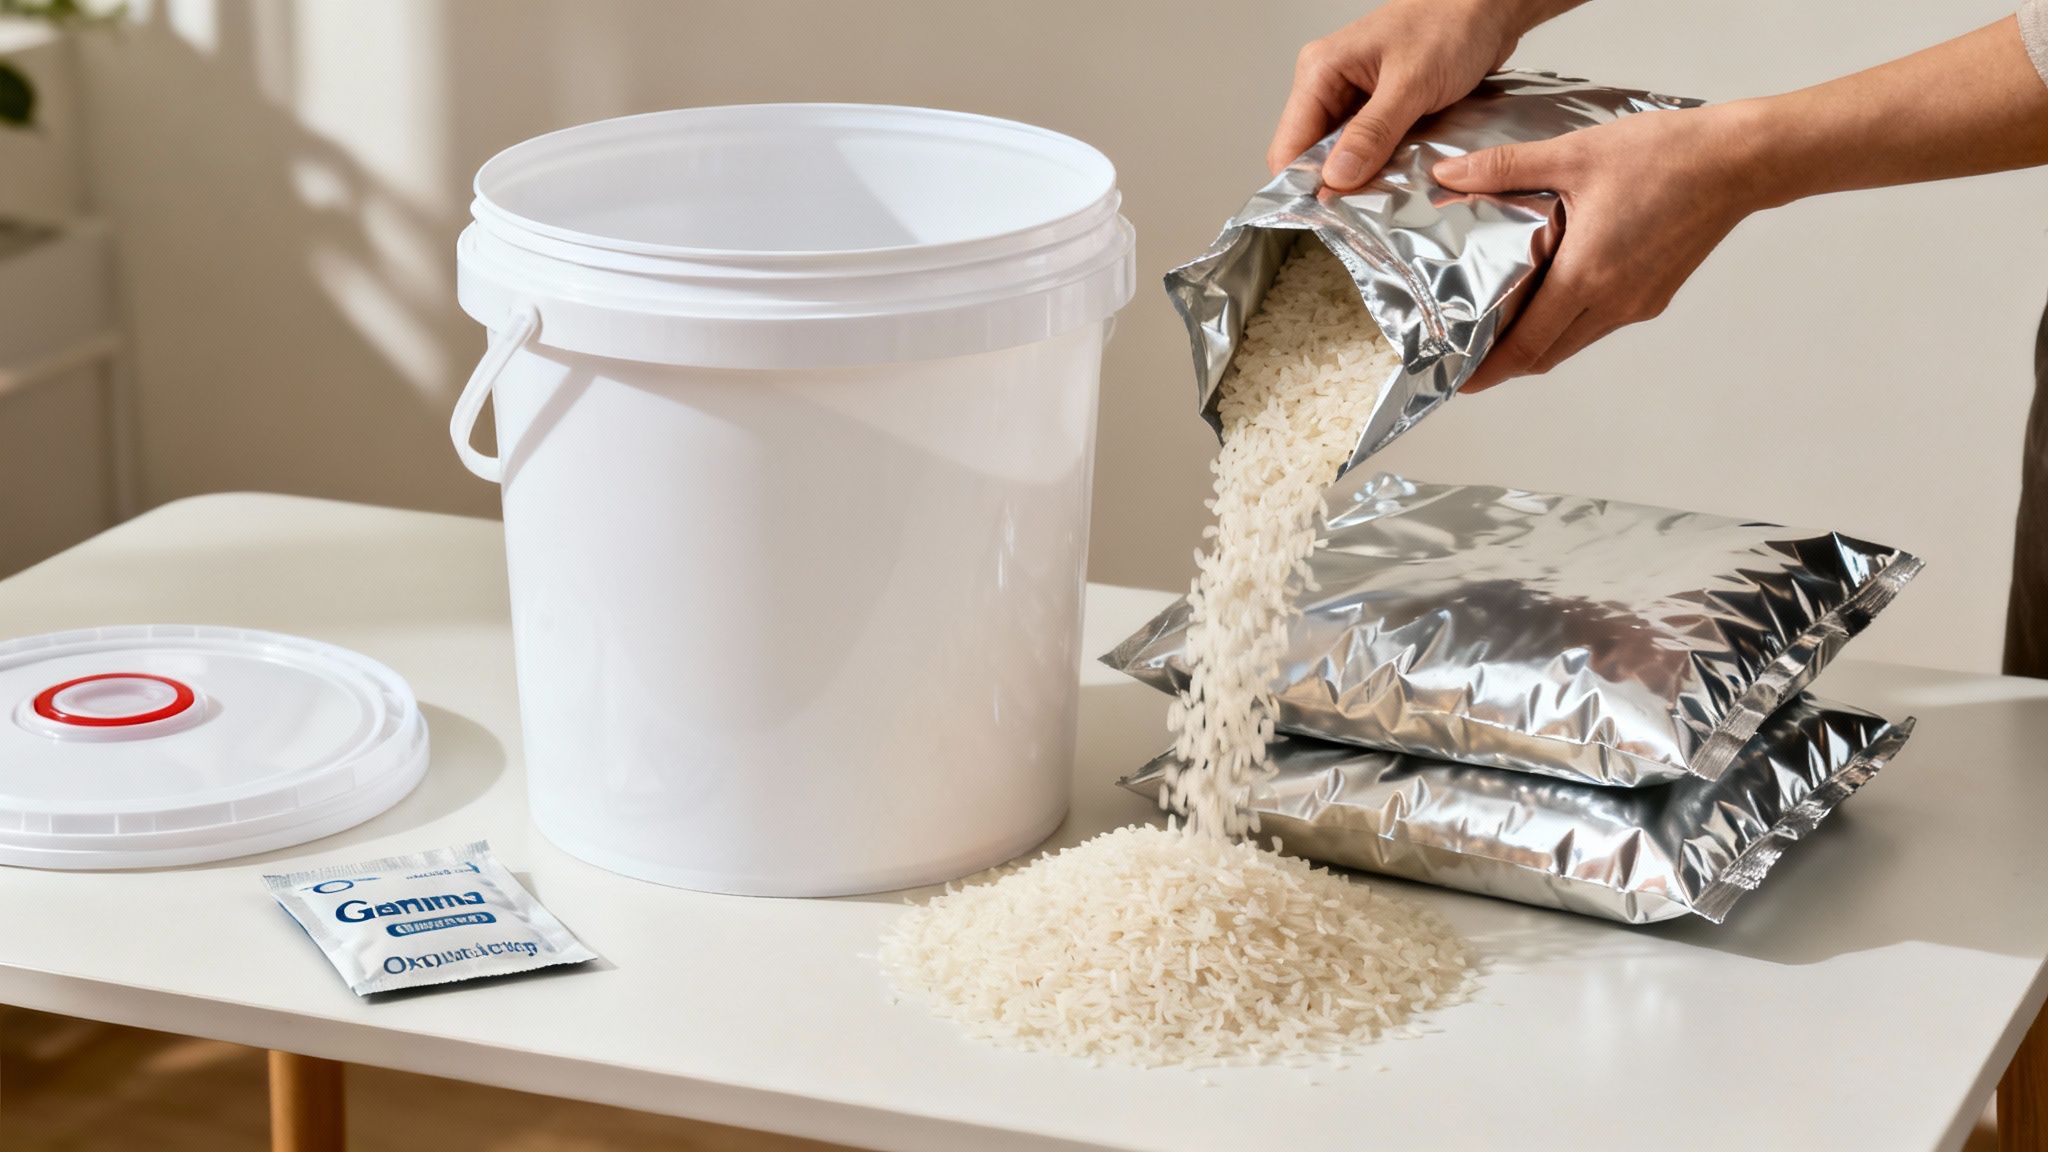
This isn’t complicated, but it does demand attention to detail. Combining Mylar bags, food-grade buckets, and oxygen absorbers is simply the most reliable way to hit that multi-decade shelf life for staples like rice and beans.
Food-Grade Buckets: These are your first line of defense against pests, floods, and being crushed. You absolutely must use buckets marked as “food grade,” usually made from HDPE plastic with a #2 recycling symbol. Using anything else, like an old paint bucket, risks leaching nasty chemicals into your food.
Mylar Bags: Think of these as flexible metal cans. The metallized film is an incredible barrier against light, moisture, and air. Don’t cheap out here—go for a thickness of at least 5 mil to prevent accidental punctures.
Oxygen Absorbers: These little packets are the real magic. They’re filled with an iron powder mixture that chemically traps oxygen, literally pulling it out of the sealed bag. Without oxygen, pests like weevil eggs can’t hatch, and the slow decay caused by oxidation grinds to a halt.
This setup creates a dark, oxygen-free environment that essentially puts your food into a state of suspended animation.
Step-by-Step Sealing Process
Getting a perfect seal is easier than you might think. You don’t need any fancy equipment; a regular household clothes iron will do the job perfectly.
First, pop the empty Mylar bag into a food-grade bucket and fold its top edges over the rim. This holds it open and makes filling a breeze. Pour your rice or beans directly into the bag, but be sure to leave about 4-5 inches of headspace at the top. You’ll need that empty space to get a clean, wide seal.
Next, it’s time for the oxygen absorbers. For a standard 5-gallon bucket, a 2000cc absorber is a good size—it’s more than enough to handle the air inside. These things start working the second you open their packaging, so move with purpose. Drop one or two right on top of the food.
Now, push as much air out of the Mylar bag as you can before you seal it. I like to use a small piece of wood or a hardcover book to gently press down on the food as I bring the top edges of the bag together. Lay that top edge flat across the board and use your hot iron (set to ‘cotton,’ no steam) to melt the Mylar shut. You’re aiming for a solid, flat seal that’s about 2-3 inches wide.
Over the next 24-48 hours, you should notice the Mylar bag shrinking and pulling tight against the food inside. That’s your proof. It’s the visual confirmation that the oxygen absorbers did their job and you have a perfect, airtight seal.
Managing Your Stored Buckets
Once your buckets are sealed, a little organization goes a long way. Use a permanent marker to clearly label every single bucket with the contents and the date you sealed it. This is a non-negotiable step for keeping track of your inventory and practicing good rotation.
For any buckets you might need to get into more often, I highly recommend upgrading to a Gamma Seal Lid. It replaces the standard pry-off lid with a screw-on top that’s just as airtight and watertight but infinitely easier to open and close. It’s the perfect solution for the “working pantry” bucket that you’re actively using.
If you want to explore more container options, our complete guide on the best food storage containers breaks down the pros and cons of different setups for every item in your pantry.
The Role of Beans in Your Survival Pantry
While rice gets a lot of attention for its pure caloric value, beans are the nutritional powerhouse that makes the combination truly sustainable. They perfectly complement rice by packing in the protein and fiber your body needs to stay strong. It’s no surprise the global demand for dry beans is growing; they offer an indefinite shelf life when stored correctly, turning a basic pantry into a fortress of nutrition. Together, rice and beans provide all the essential amino acids—a critical factor for maintaining health and endurance when you’re off-grid.
What About Vacuum Sealing?
Vacuum sealing definitely has its place, but it serves a different purpose. A machine like a FoodSaver is fantastic for short- to medium-term storage, extending the life of foods for 1-5 years. It’s great for preventing freezer burn or portioning out smaller amounts for your working pantry.
The key difference is that standard vacuum-seal bags are not a true oxygen barrier like Mylar is. Tiny amounts of air can still seep through the plastic over months and years, and they offer zero protection from light. Think of them as a tool for food you plan to rotate through fairly quickly, not for the 30-year stockpile. When it comes to ultimate long-term security, nothing beats the Mylar-and-bucket combo.
Meal Planning and Avoiding Food Fatigue
Having buckets of rice and beans stacked in your basement is a massive step toward self-reliance. That’s the easy part. The real test comes when you actually have to live on that food for weeks or months.
Let me be blunt: without a solid plan, the sheer monotony of eating the same thing day after day can become a psychological battle. This is where your strategy has to shift from just storing calories to creating actual, satisfying meals. The key is to build a “flavor pantry” right alongside your core staples. This collection of long-shelf-life ingredients is what will turn basic rice and beans from survival fuel into something you can genuinely look forward to eating.
Building Your Flavor Pantry
Think of your rice and beans as a blank canvas. Your spices, seasonings, fats, and sweeteners are the paints you’ll use to create something new every day. Food fatigue is a real morale-killer in a crisis, and a well-stocked flavor pantry is your best defense against it.
You don’t need a massive amount of stuff, just items that pack a massive flavor punch for their size and cost.
- Spices and Herbs: These are non-negotiable. Get the basics in bulk—salt, black peppercorns, garlic powder, onion powder, and chili powder. Cumin, oregano, and smoked paprika are also game-changers.
- Bouillon and Broth: Cubes or powders take up almost no space but can instantly add a rich, savory depth to a simple pot of rice and beans, turning it into a hearty soup.
- Fats and Oils: Calories are energy, simple as that. Storing cooking oil, shortening, or ghee is critical not just for cooking but for adding much-needed richness and calories to your meals.
- Sweeteners: Never underestimate the power of a little sweetness as a morale booster. Honey and granulated sugar, when stored properly, can last for decades.
- Acid: This is the secret ingredient most people forget. Vinegar or powdered lemon juice can brighten up flavors and cut through richness, preventing a dish from tasting flat and one-dimensional.
Even something as simple as a bottle of hot sauce can make a world of difference. Products like Tabasco sauce are vinegar-based and have an incredibly long shelf life, making them a perfect, potent addition to any emergency food supply.
Simple Recipes for Survival Situations
You aren’t trying to be a gourmet chef in a grid-down scenario. The goal is to have a few simple, adaptable meal concepts that you can rely on without a second thought. Practice making these now, with your stored ingredients, so the process is muscle memory when you truly need it.
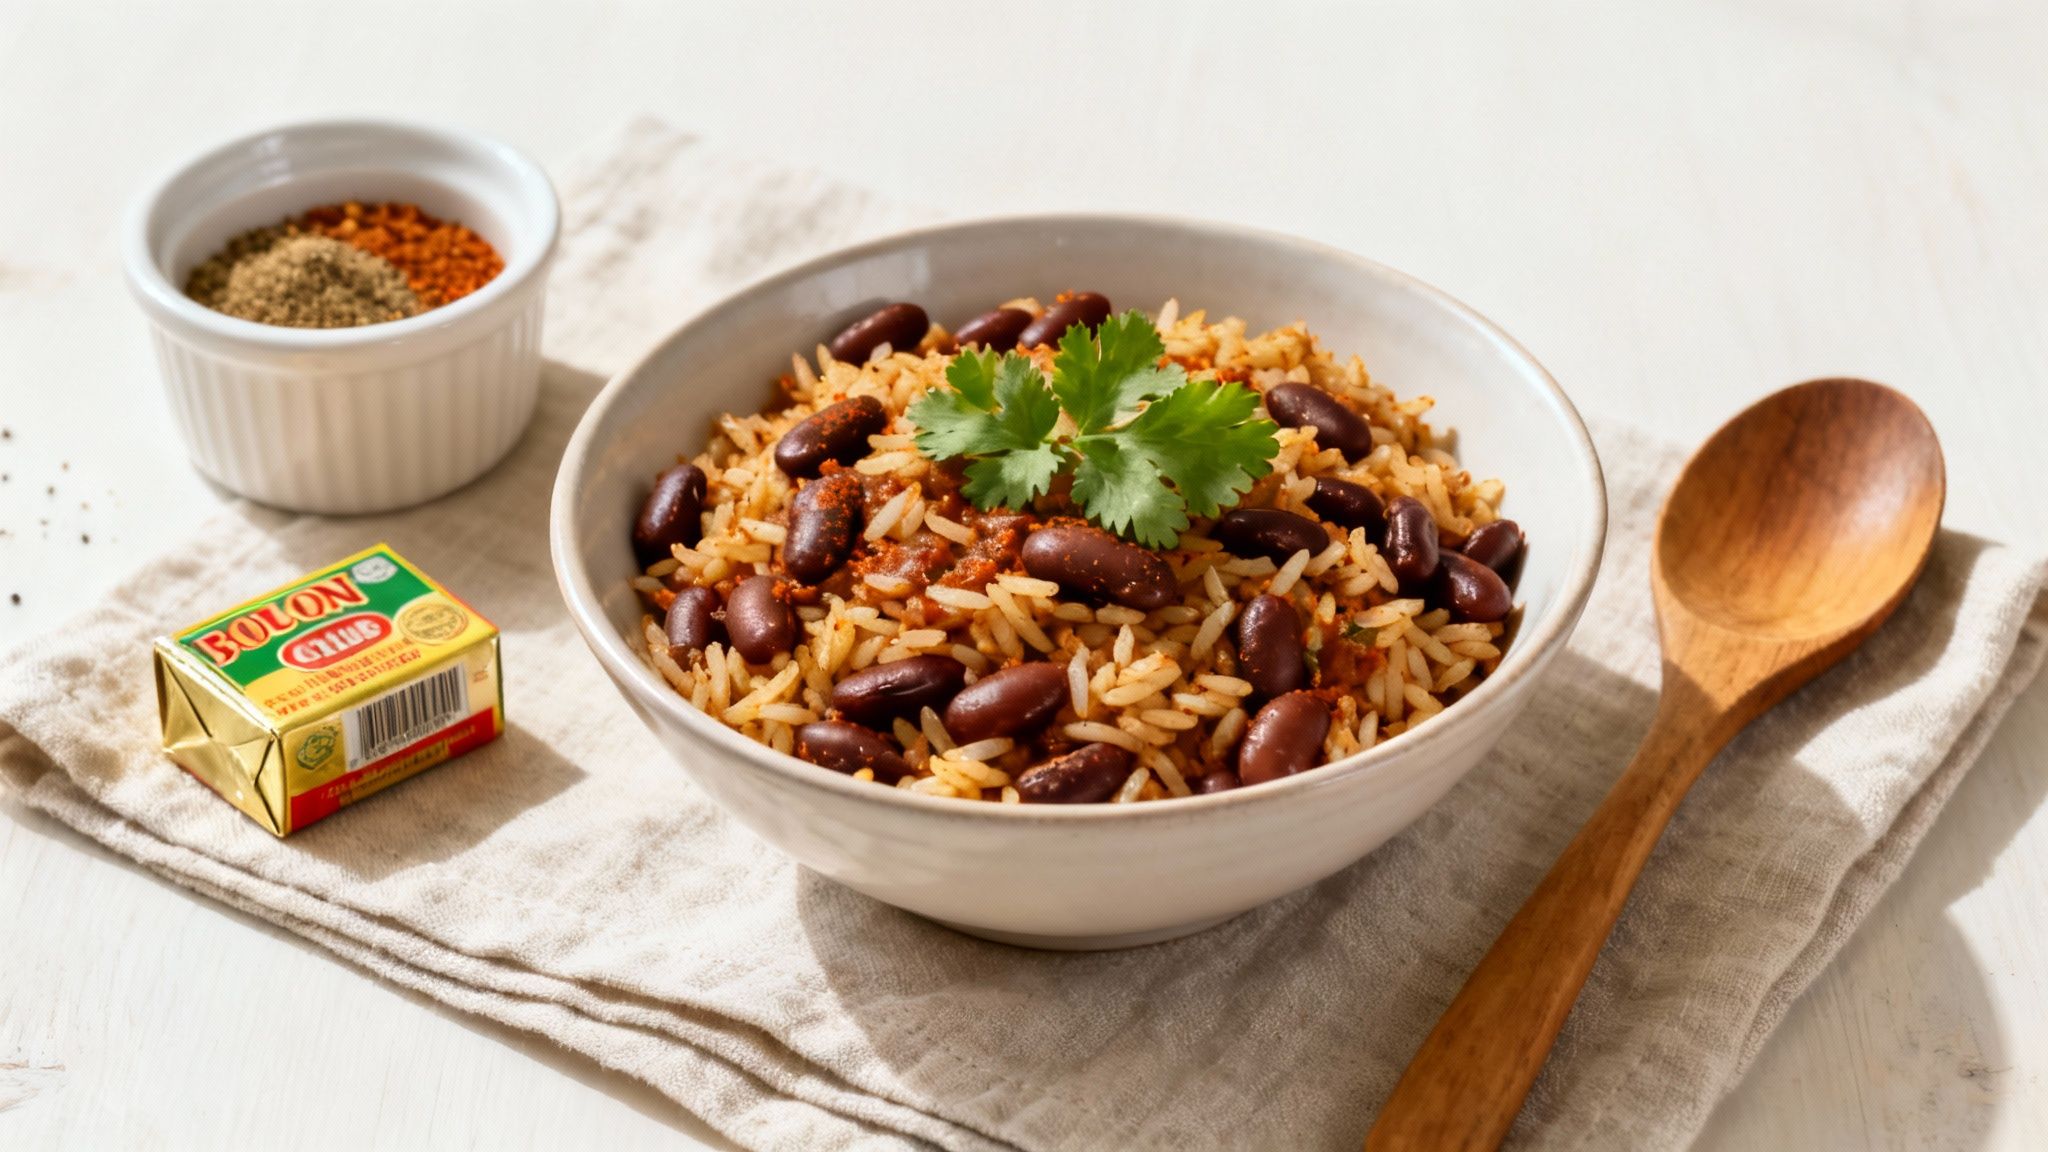
One of the most basic and satisfying meals is a simple rice and bean bowl. Cook your rice and beans separately, then combine them and raid your flavor pantry. A dash of cumin, chili powder, and onion powder creates a classic Tex-Mex flavor. Add a little oil for fat, and you have a complete, calorie-dense meal.
Your pantry isn’t a museum. The best way to build confidence in your food supply is to actively cook with it. This practice turns theoretical knowledge into practical skill.
Another great option is a hearty soup. Cook down your beans with plenty of water, add bouillon for a savory base, and toss in your cooked rice. This method is incredibly efficient, stretches your supplies further, and provides a warm, comforting meal in a stressful situation. For more ideas, explore our detailed guide on creating delicious meals for your survival pantry, which offers more advanced recipes and techniques.
The Importance of Rotation and Practice
Your stored food is not just an insurance policy; it’s a living pantry that you should be using. The “First-In, First-Out” (FIFO) method is absolutely crucial here. When you buy a new bag of rice, seal it for long-term storage and place it at the back of your supply. Pull the oldest bucket from the front to use for your regular meals.
This accomplishes two critical things at once.
- Ensures Freshness: It guarantees you are always using your oldest stock first, keeping your entire supply as fresh as possible and preventing spoilage.
- Builds Skill: It forces you to learn how to cook with your preps. You’ll figure out exactly how long your beans take to soften and master seasoning your rice perfectly.
Cooking with your staples now, when the stakes are low, is the best training you can possibly get. It builds the skill and confidence needed to provide for your family, turning what could be a daunting task into a familiar, comforting routine.
Common Questions About Storing Rice and Beans
Even with a solid plan, you’re bound to run into questions once you start putting away bulk rice and beans for the long haul. Getting the right answers is what builds confidence and makes sure all your hard work actually pays off when you need it most. Let’s tackle some of the most common things people ask.
Can I Store Brown Rice for the Long Term?
This is probably one of the most critical questions people have, and the answer is a firm “no.” While you can store brown rice, its shelf life is a fraction of white rice’s, usually lasting only 3-5 years. For a true, multi-decade food supply, you have to stick with white rice.
The reason comes down to simple biology. Brown rice still has its bran and germ, which are full of natural oils. Over time, those oils go rancid, even in perfect storage conditions. You’ll end up with rice that has a foul, chemical-like taste and smell. White rice has had those oily layers milled off, and that’s precisely why it can last an incredible 20-30 years without degrading.
Should I Freeze My Rice and Beans Before Sealing?
Tossing your staples in the freezer for a few days is an old-school trick to kill off weevils and other pests. It can work for live bugs, but honestly, it’s an unnecessary step if you’re using high-quality oxygen absorbers correctly.
When you properly seal a Mylar bag with the right-sized oxygen absorber, you create an environment with almost zero oxygen. This not only suffocates any active insects but—more importantly—prevents their eggs from ever hatching. Removing the oxygen is a much more complete and reliable solution than freezing.
What Is the Best Way to Organize My Storage Buckets?
Good organization is what turns a pile of buckets into a functional pantry you can actually use. First things first: label every single bucket with a permanent marker. Write down the contents (e.g., “Long-Grain White Rice”) and the date you sealed it.
Next, get your buckets off concrete floors. Concrete can wick moisture and create condensation problems. Use sturdy shelving or even just some simple wooden pallets to create an air gap underneath.
The most important rule for organizing is “First-In, First-Out,” or FIFO. Always put your new buckets in the back and pull from the front. This ensures you’re constantly rotating your stock and using the oldest food first.
Practicing FIFO is non-negotiable for keeping your supply fresh. To really get into the weeds on extending the life of all your preps, you can learn more about the principles of survival food shelf life and the factors that make a difference.
My Vacuum-Sealed Bag Lost Its Seal—Is the Food Bad?
If you notice a standard vacuum-sealed bag from a machine like a FoodSaver has lost its tight seal, it just means air got back in. The food inside isn’t immediately bad—it’s almost certainly safe to eat in the short term. The problem is that it’s no longer protected for the long haul.
You have two options: either use the contents of that bag soon or, if the food is still in good shape, repackage it in a fresh bag. This exact issue is why there’s a huge difference between standard vacuum bags and heavy-duty Mylar. Mylar gives you a much tougher, more permanent barrier against both oxygen and moisture, making it the clear winner for anything you want to store for more than a couple of years. Vacuum sealers are great for the freezer or short-term pantry items, but Mylar is the only way to go for a true multi-decade food supply.

