When an emergency hits and you have to leave now, your bug out bag is your lifeline. The gear inside needs to sustain you for at least 72 hours, covering your most basic survival needs when no other help is available. We’re talking about the absolute must-haves: a reliable way to get clean water, food that keeps you going, shelter from the elements, and the ability to make fire.
If you’re new to emergency preparedness, learning how to start prepping will give you the foundational knowledge to build not just a bug out bag, but a complete preparedness strategy.
These items are the foundation of your entire plan. Get them right, and you’ve built a solid base for your own self-sufficiency.
Building Your 72-Hour Lifeline With Core Gear
If an evacuation order is issued, you won’t have the luxury of time to second-guess your gear choices. The whole point of a 72-hour bag is to grab it and go, knowing it contains everything you need to survive, not just exist. It’s built around four pillars: water, food, shelter, and fire.
If you’re wondering what’s a bug out bag and why it’s different from other emergency kits, understanding its specific purpose as an evacuation-focused survival tool is crucial.
Your bug out bag is essentially a mobile emergency preparedness kit designed for evacuation scenarios, but the principles of redundancy and systematic planning apply to all emergency supplies.
Thinking like a seasoned prepper means you don’t just check these items off a list. Instead, you build interconnected systems that work together. It’s about creating redundancy and efficiency. For example, simply packing a few water bottles is a rookie mistake—it’s a finite supply. A real hydration system includes a tough water bottle, a portable filter like the Sawyer Squeeze, and purification tablets as a failsafe backup. That layered approach means you can turn almost any sketchy water source into safe drinking water.
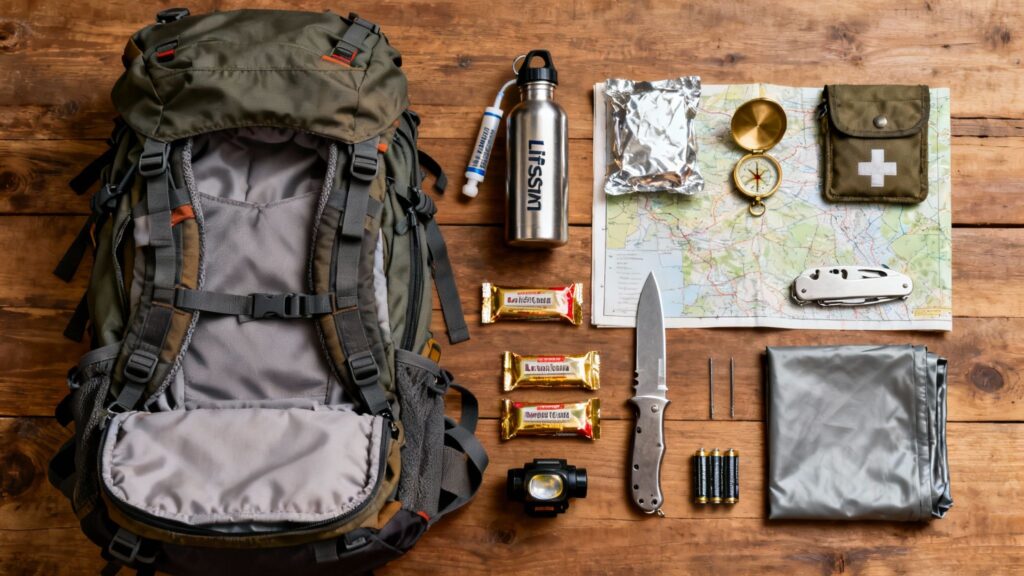
The 10 Core Bug Out Bag Essentials
To make this easier to visualize, here’s a quick-reference table of the absolute non-negotiables for a 72-hour bag. These are the ten categories you need to cover, no matter what.
While a bug out bag focuses on mobility and 72-hour survival, you should also maintain a comprehensive disaster supply kit at home for shelter-in-place scenarios where you have more storage capacity.
| Item Category | Primary Function | Example Product/Type | Key Consideration |
|---|---|---|---|
| Backpack | Carry all your gear | Osprey, 5.11 Rush series | 40-50L capacity, durable, comfortable |
| Water Filter/Purifier | Provide safe drinking water | Sawyer Squeeze, LifeStraw | Redundancy (filter + tablets) is key |
| Emergency Food | High-calorie, no-cook fuel | Datrex Emergency Ration Bars | Aim for 2,500 calories per day |
| Shelter | Protection from elements | SOL Emergency Bivvy, Tarp | Lightweight and compact is crucial |
| Fire Starter | Create fire for warmth/cooking | UCO Stormproof Match Kit, Bic Lighter | Must be waterproof or have backups |
| First-Aid Kit | Treat injuries | Adventure Medical Kits | Include trauma supplies (tourniquet) |
| Navigation | Know your location/direction | Compass, Local Maps | Don’t rely solely on electronics |
| Illumination | See in the dark | Headlamp (hands-free) | Pack extra batteries |
| Knife/Multi-Tool | Cutting, repairs, utility | Morakniv Companion, Leatherman | Full-tang fixed blade is ideal |
| Cordage | Shelter building, repairs | 550 Paracord (50-100 ft) | Strong, lightweight, and versatile |
This table covers your bases, ensuring you have the tools to manage your core survival needs effectively and efficiently when every second counts.
Layering Your Hydration And Nutrition
Water is absurdly heavy. You can’t realistically carry a three-day supply, especially if you’re on foot. That’s why the ability to filter and purify water on the move is non-negotiable. It cuts down on weight, which means you can travel faster and with less exhaustion.
The same logic applies to your food. You need calories, and lots of them, without the hassle of cooking.
Your body is a machine, and in an emergency, it needs high-octane fuel. Don’t skimp on calories; they are just as vital as any tool in your bag for maintaining energy, cognitive function, and morale under stress.
High-density emergency ration bars, like those from Mainstay or Datrex, are perfect for this. They’re designed to pack a massive caloric punch in a small, durable brick. A baseline for a 72-hour scenario is roughly 7,500 calories, but that number can skyrocket. If you’re hiking in cold weather, your body might burn through 4,000 to 5,000 calories a day.
Creating Shelter And Fire Anywhere
Exposure to the elements can incapacitate you faster than hunger or thirst. Your shelter system is your first line of defense. A full tent is often too bulky for a grab-and-go bag, so think lighter and more versatile.
While your bug out bag provides temporary shelter solutions for 72 hours on the move, long-term survival scenarios may require you to know how to build a fallout shelter for extended protection
- Emergency Bivvy: This is basically a heat-reflective, waterproof sleeping bag. It’s incredibly lightweight and can be a literal lifesaver in cold, wet conditions. The SOL Emergency Bivvy is a popular, compact option.
- Durable Tarp: A good tarp is one of the most versatile pieces of gear you can own. It can be a simple lean-to, an A-frame shelter, or a groundsheet to keep you dry.
- Emergency Space Blanket: Not as durable as a bivvy, but it’s ultralight and great for reflecting body heat or providing a basic shield from wind and rain.
Finally, fire. Being able to make fire gives you warmth, a way to boil water, cook food, and signal for help. Just like your water system, your fire kit needs layers. Pack a reliable Bic lighter, some waterproof matches, and a ferrocerium rod like the Light My Fire Swedish FireSteel that will throw a spark even when it’s pouring rain. Pair these tools with good, waterproof tinder, and you’ll be able to get a fire going when you need it most.
Mastering these core bug out bag items is the critical first step in building a kit you can trust your life with. For a broader look at equipment that complements these essentials, check out our comprehensive survival gear list.
Maintaining Health and Hygiene on the Move
When a crisis hits, professional medical help could be hours or even days away. The last thing you need is a preventable injury or infection bringing your bug-out to a grinding halt. In this world, you are your own first responder.
Your health and hygiene kit needs to be one of the most meticulously planned parts of your bag. We’re not talking about a simple box of band-aids here. This is about having the right gear to manage serious trauma, stop debilitating problems like blisters before they start, and maintain enough sanitation to keep from getting sick. Every single item has to earn its place.
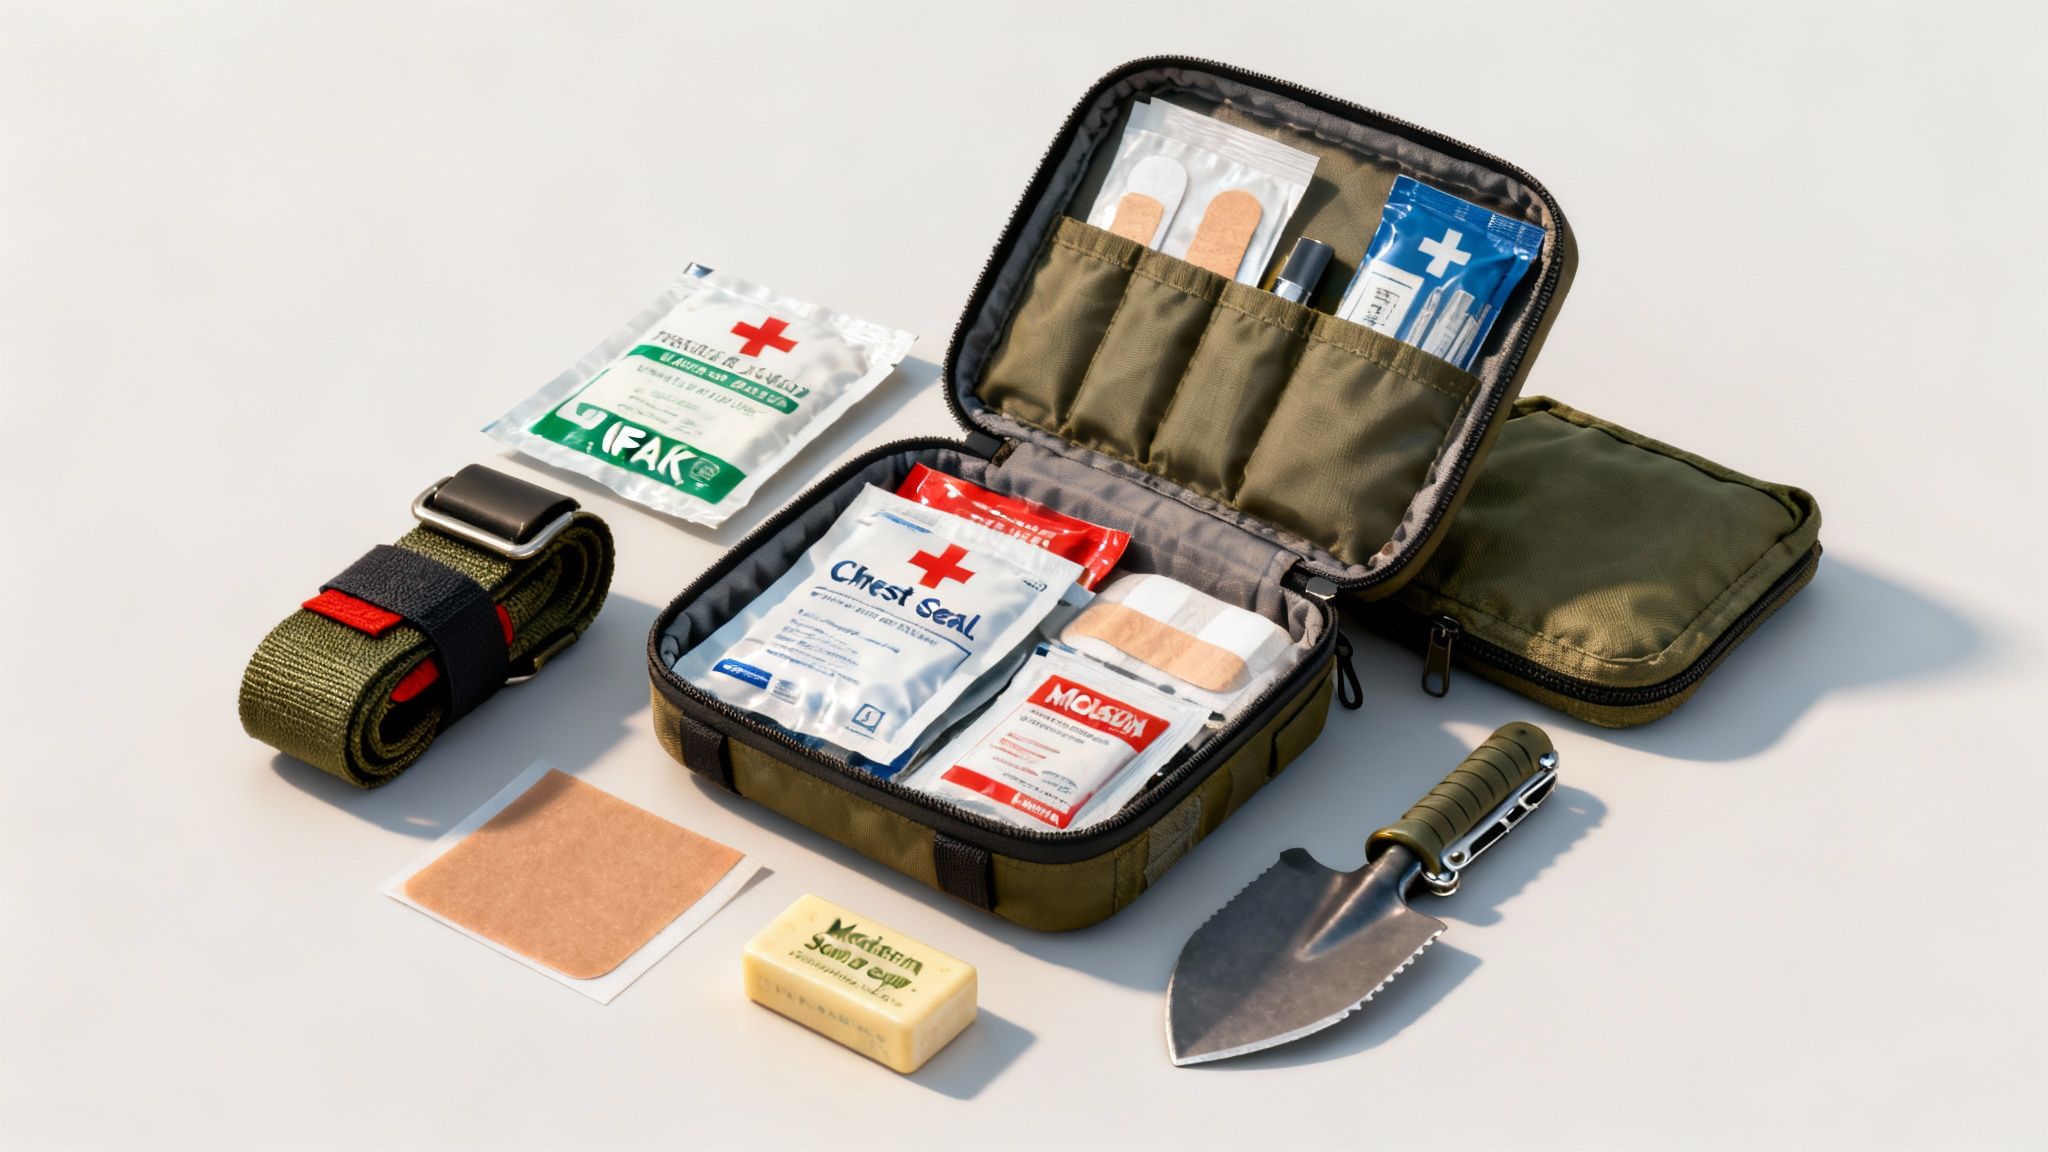
Assembling Your Individual First Aid Kit
That standard first-aid kit you can grab off the shelf? It’s a starting point, but it’s nowhere near enough for a real bug-out. You need to think like a medic and build an Individual First Aid Kit (IFAK)—a kit designed specifically to treat major trauma. While excellent pre-made options like the MyMedic MyFAK provide a solid foundation, nothing beats personalizing your gear to your own skills and needs.
I always recommend splitting your medical supplies into two clear categories: trauma care and everyday health.
Trauma Care Essentials
These are the items that deal with catastrophic bleeding and life-threatening injuries. They are absolute non-negotiables.
- Tourniquet: A quality windlass-style tourniquet like the CAT (Combat Application Tourniquet) is essential. But owning one isn’t enough—you need to train with it until applying it is second nature.
- Chest Seals: These are critical for treating penetrating chest wounds and preventing a collapsed lung. Brands like HyFin are trusted in this space.
- Hemostatic Gauze: This isn’t your average gauze. It’s impregnated with an agent that accelerates clotting, designed to be packed into deep wounds where a tourniquet can’t reach. QuikClot is a widely recognized brand.
- Pressure Dressing: Often called an “Israeli bandage,” this is a brilliant all-in-one dressing that lets you apply direct, heavy pressure to a severe wound quickly.
It’s a sobering thought, but disaster scenarios dramatically increase the risk of traumatic injuries. Having the tools and the training to stop a major bleed is arguably the single most important survival skill you can have.
Everyday Health and Minor Injury Care
This side of your kit handles the far more common issues that can still become serious problems if left untreated.
- Moleskin and Blister Treatment: A small hot spot on your heel can quickly turn into a crippling open wound. Leukotape or specialized blister pads are worth their weight in gold.
- Assorted Bandages and Gauze: Pack a variety of sizes to handle everything from minor cuts to larger scrapes and burns.
- Antiseptic Wipes and Ointment: Infection is the enemy. Single-use alcohol prep pads and antibiotic ointment are lightweight and crucial for keeping wounds clean.
- Pain Relievers and Anti-inflammatories: Ibuprofen (Advil) or acetaminophen (Tylenol) can manage pain, reduce fever, and fight inflammation.
- Allergy Medication: Antihistamines like Benadryl are vital for handling unexpected allergic reactions.
Maintaining Sanitation in the Field
Hygiene isn’t a luxury when you’re on the move; it’s a core part of staying healthy. Poor sanitation leads to stomach bugs, skin infections, and other illnesses that will sap your strength and morale. The goal is to stay clean enough to avoid sickness without hauling a bathroom’s worth of supplies.
A compact, well-thought-out hygiene kit is one of the most important components you’ll pack. For a deep dive, check out our complete guide on building an emergency hygiene kit. It covers everything you need to know to stay healthy when modern plumbing is a distant memory.
For your bug-out bag, focus on these five essentials:
- Biodegradable Soap: A small, concentrated bottle of something like Dr. Bronner’s can be used for your hands, body, and even cleaning your cook kit.
- Hand Sanitizer: A travel-sized bottle of alcohol-based sanitizer is perfect for quick decontamination before you eat or after handling something questionable.
- Small Trowel: Essential for digging catholes to properly dispose of human waste. The Deuce of Spades trowel is a popular ultralight option. This prevents the spread of disease and protects water sources.
- Toilet Paper or Wet Wipes: To save space, remove the cardboard tube from your toilet paper roll. Wet wipes are a fantastic multi-tasker for a quick field bath.
- Dental Care: A travel toothbrush and a small tube of toothpaste go a long way for both physical health and mental morale.
By preparing for both major medical emergencies and basic sanitation, you give yourself the best possible chance of staying healthy and capable, no matter what challenges you face.
Navigating and Problem-Solving Without Modern Tech
Let’s be honest. In a real crisis, the fancy tech we depend on every day—GPS, cell towers, the internet—is going to be the first casualty. When your phone is just a useless brick, your ability to figure out where you are, fix your gear, and solve problems with simple, reliable tools becomes everything.
This is where your bug-out bag transforms from a collection of “stuff” into a lifeline. Success hinges on having versatile, bombproof gear that doesn’t need a plug or a signal. Every single item has to earn its place by solving real-world problems you’ll face on the move.
The Unbeatable Utility of a Multi-Tool and Fixed Blade
Your cutting tools are the absolute cornerstone of your kit. A lot of folks think one knife is enough, but experience teaches you that a layered approach—a good multi-tool paired with a solid fixed-blade knife—gives you a massive advantage.
A quality multi-tool like the classic Leatherman Wave+ is a toolbox that fits in your pocket. It’s not just a blade. It’s pliers for bending a broken tent pole back into shape, wire cutters for snipping through a fence, and screwdrivers for tightening a loose strap. It handles all the small, technical jobs a bigger knife would just butcher.
But for the heavy lifting? That’s where a robust fixed-blade knife is king. We’re talking about processing firewood, building a shelter frame, or prepping a meal. A full-tang knife, like the popular Morakniv Companion, is built for abuse and provides a level of strength and confidence a folding multi-tool blade just can’t touch. Having both means you’re ready for anything from delicate repairs to brute force work.
Mastering Analog Navigation
Relying solely on your phone for directions is a rookie mistake with dangerous consequences. When the grid goes dark, a paper map and a real compass are the only things that will reliably get you from A to B. This isn’t just a “nice to have” skill; it’s non-negotiable.
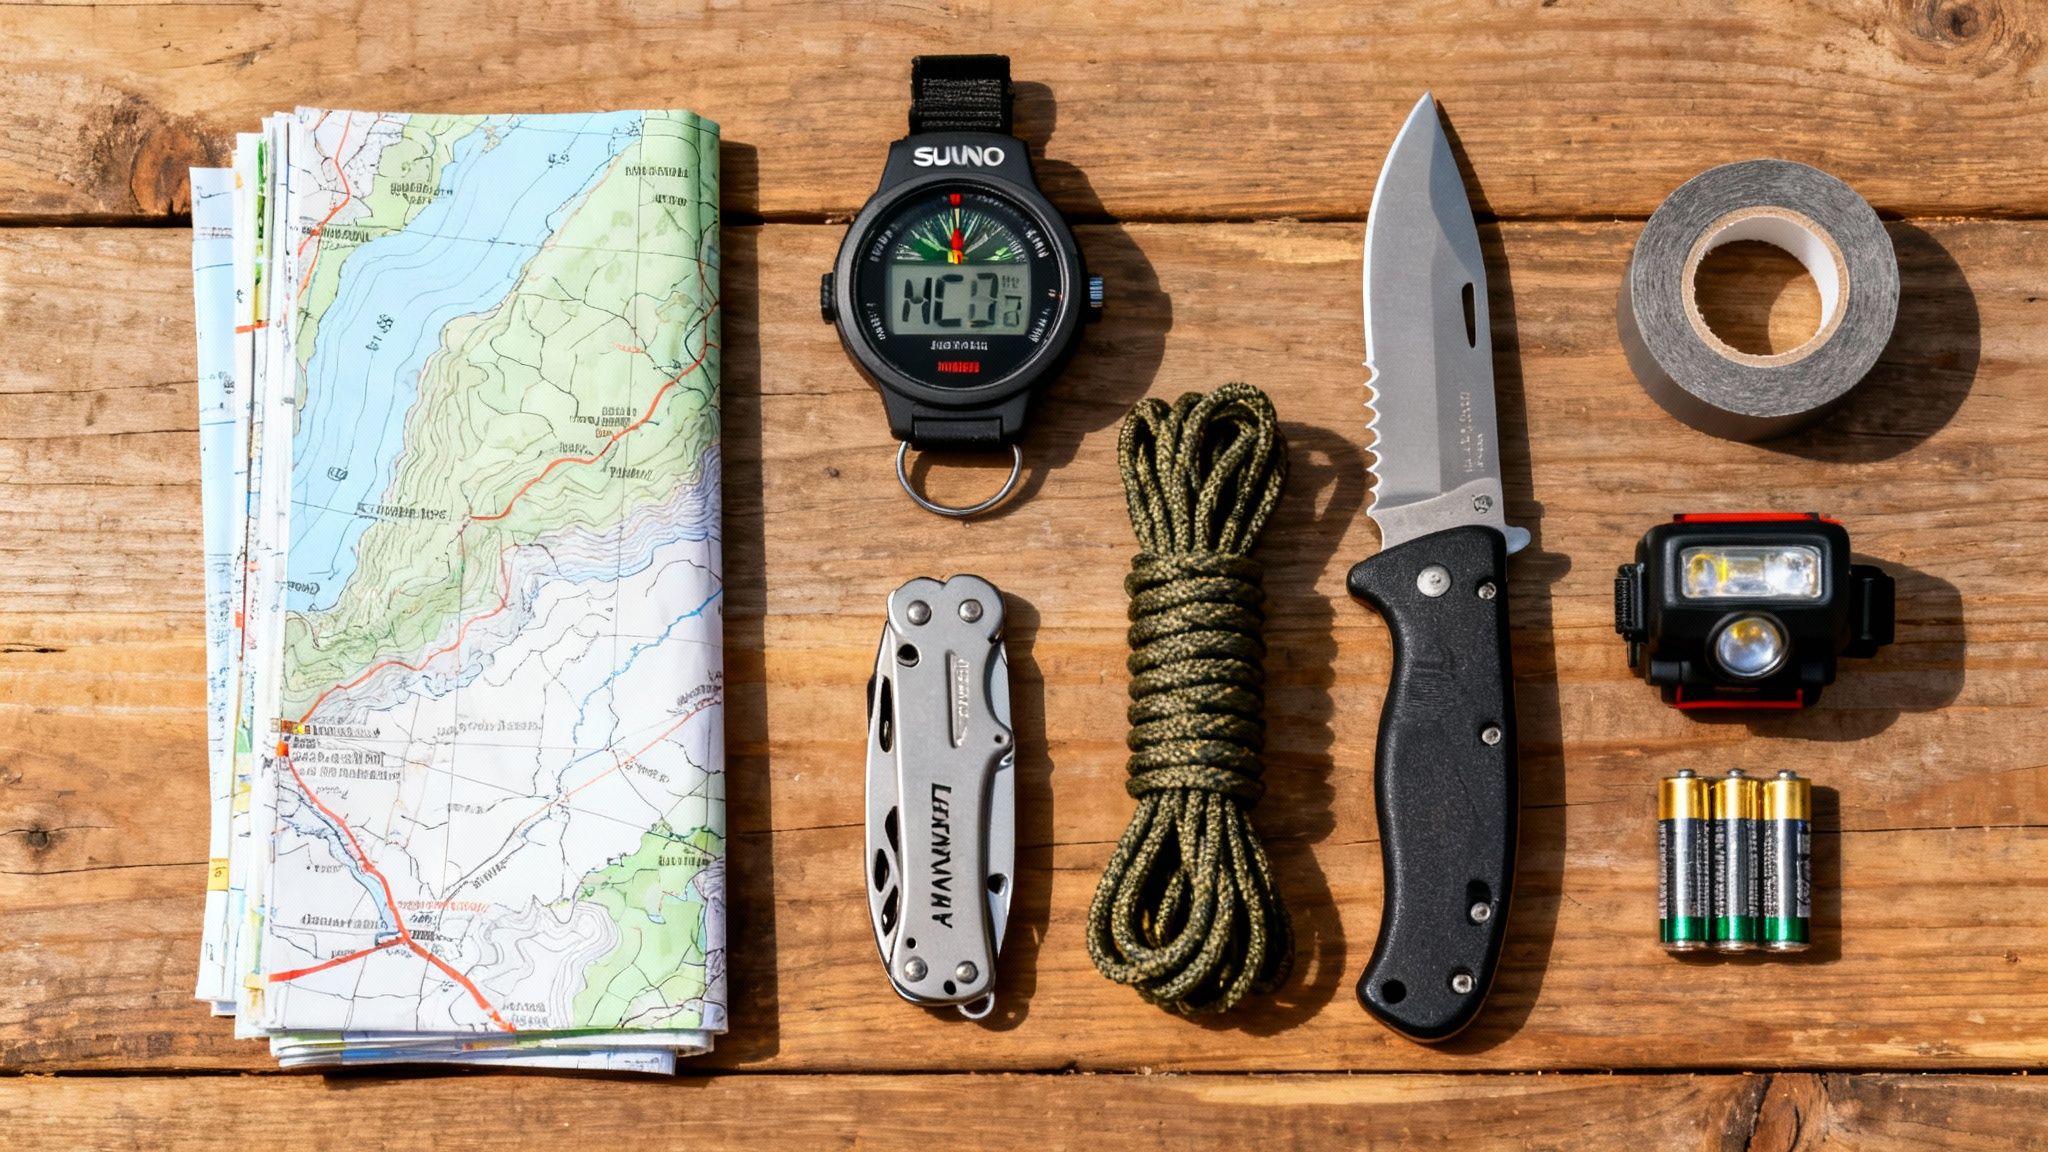
- Topographic Maps: Don’t just grab a road atlas. You need waterproof, detailed topographic maps of your local area and any potential bug-out routes. National Geographic Trails Illustrated maps are an excellent resource. These show you the lay of the land—elevation, water sources, and terrain—that can make or break your journey.
- Reliable Compass: A quality baseplate compass, something like the Suunto MC-2, is a smart investment. It’s tough, accurate, and has features like a sighting mirror that make serious navigation possible. The most important part? You have to practice using it before you need it.
Knowing how to read a map and shoot a bearing with a compass is a perishable skill. Regular practice turns a confusing piece of paper into a powerful tool that gives you the confidence to move effectively and avoid getting lost when it matters most.
The “Big Three” of Versatile Gear
Beyond knives and nav, a few other items punch way above their weight class in terms of sheer utility. These are the problem-solvers you’ll find yourself reaching for over and over again.
- Paracord: At least 50-100 feet of 550 paracord is mandatory. The uses are endless: stringing up a tarp for shelter, rigging a clothesline to dry wet socks, repairing a broken backpack strap, or even fashioning a makeshift splint.
- Duct Tape: The old cliché is true. Gorilla Tape is particularly known for its strength and durability. Wrap a good amount around your water bottle or a flat piece of plastic to save space. You’ll use it to patch a hole in your tent, waterproof a seam, or even serve as a makeshift bandage in a pinch.
- Illumination: A hands-free headlamp, such as a Petzl or Black Diamond model, is infinitely better than a flashlight. It lets you work, cook, or navigate in the dark with both hands free. And don’t forget to pack at least one full set of spare batteries.
These tools, backed by your own skills, create a powerful system for handling the unexpected. They allow you to read your environment, fix what breaks, and improvise solutions. This analog toolkit is your key to staying resourceful and in control when modern tech fails you. Of course, a complete kit also includes ways to be found if necessary, which is why understanding emergency signaling devices is another critical part of the puzzle.
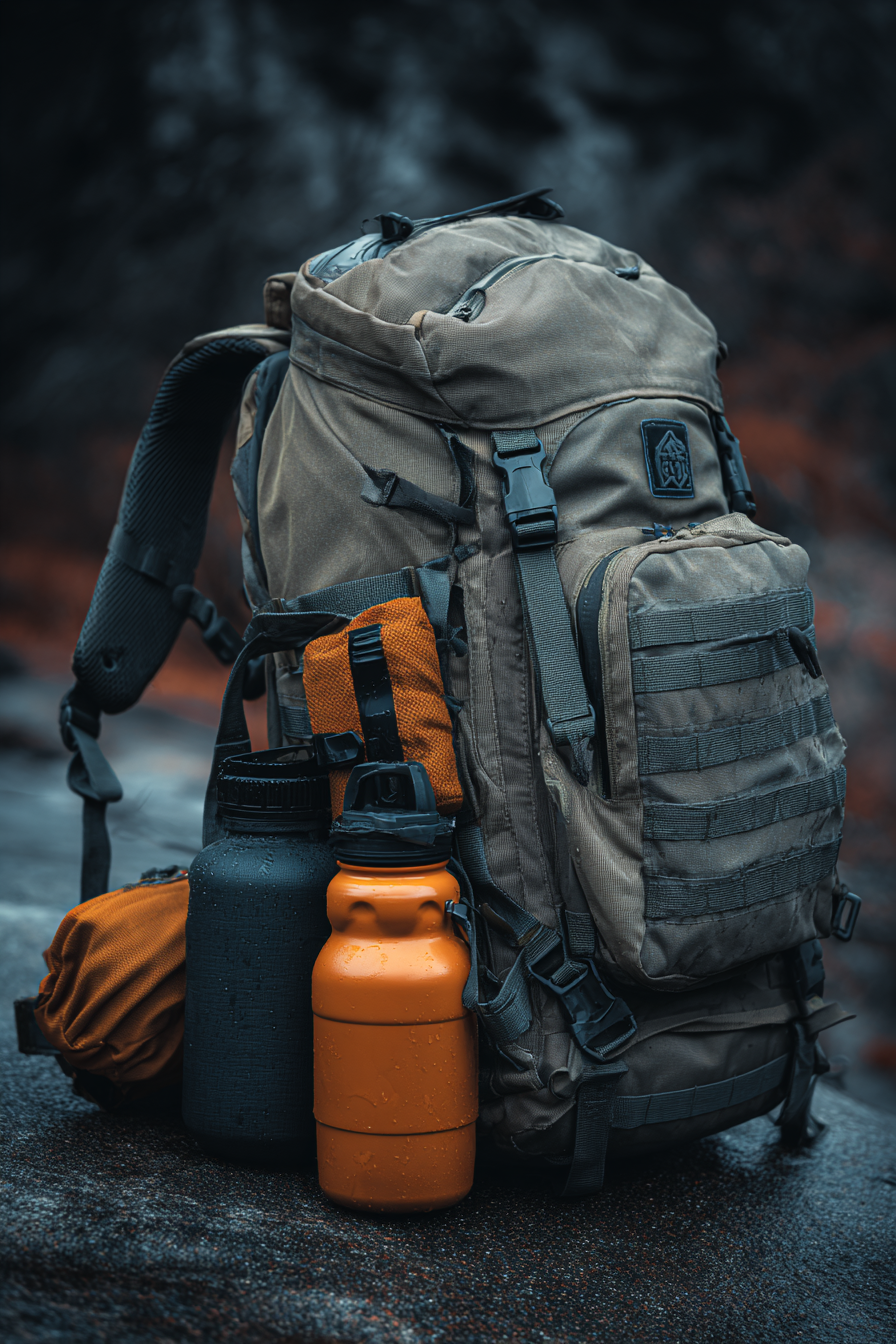
Choosing and Packing Your Bag for Maximum Efficiency
You can have the best gear in the world, but if you can’t carry it, it’s dead weight. The backpack itself is your single most important piece of equipment. It’s what dictates how much you can haul, how comfortably you can move, and how fast you can get to your tools when things go sideways.
Picking the wrong pack is a recipe for disaster. It leads to exhaustion, painful injuries, and a failed bug-out. Your bag has to be tough enough to take a beating, comfortable enough for long treks over busted-up terrain, and sized just right to hold your 72-hour lifeline without turning into a back-breaking monster.
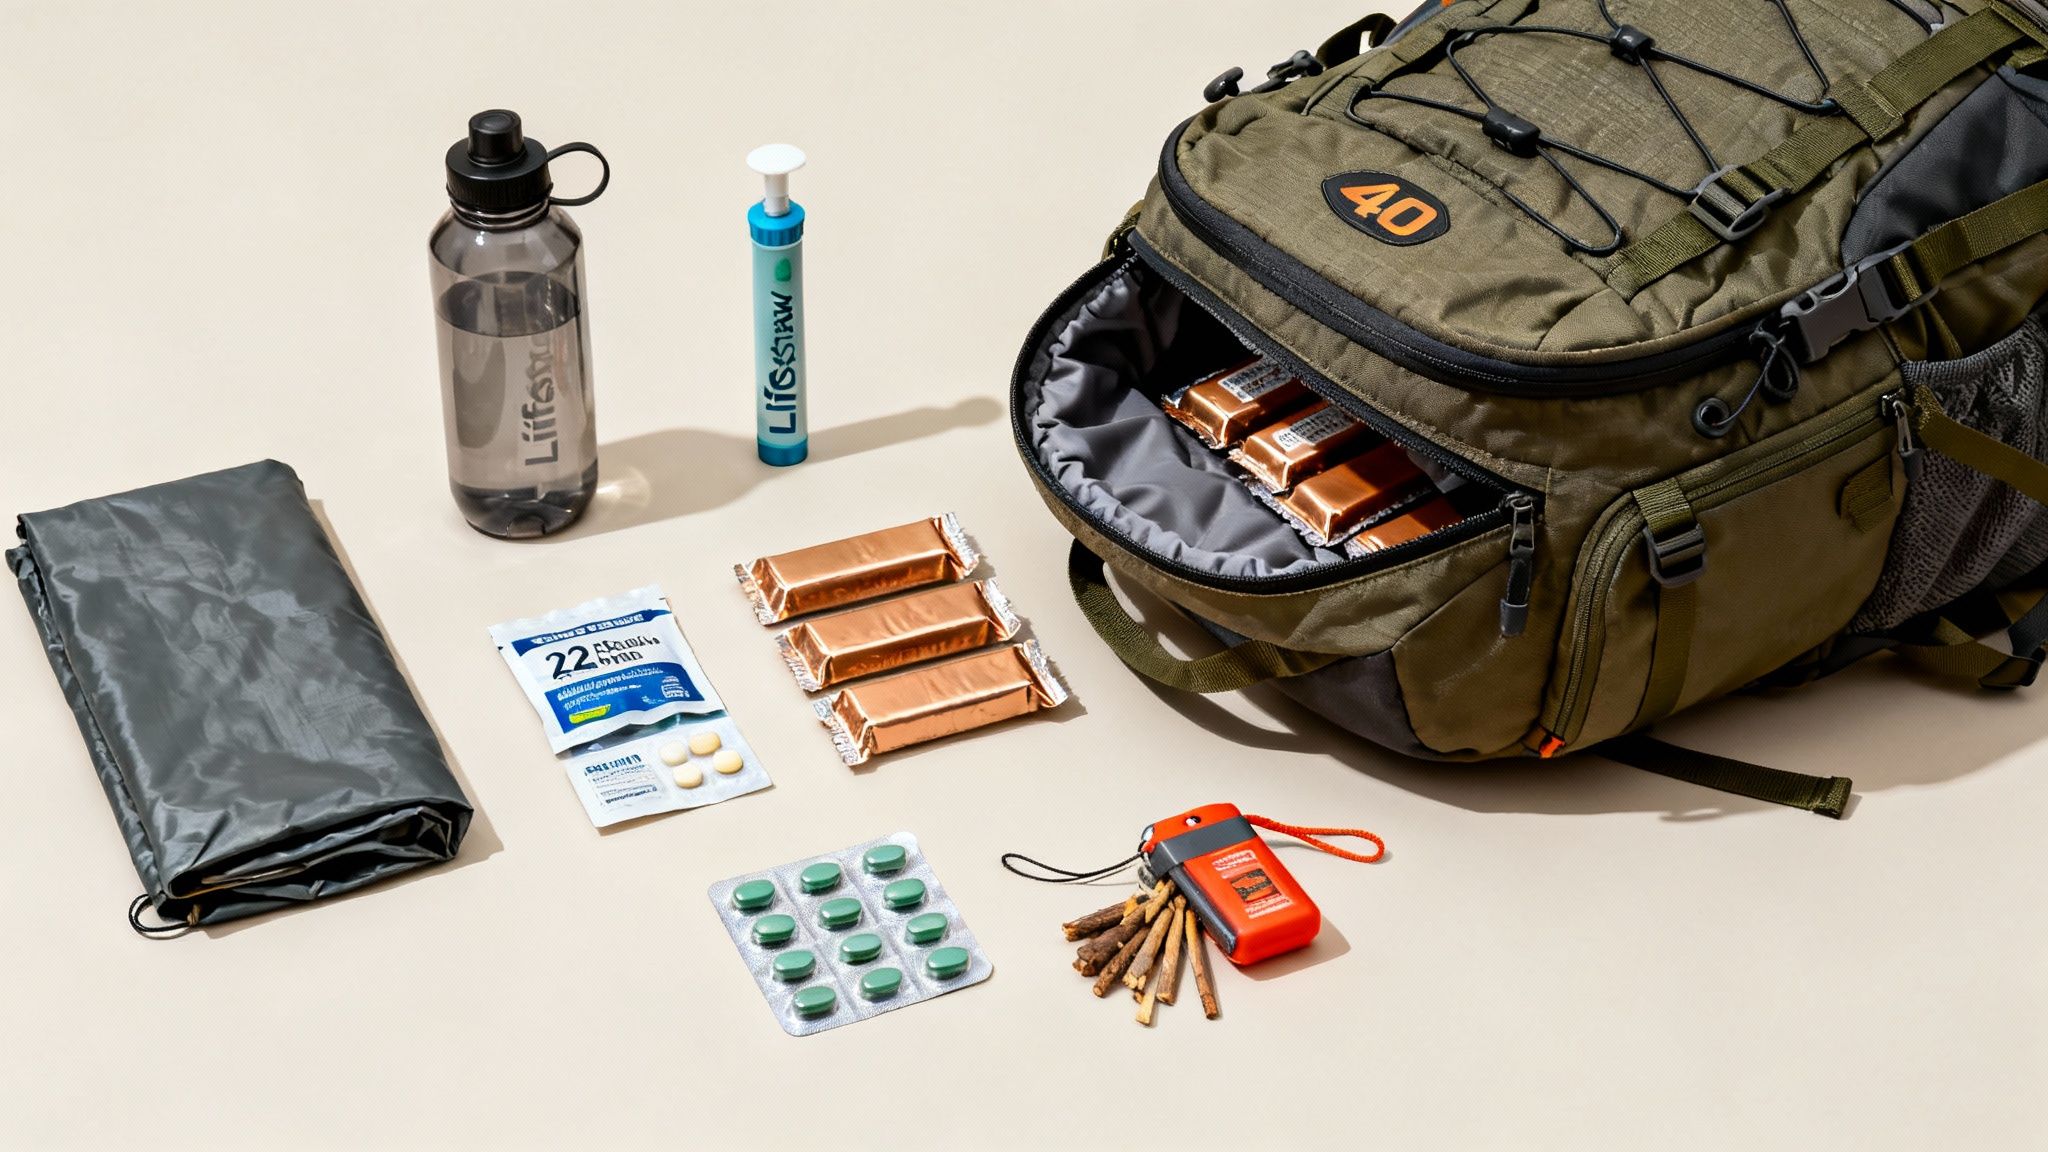
Selecting the Right Size Pack
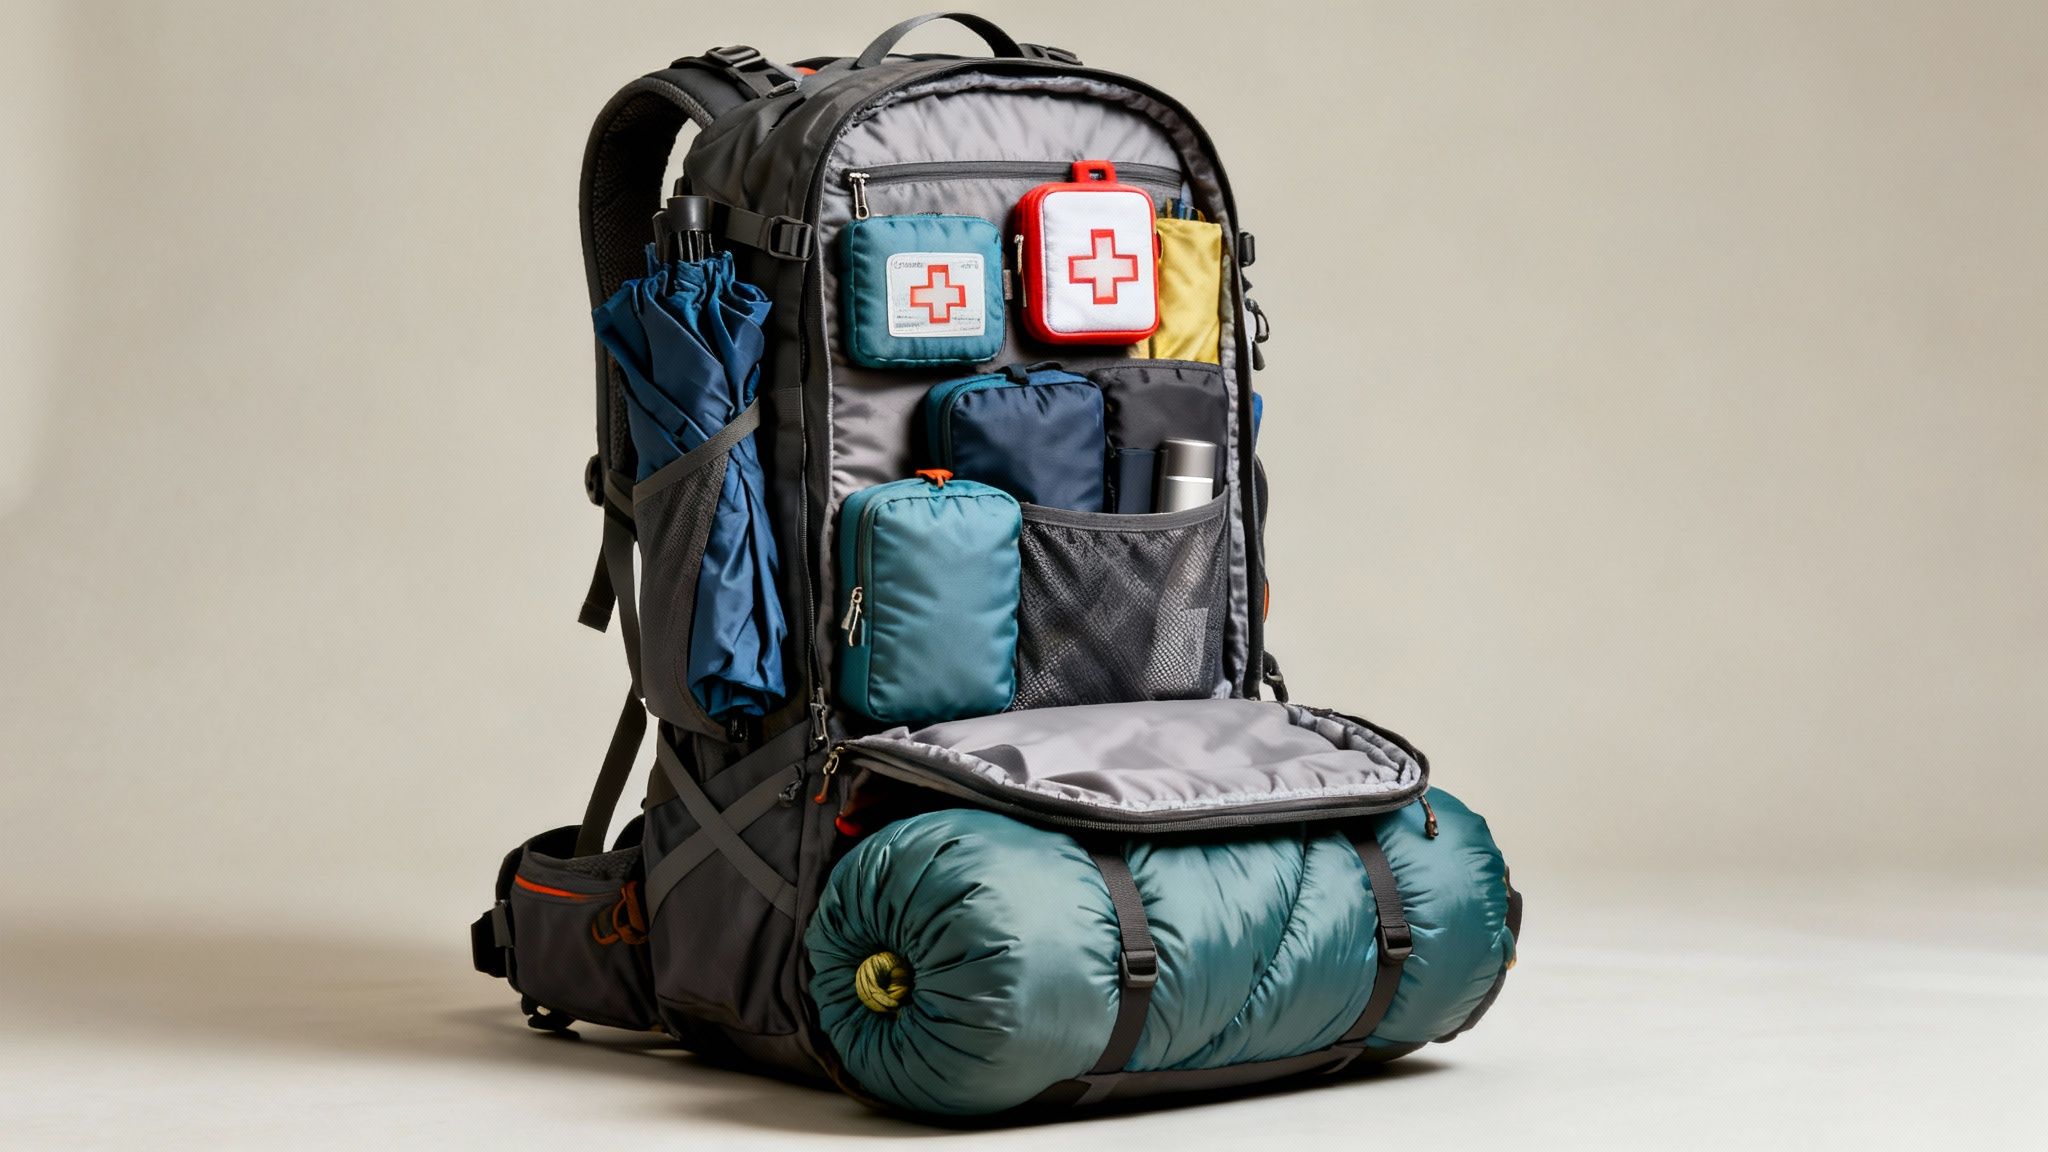
For a standard 72-hour bug-out, the sweet spot for pack capacity has settled in the 40 to 50 liter range. This gives you enough real estate for your core gear without tempting you to overpack. Go smaller, and you’ll struggle to fit essentials like a shelter system. Go any bigger, and the urge to add “just one more thing” can make your pack dangerously heavy. Brands like Osprey and Mystery Ranch are highly regarded for comfort and durability in this size range.
This size isn’t arbitrary. Water alone will take up a big chunk of that space—at least 3 liters, which is roughly 6 to 10 percent of the total volume. Your food will eat up another 10 to 15 percent, and clothing plus shelter can easily occupy another 5 to 12 liters. There’s a science to it, and the numbers don’t lie.
Mastering Weight Distribution
How you pack is just as critical as what you pack. Bad weight distribution will wreck your balance, strain your muscles, and make a 35-pound pack feel like 50. The goal is simple: create a dense, stable core that rides high and hugs your spine.
Here’s the proven method I’ve used for years:
- Bottom Zone (Bulky but Light): This is for your sleeping bag or spare clothes. They’re bulky but don’t weigh much, creating a solid base that won’t pull the weight down.
- Middle Zone (Heaviest Items): Your densest gear goes here. Food, water, extra ammo, heavy tools—pack them as close to your back as possible, right between your shoulder blades. This centers the mass where you’re strongest.
- Top Zone (Need-to-Access): Your rain gear, first-aid kit, and snacks belong on top. You need to be able to grab these without dumping your entire bag on the ground.
A well-packed bag should feel like an extension of your body, not a burden you’re fighting. If it sways, shifts, or pulls you backward, stop and repack. Immediately.
Organizing for Quick Access
In a real emergency, fumbling for a tourniquet or a map is a luxury you don’t have. You have to be deliberate with your pack’s external pockets and internal organizers.
Think about your gear in terms of “if I need this, I need it now.” Items like your primary knife, headlamp, compass, and water filter should live in side pockets or on your hip belt. Inside the main compartment, use small, color-coded pouches, like those made by Maxpedition, to group similar items—one for fire, one for hygiene, one for navigation. This modular system keeps everything tidy and lets you grab an entire kit in seconds.
The same logic applies to your vital paperwork. Keep those documents together and accessible. You can learn exactly how to do that by checking out our guide on how to create an emergency documents folder.
Customizing Your Kit for Family, Pets, and Unique Needs
A generic bug-out bag checklist is a great starting point, but that’s all it is—a start. A truly effective kit is deeply personal because a one-size-fits-all approach just doesn’t work when your family, pets, or specific health conditions are on the line.
You have to go beyond the basics and thoughtfully customize your gear.
Forgetting to plan for these unique needs isn’t a minor oversight; it can create a crisis within a crisis. A screaming infant who’s out of formula, a panicked dog, or a missed dose of essential medication can completely derail an otherwise solid bug-out plan. Personalization is what ensures everyone in your group, human or animal, is cared for and safe.
Tailoring a Kit for Children
Once you have kids, especially young ones, your packing priorities do a complete 180. You’re not just surviving anymore; you’re responsible for their physical and emotional well-being under intense pressure. Their needs are specific and absolutely non-negotiable.
Focus on their core necessities first. Think about the things you can’t possibly find or forage for in the middle of a chaotic situation.
- Infant Needs: Pack ready-to-use formula, diapers, wipes, and any necessary creams. Don’t gamble on having access to purified water for powdered formula unless you’re 100% certain.
- Medications: Always have children’s versions of pain and fever reducers on hand, plus any prescriptions they rely on. Write the correct dosage information down—don’t trust your memory when you’re stressed.
- Comfort and Security: This is where emotional support becomes a tangible survival item. A small, familiar toy, a favorite blanket, or a simple book can provide a massive psychological boost and a sliver of normalcy in a terrifying world.
- Simple Entertainment: In a drawn-out event, boredom quickly turns into anxiety. A deck of cards, a small coloring book with crayons, or another lightweight, non-electronic activity is worth its weight in gold.
A child’s morale is a critical resource. An item that brings them comfort or distraction isn’t a luxury; it’s a strategic tool for maintaining calm and focus for the entire family.
Preparing for Your Four-Legged Family Members
Your pets are completely dependent on you. In an emergency, they’ll be just as disoriented and frightened as anyone else. Building a dedicated bug-out bag for them is every bit as important as packing your own. Their survival checklist mirrors ours: food, water, shelter, and first aid.
Packing a separate, smaller bag for your pet keeps their supplies organized and ready to grab in an instant. If you have a larger dog, you can even train them to carry their own pack, like the Ruffwear Approach Pack, with some of their gear. For a deep dive, our article on building a complete pet emergency kit covers every single detail you’ll need.
For their grab-and-go bag, hit these essentials:
| Item Category | Specific Items | Key Considerations |
|---|---|---|
| Food & Water | 3-day supply of dry food, collapsible bowls | Portion food in waterproof bags to save space. |
| Leash & ID | Sturdy leash, collar with updated tags | A spare collar and leash is a smart backup. |
| Documents | Vaccination records, microchip info | Keep copies in a sealed waterproof bag. |
| First Aid | Pet-specific first aid items, vet’s contact info | Include any medications your pet takes daily. |
| Sanitation | Waste bags, cat litter/pan if applicable | Maintaining hygiene is crucial for their health. |
Addressing Critical Medical Needs
For anyone with a chronic health condition, this part isn’t optional—it’s a matter of life and death. Your medical supplies should be the very first thing you pack and the last thing you ever compromise on.
Start by getting at least a one-week supply of any prescription medications. You cannot assume you’ll be able to get a refill. It’s worth talking to your doctor about getting an extra supply specifically for your emergency kit.
Think about other dependencies beyond just prescriptions:
- Insulin: It has to stay cool. Pack it with cold packs inside an insulated pouch, such as a FRIO cooling case.
- Eyewear: Always pack a spare pair of glasses. Contact lenses are a nightmare to keep clean in the field.
- Hearing Aids: Include a generous supply of extra batteries. Don’t skimp.
- Mobility Aids: If someone uses a cane or walker, make sure it’s easily accessible. For wheelchair users, a small tool kit for basic repairs is absolutely vital.
Store these critical items in a brightly colored, clearly labeled pouch right at the top of your bag. When your health is on the line, you can’t afford to waste a single second digging for what you need.
Answering Your Top Bug Out Bag Questions
Putting together a bug out bag feels like a moving target. Just when you think you’ve got it nailed down, new questions pop up. That’s perfectly normal. Let’s tackle some of the most common questions I hear to help you fine-tune your kit and build real confidence in your gear.
How Often Should I Check and Rotate My Gear?
The single biggest mistake you can make is adopting a “set it and forget it” attitude. Your bug out bag is a living system, not a static display. Food expires, batteries corrode, and your own needs change with the seasons. A strict maintenance schedule is the only way to be 100% sure it will work when everything else has failed.
I recommend a full gear shakedown at least twice a year. An easy way to remember is to do it when you change the clocks for daylight saving time. It’s already on your calendar.
Here’s what that review should look like:
- Check all expiration dates. Pull out every single food bar, water pouch, medical item, and battery. Anything getting close to its date gets used, donated, or tossed and then replaced immediately.
- Test every piece of electronics. Don’t just look at it. Switch on your headlamp, fire up the radio, and check the charge on your power banks. Make sure they actually work.
- Inspect your tools. Look for any signs of rust or damage on your knives and multi-tools. A drop of oil can keep a multi-tool from seizing up when you need it most.
- Re-evaluate your clothing. Does it still fit? Is it right for the upcoming season? Swapping a heavy winter jacket for a lightweight rain poncho in the spring just makes sense and saves critical weight.
This isn’t just busywork; it’s a non-negotiable part of being prepared. It’s what guarantees your bag is ready the second you need to grab it.
What’s the Right Weight for a Bug Out Bag?
There’s no single magic number here. The ideal weight is completely tied to your personal fitness, your body weight, and the kind of terrain you’ll be bugging out through. That said, a solid rule of thumb is that your fully loaded pack should not be more than 20-25% of your body weight.
For someone weighing 180 pounds, that means your target is between 36 and 45 pounds. Pushing much beyond that will absolutely shred your endurance, slow you down, and dramatically increase your risk of injury. Once your bag is packed, weigh it. Then be ruthless about pulling out anything that isn’t essential to get that number down.
The only real way to know if your pack is too heavy is to actually wear it. A 40-pound bag feels manageable in the hallway. Five miles down a trail, you’ll feel every single ounce. Get out there and test it.
Should a Firearm Be Part of My Kit?
This is a deeply personal call, and it depends entirely on your local laws, your level of training, and your own philosophy on self-defense. If you can legally carry a firearm and are genuinely proficient with it, it can be an invaluable tool for protection and, potentially, for hunting.
But carrying a firearm comes with a ton of responsibility. You have to think about ammunition, secure storage, and the serious legal implications of using it. It’s not a decision to be taken lightly.
Many preppers opt for effective, non-lethal alternatives. A quality pepper spray, for example, is incredibly effective. Another great option is a high-lumen tactical flashlight. Something like a Streamlight ProTac has a disorienting strobe feature that can buy you the critical seconds needed to get away from a threat.
If you aren’t thoroughly and consistently trained, a firearm can quickly become a liability. Be honest with yourself about your skills and your situation before making this choice.

