
Making your own water well isn’t as far-fetched as it might sound. At its core, it comes down to one of three primary methods: hand-digging where the water table is high, driving a well point in sandy soil, or using a simple drill or auger to go deeper. Each route has its own challenges, but with the right site, tools, and a bit of grit, you can tap into your own sustainable source of groundwater.
Why a Private Well Is Your Ultimate Prep
Let’s face it: relying on municipal water feels like a gamble these days. Boil-water advisories, aging infrastructure, and natural disasters that can cut off supply lines are becoming all too common. A private water well flips the script, trading dependency for genuine self-reliance. This is more than a backyard project—it’s a cornerstone of security for your family.
There’s a profound sense of peace that comes from having direct control over your own water. When an emergency hits and others are scrambling for bottled water, you’ll have a sustainable supply right on your property. In scenarios like civil unrest or when you need to prepare for martial law, having an independent water source means you won’t be forced to leave your property or stand in government distribution lines. For anyone serious about preparedness, homesteading, or going off-grid, this is a non-negotiable advantage.
Securing Your Most Essential Resource
The global water situation really puts this into perspective. A 2023 report from the World Bank highlighted a sobering fact: as of 2022, 2.2 billion people didn’t have access to safely managed drinking water. The projections are even worse, with over 5 billion people expected to face water shortages by 2050. These aren’t just abstract numbers; they’re a clear signal that centralized systems are under enormous strain. Personal water independence is just plain logical.
But a private well isn’t just for a worst-case scenario. It delivers real benefits, day in and day out:
- Resilience During Outages: Hurricanes, floods, or even a simple power grid failure can knock out public water for days or weeks. A well keeps the water flowing.
- Control Over Water Quality: You are in charge of filtration and treatment. No more worrying about municipal additives or contaminants from ancient public pipes.
- Independence from Infrastructure: Your water access isn’t tied to a vulnerable system that could be compromised by anything from cyber-attacks to simple decay.
A well is the ultimate prep because it solves for the most fundamental human need. Without a reliable water source, all other preparations—from food storage to security—can quickly become irrelevant.
Having clean water unlocks the full potential of your other preps, from preparing DIY survival soup mix to maintaining proper hygiene during extended emergencies.
Understanding Your DIY Options
Figuring out how to make a water well yourself is an achievable goal, but only if you match the method to your land. Later in this guide, we’ll get into the nitty-gritty, step-by-step details for three solid DIY approaches:
- Hand-Dug Wells: This is the old-school way. It’s best for areas with a high water table and soil that isn’t full of giant rocks.
- Driven Wells: Often called sand point wells, this technique is perfect for sandy or loamy soil where you can physically drive a pipe down to the aquifer.
- Simple Drilled/Augered Wells: Using manual or powered augers, this method lets you go deeper than digging and can handle more compacted soils.
Each technique comes with its own set of costs, required tools, and headaches. Getting a handle on these differences is your first step toward building an independent water source that will serve you well for years to come. If you’re just starting this journey, understanding the basics of an off-grid lifestyle is a great place to begin.
Laying the Groundwork Before You Dig
Before you even think about picking up a shovel, know this: the success of your well is decided long before you break ground. Just grabbing some tools and digging on a whim is a surefire way to hit a wall of frustration, wasted energy, and maybe even real danger. The real work starts with some solid detective work—assessing your site, checking the local laws, and getting to know the unique lay of your land.
Think of it this way: your property is a map full of clues pointing to where water might be hiding. Learning to read those signs is the first, most critical skill. This initial phase isn’t about moving dirt; it’s about making smart, informed decisions that will give you a well that’s safe, legal, and reliable for years to come.
Decoding Your Landscape for Water Clues
The geography of your property and the plants growing on it can give you some surprisingly accurate hints about the water table below. A great starting point is to get a topographical map of your area. You can often find these through the U.S. Geological Survey (USGS). These maps are invaluable for spotting elevation changes, helping you pinpoint low-lying areas, valleys, or natural depressions where groundwater is most likely to collect. Water always follows the path of least resistance, and these spots are prime real estate for a well.
Next, it’s time to put your boots on the ground and take a look at the local vegetation. Certain plants are like living signposts for shallow groundwater.
- Water-Loving Trees: Keep an eye out for willows, cottonwoods, and poplars. These trees have deep roots and only thrive where they can get consistent access to water near the surface.
- Green Patches: Pay attention during the drier months. Do you see any areas that stay stubbornly green when everything else is browning up? That’s a strong indicator of moisture just beneath the soil.
Finding these clues doesn’t guarantee you’ll strike a gusher, but it dramatically boosts your odds by helping you zero in on the most promising locations. It’s all about working smarter, not harder.
The Non-Negotiable Legal and Safety Checks
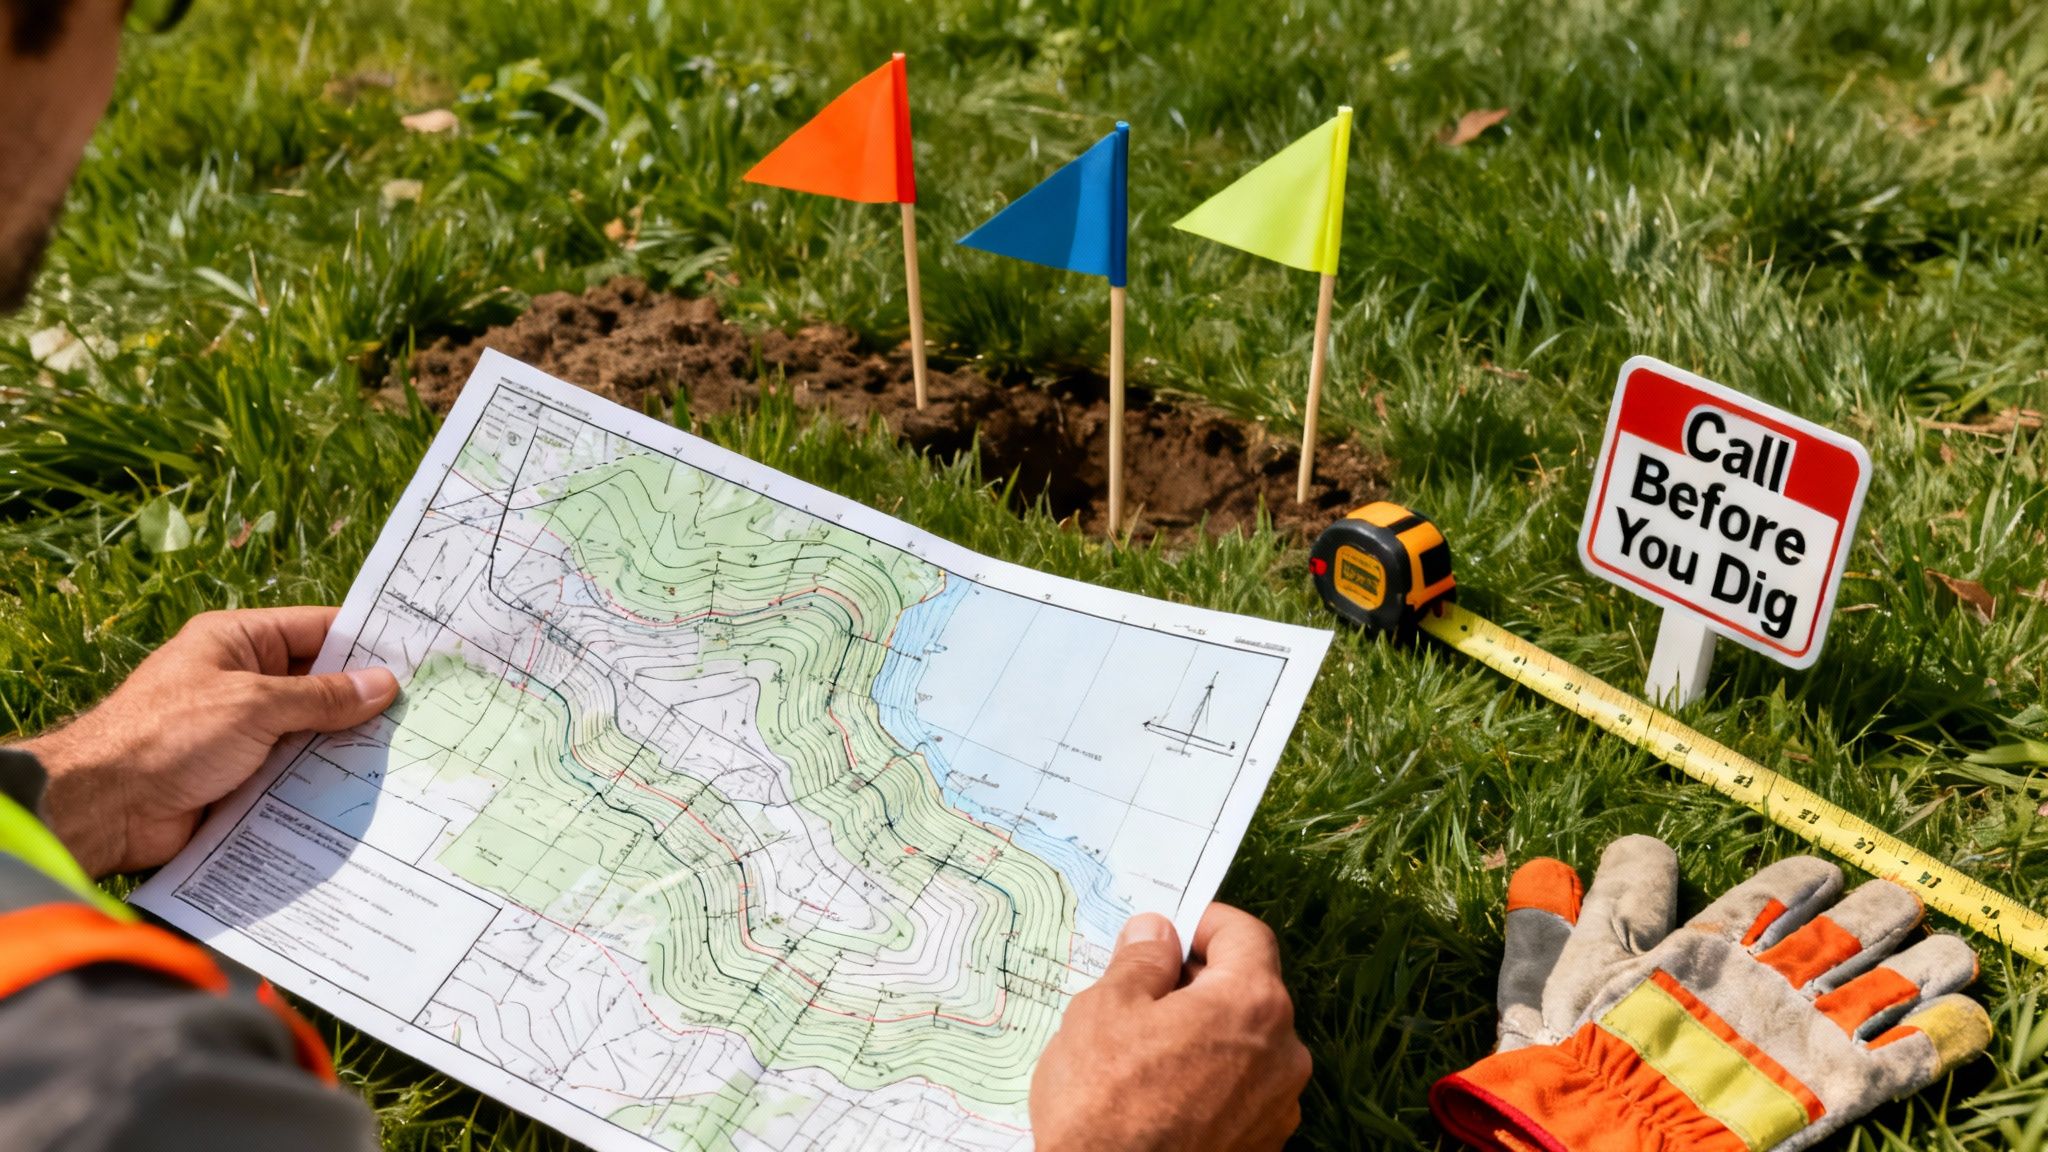
This is the part you absolutely cannot skip. Cutting corners here can lead to anything from hefty fines to a catastrophic utility accident. Before any digging starts, you have to tackle two crucial things: underground utilities and local permits.
Your very first call, before you do anything else, should be to 811. This is the national “Call Before You Dig” hotline, and it’s a free service. They’ll notify your local utility companies, who will then come out and mark the locations of any buried gas, water, electric, or communication lines on your property. Hitting one of these can cause massive outages, leave you with a huge repair bill, or worse, create a life-threatening hazard.
Don’t ever assume you know what’s buried on your land. Utility lines can be shockingly shallow and in places you’d never expect. Calling 811 isn’t just a good idea—in most places, it’s the law.
Once you know where the utility lines are, your next stop is your local county health department or planning office. The rules for digging a well can vary wildly from one county to the next. You need to get clear answers on:
- Permit Requirements: Do you even need a permit for a shallow, hand-dug well in your area?
- Setback Distances: There are strict rules about how far a well needs to be from septic tanks (usually 50-100 feet), property lines, and areas with livestock. These are in place to prevent contamination.
- Casing and Depth Rules: Some local governments have specific construction requirements to protect the regional aquifer.
Ignoring these local laws can get your project shut down fast and leave you with a nasty fine. A quick phone call can save you a mountain of headaches down the road. While you’re focused on getting clean well water, it’s also smart to know about other water safety methods. For example, check out our guide on how to filter rainwater for drinking for more strategies to secure a safe water supply.
Choosing The Right DIY Well Method
Alright, you’ve done your homework—surveyed the land, navigated the permits, and now it’s time to get your hands dirty. This is where the real work begins, and the choices you make now are critical. The well-digging technique that worked like a charm for your neighbor might be a total bust on your property.
Picking the right method isn’t about finding the single “best” way to dig a well; it’s about finding the best way for your specific situation. Your decision will boil down to three things: how deep your water table is, what kind of soil you’re dealing with, and frankly, how much back-breaking labor you’re willing to endure.
Let’s walk through the three most practical DIY options.
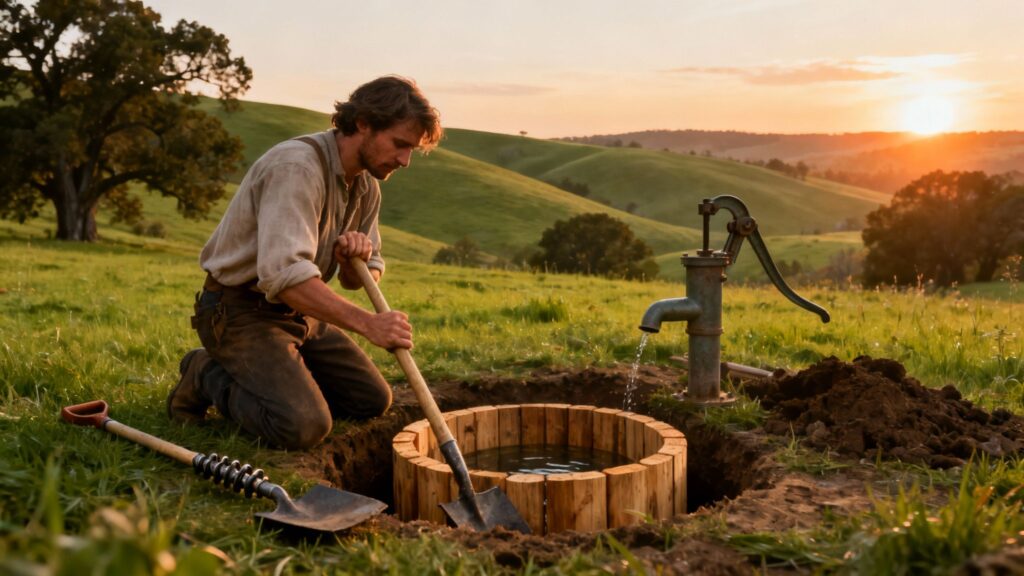
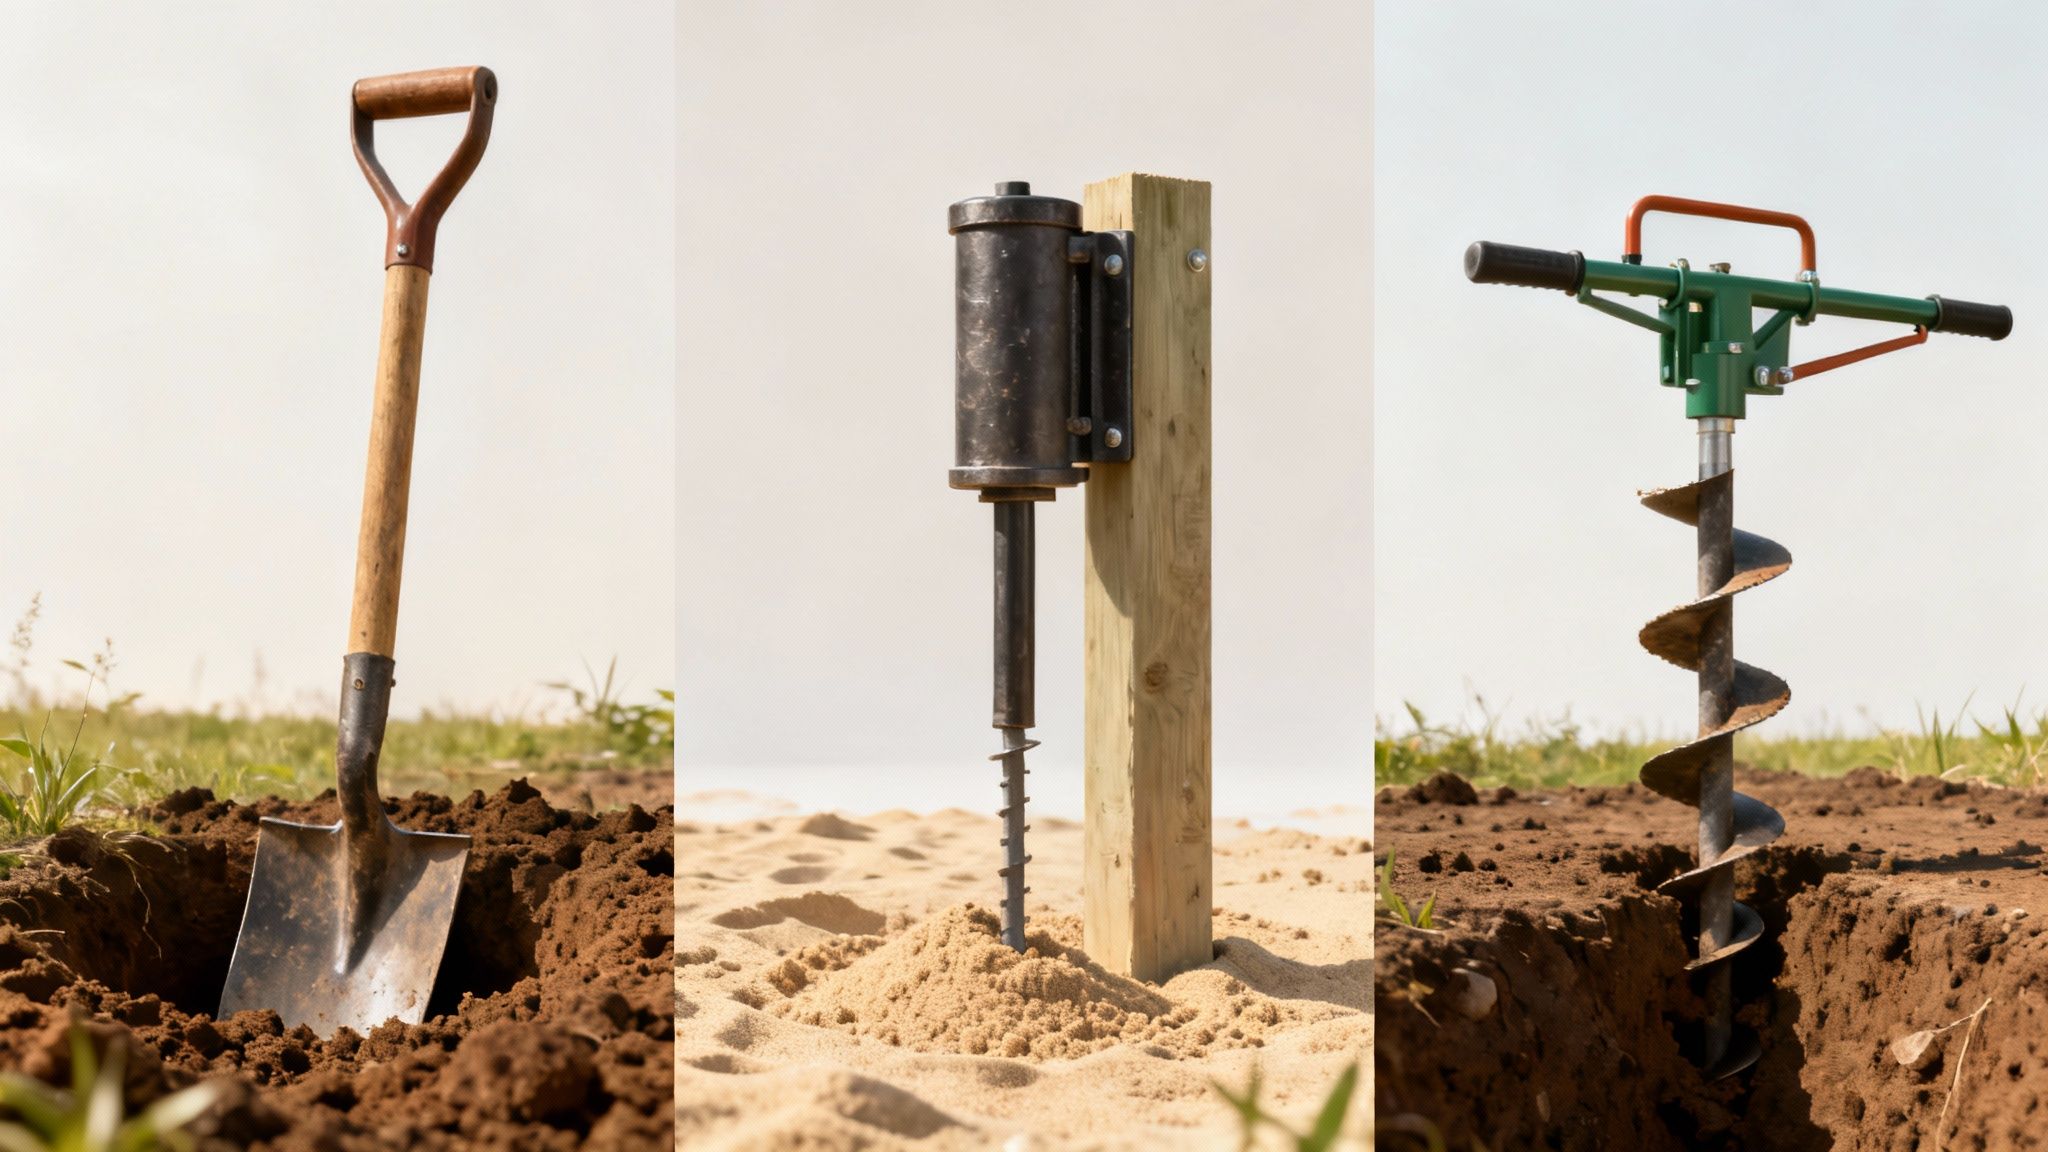
The Hand-Dug Well: The Timeless Classic
This is the old-school way, the method that has supplied water for generations. A hand-dug well is exactly what it sounds like: a wide shaft, usually 3 to 4 feet across, that you dig with basic tools until you punch through the water table. It’s simple, low-tech, and you probably already own most of the equipment you need.
A good long-handled shovel is your best friend here, at least for the first few feet. As you go deeper, you’ll switch to a shorter shovel. You’ll also need a bulletproof system for hauling dirt out, which usually means a sturdy bucket, a strong rope, and maybe a tripod rig to make lifting easier.
This method really only works under specific conditions:
- Shallow Water Table: You’re not digging to the center of the earth. This is only realistic if your water is close to the surface, typically less than 30 feet deep.
- Cohesive Soil: You need ground that holds its shape. Think clay or a firm loam that won’t immediately collapse on you.
- No Giant Rocks: Hitting a massive boulder a few feet down can bring your entire project to a screeching halt.
The real challenge with a hand-dug well isn’t the digging itself—it’s safety. You absolutely must shore up the walls as you go with a casing (like concrete rings) to prevent a cave-in. This is a serious physical undertaking and should never, ever be attempted alone.
The Driven Well: The Sand Point Solution
If your property sits on sandy or loamy soil, the driven well is a game-changer. Often called a “sand point” well, this method doesn’t involve digging a big hole. Instead, you drive a narrow pipe (1.25 to 2 inches in diameter) straight into the ground until you hit a water-rich layer of sand or gravel.
The business end is a “well point,” a screened, perforated pipe section with a hardened tip designed to pierce the soil. You attach sections of pipe and hammer the whole assembly down using a heavy post driver or a specialized well-point driver.
Driven wells are perfect for:
- Sandy or Soft Soil: This is the most important factor. The method relies on pushing the pipe through the ground. It’s a non-starter in heavy clay or rocky terrain.
- Shallow Aquifers: Just like hand-dug wells, this is for shallow water sources, typically 25 feet or less. That’s because you’ll be using a surface pump (like a pitcher pump) that relies on suction.
The biggest plus? Speed. With the right soil, you can have a driven well installed in a single afternoon. The narrow pipe also significantly reduces the risk of surface contamination compared to a wide-dug well.
The Simple Drilled Or Augered Well: Going A Little Deeper
When you need to go past 30 feet or need to muscle through more compacted ground, drilling or augering is your next move. This method uses a tool to bore a clean, narrow hole, usually 4 to 6 inches wide, down to the aquifer.
For a DIYer, this doesn’t mean you need some massive, truck-mounted rig. Here are the most common approaches:
- Hand Augers: These look like giant corkscrews and are usually a two-person job. They work well in rock-free soil and can get you down 20-40 feet with a whole lot of elbow grease.
- Powered Augers: Renting a one- or two-man gas-powered auger (the kind used for fence posts) can be a back-saver. With extensions, you can push past 50 feet in the right conditions.
- DIY Water Jetting: This technique uses a high-pressure water stream to blast a hole in the ground. It works incredibly well in sandy soil.
Once the hole is bored, you’ll lower a well casing (usually PVC) and a well screen into place. This method is more versatile than digging or driving, but it does require renting some specialized gear. Knowing your options for water is a core part of self-reliance, just like mastering all your off-grid living essentials is for building a resilient homestead.
DIY Well Method Comparison
To help you decide, sometimes it’s best to see everything laid out side-by-side. Your land’s geology and your personal resources will probably eliminate one or two of these options right away. This table should help you narrow it down even further.
| Method | Ideal Depth | Best Soil Type | Labor Intensity | Relative Cost |
|---|---|---|---|---|
| Hand-Dug Well | Under 30 feet | Clay, Loam | Extremely High | Low |
| Driven Well | Under 25 feet | Sand, Silt | Moderate to High | Low to Moderate |
| Augered Well | 20-50+ feet | Loam, Clay, Sand | High | Moderate |
Ultimately, the best choice is the one that aligns with your property, your budget, and your physical limits. Each of these methods can lead you to a reliable water source, but success starts with picking the right tool for the job.
Turning a Hole into a Safe Water Source
Hitting that cold, damp layer of earth that signals you’ve reached the water table is a huge moment of success. But the job is far from over.
Right now, you have an open hole full of muddy water—a liability, not an asset. The next steps are all about transforming that raw hole into a stable, clean, and reliable source of water for your home and family.
This critical finishing phase is where you secure your well against collapse, install a system to get the water out, and most importantly, ensure the water you draw is safe to drink. Skipping these steps is not an option; they are what make the difference between a simple hole and a life-sustaining water well.
Casing and Screening Your Well
Think of the well casing as the backbone of your entire project. This is a solid pipe, typically made of PVC, that you lower into the drilled or dug hole. Its main job is providing structural integrity, preventing the surrounding earth from caving in and ruining all your hard work. This is non-negotiable for both safety and longevity.
At the bottom of the casing, you’ll install a well screen. This is just a section of perforated pipe designed to let water flow in while keeping sand, silt, and gravel out. The size of the slots in the screen is critical—too large, and your pump will suck up sediment; too small, and you’ll choke off the water flow. Choosing the right screen often depends on a little research into your local soil composition.
The goal of casing and screening is simple: protect the structure of the well while maximizing the inflow of clean water. It’s the permanent infrastructure that allows your well to function day after day, year after year.
Once the casing and screen are in place, you’ll need to “pack” the space around the screen with coarse sand or fine gravel. This gravel pack acts as a pre-filter, stopping fine particles from ever reaching your well and clogging the screen. It’s an extra step that pays huge dividends in water clarity and the lifespan of your pump.
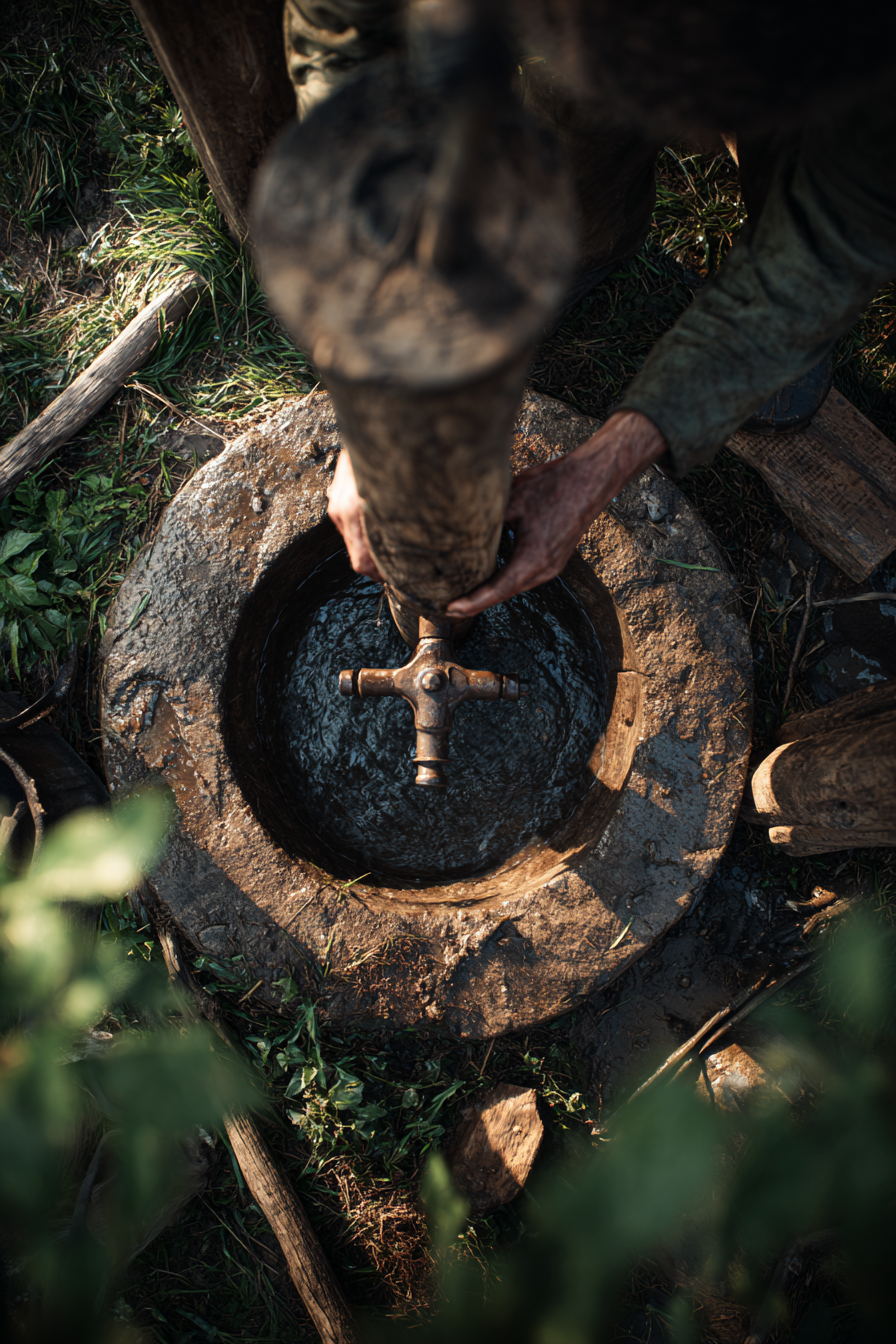
Choosing Your Water Pump
With the well structure secured, your next challenge is getting that water to the surface. For any off-grid or preparedness-focused setup, your pump needs to be reliable and completely independent of the power grid.
Here are a few practical options that have proven themselves time and again:
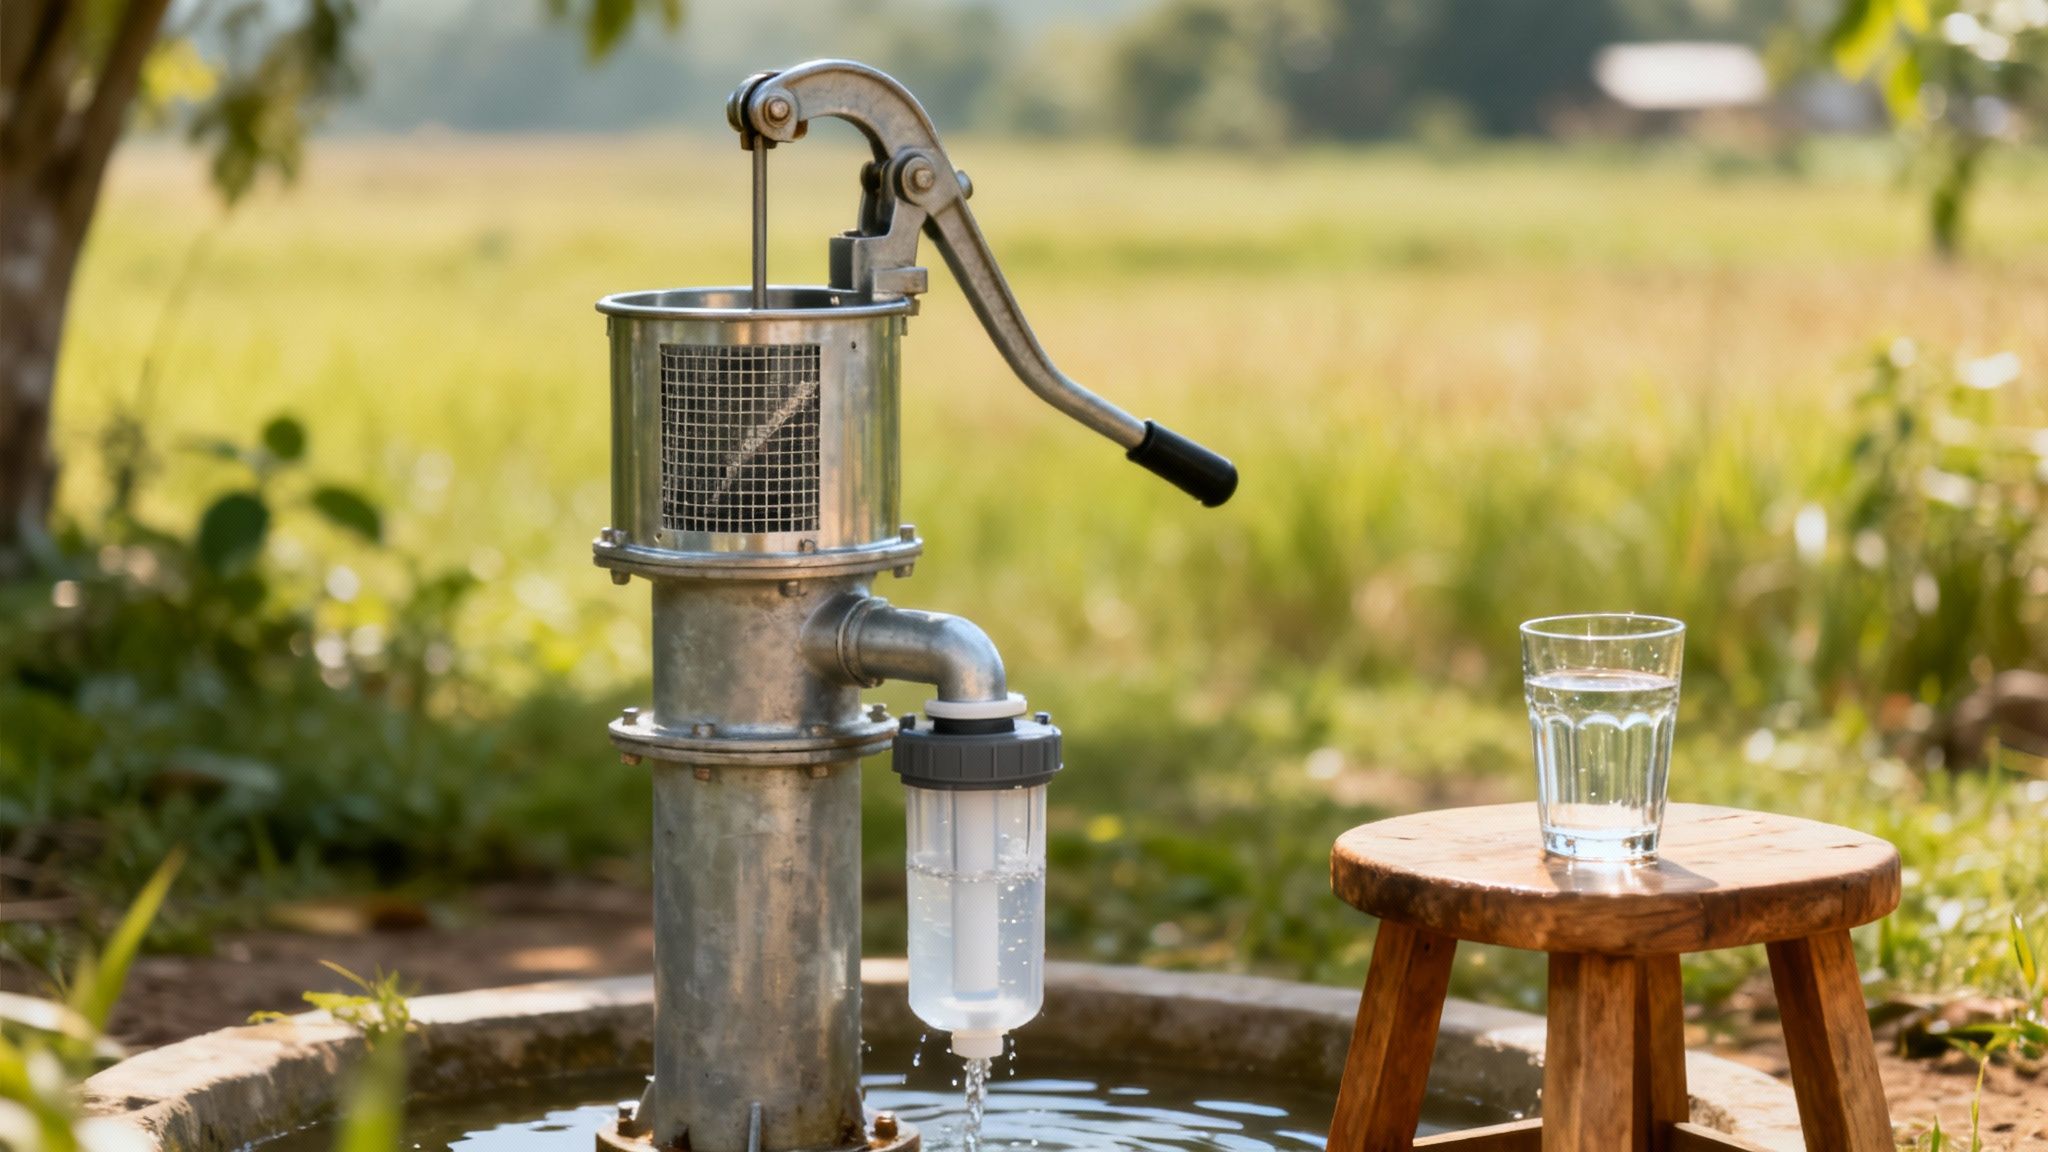
- Hand Pumps: These are the gold standard for reliability. A high-quality hand pump like the Simple Pump can draw water from significant depths and works without a single watt of electricity. Its straightforward mechanical design means it’s easy to maintain and repair, making it a top choice for a primary or backup system.
- Solar-Powered Submersible Pumps: If you have decent sunlight and need to move a larger volume of water, a solar pump is an excellent investment. These pumps sit deep inside the well casing and are powered by a dedicated solar panel array. You get the convenience of an electric pump without any reliance on the grid.
- Bucket and Rope System: Never discount the most basic method, especially for wider, hand-dug wells. A simple bucket on a rope is a foolproof backup system that will never fail due to a mechanical issue. Sure, it’s labor-intensive, but it guarantees you can always access your water.
Your final choice will come down to your well’s depth, your daily water needs, and your budget. Many preppers I know opt for a hybrid approach: a primary solar pump for daily use with a manual hand pump installed right alongside it as a bulletproof backup.
Ensuring Your Water Is Safe to Drink
This is, without a doubt, the most important step of all. Just because the water looks clear does not mean it is safe. Groundwater can be contaminated with bacteria, nitrates, heavy metals, or agricultural runoff. You must test and purify your water before you even think about drinking it.
First things first: get a professional water test. Contact your local health department or a certified lab to get a water test kit. This analysis will give you a detailed report on any contaminants present in your well, from E. coli to arsenic.
Once you know what you’re dealing with, you can choose the right purification method. For daily use, a powerful gravity-fed filter is a fantastic solution. Systems like the Big Berkey can remove a wide spectrum of contaminants, including viruses, bacteria, heavy metals, and chemicals, providing safe, clean water for drinking and cooking.
Understanding multiple water purification for survival methods ensures you’re never dependent on a single system—a critical principle for true preparedness.
For emergency preparedness, it’s also wise to have a backup purification method. A small bottle of Potable Aqua iodine tablets is an inexpensive and shelf-stable way to ensure you can disinfect water in any situation. A single tablet can make a quart of questionable water biologically safe to drink in about 30 minutes. To dive deeper into various methods, check out our comprehensive guide on survivalist water purification for additional techniques and backup strategies.
Keeping Your Well Flowing for Years
Getting your well built isn’t the finish line—it’s just the start. A truly successful well is one that gives you clean, reliable water year after year. That kind of dependability doesn’t happen by accident. It comes from staying on top of maintenance, not just fixing things when they break.
Your well is a cornerstone of your family’s self-reliance. Treating it like a “set it and forget it” appliance is a surefire way to have it fail when you need it most.
This isn’t just a hunch; it’s a hard lesson learned from large-scale water projects across the globe. A shocking 30-50% of water and sanitation projects fail within just two to five years. In Africa, the number is even worse, with an estimated 60% of wells failing because of poor maintenance or the inability to get quality replacement parts.
The takeaway for us is crystal clear: a well is only as good as its upkeep. You need a solid maintenance plan and a stash of spare parts to keep the water flowing long-term.
Establishing a Simple Maintenance Routine
Good maintenance doesn’t have to be complicated or time-consuming. It’s all about consistent, simple checks that spot small issues before they snowball into expensive emergencies. Just work a few key tasks into your regular seasonal property upkeep, and you’ll protect your investment.
Here’s a practical checklist to get you started:
- Inspect the Well Cap and Seal: A couple of times a year, give your well cap a once-over. Make sure it’s on tight and the seal is intact. A cracked or loose cap is like an open door for insects, contaminated runoff, and other junk to get into your water supply.
- Clear the Area Around the Wellhead: Keep the area immediately around your wellhead clear of junk, tall grass, and any stored chemicals like fertilizers or pesticides. This buffer zone is your first line of defense against surface contaminants seeping into the ground.
- Listen to Your Pump: Get to know what your pump sounds like when it’s running normally. Any new noises—like clicking, grinding, or cycling on and off too frequently—are early warning signs of a mechanical problem. If you’re running off-grid, this is also a great time to check on your power setup. We cover that in our guide to solar power for cabins.
The most effective maintenance is preventative. A five-minute visual inspection every few months can save you from a week without water and a thousand-dollar repair bill.
Troubleshooting Common Well Issues
Even with the best maintenance, problems can still pop up. Knowing how to spot the signs of common issues can help you fix them fast or know when it’s time to call in a pro.
A sudden drop in water pressure or flow can be caused by a few different things. It could be a failing pump, a clog somewhere in the pipes, or—more seriously—a drop in the water table itself. Always start with the easiest things first: check your pump’s circuit breaker and look for any obvious clogs in your filters.
Seeing sediment or discolored water is another major red flag. This often points to a problem with the well screen or the gravel pack surrounding it, which might be damaged or clogged. While a little bit of cloudiness after a heavy rainstorm can happen with shallower wells, persistent sediment needs your immediate attention. It can wreck your pump and plumbing fixtures if you ignore it.
Your best defense here is a regular water testing schedule. Getting your water tested annually keeps you ahead of any unseen quality issues.
Your Water Well Questions Answered
Jumping into a well project brings up a ton of questions. It’s only natural. Getting straight answers is the best way to sidestep common mistakes and move forward feeling good about your plan. Let’s dig into some of the most frequent questions we get from folks ready to tap into their own water source.
What Is a Realistic Budget for a DIY Water Well?
The final cost can swing wildly, so it’s better to think in ranges.
A super-shallow, hand-dug well might only set you back a few hundred dollars. That’s assuming you already own most of the basic tools and just need to buy the well casing. It’s hands-down the cheapest route, but only if your land is perfectly suited for it.
A driven well, often called a sand point well, typically lands in the $500 to $2,000 range. What you end up paying really hinges on how deep you need to go and the kind of pump you choose. A simple auger setup might cost a bit more, especially if you have to rent powered equipment for a day or two.
Remember, the digging is only part of the budget. Always factor in the cost of the well casing, a reliable pump, and professional water testing to get a true picture of your total investment.
Even on the higher end, these DIY methods are a fraction of what you’d pay a professional driller. Those projects easily start around $5,000 and can climb much, much higher depending on the depth and local geology.
How Can I Tell if I Have Water Before Digging?
Short of hiring a hydrologist, there’s no absolute guarantee. But you can play detective and get a pretty good idea yourself.
Your first move should be to check online resources. The U.S. Geological Survey (USGS) offers a ton of public data on local water tables. This can give you a solid starting point for how deep you might need to dig.
Next, become an observer of your own property. Your land will give you clues. Look for things like:
- Low-Lying Areas: Water follows gravity. It naturally pools in depressions, valleys, and the lowest spots on your land.
- Water-Loving Plants: See a bunch of willows, cottonwoods, or poplars? That’s a very strong indicator of shallow groundwater.
- Neighboring Wells: This is gold. Talk to your neighbors. Finding out the depth of their wells—and whether they were successful—is invaluable local intel.
Some old-timers swear by water dowsing, but for a reliable assessment, you can’t beat combining geological data with a keen eye for your local environment.
Is a DIY Well as Good as a Professional One?
This is a great question, but they really serve different purposes. A pro driller’s rig has the muscle to chew through solid rock and reach deep, stable aquifers. This often creates an incredibly reliable water source that’s less affected by surface contamination or droughts. Plus, they handle all the permits, which is a huge weight off your shoulders.
A DIY well, on the other hand, is almost always a shallow well—we’re talking under 50 feet. It’s only an option in specific soil conditions, like sand, loam, or clay. It’s a solution for a specific problem.
For people who want to learn how to make a water well, the trade-off is pretty clear: you swap the high price tag of a professional job for your own sweat equity. In the process, you gain some incredible self-reliance skills.
But let’s be honest—if you’re sitting on rocky ground or the water table is a hundred feet down, a professional driller isn’t just a better choice. It’s your only choice.