Learning how to preserve meat without refrigeration is one of those foundational skills that separates the prepared from the panicked. This isn’t just some old-fashioned hobby; it’s a critical tool for true self-reliance, turning a highly perishable food into something that can sustain you for months.
Think about it: when the power grid fails, you’re not just losing lights. You’re starting a countdown on every single frozen asset you own.
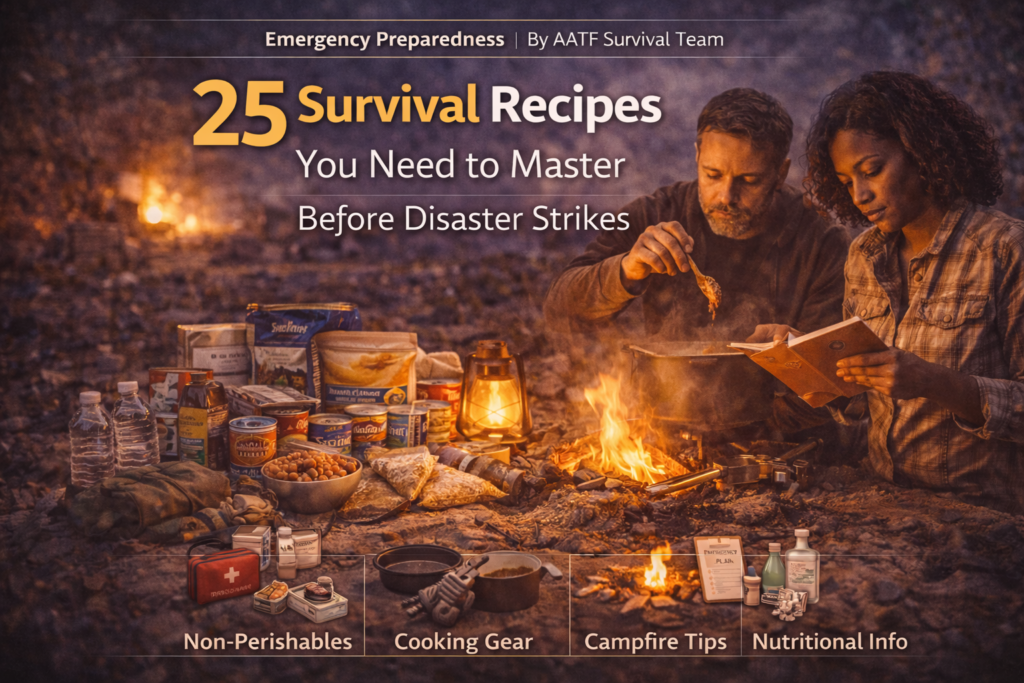
Why Off-Grid Meat Preservation Is A Critical Skill
Picture this: a nasty storm knocks out the power for a week, maybe longer. The generator you counted on won’t start, and that big chest freezer full of meat is no longer a symbol of abundance. It’s a ticking time bomb.
That half-cow you invested in, the one meant to feed your family through the winter, is now just a few days away from being a total loss. This is the all-too-common scenario that shows just how fragile our modern food supply chain really is.
Mastering these preservation methods is about deliberately breaking that chain of dependency. It’s a complete shift from trusting fragile technology to relying on the same ancestral knowledge that kept our forebears alive. These techniques weren’t optional for them—they were the very foundation of survival, letting them store a successful hunt or a butchered hog through the leanest months.
The Science Behind The Skill
At its core, every single method of meat preservation is about waging war on spoilage. You’re fighting an invisible battle against microorganisms like bacteria and mold, which need moisture and the right conditions to wreck your food supply.
To understand how these principles apply across different food types, check out our comprehensive guide on how to preserve food using various methods.
These time-tested techniques are all designed to make the meat an inhospitable place for them to grow:
- Salting & Curing: Salt is the star here. Through osmosis, it literally pulls the water out of the meat cells, creating a dry environment where bacteria simply can’t survive.
- Drying & Smoking: This is the most direct approach to removing moisture. Smoking takes it a step further, coating the meat with a protective layer of antimicrobial compounds from the wood.
- Canning: This method uses intense heat inside a sealed jar to obliterate any harmful bacteria. A quality pressure canner creates a powerful vacuum seal that locks out any new contaminants.
- Rendering & Confit: By submerging meat in rendered fat (like lard or tallow), you create a perfect airtight barrier. This seal blocks out oxygen and airborne pathogens, keeping the meat safe.
A Foundational Element of Self-Reliance
This isn’t just a backup plan for when things go wrong; it’s a proactive step toward genuine independence. If you’re serious about a self-sufficient lifestyle, knowing how to process a large animal without a walk-in freezer is non-negotiable. It’s a skill that ties directly into hunting, homesteading, and long-term food security.
You can learn more about how this fits into a bigger picture by reading our comprehensive guide on off-grid living for beginners.
When you master these skills, a potential crisis—like a freezer full of thawing meat—becomes an opportunity. You can turn that liability into a resilient, shelf-stable food supply that will feed your family for months to come. It’s the ultimate insurance policy.
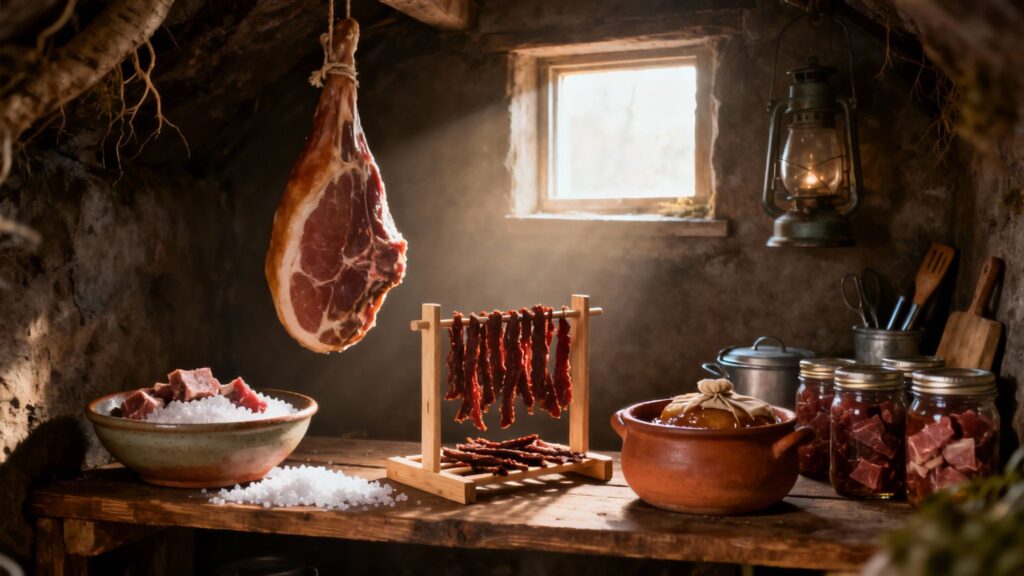
Building Your Foundation With Salting And Curing
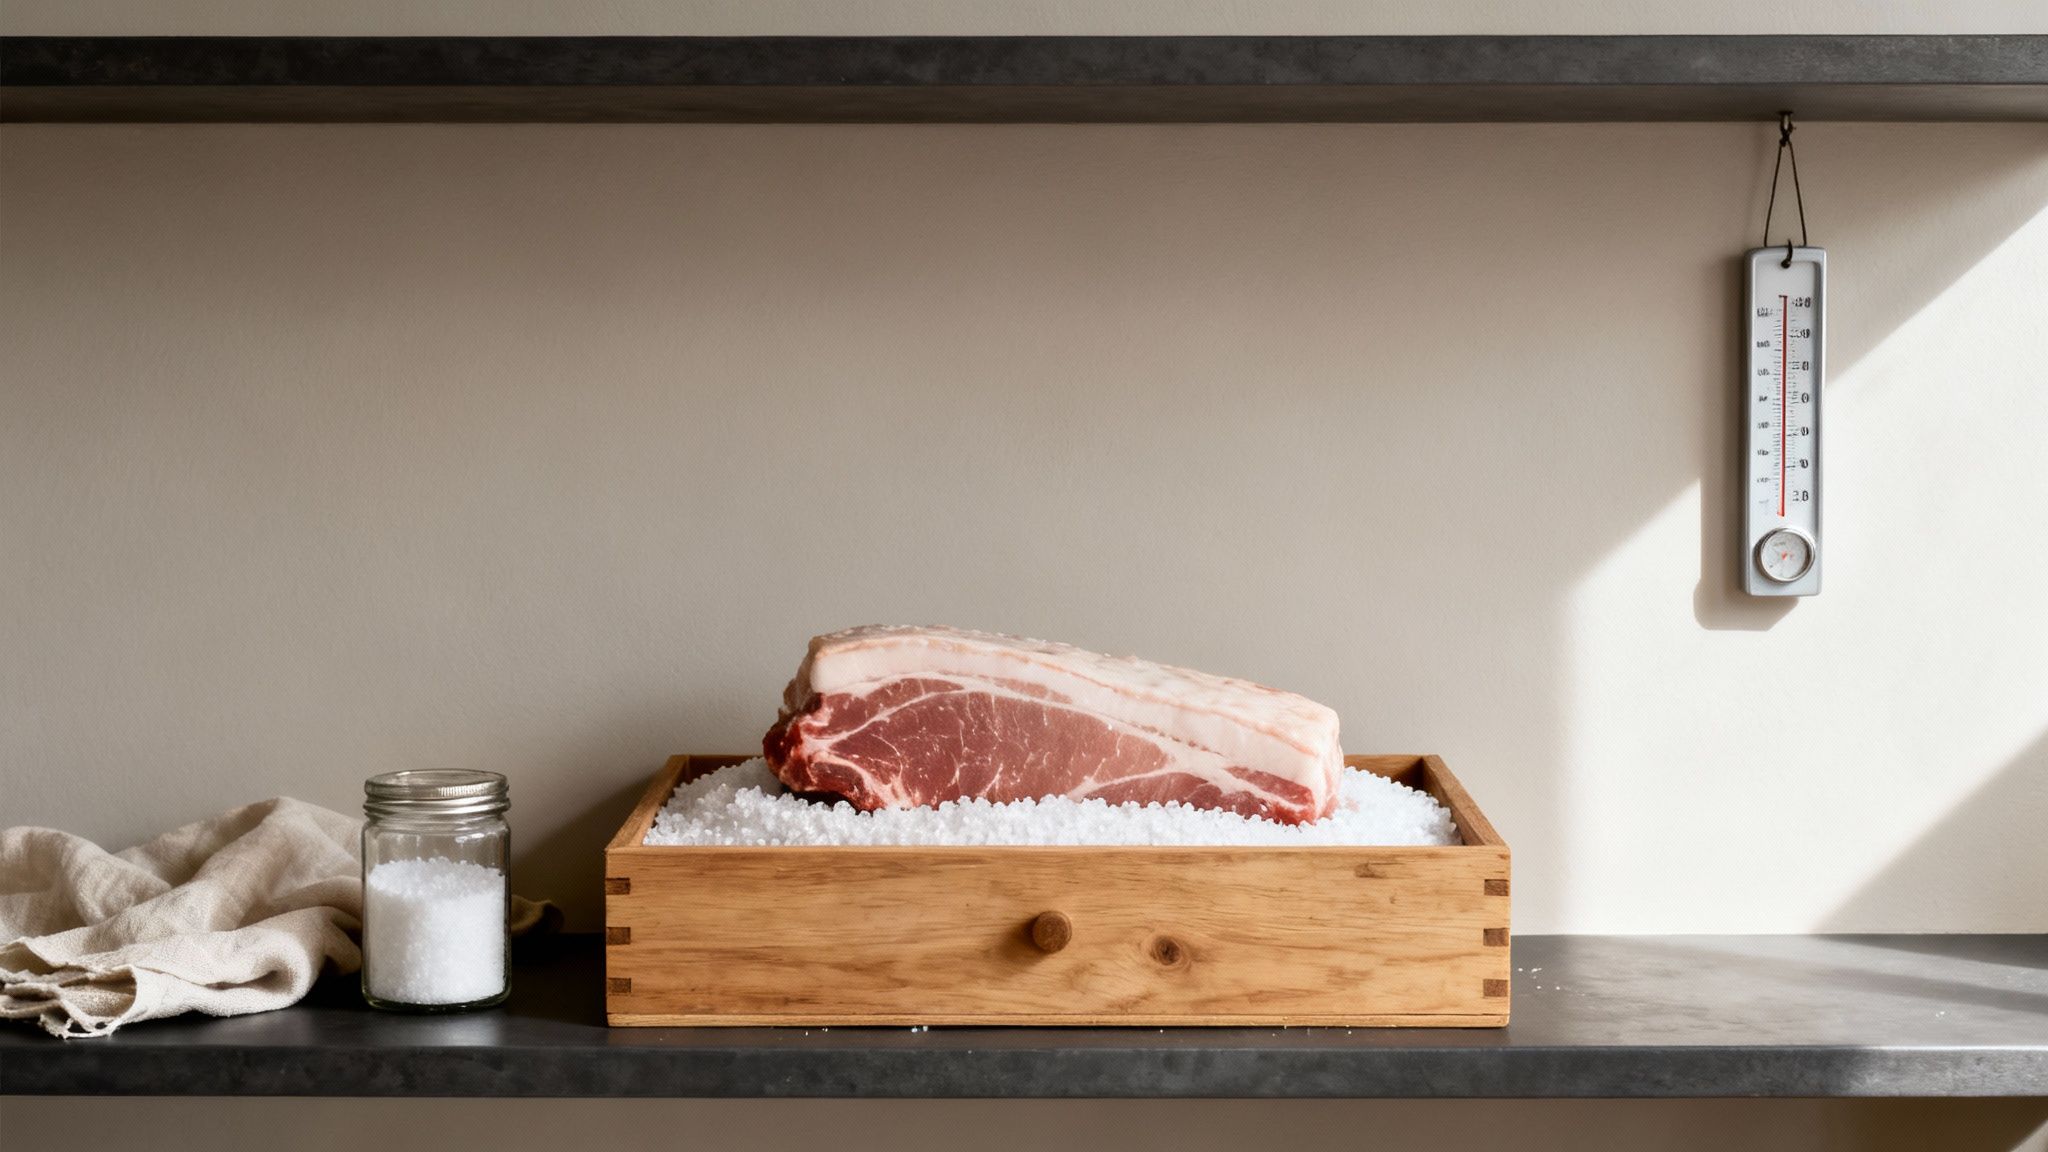
If you’re serious about preserving meat without a fridge, salting is the first skill you need to master. It’s the oldest trick in the book for a reason—it’s simple, effective, and has kept humanity fed for millennia. Before you even think about smokers or dehydrators, you have to get the cure right. The whole process works on a basic principle: osmosis.
When you pack a piece of meat in salt, the salt immediately starts pulling moisture out of the muscle. This is key. Spoilage bacteria need water to thrive, and by removing it, you’re making the meat an inhospitable place for them to grow. At the same time, the salt works its way deep into the meat, acting as a powerful antimicrobial shield.
This isn’t some new-fangled technique; salt curing has been around for over 12,000 years. People in the Middle East were using it to keep food from spoiling long before recorded history. The National Center for Home Food Preservation has some great info on these historical origins of food preservation if you want to dig deeper.
Dry Curing For Long-Term Stability
Dry curing is about as straightforward as it gets. You just rub the entire surface of the meat with a whole lot of salt and let it do its thing. The type of salt you use matters, though. Stay away from standard iodized table salt—the iodine can give the meat a funky, bitter taste and cause some discoloration.
Your best bet is a pure, non-iodized salt like Morton Canning & Pickling Salt. Its fine grains stick to the meat really well and dissolve evenly, which is exactly what you want for a consistent cure.
To set up a basic “salt box” for a pork shoulder or a big beef roast, just follow these principles:
- Total Coverage is a Must: Start with a thick bed of salt (at least an inch deep) in a container that won’t react with the salt, like a wooden box or a food-grade plastic tub. Plop the meat on top and then completely bury it. No part of the meat should be exposed to the air.
- Forget Exact Ratios: While some guides say to use 1.5 pounds of salt for every 10 pounds of meat, the salt box method is more about total burial than precise measurements. Just make sure it’s completely covered.
- Find the Right Spot: You need to put the box somewhere cool, dark, and with decent airflow. A root cellar, a cool corner of a basement, or a shaded shed works great as long as the temperature stays consistently below 40°F (4°C).
Understanding Brine Curing
Brine curing, or wet curing, gets you to the same place but uses a saltwater solution instead. This method is often a bit quicker than dry curing and does a great job of keeping leaner cuts from getting too tough and dry. A basic brine is nothing more than non-iodized salt and water.
The old-timer’s trick for getting the salinity right is to make a solution salty enough to float a raw egg. It’s a foolproof method that doesn’t require any special gear. A good starting point is about 1 pound of salt per gallon of water. Make sure the meat is fully submerged—you might need to use a plate or a clean rock to weigh it down—and store it in the same cool conditions you’d use for a dry cure.
The thickness of the meat is the single most important factor determining curing time. A general rule of thumb is to allow two days of curing per pound of meat for smaller cuts and up to a week per inch of thickness for larger cuts like a whole ham.
No matter which method you choose, you’ll know the cure is working when you see the results. The meat will get much firmer, darken in color, and feel dense as the water is pulled out. Once it’s fully cured, you can brush off the excess salt and hang it to dry further, or move on to smoking it for extra flavor and preservation. After all that work, you’ll want to store it right. Take a look at our guide on how vacuum sealing can extend food storage for some modern options that work well with traditionally cured meats.
Taking It To The Next Level: Drying And Smoking For Long-Term Storage
While a good salt cure is the first line of defense, truly achieving long-term stability without refrigeration comes down to one thing: removing moisture. This is where drying and smoking come in. These are two of the most powerful and time-tested techniques for turning cured meat into a durable, lightweight food source that’s perfect for any survival scenario.
Both methods work by pulling so much water out of the meat that spoilage-causing bacteria simply can’t survive.
This isn’t new technology; it’s one of the cornerstones of ancestral food preservation. Hunter-gatherer societies and medieval cultures absolutely depended on these methods. Smoking, in particular, delivers a powerful one-two punch. It not only dries the meat but also coats it with natural compounds from the wood smoke that actively stop decomposition in its tracks. When you combine this with a preliminary salt cure, you’ve got an incredibly effective preservation strategy. For a deeper dive, you can explore the science behind smoking and curing meats on academic.oup.com.
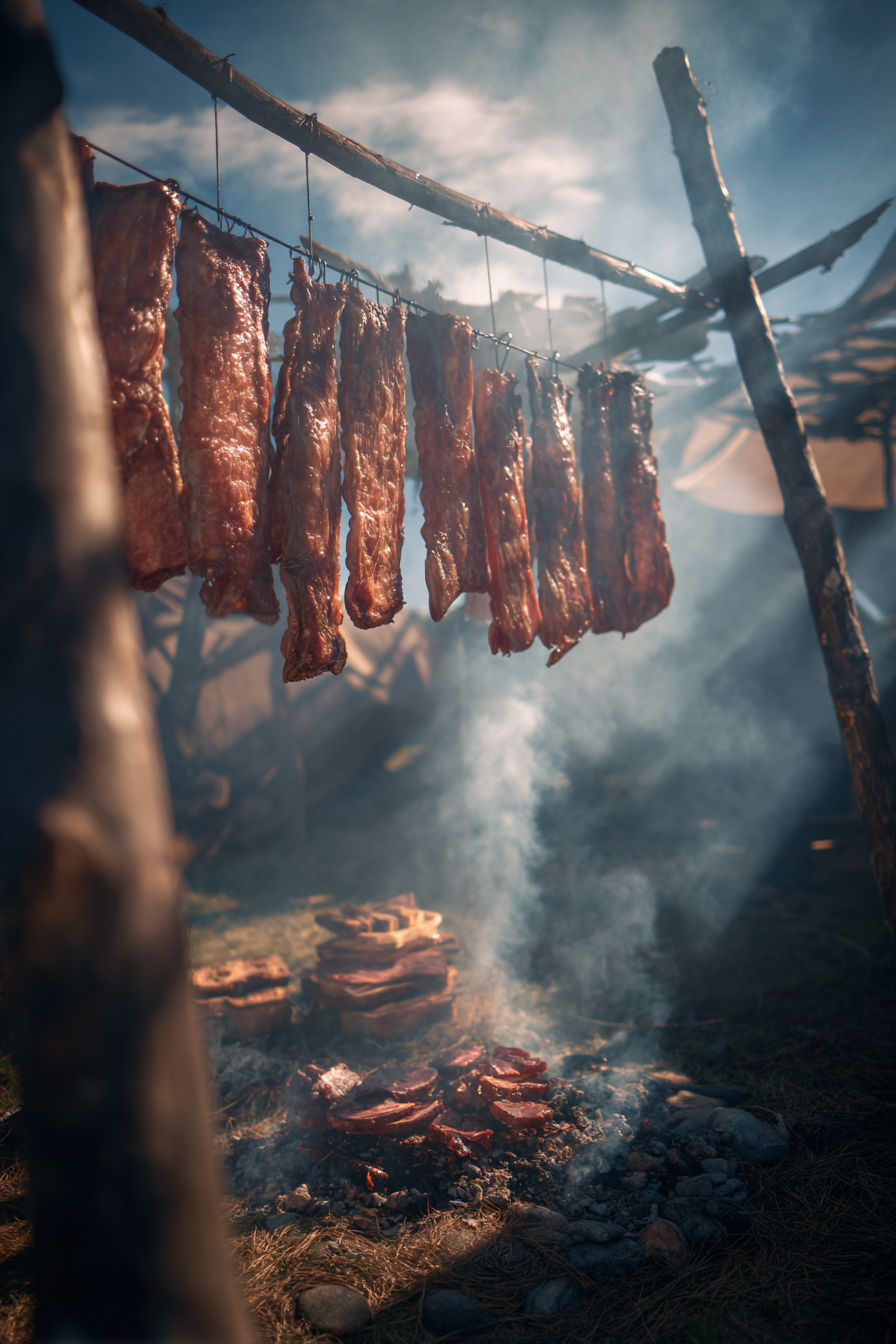
Harnessing The Power Of Air Drying To Make Jerky
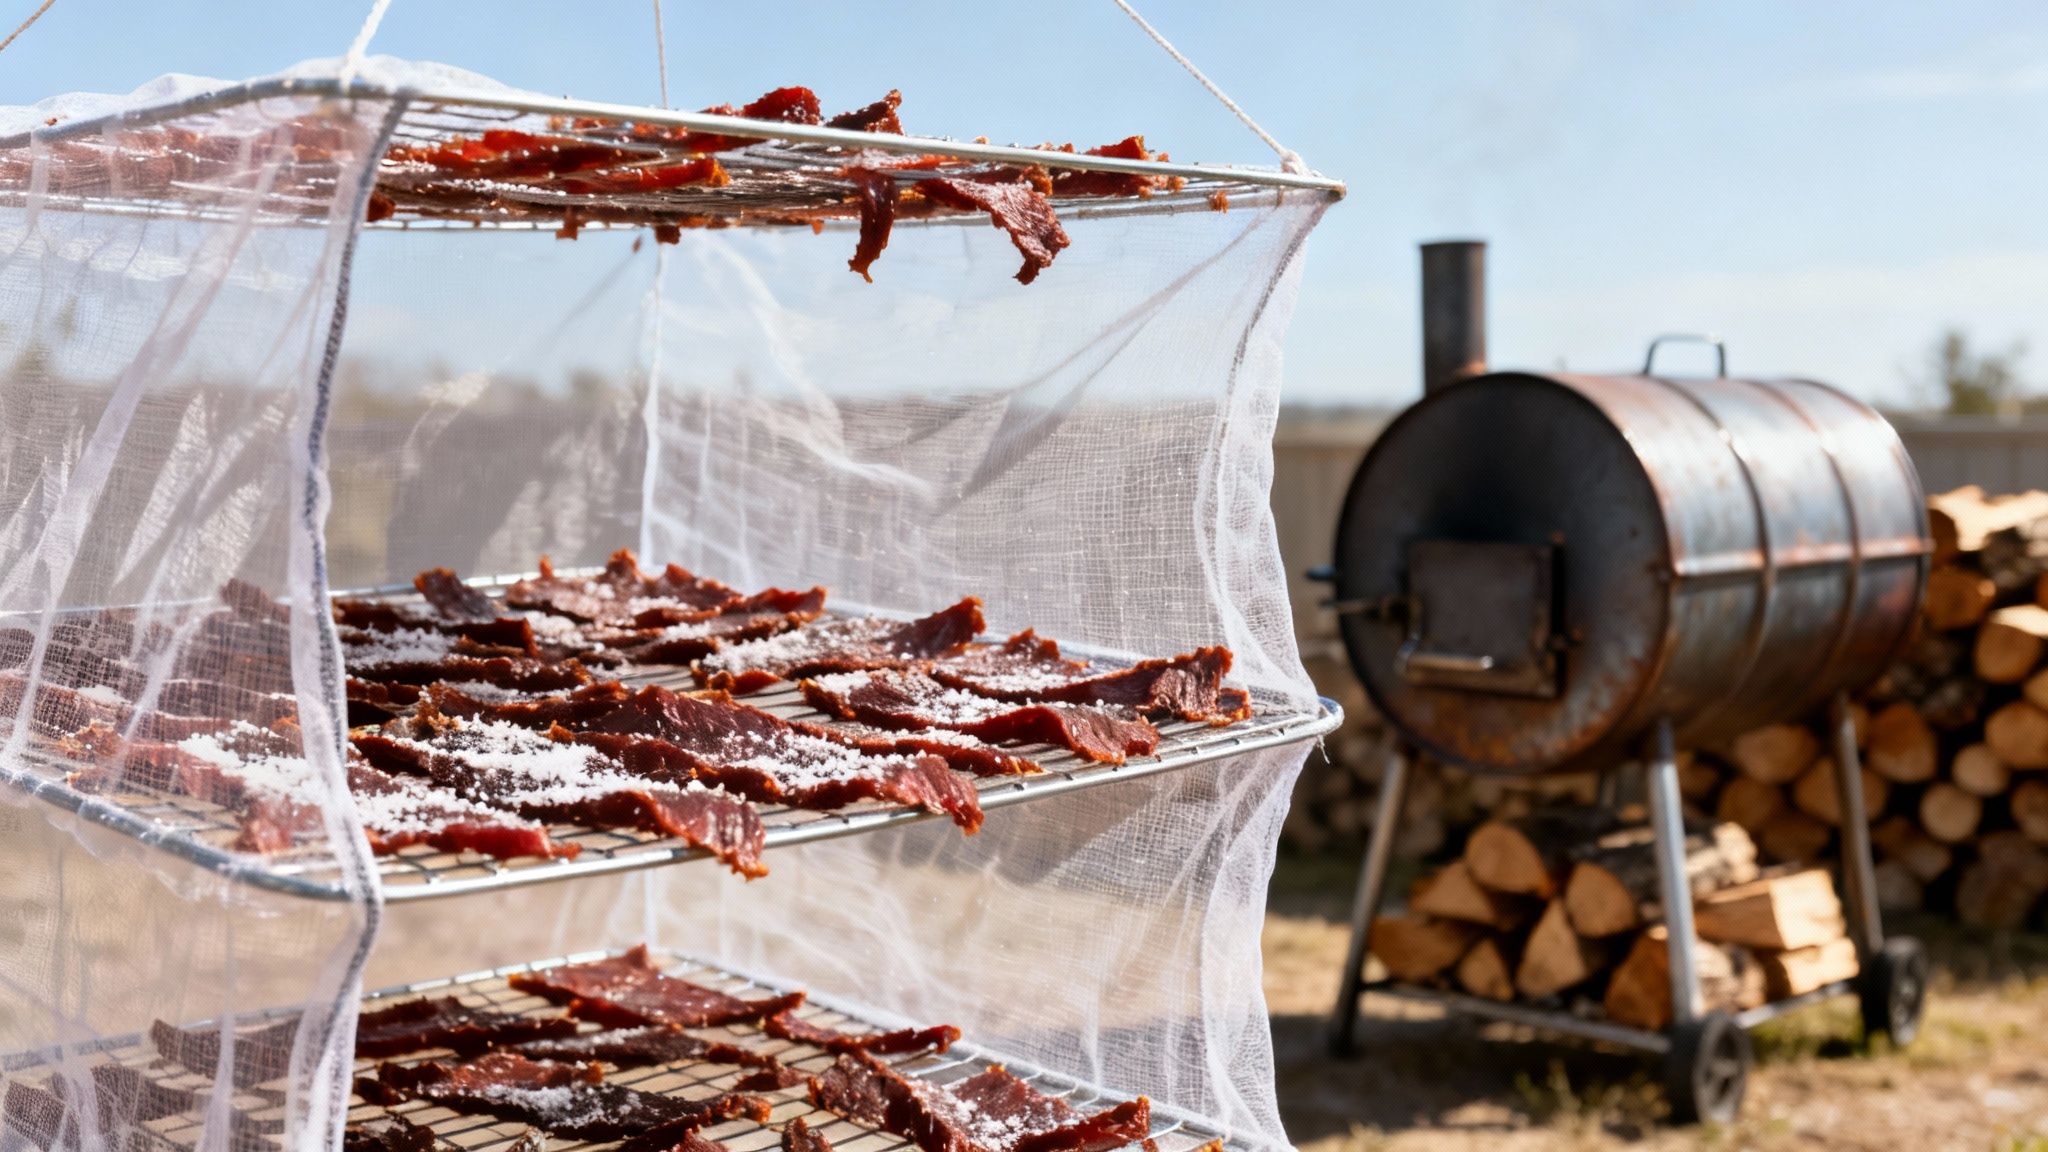
Making jerky is a fundamental off-grid skill. It takes very little equipment and lets the sun and wind do most of the heavy lifting. The whole point is to create thin, leathery strips of meat that have practically zero moisture left in them.
First, you have to prep the meat correctly. Stick with lean cuts like beef round or venison. Fat doesn’t dry well and goes rancid fast, which will ruin your entire batch. Slice the meat as thinly as you can—no more than a quarter-inch thick—and always cut against the grain. This makes for a more tender jerky that’s easier to chew. A light salt cure for a few hours beforehand is a great way to kickstart the dehydration process.
Next, you’ll need a simple drying rack. You can rig one up easily by stretching cheesecloth over a wooden frame or just by stringing the meat strips on a line like you’re hanging laundry. The most important thing is to make sure air can circulate freely around every single piece.
- Pest Protection: This is non-negotiable. Drape a layer of cheesecloth or fine mesh over your entire rack. This keeps flies and other bugs off your meat while still letting the air flow through.
- Location is Everything: Find a spot that gets plenty of direct sunlight and a good, steady breeze. The combination of heat and airflow is what makes the magic happen, speeding up the drying process significantly.
- Patience and Observation: Depending on the weather—sunlight, humidity, wind—this can take anywhere from one to three days. You’ll know the jerky is done when it’s stiff and cracks when you bend it, but doesn’t snap clean in two.
If you have access to modern gear, an electric food dehydrator makes this whole process foolproof by giving you precise temperature control. A reliable unit like the Nesco Gardenmaster or an Excalibur Dehydrator can produce consistent results regardless of the weather outside. Take a look at our guide on the best food dehydrators to see how they stack up against the old-school methods.
The Dual Role Of Smoking For Preservation And Flavor
Smoking takes drying a step further by infusing the meat with compounds that act as natural preservatives. It’s a method that requires a bit more setup, but the payoff is a product with a much richer flavor and an even longer shelf life.
Before you start, it’s critical to understand the difference between the two main types of smoking.
Hot Smoking vs. Cold Smoking
Hot smoking happens at temperatures between 165°F and 185°F (74°C to 85°C). This cooks and smokes the meat at the same time. It’s great for ribs or brisket, but it’s not what you want for long-term preservation. Cold smoking is the true preservation technique, done at temperatures below 85°F (29°C). The goal here is to dehydrate and preserve the meat with smoke without actually cooking it.
For real cold smoking, you need to create a low, consistent, smoldering fire. This can be done in a dedicated smoker, and many people use a cold smoke generator like the Smoke Daddy or A-MAZE-N Pellet Smoker to get a reliable, low-temperature smoke for hours. A basic backyard smoker can also be built from an old barrel or even a large cardboard box, as long as you have a separate firebox connected by a pipe to keep the direct heat away from the meat.
The wood you choose is also a huge factor.
Hardwoods are your only safe bet. Woods like hickory, apple, mesquite, and oak produce a clean, flavorful smoke. Never use softwoods like pine or fir. They contain nasty resins that create a sooty, foul-tasting smoke that will make your meat completely unsafe to eat. The whole process can take days, but the result is a beautifully preserved, flavorful product ready for your pantry.
Using Fat For Preservation Through Rendering And Confit
Beyond salting and smoking, one of the oldest and most effective ways to preserve meat without a fridge is by using fat as a natural barrier. This is a time-tested technique that leverages the protective qualities of rendered animal fat to create an airtight seal, shutting out the oxygen and bacteria that lead to spoilage.
The two main methods here are rendering and confit. They serve different purposes, but both are incredibly valuable for building a resilient, off-grid food supply.
Creating Shelf-Stable Lard And Tallow Through Rendering
Rendering is just a simple process of melting down raw animal fat—think pork back fat or beef suet—to separate the pure, clean fat from any leftover bits of meat or tissue. The end result is a beautiful, white, shelf-stable product called lard (from pork) or tallow (from beef) that’s an absolute game-changer in a grid-down kitchen.
The process itself is straightforward. All you really need is a heavy-bottomed pot and a low, steady heat source.
- Chop the Fat: Cut the raw fat into small, uniform cubes, or better yet, run it through a meat grinder. Smaller pieces mean the fat will render more efficiently and cleanly. A good grinder like the LEM Big Bite Grinder makes this part of the job go much faster.
- Slow and Steady Heat: Toss the fat into your pot with just a splash of water (about a quarter cup) to keep it from scorching as it starts to melt. Heat it slowly and let the fat liquefy gently.
- Strain and Store: Once all the fat has melted and the crispy leftover bits (the delicious “cracklings”) are golden brown, carefully strain the hot liquid fat through a few layers of cheesecloth into clean, completely dry jars.
After it cools, this pure rendered fat is incredibly stable. Stored in a cool, dark pantry, it can last for months. It’s perfect for cooking, baking, or sealing other preserved meats. You can find more details in our guide to the best oils for survival.
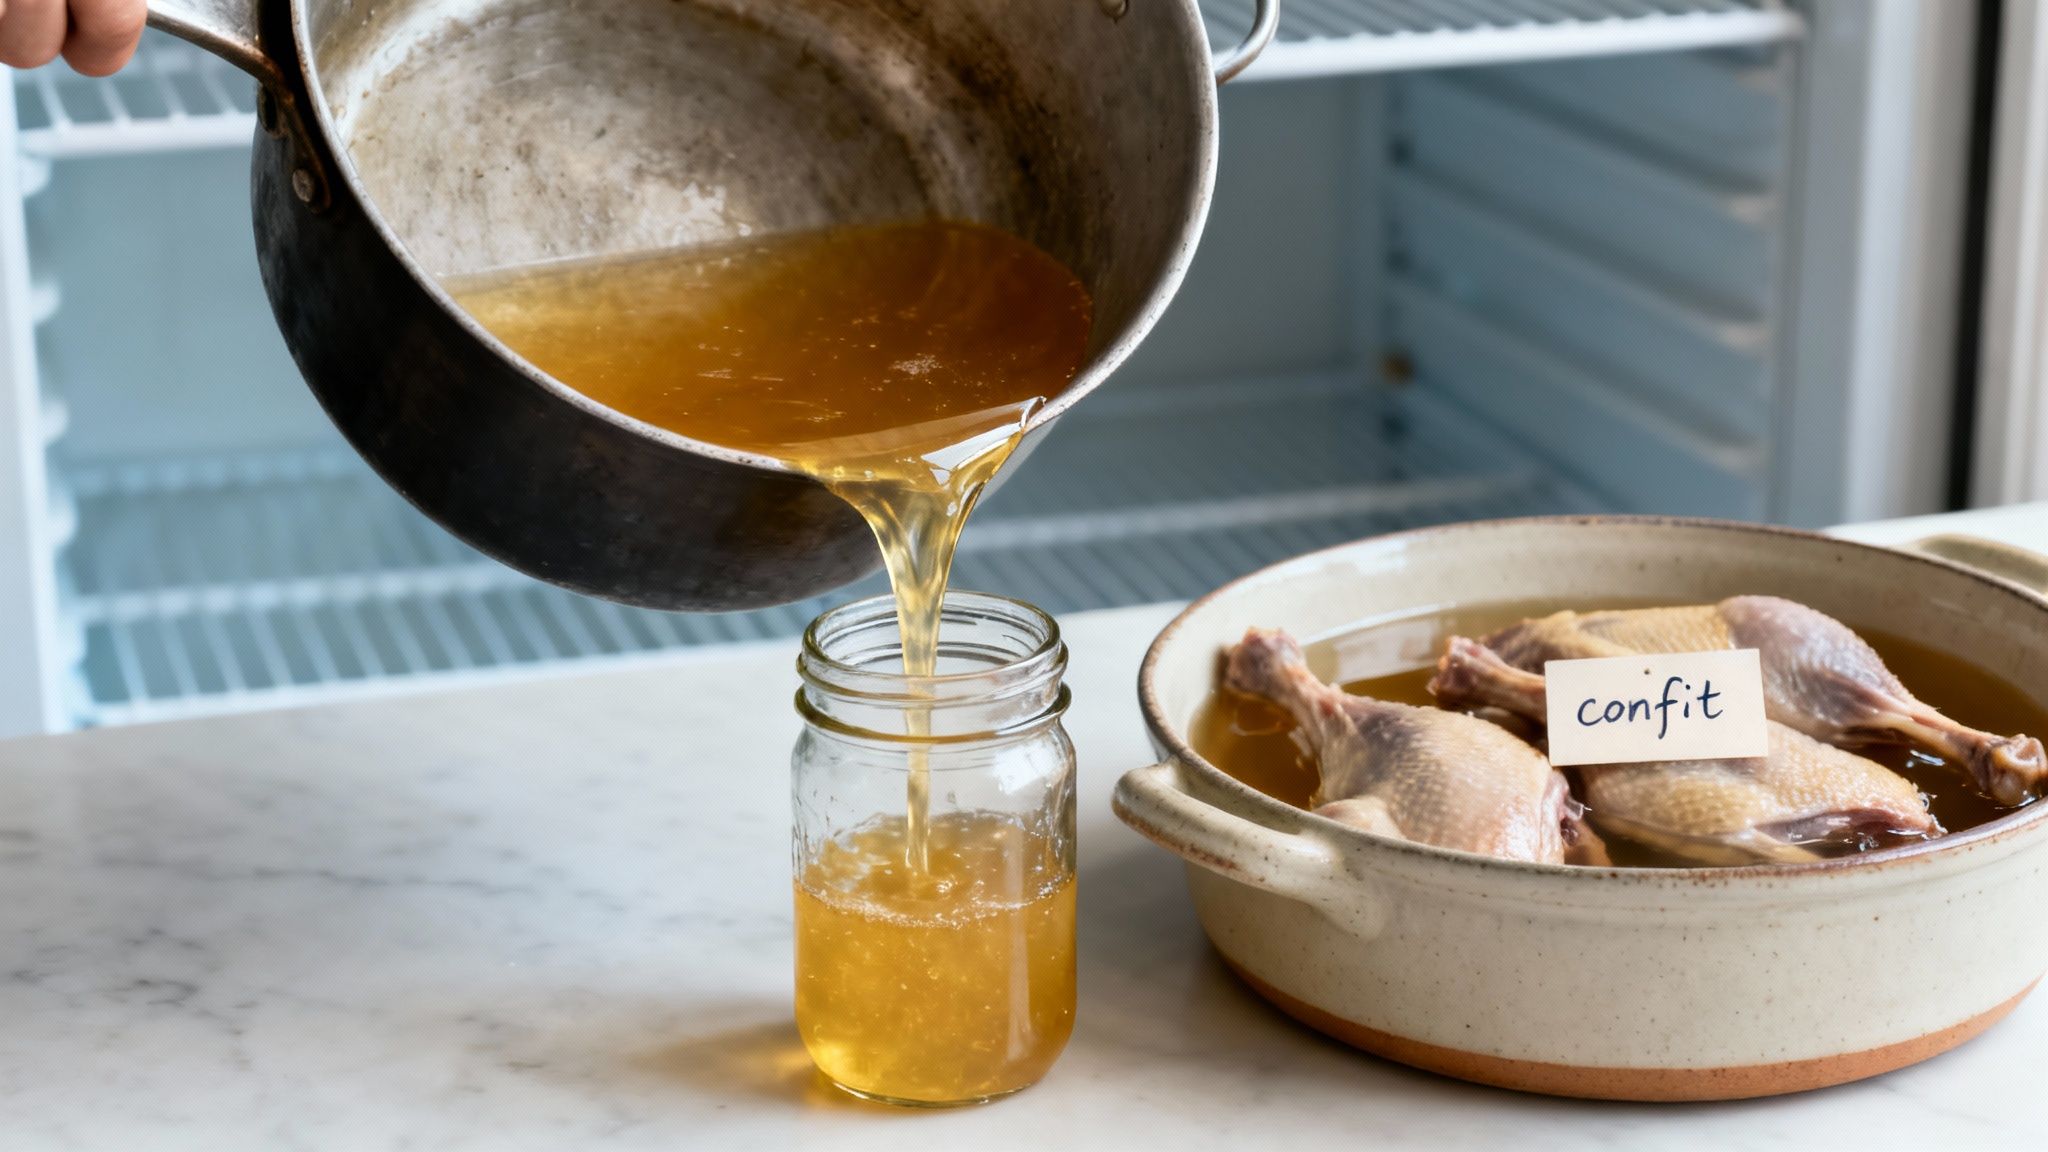
Mastering The Art Of Confit
Confit is a classic French preservation method where you lightly cure meat and then slow-cook it while it’s completely submerged in its own rendered fat. It works especially well for poultry like duck and chicken, but it’s also fantastic for small game.
This method produces incredibly tender, flavorful meat that’s perfectly preserved beneath a protective cap of fat.
- Cure First: Start by rubbing the meat pieces, like duck legs, with a generous amount of non-iodized salt and your choice of herbs. Let them cure for 24-48 hours in a cool spot.
- Rinse and Dry: Rinse all the salt off the meat thoroughly, then pat it completely dry. Any moisture left on the meat is the enemy of long-term preservation.
- Slow Cook in Fat: Put the cured meat in a pot and cover it completely with rendered fat—duck fat for duck, lard for pork or chicken. Cook it over a very low temperature, barely a simmer, for several hours until the meat is fork-tender.
- Pack and Seal: Gently transfer the cooked meat into a clean crock or a wide-mouth jar. Pour the liquid fat over the top, making sure the meat is fully submerged by at least an inch.
Once the fat cools and solidifies, it creates a perfect airtight seal. You can store this crock in a root cellar or cool pantry for several months, giving you a ready-to-eat source of rich, delicious protein whenever you need it.
Advanced Shelf-Stable Methods: Canning And Fermentation
If you’re serious about building a truly resilient food supply, you need to move beyond the basics of salting and drying. Canning and fermentation are the next level up, offering incredible shelf life and transforming your ability to store meat for the long haul. These methods do require more gear and a bit more know-how, but the payoff is meat that’s safe and ready to eat for years to come.
The result? Shelf-stable, ready-to-eat meat that can last for years. For building a complete long-term pantry alongside your preserved meats, explore our guide on foods that last 25 years or more.
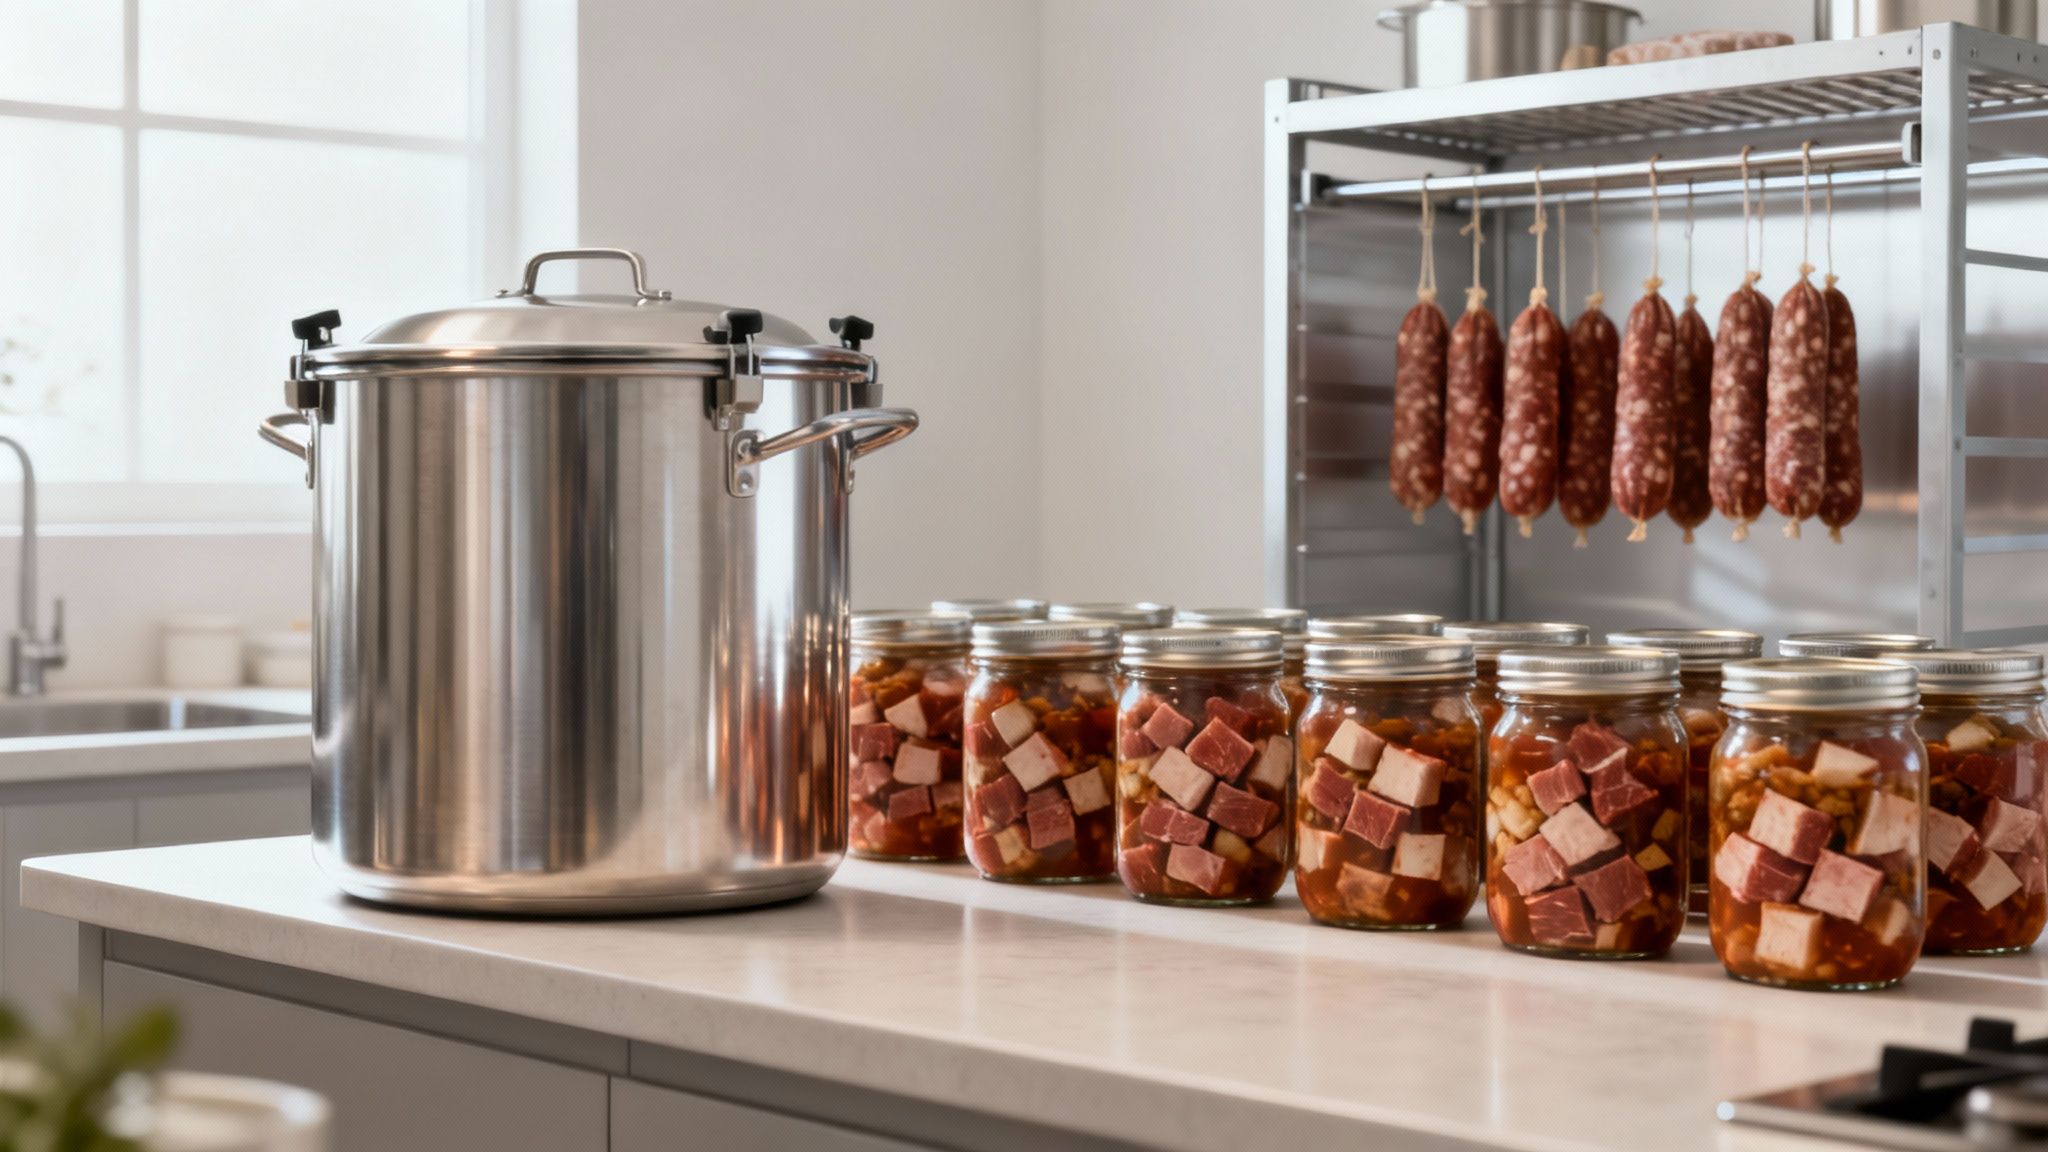
Pressure Canning Meat For Maximum Safety
Let’s get one thing straight: when it comes to canning meat, there’s only one safe way to do it. Pressure canning. Meat is a low-acid food, which is the perfect breeding ground for Clostridium botulinum spores if you don’t handle it correctly. A simple water bath canner just can’t get hot enough to kill this deadly threat.
This is where a pressure canner becomes an essential piece of kit. By trapping steam under high pressure, a quality unit like the workhorse Presto 23-Quart Pressure Canner or the durable All American Pressure Canner can hit temperatures of 240°F (116°C) or even higher. That intense heat is the only proven way to destroy botulism spores, period.
The process is straightforward but requires precision. You’ll pack your meat—cubed, ground, or even in a finished stew—into sterilized jars, leave the correct amount of headspace, and process it for a specific time based on your recipe and altitude. The result? Shelf-stable, ready-to-eat meat that can last for years. For more ideas on what to stock, check out our guide on the longest-lasting canned foods for your pantry.
Always, and I mean always, follow a tested recipe from a reliable source like the National Center for Home Food Preservation. Never guess or cut corners on processing times with meat. Your safety hinges on following established guidelines to the letter.
An Introduction To Meat Fermentation
Fermentation is one of humanity’s oldest preservation tricks, a fascinating process that uses good microbes to create delicious, shelf-stable products like salami and pepperoni. It’s more of an art form than a simple recipe, and it demands a solid understanding of the science at play.
This technique has been around for 3,000+ years. It works by introducing beneficial microorganisms that outcompete and destroy the bad ones. As these good microbes work, they produce acid, making the environment even more hostile to spoilage organisms. Old-world artisans mastered this with a technique called “back slopping”—using a bit of a successful batch to kickstart the next one, ensuring the right cultures took over. You can find more on the history of food preservation on blogs.libraries.indiana.edu.
Making something like salami involves mixing ground meat and fat with salt, spices, and a specific starter culture of bacteria. This mix gets stuffed into casings and then hung to cure in a controlled environment where you manage both temperature and humidity.
- The Role of Bacteria: The starter culture eats the sugars in the meat and produces lactic acid. This drops the meat’s pH, creating an acidic environment where spoilage bacteria can’t survive.
- The Role of Salt and Drying: Salt is crucial. It pulls out moisture and stops bad bacteria in their tracks while the friendly cultures get established. The slow drying process removes even more water and concentrates all those amazing flavors.
Because you’re essentially managing a tiny, living ecosystem, this is considered an advanced skill. It’s not something you should try casually. To succeed, you need to follow proven recipes, use precise measurements of curing salts, and maintain meticulous control over your curing chamber. Get it wrong, and you’ll have catastrophic (and dangerous) spoilage.
Common Questions About Preserving Meat Off-Grid
Diving into off-grid meat preservation is a huge step toward self-reliance, but it naturally brings up some critical questions. Let’s be honest, nobody wants to mess this up. Getting clear, reliable answers is the key to building the confidence you need to safely feed your family when the grocery store isn’t an option.
We’re going to tackle some of the most common concerns I hear all the time.
How Can I Tell If My Preserved Meat Is Safe To Eat?
When it comes to safety, your own senses are your first and best line of defense. Before a piece of preserved meat gets anywhere near your mouth, you need to give it a thorough inspection.
- Look it over: Scan for any signs of mold—that could be white, green, or even black fuzz. Also, look for any unnatural discoloration or a slimy, sticky film on the surface.
- Give it a sniff: Properly cured or dried meat should have a clean, salty, and maybe even smoky aroma. If you get any hint of a sour, rancid, or just plain “off” odor, that’s a major red flag.
- Check the texture: The meat should feel firm and dry to the touch. Anything that feels mushy, soft, or sticky is a bad sign.
With pressure-canned meats, the jar’s seal is everything. The lid has to be concave, meaning it curves down in the middle. It shouldn’t move or make a popping sound when you press on it. Also, check for any leakage around the rim or weird bubbling inside the jar.
The most important rule in food preservation is brutally simple: when in doubt, throw it out. Risking something serious like botulism in a survival situation is a gamble you can’t afford to take. Ever.
What Is The Best Salt For Curing Meat?
This is a crucial detail that trips a lot of people up. You absolutely must use a non-iodized salt that doesn’t have any anti-caking agents mixed in. Your standard iodized table salt will give your meat a nasty, bitter, metallic flavor and can even cause discoloration. It’ll ruin the whole project.
Your best bets are pure salts like Morton Canning & Pickling Salt, kosher salt, or a pure sea salt.
For more advanced curing, like making bacon or salami, you’ll need specific curing salts. These are often called Prague Powder #1 or Prague Powder #2. They contain sodium nitrite, which is essential for preventing the growth of botulism bacteria in certain recipes. But—and this is critical—they have to be used in very precise, small amounts. Follow your recipe to the letter.
How Do I Protect Drying Meat From Insects And Pests?
Keeping your meat safe from contamination while it air-dries is non-negotiable. One fly can lay eggs and ruin an entire batch of carefully prepared meat.
The most effective method is to build a simple drying box or screen. You can use a fine mesh material like cheesecloth or even a clean window screen stretched over a frame. This creates a physical barrier that allows for great airflow but keeps the bugs out.
Set this up in a sunny, breezy spot to help the drying process along. Another old-school trick is to keep a smoky fire smoldering nearby; the smoke is a natural insect repellent. Lastly, make sure your whole setup is secure from bigger critters like raccoons or rodents who would love a free meal.