If you’re serious about long-term food storage, the answer is simple: at least 5 mil thick, food-grade, BPA-free Mylar bags, sealed up tight with the right-sized oxygen absorber. Anything less is a gamble. Thicker bags are your best defense against punctures, pests, and the slow march of time, ensuring your food stays safe and edible for decades. This combination isn’t just a good idea—it’s the gold standard for anyone building a truly resilient pantry.

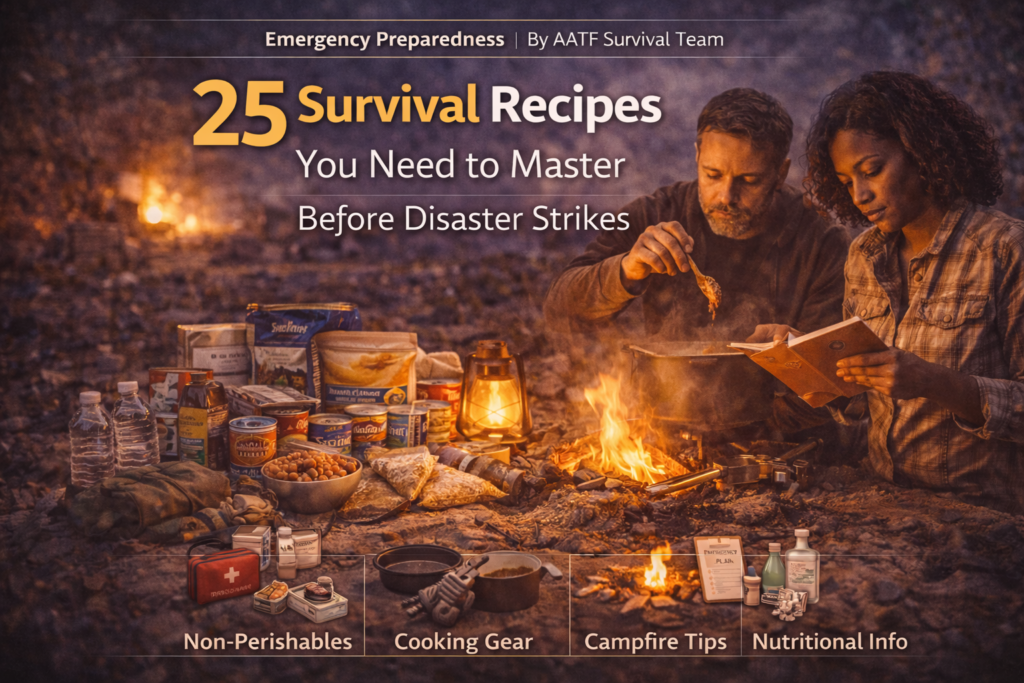
Why Mylar Is the Gold Standard for Your Pantry’s Defense
Stop thinking of a Mylar bag as just a bag. Think of it as flexible armor for your food supply. For anyone building a stockpile they can depend on, these bags are the undisputed champions of long-term preservation. They build a nearly impenetrable fortress against the three enemies of shelf life: oxygen, light, and moisture.
When left unchecked, these three elements will ruin your food. Oxygen causes fats to go rancid and destroys vitamins. Light breaks down nutrients and fades colors. And moisture? That’s an open invitation for mold, mildew, and bacteria. Mylar bags shut the door on all three at once.
A Fortress for Your Food
The secret is in their layered construction. A micro-thin layer of aluminum foil is sandwiched between layers of tough, flexible polyester film. This simple but brilliant design creates a barrier that is incredibly non-porous.
Mylar bags are the go-to choice for serious emergency food storage because they work. When sealed and stored correctly, food can last up to 20 years or more. How long it lasts really comes down to the bag’s thickness and where you store it.
Bags in the 7-10 mil thickness range offer far better protection for your long-term goals than thinner, flimsy alternatives. The science is clear: Mylar’s barrier properties block the oxygen, moisture, and light that cause food to spoil.
A Strategic Preparedness Tool
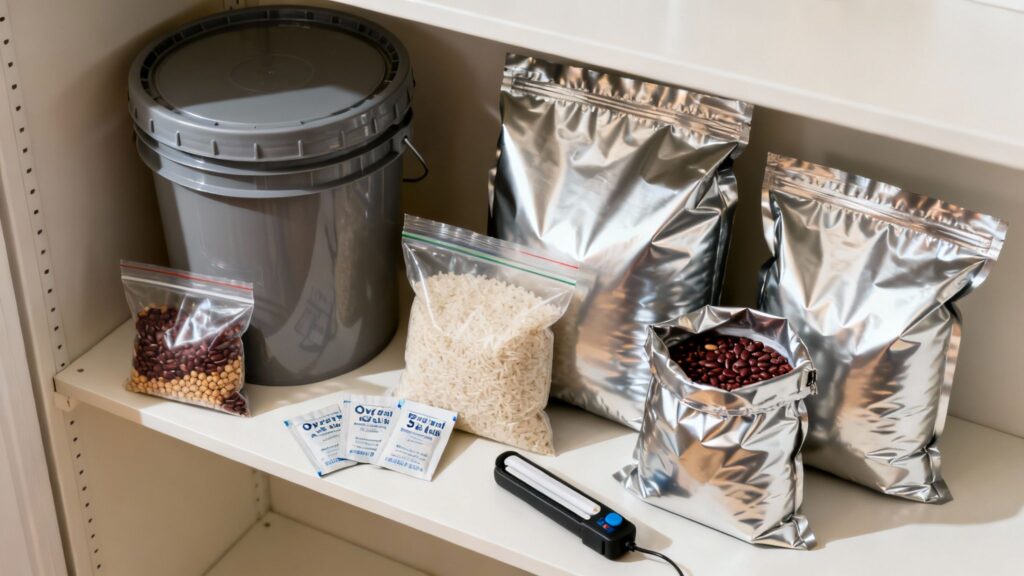
Choosing the ‘best’ bag is a strategic decision, not a one-size-fits-all answer. A heavy-duty 7-mil bag is perfect for storing 50 pounds of wheat berries you won’t touch for two decades. On the other hand, a smaller 5-mil bag is ideal for portioning out individual meal kits of pasta and dehydrated sauce for your bug-out bag. A common choice for these kits are bags from brands like Wallaby Goods or Harvest Right.
For more details on assembling effective meal kits, check out our guide on storing bulk rice and beans.
This focus on preservation makes Mylar bags a cornerstone of a self-reliant lifestyle. They’re just as critical as having a Berkey Water Filter for clean water or an All American Sun Oven for off-grid cooking. Learning to use them right is a core skill for protecting your investment in food security.
If you’re just getting started, our complete guide on how to store food long-term will give you a solid foundation. This section will arm you with the specific knowledge to pick and use Mylar bags like a pro.
Quick Guide to Choosing Mylar Bags
Use this table to quickly match your food storage needs with the right Mylar bag features.
| Factor | What to Look For | Why It Matters for Preparedness |
|---|---|---|
| Thickness (Mils) | 5 mil minimum for long-term storage; 7+ mil for ultimate durability. | Thicker bags resist punctures from sharp grains (like wheat) and accidental drops, protecting your investment. |
| Material Quality | Food-grade, BPA-free, and multiple layers (at least one foil layer). | Ensures no harmful chemicals leach into your food. The foil layer is non-negotiable for blocking light and oxygen. |
| Bag Size | Varies based on need: quart, 1-gallon, 5-gallon. | Smaller bags are great for meal kits and rationing. Larger bags are efficient for bulk staples like rice and beans. |
| Closure Type | Zipper top for short-term use; heat-seal only for long-term. | A zipper is a point of failure. For 10+ year storage, you must have a solid, uninterrupted heat seal. |
Choosing the right bag from the start prevents waste, saves money, and gives you peace of mind knowing your food supply is secure when you need it most.
Decoding Mylar Bag Thickness and Features
Shopping for Mylar bags can feel like you’re learning a new language, with terms like “mil,” “gusset,” and “food-grade” thrown around constantly. But getting a handle on these key features is what separates a confident prepper from a frustrated one. Once you learn to decode the specs, you can easily match the right bag to your specific food storage mission.
And it’s a big mission for a lot of people. The global mylar bag market was valued at $1.81 billion USD in 2022 and is expected to hit nearly $7.5 billion USD by 2025. The food packaging industry is the biggest reason for that growth, making up around 45% of the market—a clear sign of how many folks are relying on this tech to preserve their supplies. You can dig deeper into these numbers over at Market Report Analytics.
Mil Thickness: The Armor Rating of Your Bag
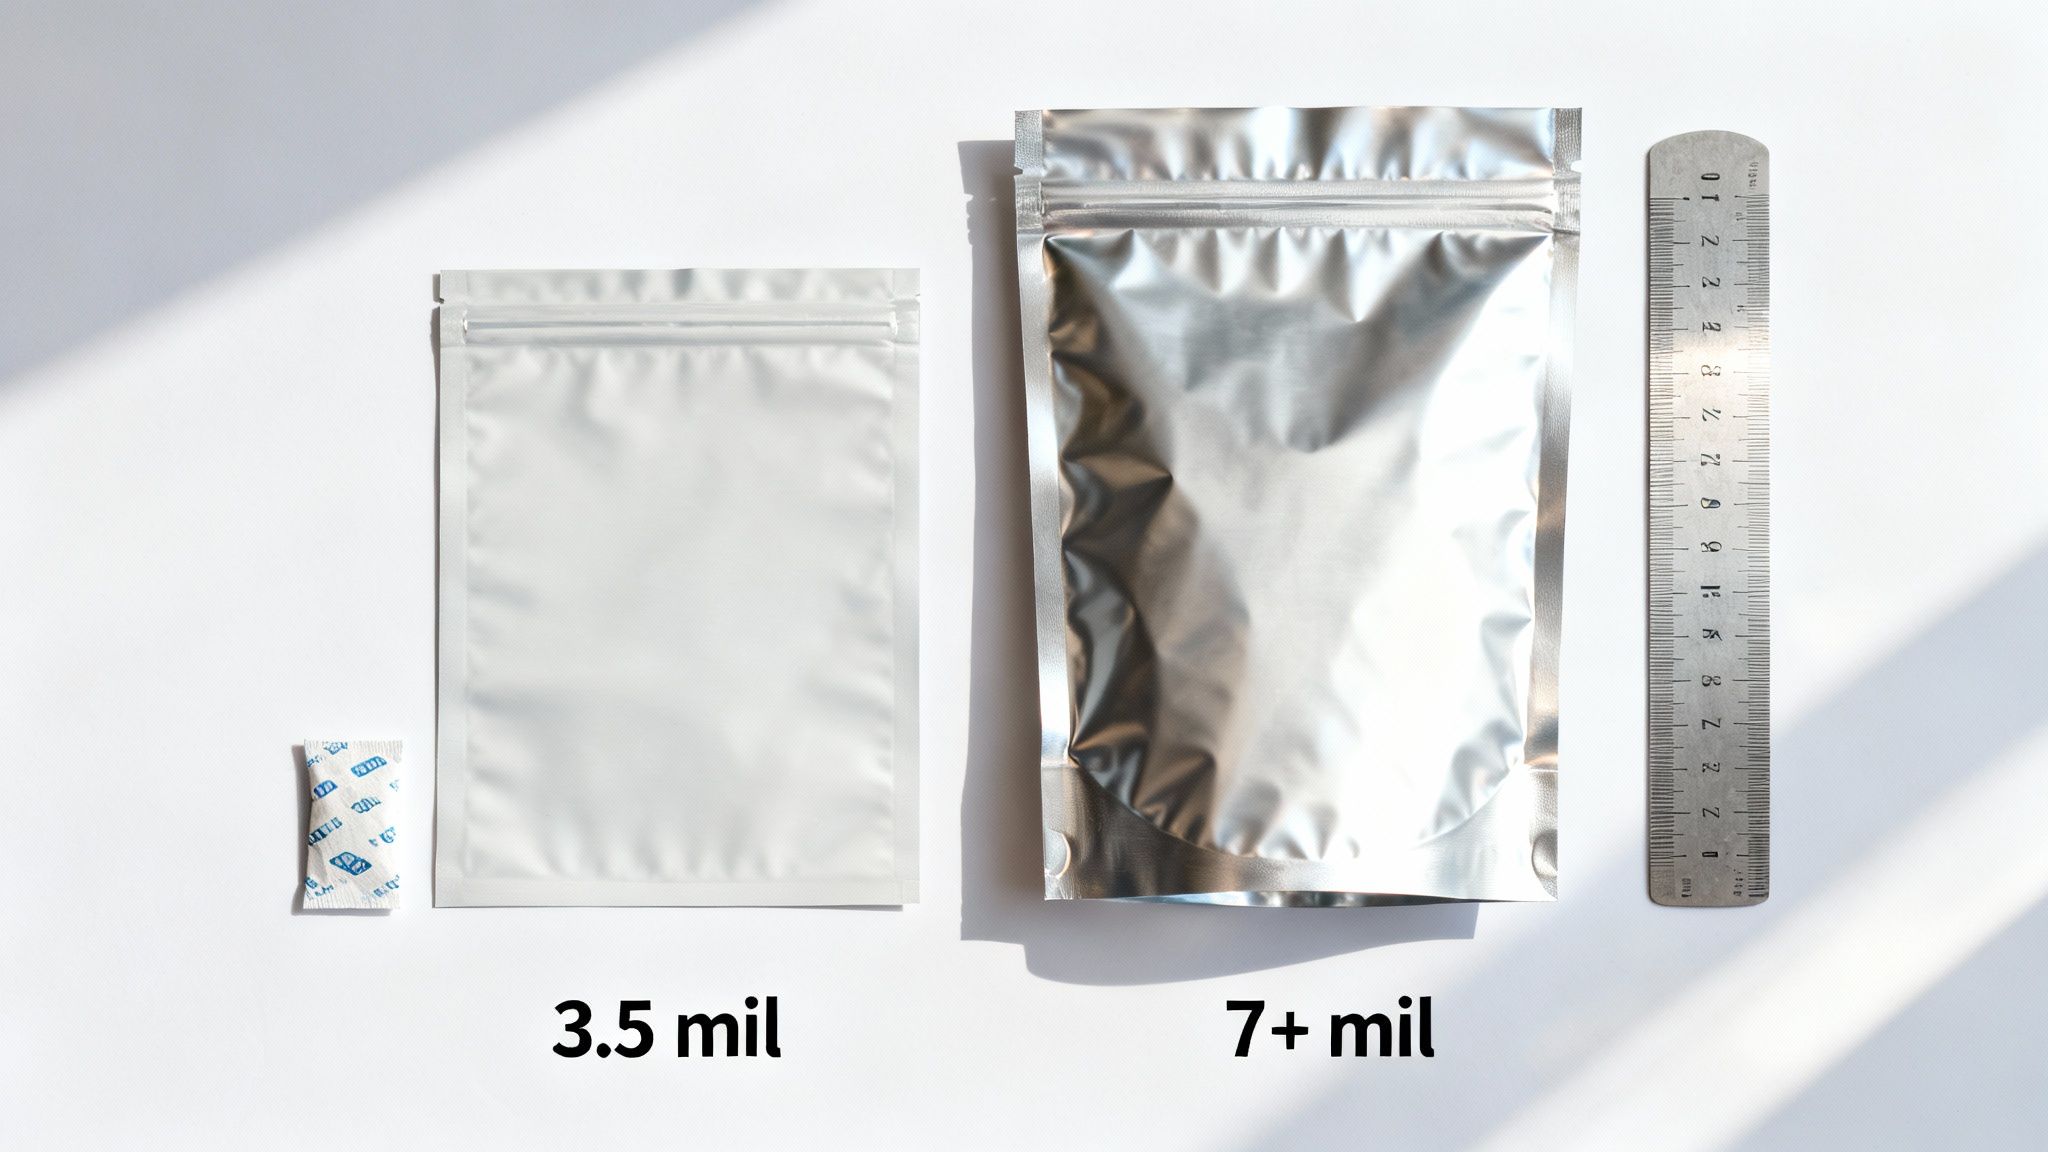
The single most important spec to understand is the bag’s thickness, measured in mils. One mil is simply one-thousandth of an inch. It sounds tiny, but the difference between a 3.5 mil bag and a 7 mil bag is massive when it comes to long-term durability and protection.
Think of it like choosing a jacket for a storm.
A 3.5 mil bag is your basic rain jacket. It’s perfectly fine for short-term protection and works well for storing soft, lightweight foods like powdered milk or dehydrated vegetables, especially when you plan on putting them inside another container like a bucket.
A heavy-duty 7+ mil bag, on the other hand, is like a concrete bunker. It’s built to resist punctures from sharp-edged foods like spaghetti or whole wheat berries. This is the thickness you want for generational staples you expect to last for decades, giving you maximum defense against pests and accidental damage.
Key Takeaway: For serious, long-term food storage (think 10+ years), you should be looking for a minimum thickness of 5 mils. For ultimate peace of mind and the best protection against punctures, 7 mils or thicker is the gold standard.
Non-Negotiable Safety Features
Beyond thickness, two labels are absolutely critical for your family’s safety: food-grade and BPA-free. An industrial Mylar bag might look identical, but it could be treated with chemicals you definitely don’t want touching your food.
- Food-Grade: This certification is your guarantee that no harmful substances from the bag’s material will leach into your food over time. It’s a promise of safety.
- BPA-Free: Bisphenol A (BPA) is an industrial chemical used in some plastics. Making sure your bags are BPA-free adds another layer of health security for your stored food.
Always double-check that a supplier explicitly states their bags meet these standards. Any reputable seller in the preparedness community will make this information clear and easy to find.
Bag Shape: Maximizing Your Storage Space
The shape of the bag directly impacts how you can fill it and where you can store it. You’ll mainly run into two types: flat and gusseted.
A flat bag is just what it sounds like—a simple, two-sided pouch. They are incredibly efficient for packing items inside a structured container, like a 5-gallon bucket, where the bucket itself provides the shape.
A gusseted bag has an extra fold of material at the bottom. This lets it expand and stand upright on its own once it’s filled. Think of it as a well-organized backpack; it maximizes the internal volume and makes the bag much easier to fill without it constantly tipping over. These are an excellent choice for organizing food directly on pantry shelves.
Matching Bag Size to Your Mission
Choosing the right size is all about efficiency. Using a bag that’s too large just wastes space and forces you to use a bigger, more expensive oxygen absorber. It’s much smarter to tailor the bag size to the food you’re storing.
- Quart Bags: These are perfect for creating individual meal kits, storing spices, or packing trail mix for a get-home bag.
- Gallon Bags: This is your versatile, everyday size, ideal for storing a few pounds of rice, pasta, or beans for your family’s pantry.
- 5-Gallon Bags: This is the workhorse for bulk storage. These bags are specifically designed to fit perfectly inside standard 5-gallon buckets, creating a powerful double-barrier system. When you pair this setup with an airtight lid like a Gamma Seal Lid, you get the ultimate protection against pests, moisture, and physical damage.
While Mylar bags offer incredible protection, it’s always good to know all your options. To get a complete picture, check out our guide on the best food storage containers.
Mastering the Perfect Airtight Seal
A Mylar bag full of food is just a bag until you lock it down. The real magic—the decades-long preservation—happens when you create a truly airtight environment. This is your hands-on guide to achieving a perfect, long-lasting seal every single time, turning a simple bag into a food preservation powerhouse.
The two keys to a successful seal are the oxygen absorber and the heat seal itself. Getting both right is non-negotiable for anyone serious about building a resilient food supply. Think of it as a two-part security system for your pantry.
The Science of Oxygen Absorbers
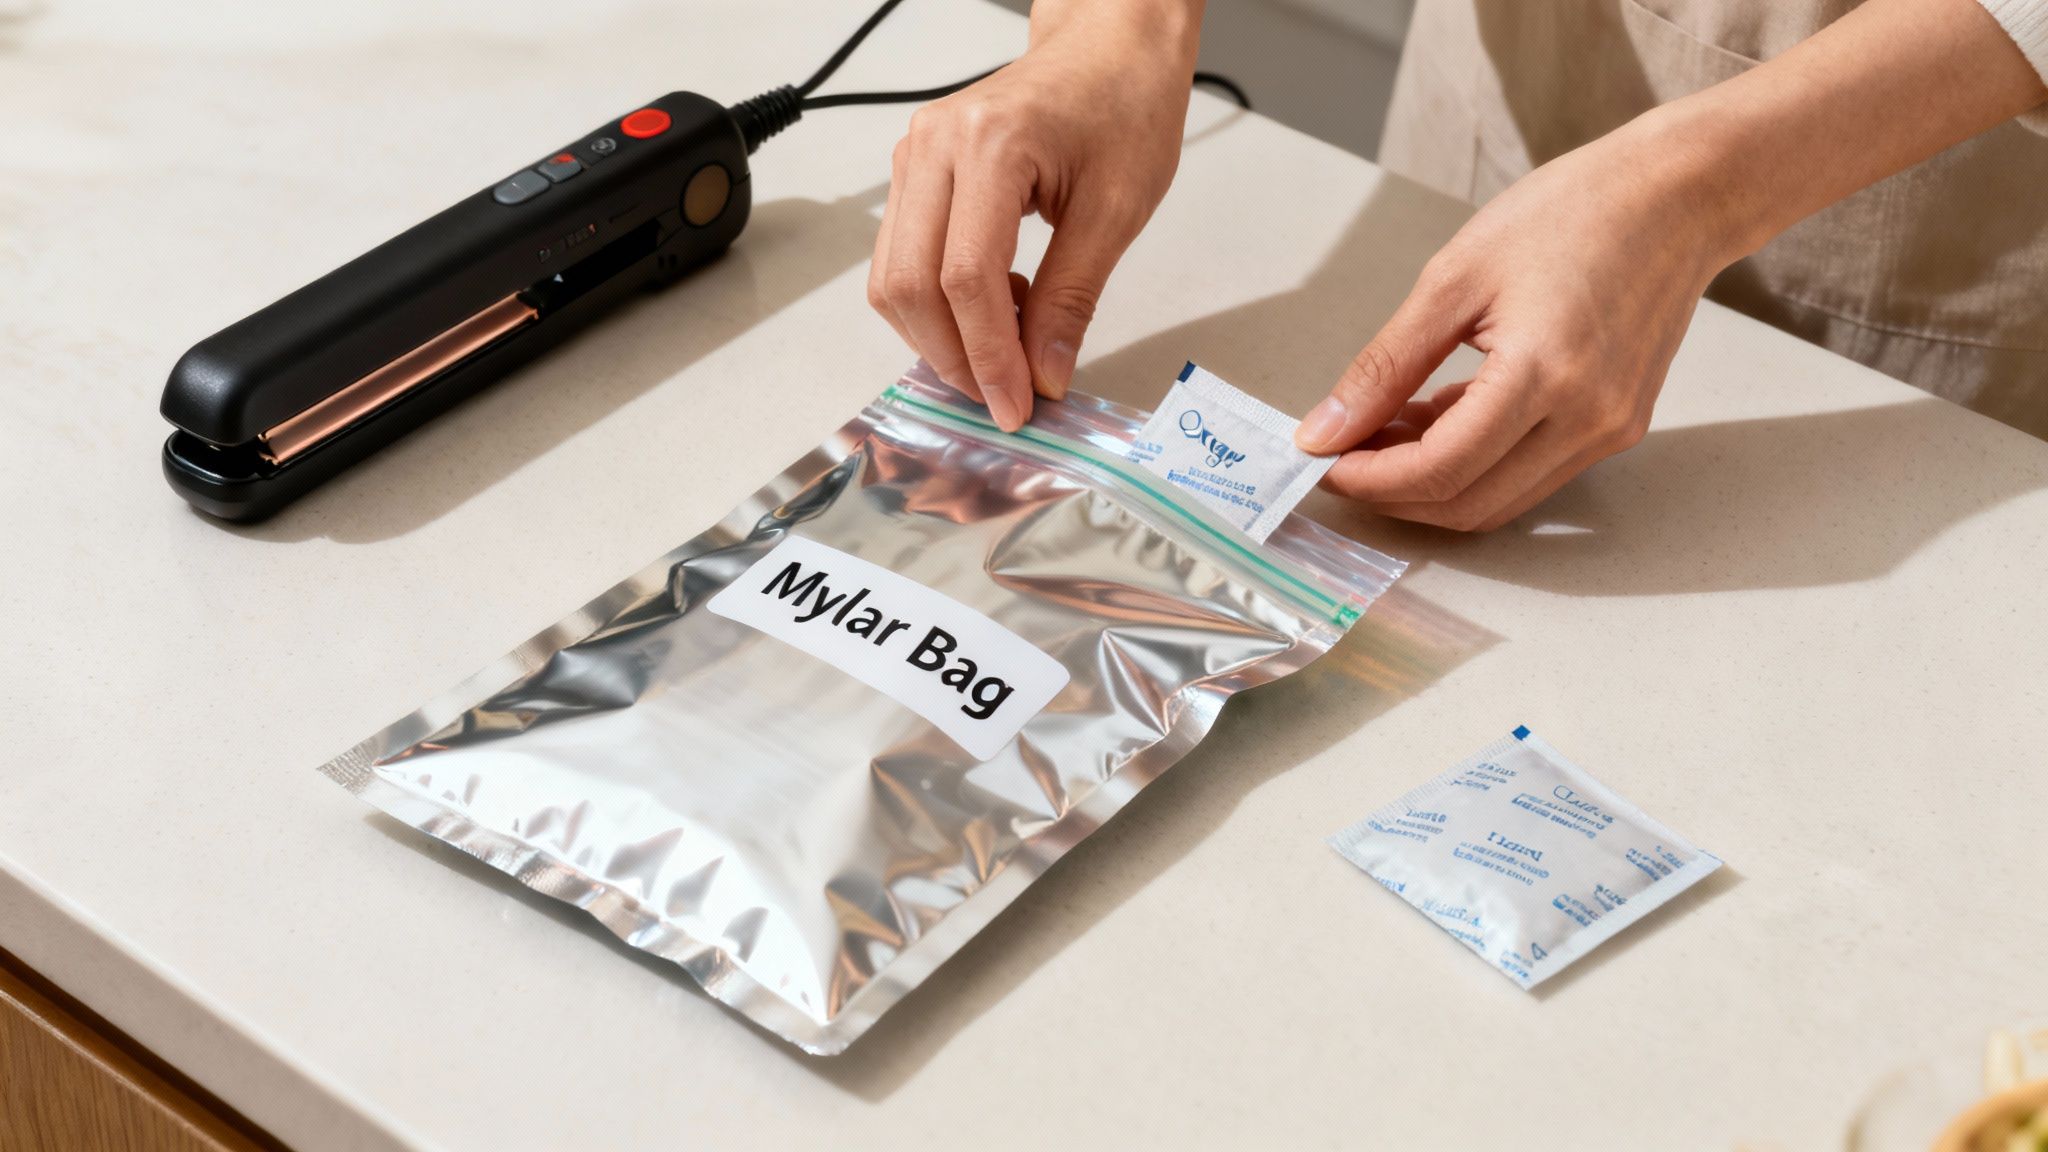
Let’s demystify oxygen absorbers. They aren’t complicated; they are essentially tiny rust engines. Inside each small packet is iron powder. When exposed to air, the iron begins to oxidize—or rust—a chemical reaction that literally consumes the oxygen molecules inside your sealed bag.
This process removes nearly all the oxygen, dropping the level below 0.1%. Without oxygen, pests cannot survive, and the oxidative processes that cause food to spoil are halted in their tracks. It’s a simple, brilliant, and food-safe method of preservation.
Choosing the right size absorber is critical. They are rated in cubic centimeters (cc), which measures the volume of oxygen they can remove. Using one that’s too weak for your bag size is one of the most common and costly food storage mistakes you can make.
Rule of Thumb: It is impossible to use an oxygen absorber that is too powerful for a bag, but it is very easy to use one that is too weak. When in doubt, always go up a size to ensure complete oxygen removal and total peace of mind.
Here is a simple chart to help you match the right absorber to your bag size:
| Mylar Bag Size | Recommended Oxygen Absorber Size (cc) | Common Foods to Store |
|---|---|---|
| Pint / Quart | 100-300 cc | Spices, dehydrated herbs, small meal kits |
| 1-Gallon | 300-500 cc | Pasta, oats, dehydrated vegetables |
| 5-Gallon | 2000-3000 cc | Bulk rice, wheat berries, pinto beans |
Sealing Methods for Every Prepper
Once the food and the correct oxygen absorber are in the bag, you have to create a permanent, airtight seal. You don’t need expensive equipment to get a professional-grade seal; a few common household tools can work just as well, especially for smaller batches.
- Household Iron: This is the most accessible method for most people. Set your iron to a high heat setting (like wool or cotton) with no steam. Place the top edge of the bag on a wooden board and press the hot iron down firmly for a few seconds.
- Hair Straightener: Surprisingly effective and offers great control. Clamp a high-quality hair straightener over the edge of the bag, holding it for just a few seconds to melt the layers together into a solid seal.
- Impulse Sealer: For those processing large quantities of food, a dedicated impulse sealer like one from Metronic is a fantastic investment. These devices provide a consistent, clean, and fast seal every time, making big projects much more efficient.
No matter which method you choose, here’s a professional trick: create a double seal. Make your first seal, then move down about a quarter-inch and make a second one. This provides critical redundancy against any tiny imperfections or pinhole leaks, adding an extra layer of insurance for your food supply.
Confirming a Successful Seal
So, how do you know if it worked? You don’t have to guess. About 24 hours after sealing, perform a simple “press test.” Gently squeeze the bag. It should feel hard and compressed, almost like a brick.
If you can easily press into the bag and feel air moving around, your seal has failed. This is usually due to an undersized oxygen absorber or a small leak in your heat seal. This simple check is your final confirmation that your food is secure for the long haul.
While an oxygen absorber creates a passive vacuum, some preppers prefer a more active approach. For a detailed comparison, you can explore more about active vacuum seal food storage techniques in our other guides.
Your Blueprint for a Resilient Food Supply
Alright, you’ve got the theory down—you know your bags, seals, and oxygen absorbers. Now it’s time to put that knowledge to work. Building a real, resilient food supply isn’t about just tossing cans in a closet. It’s about methodically creating a pantry that’s organized, accessible, and designed to last for decades.
This is where you turn piles of bulk ingredients into a strategic reserve. The key is to start with a plan. Don’t just store 25 pounds of loose flour and call it a day; think about the actual meals you’ll be making. This approach makes your supply far more practical and simplifies everything from stock rotation to inventory checks.
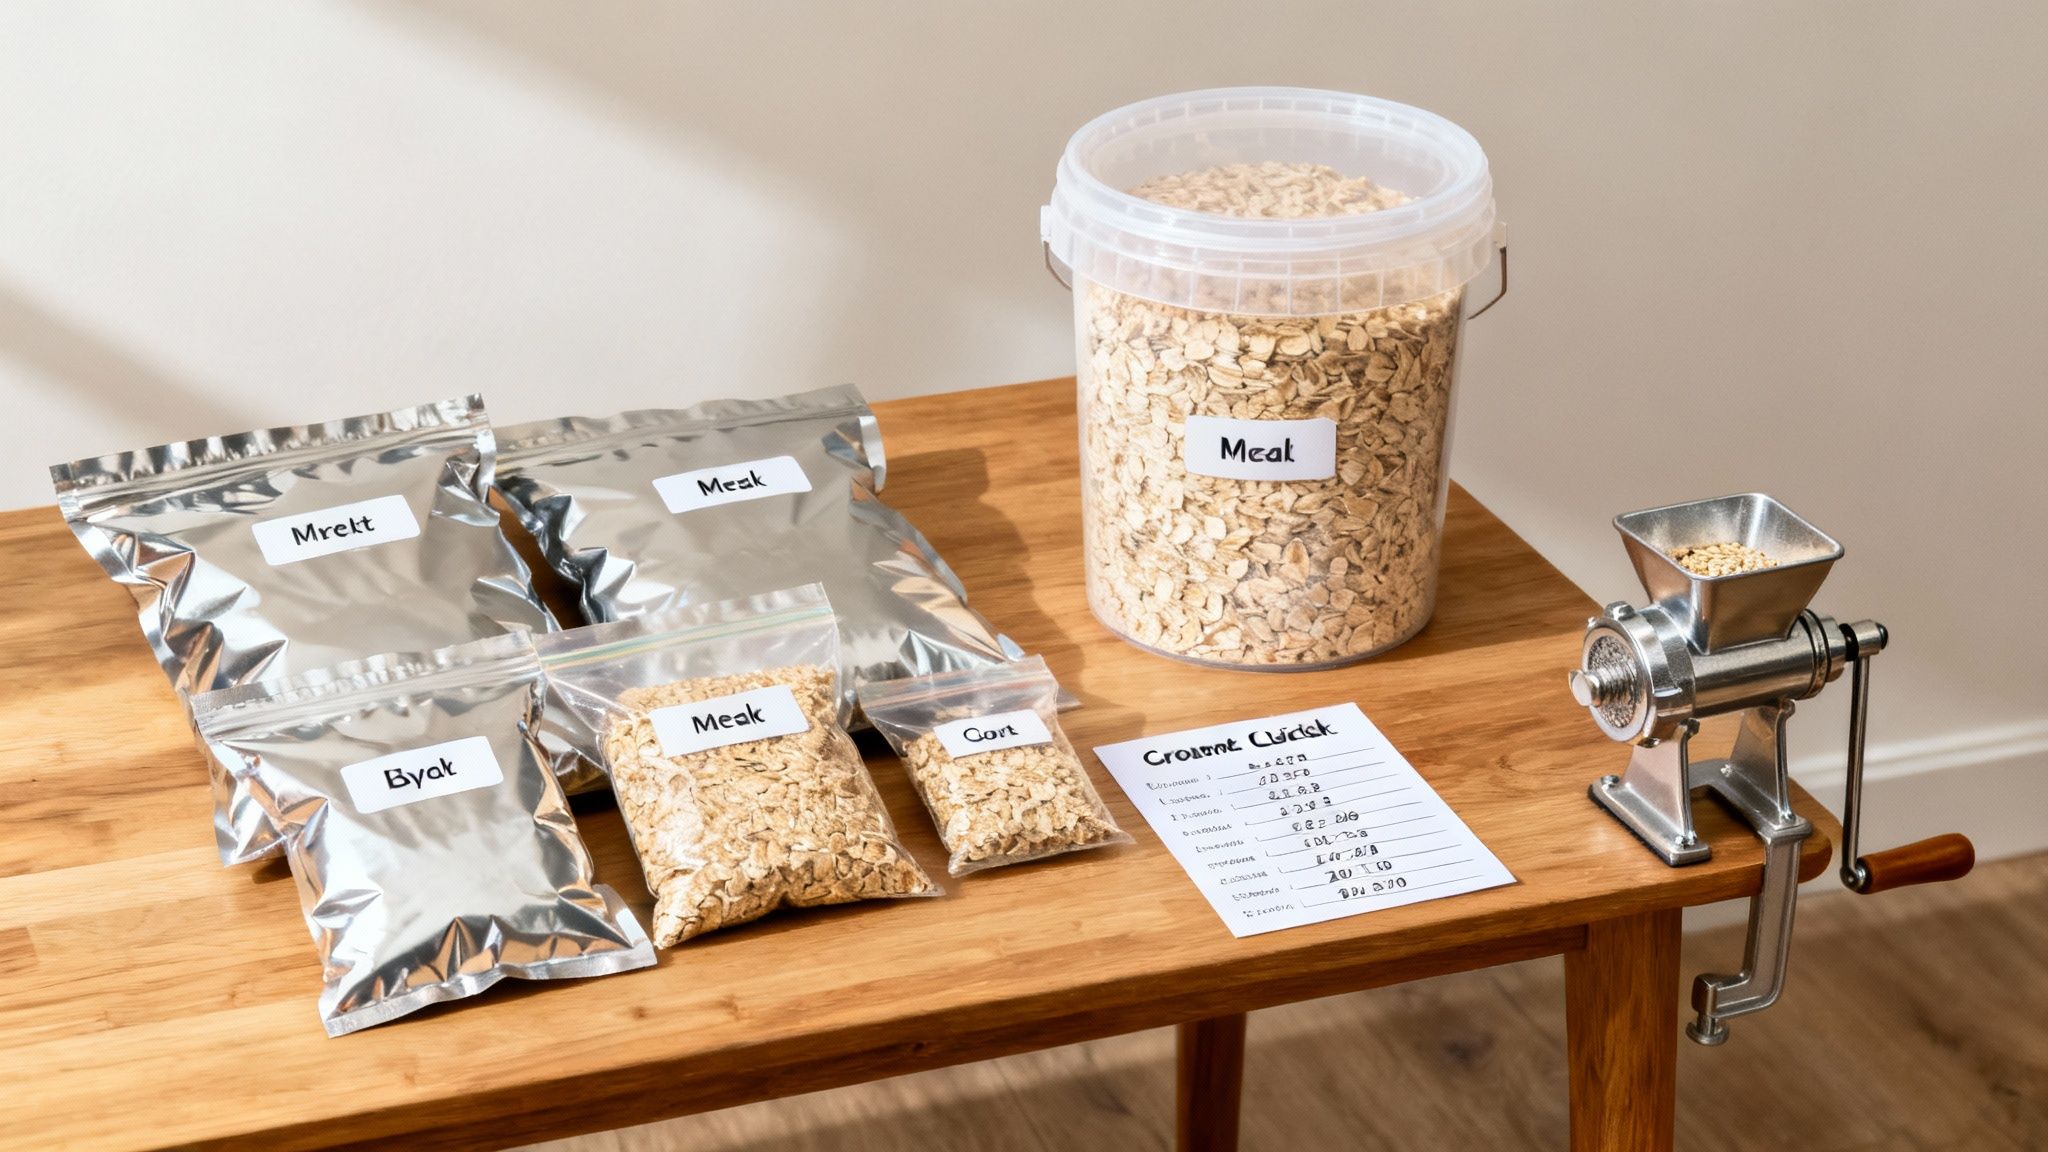
Creating Smart Food Kits
One of the most effective strategies is to assemble “meal kits” right inside a single Mylar bag. This simple trick removes all the guesswork when a stressful situation hits. Just grab one bag, and you’ve got the core of a meal ready to go.
- Pasta Night Kit (1-Gallon Bag): Pack two pounds of spaghetti (snap it in half to keep it from poking through the bag), a smaller Mylar pouch of dehydrated tomato powder, and another tiny pouch with your Italian spices and salt. Seal it all up in the gallon bag, and you’ve got a complete, shelf-stable dinner.
- Breakfast Oats Bucket (5-Gallon Bag): Start by filling a 5-gallon Mylar bag with rolled oats. Before sealing it, toss in smaller, separately sealed quart bags of brown sugar, cinnamon, and dehydrated apple slices. Just like that, a bulk staple becomes years of ready-made breakfasts.
This “kit” method transforms your storage from a random collection of ingredients into a functional, grab-and-go system. When you actually need a meal, all the thinking is already done.
To ensure your bug-out bag is fully prepared, refer to our list of essential bug-out bag items.
The Power of Labeling
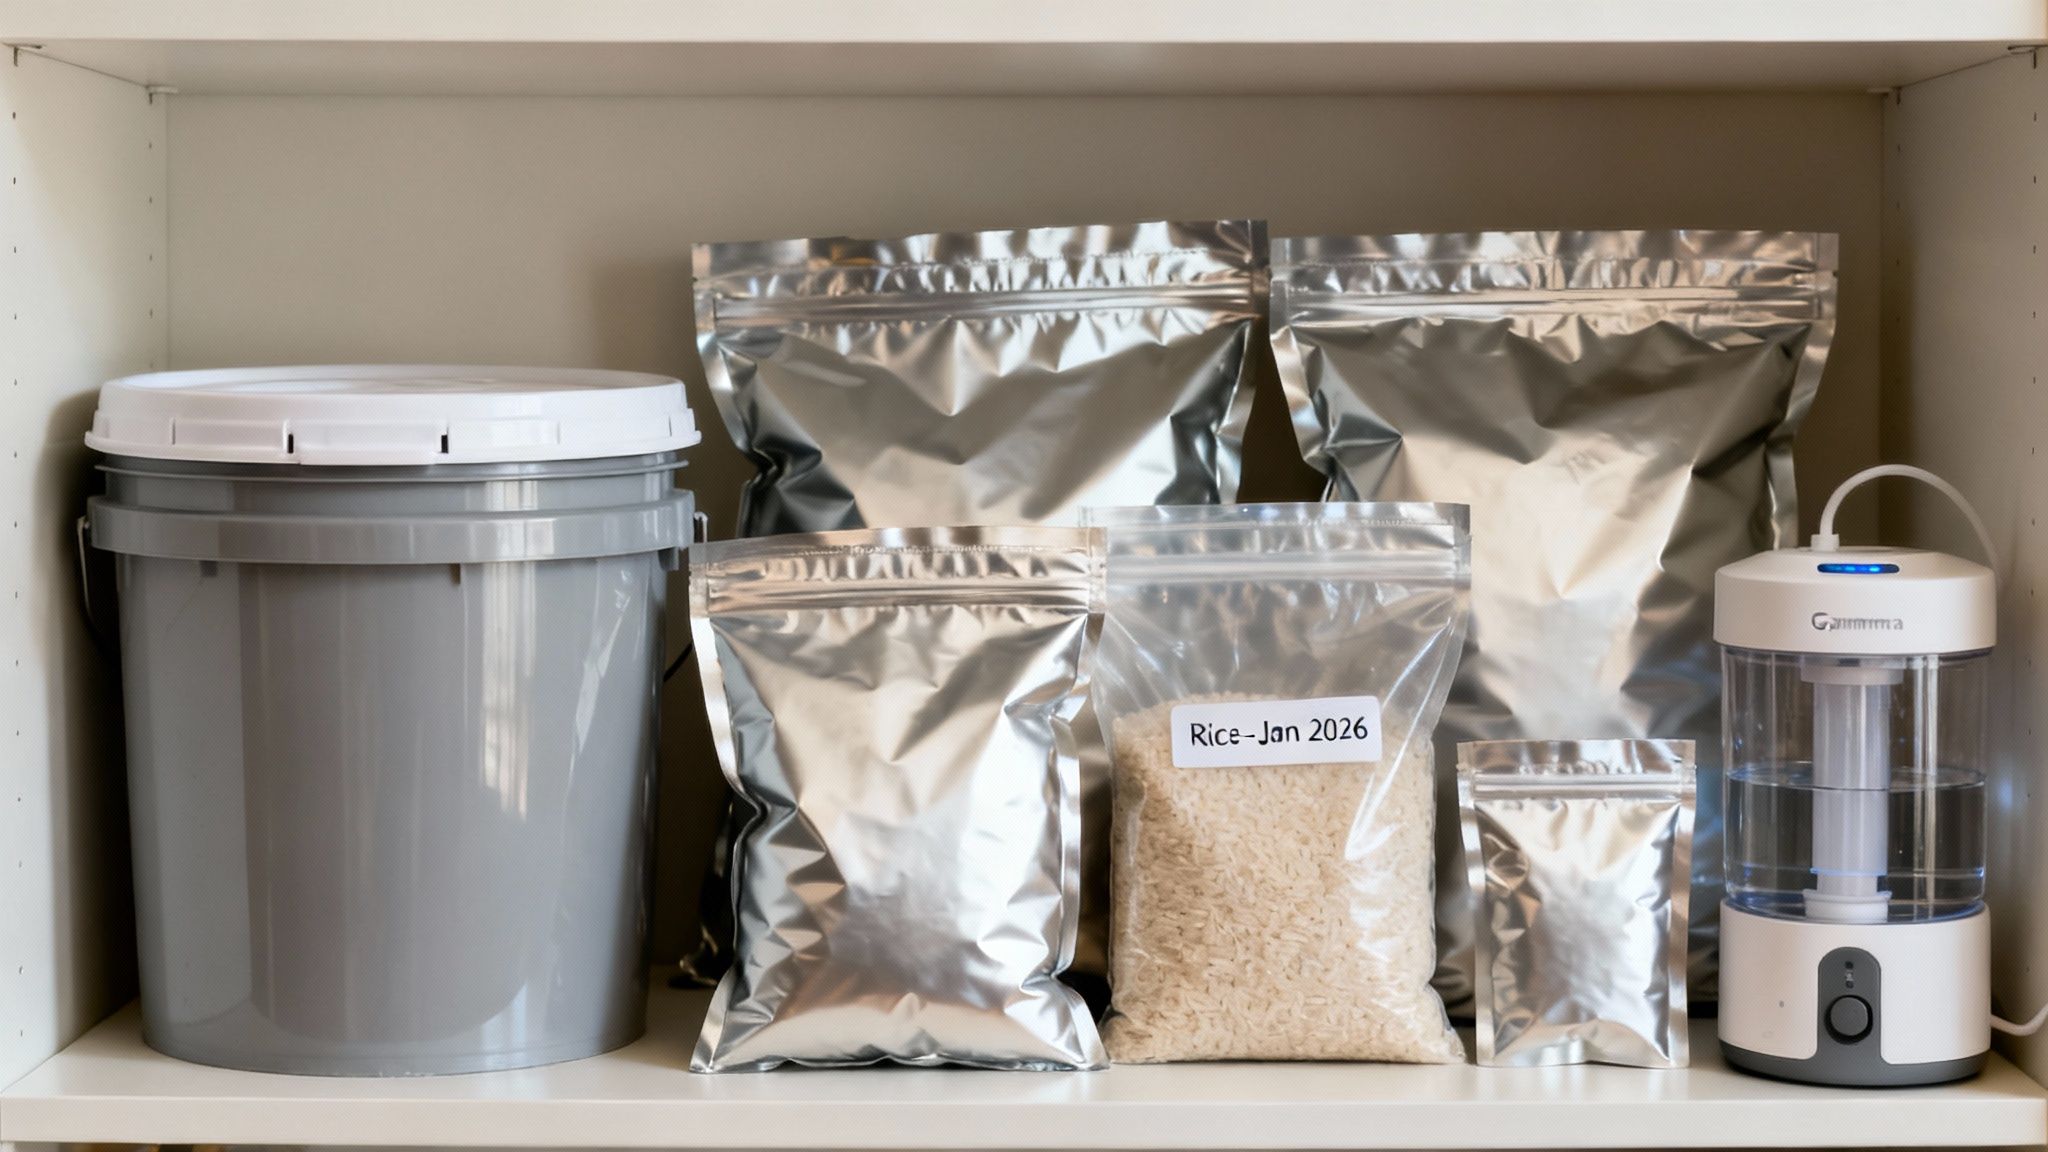
This step is non-negotiable, yet it’s shocking how often it gets overlooked. An unlabeled Mylar bag is a mystery box you don’t want to deal with later. You absolutely must label every single bag with two key pieces of info the second you seal it.
- Contents: Be specific. Not just “Beans,” but “Pinto Beans.”
- Date Sealed: Write the full month and year, like “October 2024.”
A permanent marker like a Sharpie is your best friend here. This simple habit makes it easy to practice “first in, first out” (FIFO) rotation and lets you see the age and contents of your entire supply at a glance.
Properly storing staple foods can yield incredible longevity. When correctly sealed in a Mylar bag with an oxygen absorber and stored in a cool, dark place, basic dry goods can far outlast their commercial packaging dates, remaining viable for 20 years or even longer.
Integrating with Other Preparedness Tools
Your Mylar bag food supply is just one piece of a much larger self-reliance puzzle. The best prep plans don’t just have one solution; they have an integrated system of tools that work together. For example, storing whole wheat berries gives you a much longer shelf life than pre-ground flour, which can go rancid in just a few months because of its natural oils.
But those wheat berries are useless without a way to process them. This is where a high-quality manual grain mill becomes the perfect partner to your food storage. A tough, reliable mill like the Wondermill Junior Deluxe can turn your stored wheat into fresh, nutritious flour without needing a single watt of electricity. It’s this synergy—long-lasting whole grains plus a dependable manual mill—that creates true food independence.
Estimated Shelf Life for Foods in Mylar Bags
Knowing how long different foods can last helps you prioritize what to buy and store. The table below is a general guide for common dry goods when you seal them correctly with oxygen absorbers in the best Mylar bags for food storage.
If you want to dig deeper into building your pantry with core staples, our guide on storing bulk rice and beans is a fantastic place to start.
| Food Category | Example Foods | Estimated Shelf Life (Years) |
|---|---|---|
| Grains | White Rice, Wheat Berries, Rolled Oats | 20-30+ |
| Legumes | Dried Beans (Pinto, Black), Lentils, Chickpeas | 20-30+ |
| Flours & Powders | White Flour, Powdered Milk, Corn Starch | 5-10 |
| Pasta | Spaghetti, Macaroni (Low Moisture) | 10-20 |
| Dehydrated Foods | Dehydrated Fruits & Vegetables | 5-20 |
| Freeze-Dried Foods | Freeze-Dried Meats, Fruits, Full Meals | 15-25 |
| Sugars & Salts | White Sugar, Honey Powder, Salt | Indefinite |
| Spices & Herbs | Whole Spices, Dried Herbs, Coffee Beans | 2-5 |
Keep in mind that foods with higher fat or oil content, like brown rice, nuts, or whole-wheat flour, have a much shorter shelf life because they can go rancid. Sticking with low-moisture, low-fat staples is the secret to building a food supply that will truly stand the test of time.
Avoiding Common Food Storage Mistakes
Learning from somebody else’s mistake is the best shortcut there is. Even with the perfect Mylar bags, a few simple slip-ups can completely trash your efforts, turning a decade’s worth of food into a huge disappointment. Let’s walk through the common blunders so you can sidestep them completely.
By understanding what goes wrong, you can build a storage plan that’s solid, dependable, and truly secure. Think of each mistake here as a lesson that protects your investment and ensures your food is ready when you need it.
Mismatching Oxygen Absorbers and Bag Size
This is, without a doubt, the number one failure point in the entire process. If your oxygen absorber is too small for your bag, it simply can’t soak up all the oxygen. Even a tiny bit left over is enough to let fats go rancid and vitamins degrade, hacking years off the shelf life you were counting on.
The good news? You can’t go too big with an oxygen absorber.
Key Insight: A larger-than-needed oxygen absorber just does its job faster and then goes dormant. When you’re in doubt, always grab the next size up. It’s a small price to pay for total peace of mind.
Storing Foods with High Oil or Moisture Content
Mylar bags are champions for preserving dry, low-fat staples. But they are absolutely the wrong tool for storing anything with high oil or moisture content for the long haul. Things like brown rice, nuts, whole wheat flour, and seeds contain natural oils that will go rancid, even in a zero-oxygen environment.
Likewise, any food with more than 10% moisture is a gamble you don’t want to take. That extra water can become a playground for nasty anaerobic bacteria—including botulism spores, which thrive without oxygen. Stick to bone-dry goods only.
Creating Punctures and Micro-Leaks
Even the toughest Mylar bags aren’t puncture-proof, especially from the inside. One of the most common ways people ruin their seals is by packing sharp-edged foods without any protection. These create tiny, almost invisible holes that compromise the whole bag.
- The Spaghetti Problem: Never just dump pasta like spaghetti or lasagna noodles into a bag. The sharp corners will absolutely press against the sides and poke through. The smart move is to pack them in a cardboard box first, or at least wrap the ends in thick paper towels before bagging them.
- Imperfect Seals: If you’re using a household iron or a hair straightener, it’s really easy to miss a tiny spot or apply uneven heat. This creates a micro-leak that slowly lets oxygen creep back in over weeks or months. Always run your fingers over the seal to feel for gaps, and get in the habit of making a second, redundant seal just behind the first one.
To get a better handle on what can go wrong, check out this detailed guide on the most common food storage mistakes to make sure your pantry is truly secure.
Improper Labeling and Organization
An unlabeled Mylar bag is a mystery box you don’t want to solve years from now. You will not remember if it’s white rice or powdered sugar, or whether you sealed it last year or five years ago. Every single bag needs to be clearly labeled with a permanent marker the second you seal it shut.
Your label must include two things:
- The exact contents (e.g., “Pinto Beans,” not just “Beans”)
- The date it was sealed (e.g., “Oct 2024”)
Without this simple discipline, you can’t practice the “first in, first out” rotation that’s essential for keeping your food supply fresh and usable. Avoiding these common pitfalls ensures all your careful planning and hard work will pay off when it truly matters.
Frequently Asked Questions About Mylar Bags
Once you get the hang of sealing and storing your food, a few common questions always seem to surface. Getting these details right is the final step in making sure your food storage plan is rock-solid. We’ll tackle those lingering “what if” scenarios here, so you can move forward with total confidence.
The goal is to go from just following steps to truly understanding why you’re doing them. That deeper knowledge is what lets you adapt and troubleshoot, protecting your valuable food supply no matter what comes your way.
Can I Reuse Mylar Bags and Oxygen Absorbers?
This is probably the most common question we see, and the answer is a firm “yes” for the bags and an absolute “no” for the absorbers.
You can definitely reuse Mylar bags. Just slice the bag open with a clean cut right below the existing heat seal. Once you’ve used the contents, wash the bag thoroughly with soap and water and let it dry completely. As long as you left enough room at the top, you can fill it up and create a new heat seal just like before.
Oxygen absorbers, however, are strictly a one-time-use item. The second they’re exposed to air, the iron powder inside starts to rust—a chemical reaction that can’t be stopped or reversed. Always, always use a fresh oxygen absorber every single time you seal a bag. It’s the only way to guarantee you’re removing all the oxygen.
What Is the Best Way to Store Sealed Mylar Bags?
Once your bags are sealed, where you put them matters just as much as how you sealed them. The perfect spot is cool, dark, and dry, with a stable temperature. Think of a basement, a closet on an interior wall, or a root cellar—basically, anywhere away from sunlight and big temperature swings.
For ultimate protection against pests and physical damage, the gold standard is to place your sealed bags inside food-grade 5-gallon buckets.
This double-barrier system gives you serious physical security. A determined rodent can and will chew right through a Mylar bag if it’s left out in the open, but they don’t stand a chance against a hard plastic bucket. This method also makes it a heck of a lot easier to stack, organize, and grab your food supply if you ever need to move it in a hurry.
When you seal those buckets with an airtight lid, you’ve created a nearly indestructible fortress for your food. This isn’t just a tip; it’s a core principle for building a truly resilient, long-term pantry.
Do I Have to Vacuum Seal Mylar Bags?
Nope. In fact, trying to use a typical vacuum sealer is not only unnecessary, but it usually doesn’t work well anyway. The real magic of this system is that the oxygen absorber does all the work for you in a process called passive vacuuming.
As the absorber does its job and scrubs the oxygen out of the bag, the atmospheric pressure outside pushes inward, causing the bag to shrink wrap itself tightly around the food. This is what creates that “vacuum-sealed” look without any extra equipment. Most common channel-style vacuum sealers, like a FoodSaver, are designed for their own special textured bags and just can’t get a proper, permanent seal on the smooth surface of a Mylar bag. A good, solid heat seal is all you need.
Are All Mylar Bags Safe for Food?
Absolutely not, and this is a critical point for your family’s safety. Only use bags that are clearly marked as “food-grade” and “BPA-free.” There’s a huge difference between Mylar made for industrial packaging and the material meant to be in direct contact with your food.
Industrial-grade Mylar might be treated with chemicals or made in facilities that don’t meet food safety standards. Over years of storage, those contaminants could leach into your food and pose a health risk. Any reputable supplier who serves the preparedness community will make these safety features clear. Always check the product description before buying—it’s a non-negotiable step to protect both your investment and your well-being.