A solid fallout shelter build comes down to three things: smart planning, tough construction, and stocking it right. Honestly, the success of your entire project is decided before you ever break ground. A realistic plan that accounts for your property, family, and budget is the only way to start.

Your Blueprint for Survival: Planning Your Shelter
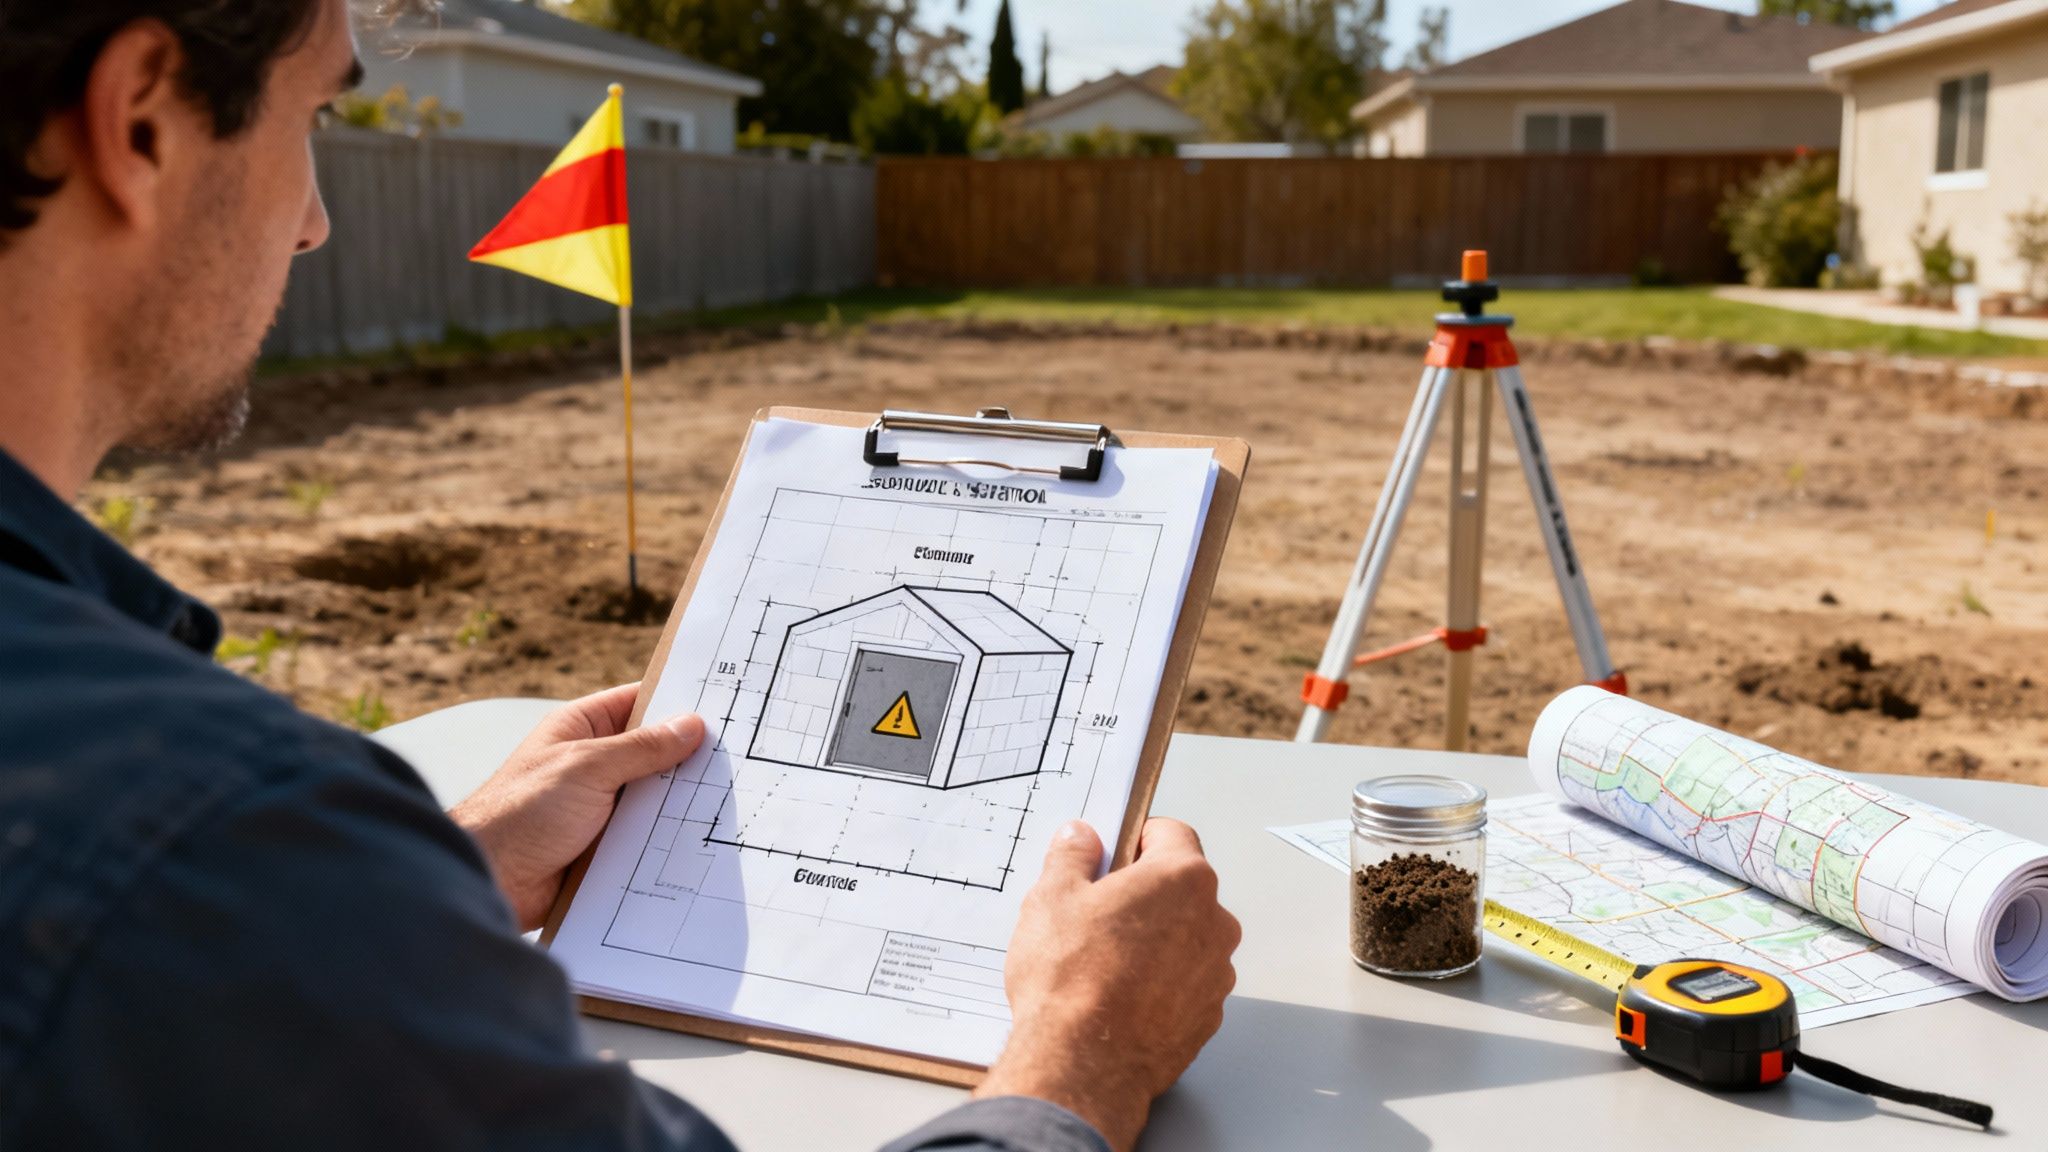
The choices you make during the planning phase will lock in your shelter’s safety, final cost, and whether it will actually work when you need it most. This isn’t just about digging a hole in the backyard; it’s about engineering a livable space that can shield your family from serious radiological threats.
First things first, let’s get the boring but essential stuff out of the way. Before you get too deep into designs, head down to your local municipal office. You need to know the rules—building codes, permits, and zoning restrictions. The dream of a hidden bunker ends fast if you’re hit with a stop-work order and fines. Don’t skip this step.
Assessing Your Property and Needs
The perfect spot for your shelter is dictated entirely by your land. You need to get familiar with your soil composition; sandy or loamy soil is a dream to excavate compared to dense clay or solid rock. You also have to know your water table. A high water table means you’ll be fighting a constant battle with leaks and flooding, which requires serious—and expensive—waterproofing.
Think about access, too. You’ll need a path for heavy equipment during the build, and later, a discreet but easy-to-use entrance for your family.
At the same time, you need to be brutally honest about what you’re building this for. A good emergency preparedness plan—including knowing how to prepare for natural disasters—will force you to answer the tough questions:
- Who is this for? A family of four has completely different space, air, and supply requirements than one or two people.
- How long do you need it to last? The baseline for a fallout event is a minimum of 14 days. This gives the most intense, short-lived radiation enough time to decay to more manageable levels.
- What are you protecting against? Is this purely for radiological fallout, or are you considering other threats that might influence the design?
Understanding Shelter Types and Protection Factor
Not all shelters are created equal, not by a long shot. The design you pick determines everything. The most critical metric here is the Protection Factor (PF). It’s a simple concept: a PF of 100 means you’re only being exposed to 1/100th of the radiation dose you’d get standing outside.
A higher Protection Factor is the ultimate goal. For meaningful protection against fallout, a minimum PF of 40 is often cited, but aiming for a PF of 100 or higher provides a much greater margin of safety.
This isn’t a new idea. During the Cold War, the Office of Civil Defense mandated that public shelters provide a PF of at least 100. That tells you just how important robust shielding is.
To help you decide, here’s a look at the three main approaches to shelter design.
Comparing Fallout Shelter Designs
This table breaks down the pros and cons of the most common shelter types. Your property, budget, and desired level of protection will steer you toward one of these options.
| Shelter Type | Protection Factor (PF) | Typical Cost | Construction Complexity | Key Advantages |
|---|---|---|---|---|
| Underground | Very High (1,000+) | High | Very High | Maximum radiation protection; most discreet. |
| Bermed (Earth-Covered) | High (100-1,000) | Medium | Moderate | Good balance of high PF and lower excavation cost. |
| Above-Ground | Low to Medium (40-100) | Low-Medium | Low | Easiest and cheapest to build; requires massive walls. |
Ultimately, an underground shelter offers the best protection if you can manage the cost and complexity. However, a well-designed bermed shelter is a fantastic and more accessible option for many people, providing excellent safety without the challenges of deep excavation. Above-ground shelters are really only a last resort for fallout protection, as achieving a meaningful PF is difficult and expensive.
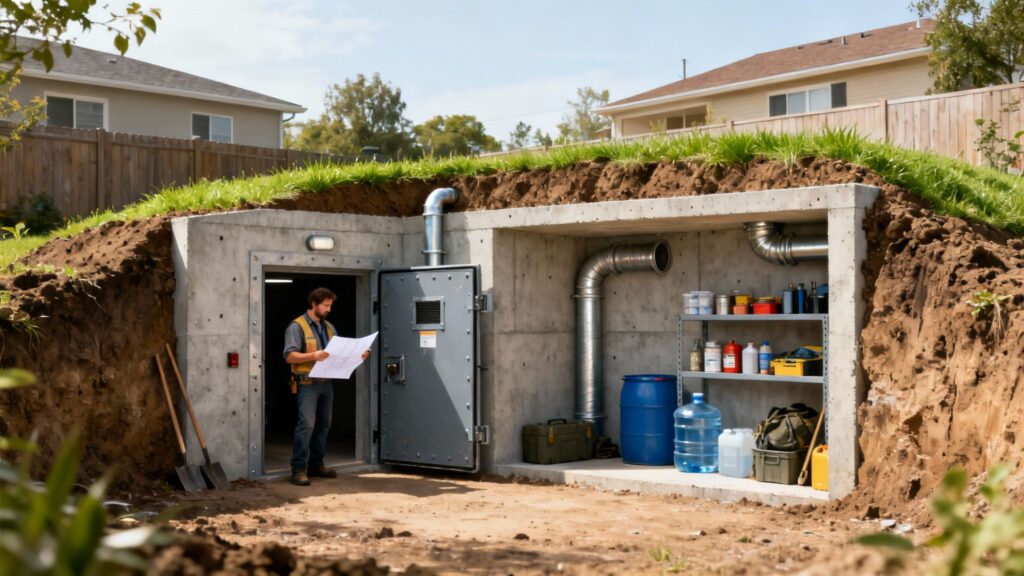
From Foundation to Fortress: Core Construction Methods
With your blueprints finalized, it’s time to break ground and turn that plan into a physical reality. This is where the real work begins—the phase where theory becomes a tangible fortress. The strength of your shelter comes down to the quality of your work right here, right now. No shortcuts.
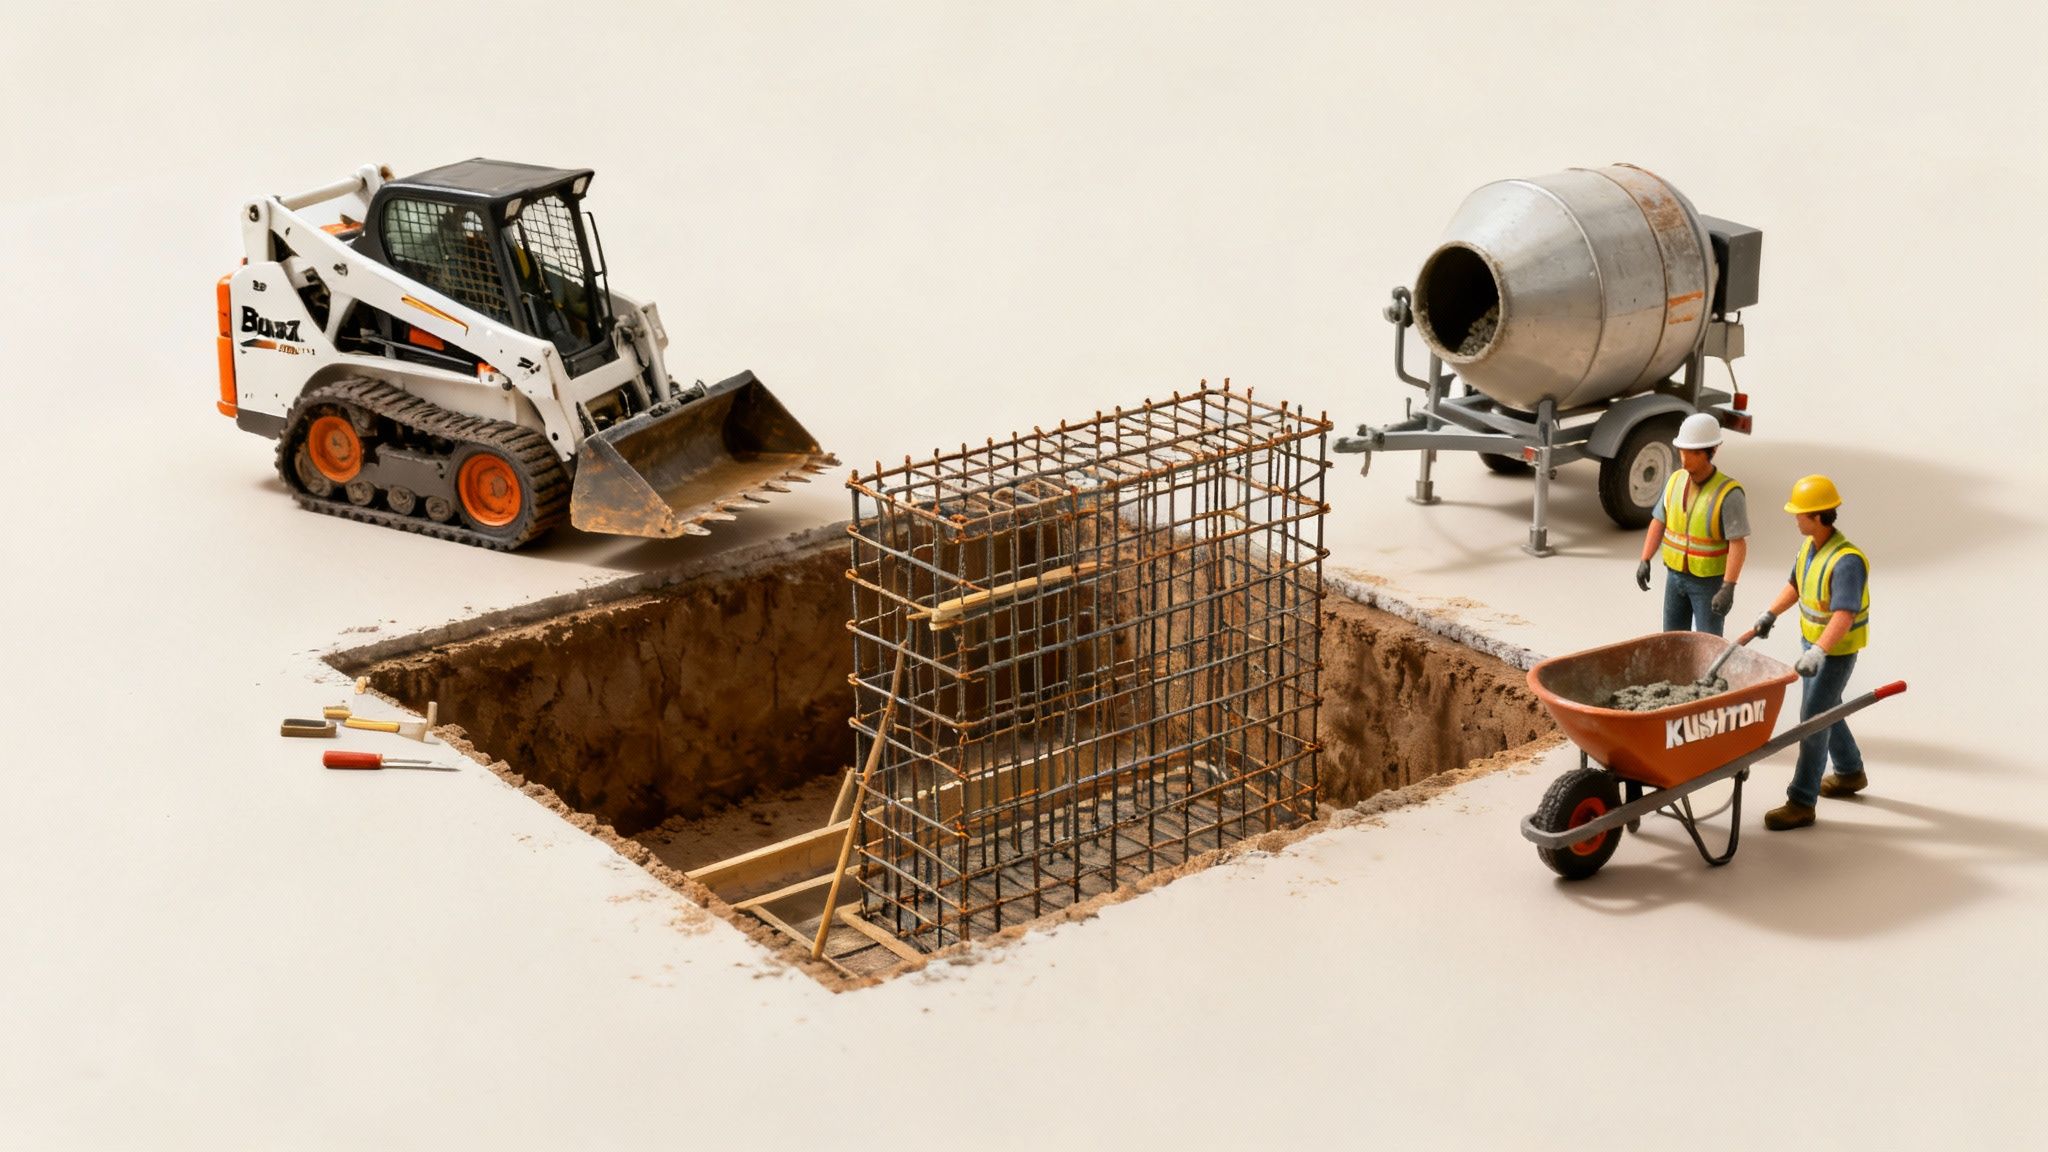
Excavation is your first major task. For any underground or earth-bermed design, you’re going to be moving a serious amount of dirt. For most DIY builders, renting a compact machine like a Bobcat skid-steer is the only practical option unless you enjoy back-breaking labor. Always dig the hole wider than your shelter’s footprint; you’ll need that extra space for waterproofing and other exterior work.
Once you’ve got your hole, the foundation comes next. This is almost always a thick, reinforced concrete slab that anchors the entire structure. Don’t even think about pouring concrete until you have a perfectly level, compacted gravel base. Skimping here is a recipe for settling and structural failure down the road.
Choosing Your Core Building Materials
The materials you select for the walls and ceiling are what will stand between you and the threat. This decision defines the shelter’s ultimate strength and shielding capability, and each option has its own pros and cons.
There’s a reason reinforced concrete is the gold standard. It has incredible compressive strength, and when you pair it with a grid of steel rebar, it becomes ridiculously resistant to blast pressure and radiation. If you’re learning how to build a fallout shelter, the relationship between concrete thickness and your target Protection Factor (PF) is the most critical calculation you’ll make.
Mixing that much concrete yourself is a monumental job. A small electric Kushlan mixer can be a lifesaver, ensuring a consistent, quality mix batch after batch. But for the foundation or a large wall pour, do yourself a favor and just order a concrete truck.
Of course, concrete isn’t your only choice:
- Steel Panels: A pre-fabricated steel shelter is a fantastic, if pricier, route. You get high structural integrity and a much faster installation time. The trade-off is that every single weld has to be perfect to ensure a complete seal.
- Concrete Blocks (CMUs): You can use standard cinder blocks, but they have to be filled solid. Every core must be grouted with concrete and contain vertical rebar to provide the necessary mass for proper shielding.
- Earth-Bag Construction: This is a low-cost, high-labor method using soil-filled polypropylene bags stacked like masonry. It’s surprisingly resilient and provides excellent thermal mass and radiation shielding.
Weighing the trade-offs between these different approaches is a big step. Our guide on emergency shelter options can give you a deeper look into the specifics of each method.
Ensuring a Dry and Secure Structure
A strong shelter that leaks is a failed shelter. Water is relentless, and a robust waterproofing membrane is your only real defense. This gets applied to the exterior of your shelter walls before you backfill the soil.
This means coating the walls with a thick, seamless membrane—think liquid-applied coatings or heavy-duty bitumen sheets. A dimple board drainage mat is another great layer of protection that helps channel water away. Whatever you do, don’t cut corners here. Fixing a leak after the shelter is buried is a nightmare you don’t want to live.
Key Takeaway: Your shelter’s integrity is only as strong as its weakest point. A poorly sealed joint, a weak weld, or an inadequate foundation can compromise the entire project. Meticulous attention to detail is paramount.
Just as critical as keeping water out is securing the way in. The doorway is your single biggest structural vulnerability. A standard door from a hardware store offers zero protection from a blast wave or radiation. You absolutely must install a purpose-built blast door.
These are made from thick plate steel with massively reinforced frames anchored deep into the concrete. They use heavy cam-latch mechanisms to create a gas-tight seal when closed. This door is one of the most important investments in your entire build. Installing it perfectly plumb and ensuring it’s fully integrated into the wall is a job that demands absolute precision.
Essential Life Support Systems: Air, Water, and Power
A perfectly shielded shelter is nothing more than a concrete tomb without the systems that keep you alive. Once that hatch is sealed, your survival depends entirely on three pillars: breathable air, safe water, and reliable power.
These aren’t optional extras or things you figure out later. They have to be designed into the shelter from day one. If you neglect even one, the entire project is pointless. A thick wall of concrete won’t save you from suffocation, dehydration, or a powerless blackout. This is where your shelter goes from being a passive structure to an active life-support capsule.
To understand the broader concept of self-sufficiency, review our guide on what is off-grid living to see how this philosophy applies to your shelter’s design and operation.
Securing Your Air Supply with NBC Filtration
After a fallout event, the air outside is the enemy. It’s saturated with microscopic radioactive particles that, if inhaled, will cause severe sickness or death. A standard HVAC filter or a dust mask is completely useless against this threat. You need a specialized Nuclear, Biological, and Chemical (NBC) air filtration system. No exceptions.
These systems are non-negotiable. They work by creating positive pressure inside your shelter. A blower pulls outside air through a heavy-duty filter bank—usually a pre-filter, a HEPA filter, and an activated carbon filter—before pumping the clean air inside.
This constant flow of purified air pushes outward through any tiny gaps, preventing contaminated air from ever seeping in. It’s the same concept used in surgical cleanrooms. Reputable manufacturers like Andair or American Safe Room build systems specifically for this purpose, and many include a manual hand-crank backup for a worst-case power failure.
Your NBC filtration system is the literal lung of the shelter. It’s not a luxury item to consider but a fundamental piece of equipment that makes the space survivable.
This isn’t some fringe idea. Just look at Switzerland, where civil defense laws have long required nuclear shelters in new residential buildings, rated to withstand a 12-megaton blast from 700 meters away. Their national strategy is a serious testament to how vital these life support systems truly are.
Water Storage and Purification Strategies
You can last weeks without food, but only a few days without water. This means your shelter needs a two-pronged approach to hydration: long-term storage and a reliable way to purify water from questionable sources.
The simplest starting point is storing water in dedicated, BPA-free containers. The baseline rule is one gallon of water per person, per day, covering both drinking and basic hygiene. For a family of four planning for a 14-day stay, that’s 56 gallons at a bare minimum. Frankly, you should aim for double that.
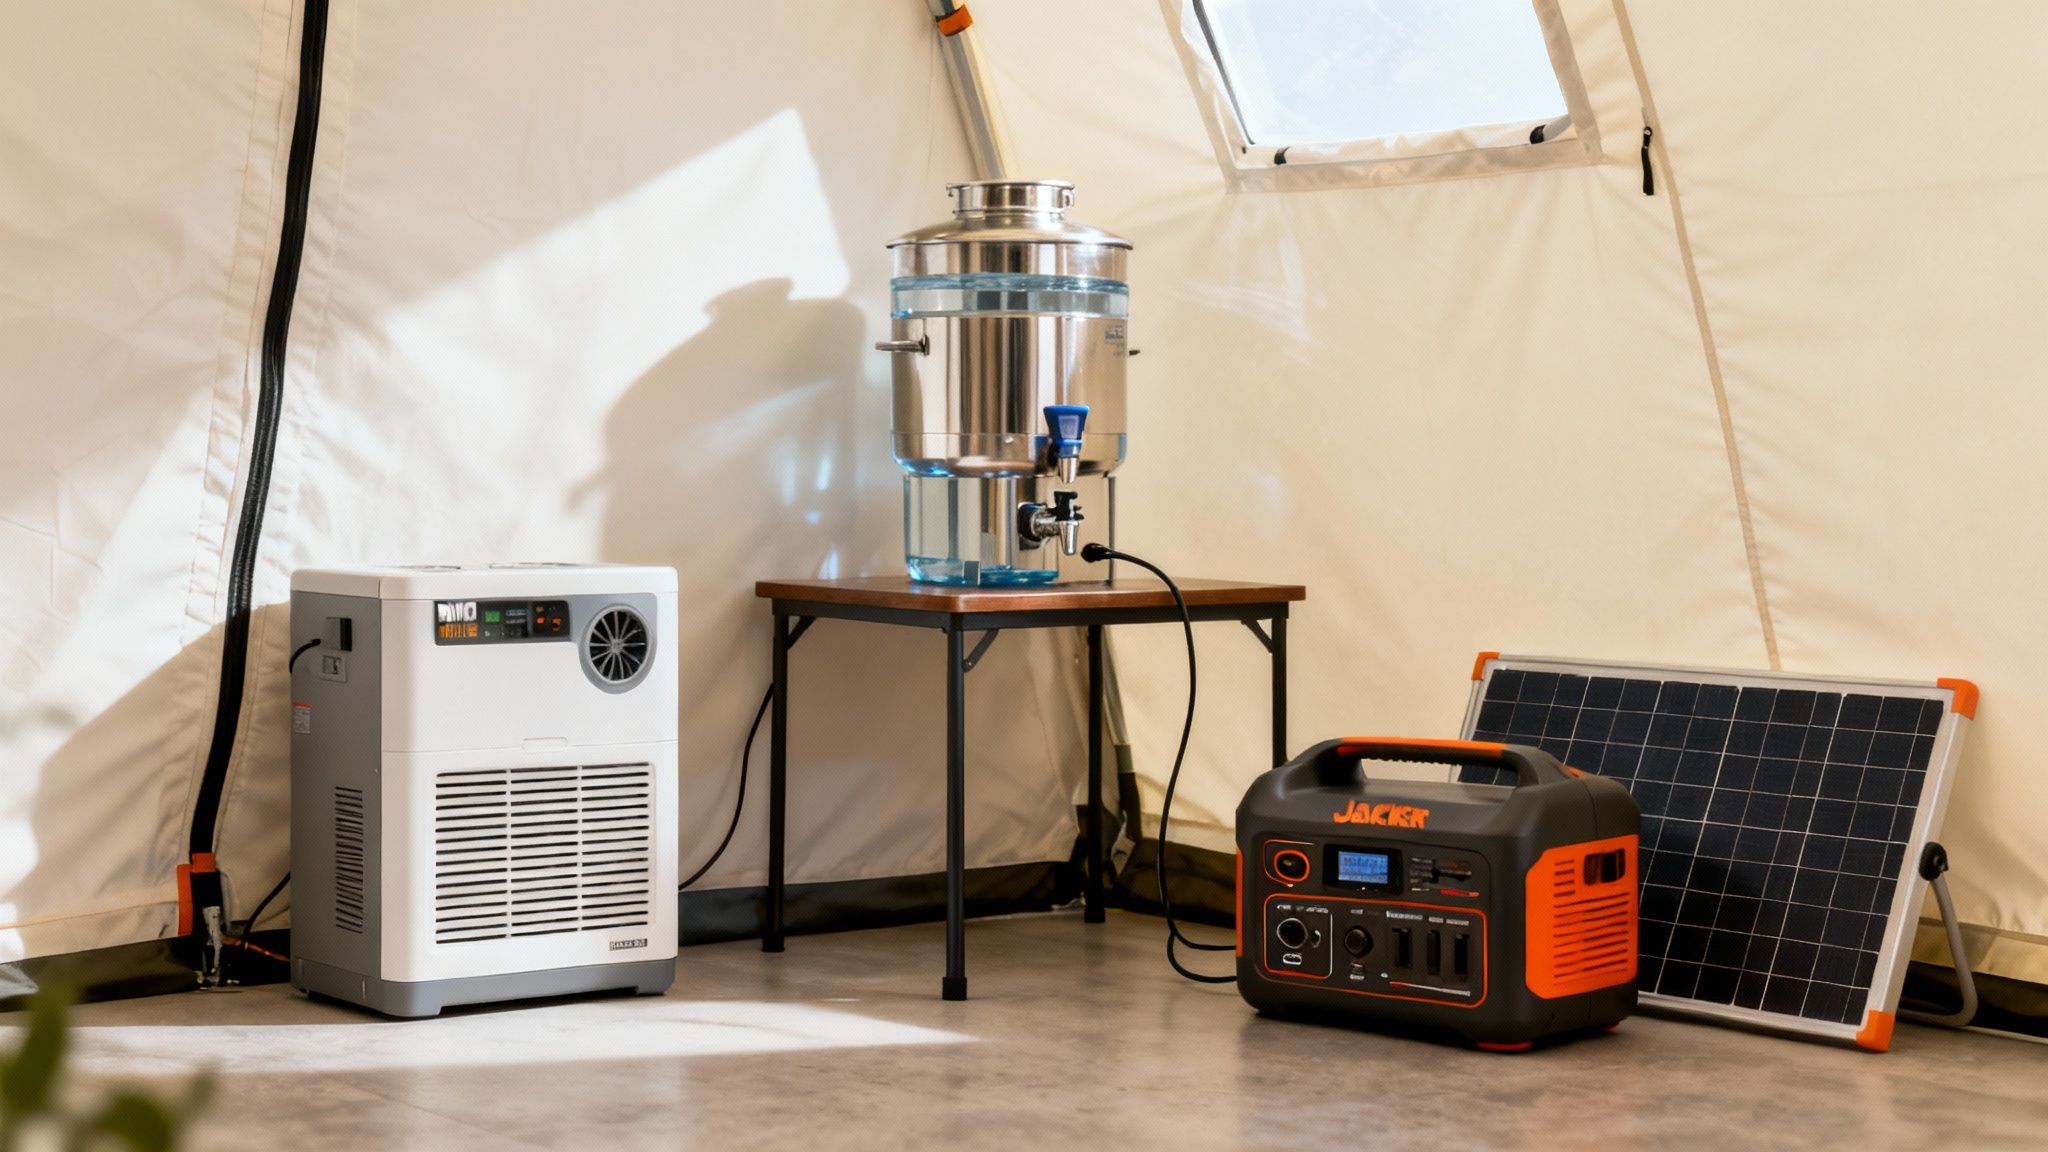
But what happens if you need to stay sealed in for longer than you planned? That’s when a high-capacity, gravity-fed water filter becomes your best friend. Something like a Big Berkey can strip pathogenic bacteria, cysts, and chemical contaminants from nearly any water source, all without electricity. It’s the perfect backup. You can dive deeper into different water purification methods to find what best fits your setup.
Creating a Resilient Off-Grid Power System
Modern survival is deeply tied to electricity. It runs your air filtration, lights, communication gear, and any other critical devices. The grid will be the first thing to go in a major crisis, so your shelter absolutely must have its own independent power source.
You’ve got two main routes for off-grid power:
- Solar Generators: These aren’t really generators; they’re large battery banks that can be recharged with solar panels. Brands like Jackery or Grid Doctor 3300 EMP make portable power stations that are silent, fume-free, and ideal for running sensitive electronics and essential systems inside the shelter.
- Conventional Generators: A gas or diesel generator gives you massive power output but has to be operated outside because of deadly carbon monoxide fumes. You’d need to build a secure, shielded, and ventilated enclosure for it and figure out a safe way to run the power inside.
For most people, a hybrid approach is the smartest way to go. Use a solar generator for your primary, low-draw needs inside, and keep a conventional generator in a protected spot outside as a high-power backup. And one last critical point: all your sensitive electronics, especially the power system itself, need to be stored in an EMP-proof container or Faraday cage. A nuclear event can produce an electromagnetic pulse that will fry unprotected circuits instantly.
Beyond just power generation, understanding off-grid living essentials will help you design a shelter that functions as a truly independent system.
Stocking and Outfitting for Long-Term Habitation
You’ve done the hard part. The concrete is poured, the life-support systems are humming, and your shelter is a secure shell. But an empty bunker is just a box. It’s what you put inside that turns it into a livable sanctuary.
Outfitting your shelter is all about thinking through every single need, from the obvious stuff like food and water to the small things that preserve your health and sanity. You’re preparing for a scenario where running to the store isn’t an option.
The initial goal is to be fully self-sufficient for a minimum of 14 days. This two-week window is absolutely critical—it’s the time needed for the most dangerous, short-lived radioisotopes in fallout to decay to less threatening levels. Space is at a premium, so every item you bring inside has to earn its place.
Managing Sanitation in a Sealed Environment
Let’s talk about the least glamorous but most important part of long-term shelter life: sanitation. Get this wrong, and you’ve created a sealed environment perfect for spreading disease. Your shelter could become more dangerous than the world outside. You need a simple, reliable, and completely contained solution.
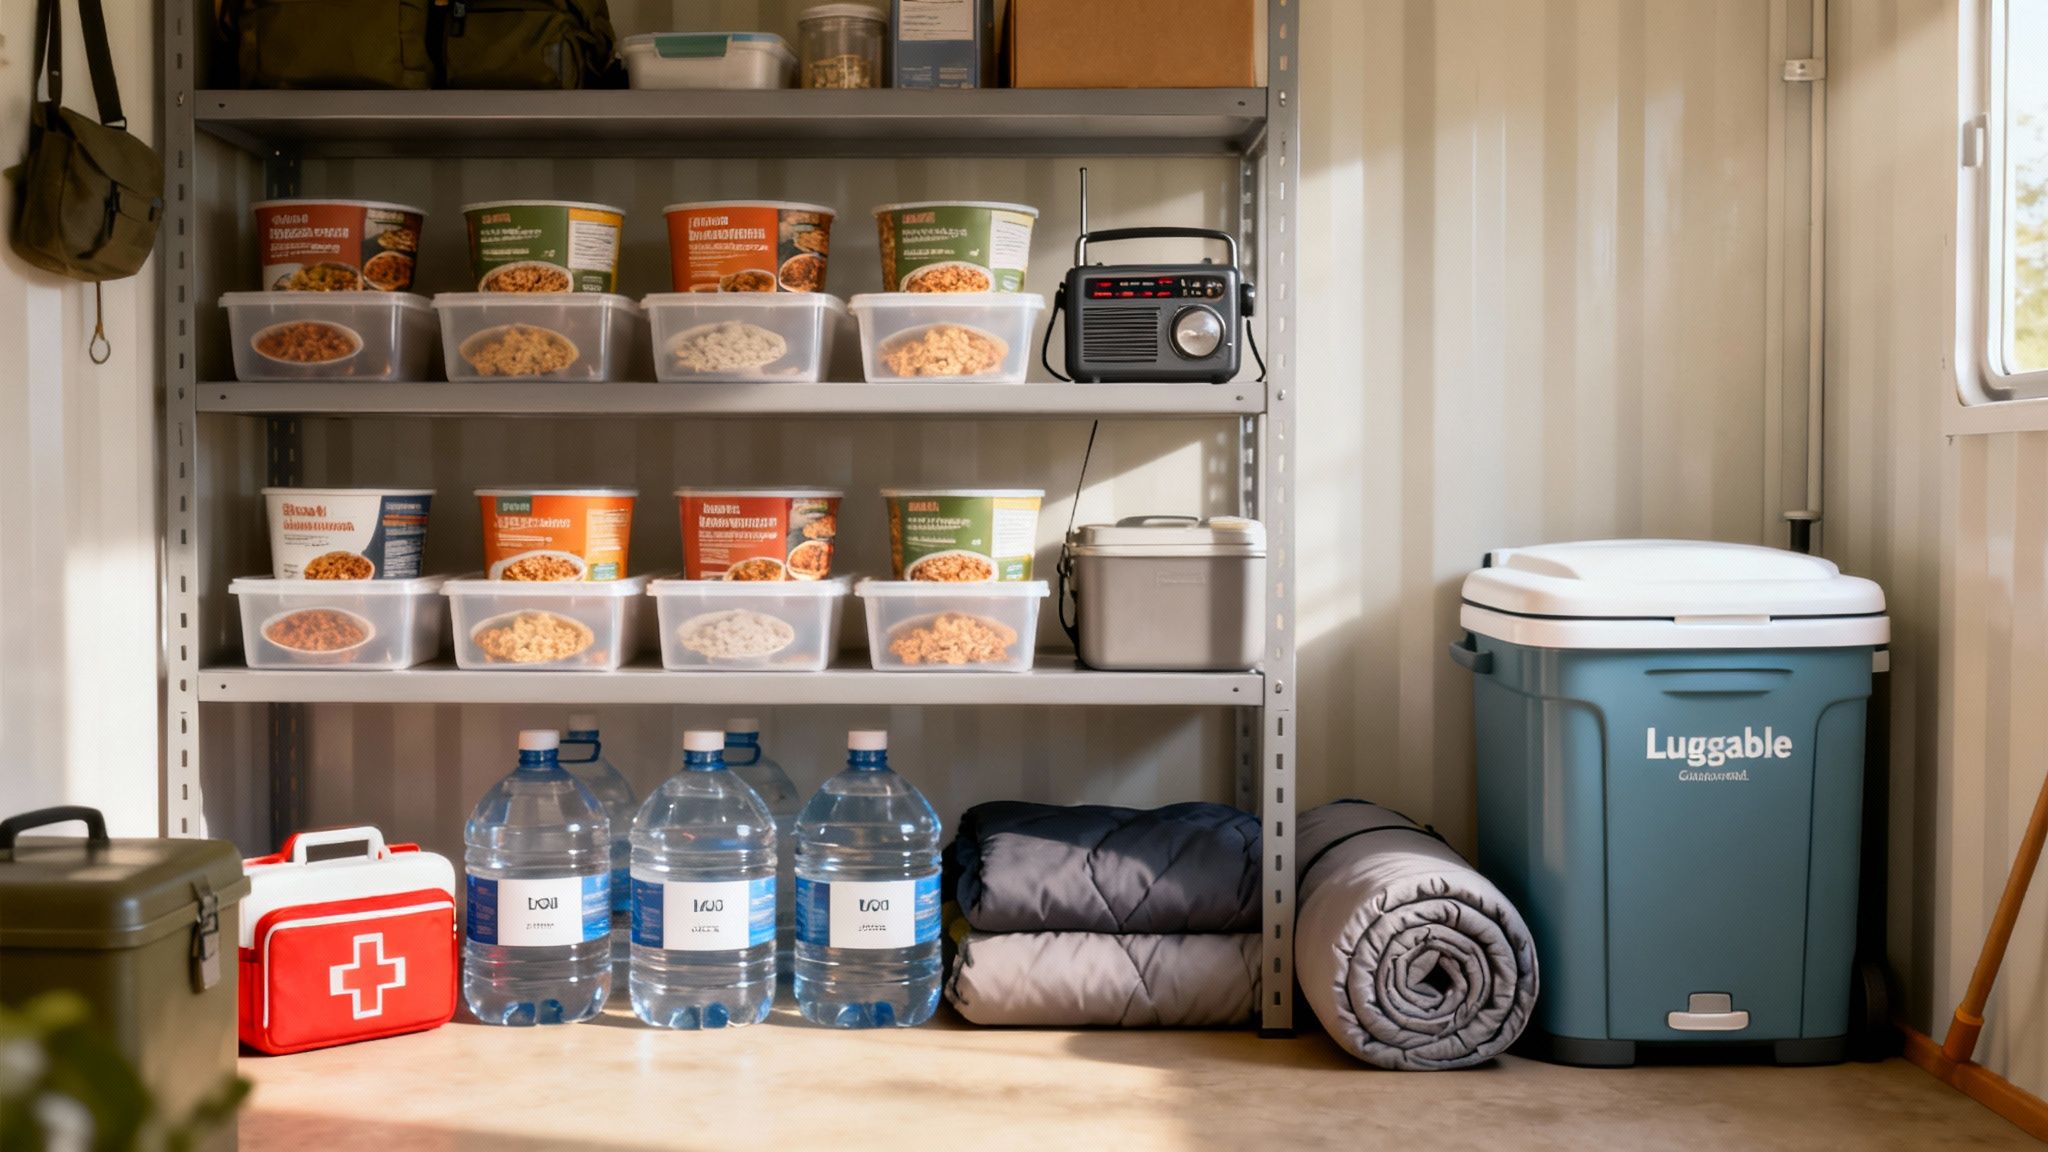
For most people, a basic chemical toilet is the best place to start. A simple setup like the Luggable Loo—essentially a sturdy bucket with a proper toilet seat and a tight-sealing lid—is a popular choice because it’s dead simple. Pair it with disposable waste bags and the right chemicals to control odor and break down waste, and you have an effective short-term fix.
If you’re planning for longer-term scenarios, it’s worth looking at composting toilets. These units separate liquids from solids, which dramatically reduces odor and helps the waste decompose. They’re a bigger upfront investment and require their own dedicated vent line to the outside, but for extended stays, they are vastly superior. You’ll reduce waste volume and won’t be dependent on a finite supply of chemicals.
Calculating Your Food and Water Needs
Food and water are the fuel that will keep you and your family going. The priority here is non-perishable food that doesn’t need a refrigerator and requires little, if any, water to prepare. You’re aiming to stock enough calories to keep everyone healthy and energized. A good rule of thumb is 2,000 to 2,500 calories per adult, per day.
Freeze-dried meals are the gold standard for a shelter pantry. They’re incredibly lightweight, have a staggering shelf life—often 25 years or more—and retain a surprising amount of their nutritional value. Companies like Mountain House or Augason Farms have this down to a science, offering everything from single-serving meal pouches to bulk #10 cans of ingredients.
Pro Tip: Don’t just buy a pallet of food you’ve never tasted. Order a few samples and actually try the meals before you’re in a crisis. Discovering your family can’t stand the taste of your entire food supply when you’re locked in a bunker would be a serious blow to morale.
Beyond the ready-made meals, you’ll want to stock up on dense, long-lasting staples:
- Grains: White rice, oats, and pasta are cheap, calorie-dense, and store forever.
- Legumes: Dried beans and lentils are your go-to for protein and fiber.
- Fats: Canned meats, peanut butter, and cooking oils are vital for feeling full and maintaining energy levels.
- Comfort Items: Don’t underestimate the power of coffee, tea, hard candy, or powdered drink mixes. These small comforts can make a world of difference for your mental state.
Building out your food supply can seem daunting, but you can get a solid start by learning the best practices for long-term food storage and tailoring a plan to your family’s tastes.
Assembling Your Essential Supplies and Tools
With food and sanitation handled, the final layer is everything else you need to live, stay safe, and keep from going stir-crazy. I recommend organizing these items into clearly labeled, waterproof bins so you can find what you need, when you need it.
Your checklist should be exhaustive and cover several key areas:
- First-Aid: You need more than a box of bandages. A full trauma kit is non-negotiable. This means serious wound care supplies, splints, tourniquets, and a good supply of any prescription medications your family relies on.
- Communications: A simple hand-crank emergency radio is essential for getting information from the outside world without depending on a power source.
- Lighting: Have multiple options. LED lanterns and headlamps are great, but make sure you have piles of spare batteries. Chemical light sticks are a fantastic, safe backup that lasts for hours.
- Bedding and Clothing: Warm blankets or sleeping bags are a must. Everyone should also have at least one full change of durable, comfortable clothing.
- Tools: A quality multi-tool, a roll of duct tape, a crescent wrench (for shutting off utilities if needed), and a basic toolkit will let you handle most minor repairs that might pop up.
For a comprehensive breakdown of what belongs in your shelter, refer to our complete disaster supply kit guide that covers every category in detail.
Maintaining Readiness with Drills and Upkeep
Getting the shelter built is a huge milestone, but the job isn’t done just because the last screw is tightened. Think of your fallout shelter as a living system. It needs regular attention to make sure it works perfectly when your life is on the line. Building a shelter and then forgetting about it is like buying a lifeboat but never checking it for leaks.
This final phase is all about shifting from construction to a constant state of readiness. It’s a cycle of maintenance, security, and practice. This is what turns a concrete box into a familiar, life-saving refuge instead of a dark, unfamiliar hole in the ground when things go sideways.
Concealment and Operational Security
The safest shelter is the one nobody knows exists. This is where Operational Security, or OPSEC, comes in. It’s the simple practice of not broadcasting your preparations. You don’t want your shelter to become common knowledge.
- Hide the Entrance: Your first and best line of defense is a hidden entrance. Think creatively. Hide it inside a garden shed, under a false floor in your workshop, or behind a fake wall in the basement.
- Camouflage Air Vents: Ventilation pipes are a dead giveaway. Disguise them to look like plumbing vents or part of a septic system. You can also hide them inside dense bushes or a decorative rock pile.
- Keep Quiet: Be incredibly careful about who you tell. The more people who know, the higher the risk that word gets out, especially in a crisis.
A low profile isn’t about paranoia—it’s about maintaining control. During a widespread emergency, a known shelter can easily become a target for the desperate and unprepared. That’s a security nightmare you want to avoid at all costs.
Your Routine Maintenance Checklist
Just like your car, your shelter’s systems need routine check-ups. Set up a simple calendar to track these tasks because consistency is everything. Small, ignored problems can snowball into major system failures when you can’t afford them.
A quarterly check-in is a great starting point for the most critical components.
- Ventilation Test: Fire up your NBC filtration system and let it run for at least 30 minutes. Listen for any strange noises, feel for strong airflow, and give the filters a quick look for any moisture or damage.
- Battery Bank Inspection: Check the charge level on your batteries, whether it’s a portable solar generator or a large deep-cycle bank. Make sure the terminals are clean and all connections are tight.
- Structural Walkthrough: Grab a good flashlight and do a slow, careful inspection. Look for any new cracks in the concrete, signs of water seepage, and check the blast door’s gasket for cracks or brittleness.
On an annual basis, you’ll need to rotate your perishable supplies. This is non-negotiable for keeping your food and medical gear effective. For a deeper dive, check out our detailed guide on emergency kit maintenance, which covers everything from food and water to first aid.
Practicing Your Emergency Plan
A plan is just a piece of paper until you put it into action. You absolutely must run drills with your family. The goal is to build muscle memory so that getting to the shelter is fast and automatic, even when you’re under extreme stress.
Make your drills realistic. Time yourselves getting from different parts of the house to the shelter entrance. Does everyone know their job? Who grabs the go-bags? The house needs to be locked down—who handles that? And who secures the blast door?
Once inside, practice using the equipment. Show everyone how to manually operate the air filtration, how to use the radio, and where the fire extinguisher is. This familiarity eliminates panic and transforms your family from a group of scared individuals into a cohesive team. Practice is what turns a structure into a tool—one you know how to use to save your lives.
Common Questions About Building a Shelter
Taking on a project this big always stirs up a lot of questions. Getting clear on the details now can save you a world of hurt—and a ton of cash—down the line. You want to be sure every ounce of effort results in a shelter that actually works.
Let’s walk through some of the most common questions that come up when people start seriously looking into building a fallout shelter. We’ll cover everything from budget and timelines to the nitty-gritty technical details.
How Much Does a Fallout Shelter Cost
Let’s be blunt: building a proper fallout shelter is a major investment. The final price tag can swing wildly based on your approach. A bare-bones, DIY build using materials like concrete blocks or earth bags might start in the $20,000 to $40,000 range, and that’s assuming you’re doing most of the heavy lifting yourself.
If you go the professional route with a prefabricated steel or concrete unit, you’re looking at a completely different ballpark. These typically run from $60,000 to well over $150,000, depending on size, depth, and features.
Several key factors will drive your final cost:
- Excavation and Soil: Digging in soft loam is one thing; blasting through solid rock is another. The tougher the ground, the higher the price.
- Core Materials: Reinforced concrete and prefabricated steel are the gold standards, but they come with a premium price tag compared to cinder blocks.
- Life Support: This is not an area to skimp. A top-tier NBC (Nuclear, Biological, Chemical) air filtration system from a trusted brand like Andair can easily cost thousands of dollars all by itself.
- Labor: If you’re not a seasoned builder, professional labor will be a significant chunk of your budget.
If cost is a major concern, our guide on prepping on a budget offers strategies to prioritize your spending and phase your build over time.
How Long Should You Plan to Stay Inside
The absolute minimum stay you need to plan for is 14 days. This isn’t an arbitrary number. After two weeks, the most dangerous, short-lived radioactive isotopes from fallout will have decayed to roughly 1% of their initial intensity.
At the two-week mark, the immediate radiation threat drops dramatically. This makes very short, essential trips outside significantly less dangerous.
A more prudent plan, however, would be to provision for at least 30 days. This buffer gives you a much wider margin of safety to handle any unexpected delays or slower-than-expected decay rates. Your ability to stay longer is really only capped by the amount of food, water, and sanitation supplies you’ve stored.
Fallout Shelter vs. Blast Shelter: What’s the Difference
People often use these terms interchangeably, but they are designed to counter very different threats. Getting this right is critical.
A fallout shelter has one primary job: shield its occupants from ionizing radiation. Its main defense is sheer mass—thick layers of concrete, earth, or other dense materials that physically block gamma rays. It isn’t necessarily built to withstand the concussive force of an explosion.
A blast shelter, on the other hand, is engineered from the ground up to survive the colossal overpressure and ground shock from a nearby detonation. This requires much deeper burial, heavily reinforced construction, and often features arched or rounded designs to deflect the blast wave. While almost all blast shelters are excellent fallout shelters by default (thanks to their thick construction), the reverse is definitely not true.
Can I Just Convert My Basement
Using an existing basement is a common first thought, but it’s an idea that comes with some serious drawbacks. Your average residential basement provides a Protection Factor (PF) of only 10 to 20. That’s nowhere near enough for real fallout protection.
Turning a basement into a truly viable shelter is a major construction project in itself. You’d have to:
- Beef Up the Ceiling: This means adding a tremendous amount of mass on the first floor directly above your shelter corner. Think thick layers of sandbags, poured concrete, or even just piles of dense books and furniture.
- Thicken the Walls: Any walls facing outwards need reinforcement. This often involves building new concrete block walls inside the existing foundation and filling the gap with sand or gravel.
- Install Shelter-Grade Systems: You can’t just shut the door. A proper sealed blast door and a dedicated NBC air filtration system are non-negotiable for making the space safe and breathable.
While it’s possible, the cost and effort can be huge. For many people, starting from scratch with a purpose-built design is actually the more effective and straightforward path.